Fun & Simple Mickey Mouse Pumpkin Topiary Craft for Fall!
Home » CREATE » Crafts » Autumn/Fall Crafts »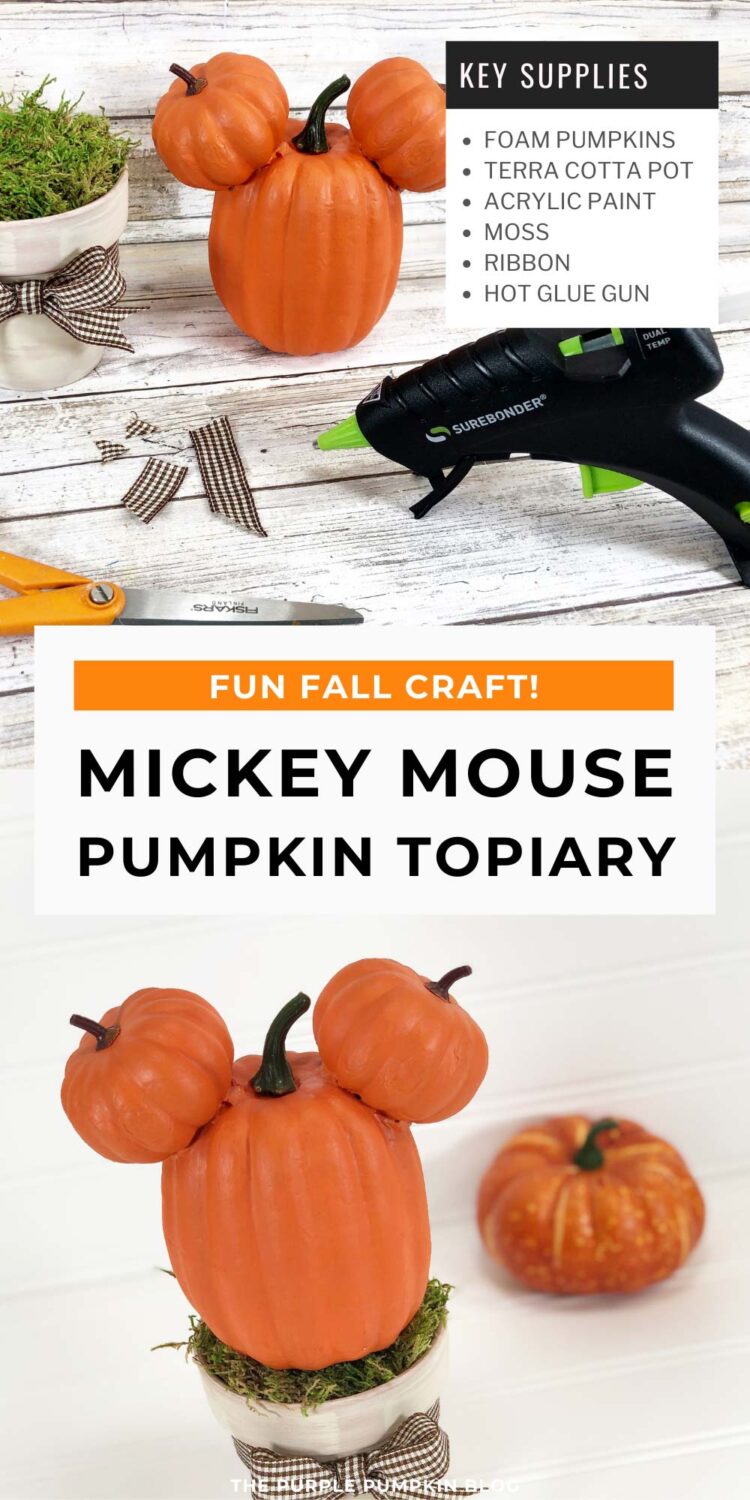
With this inspired Mickey Mouse Pumpkin Topiary, you can combine your passion for everything Disney with an awesome Autumn themed craft! The whole family can enjoy making this Mickey topiary together and the end result will be a great addition to your usual Fall and Halloween decorations!

Affiliate Disclosure
We have included affiliate links to products and services related to this post.
We may earn a commission if you purchase after clicking on those links.
As an Amazon Associate, I earn from qualifying purchases.
Read Our Full Disclosure Policy and Privacy Policy
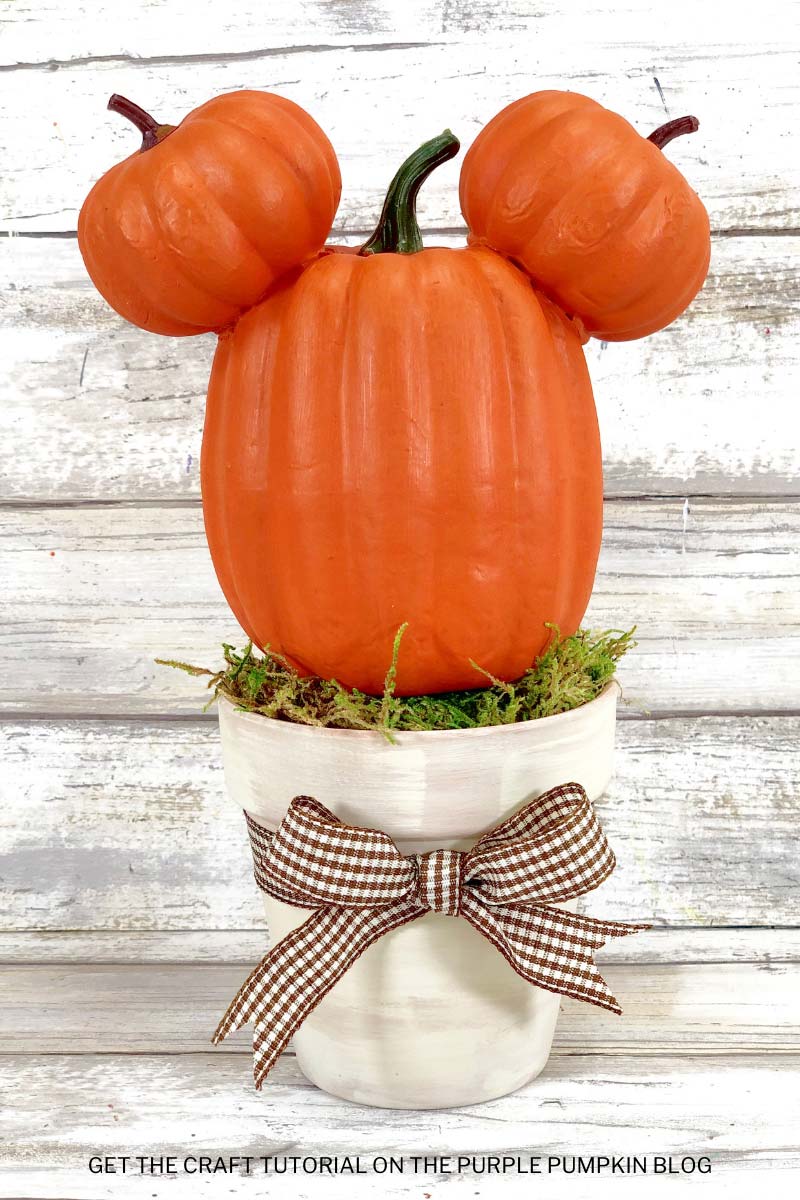
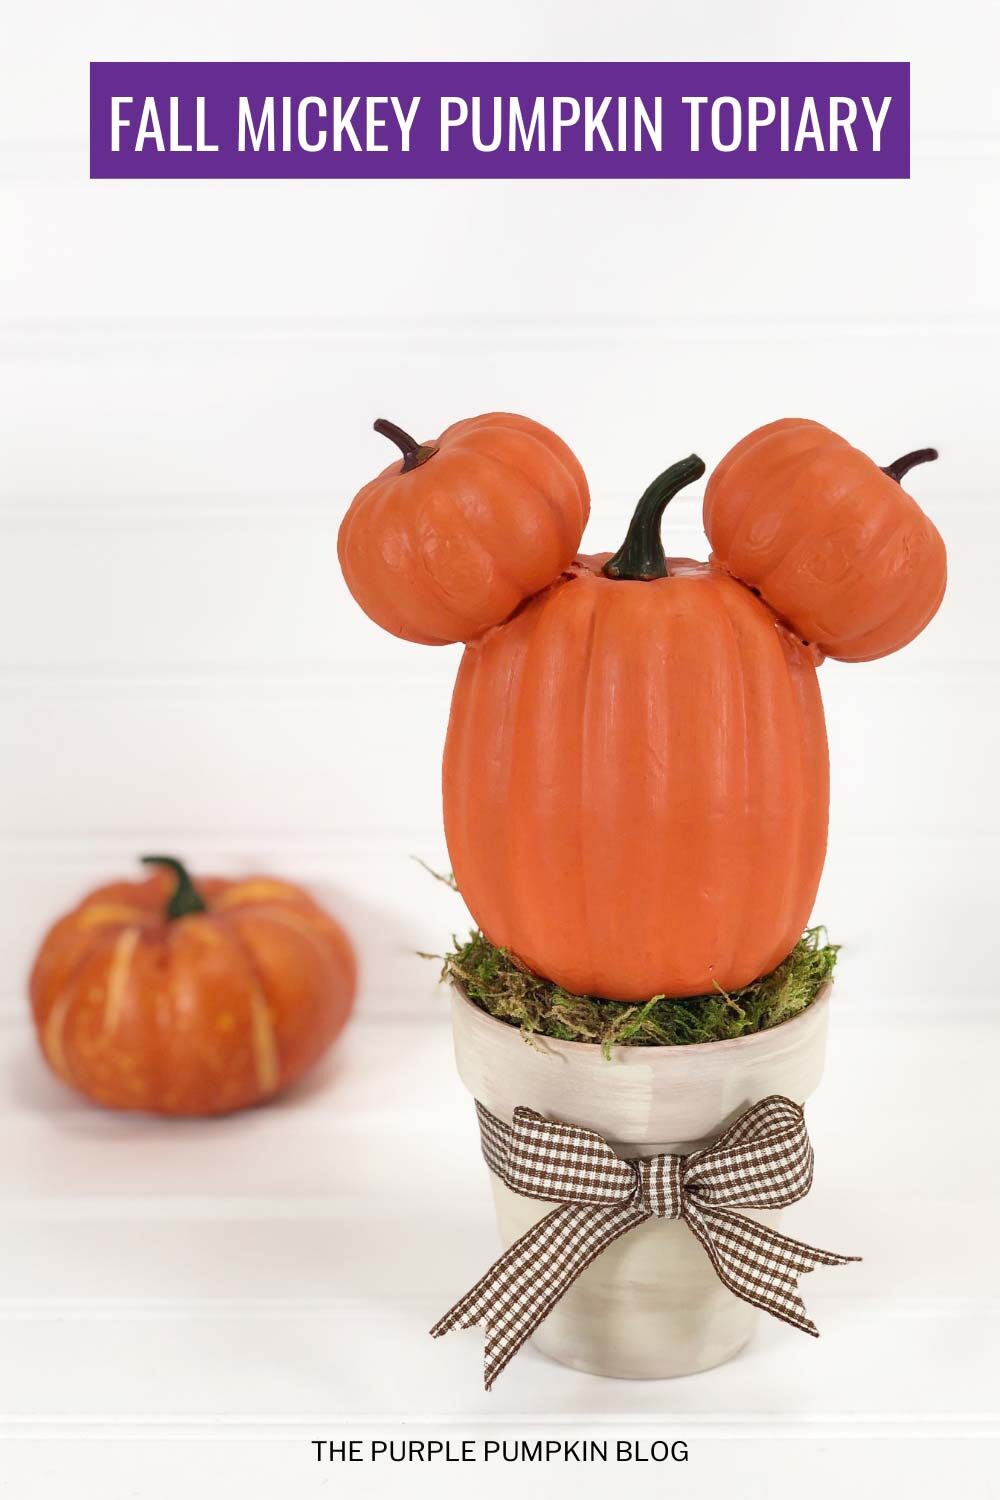
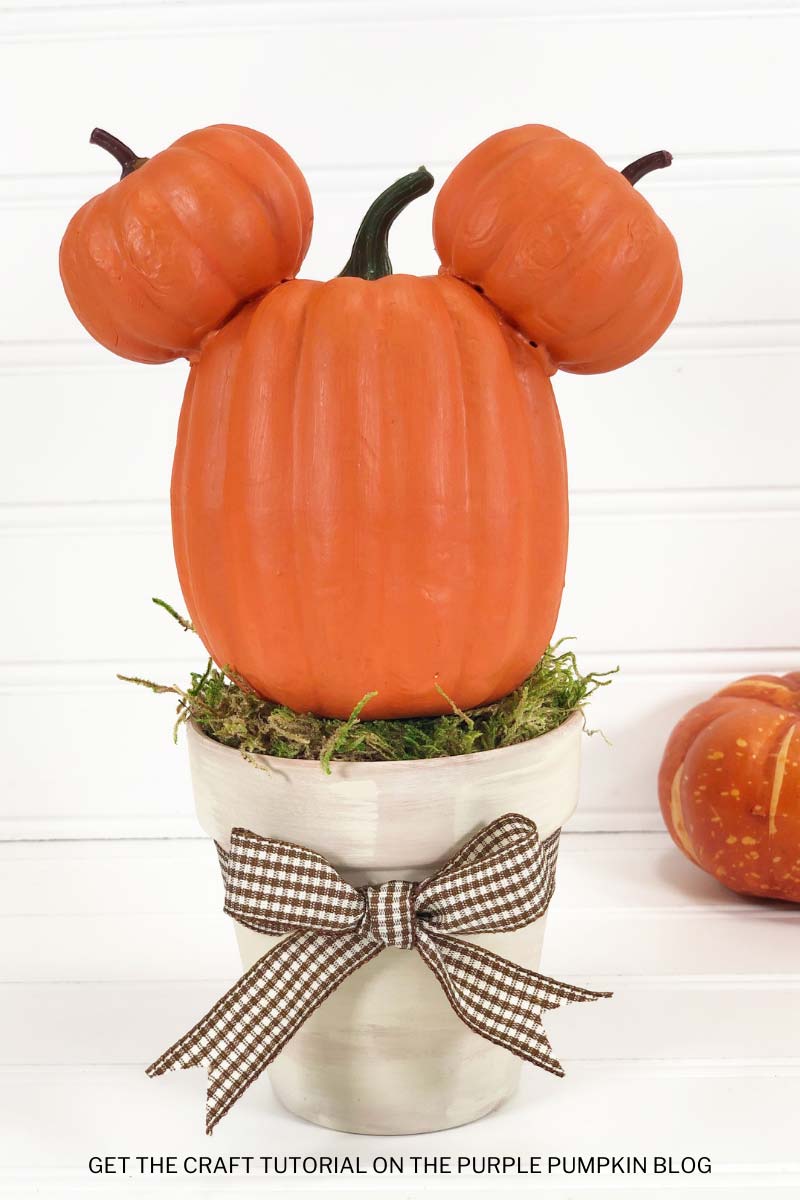
Mickey Mouse Pumpkin Topiary
The full list of materials, tools, and instructions is found in the printable tutorial card at the end of this post. I highly recommend reading the blog post all the way through before starting this project to ensure that you have everything required and understand the steps and timings involved.
If you’ve ever visited a Disney theme park during the Fall and Halloween season you will have seen plenty of pumpkin decorations.
Taking inspiration from the Mickey Mouse pumpkin topiary at Disneyland, I present to you this awesome seasonal Disney craft!
You can create this fun and iconic Mickey topiary using small, artificial pumpkins and a few other supplies.
Its cute, mini size is perfect for displaying on tiered trays, and an easy way to bring some Disney and fall decor into your home!
The post is part of the Crafty October series on The Purple Pumpkin Blog and is filled with free printables, crafts, recipes, and more for Halloween! You can check out Crafty October from 2022, 2021, 2020, 2019, 2018, 2017, 2016, 2015, 2014, 2013, and 2012 for tons of awesome Halloween ideas and inspiration!
Materials & Tools Used in This Craft
For your convenience, I’ve linked [some of] the materials and tools needed for this project to Amazon below. The quantities are on the tutorial card at the end of this post.
- Foam Pumpkins – you will need 3 pumpkins in 2 different sizes. We used one that was 3-inches tall for Mickey’s “head”, and two smaller pumpkins for Mickey’s “ears”. The size you get will indicate what size pot you will need.
- Acrylic Craft Paint – Off-White, Light, Medium, and Dark Orange.
- 2-inch Terra Cotta Pot – adjust the size according to the size of your pumpkins.
- Brown Gingham Ribbon
- Green Moss
- Glue Gun and Glue Sticks
- Moss
- Rocks/Pebbles – to weigh the pot down
Cheap Craft Supplies
A great thing about this craft idea is that it can be budget-friendly using supplies you may already have or can be purchased cheaply in stores:
If you’re in the USA, check out your local Dollar Store or Dollar Tree; and if you’re in the UK, the Poundshop, The Range, Wilko, and Baker Ross are great places to shop for cheap and inexpensive craft supplies. The rest of the world reading this – I don’t know every cheap store – sorry! But hunt the ones out in your location for crafting bargains!
More Pumpkin Crafts
Looking for more pumpkins crafts to do? Right-click and open these in a new tab to read next!
- Mickey Mouse Pumpkin Ornament Craft
- How To Make Pumpkin Mickey Ears!
- Mickey Mouse Pumpkin Rice Krispies Treats – okay, it’s a recipe, but it’s Mickey pumpkin-themed!
- How To Make a Paperback Book Pumpkin – Fall Decor Craft!
- Framed Paper Quill Pumpkin Craft – An Easy Quilling Project for Beginners!
- How to Make Rustic Wooden Pumpkins
I’ve shared lots of great craft ideas on The Purple Pumpkin Blog over the years, in fact, there are 100+ crafts to make and do at home for you to try!
Craft Tips
- We used quite small pumpkins in this craft, but you could use any size you like, as long as the head and ears are about the correct ratio. Don’t forget to adjust the size of the pot too.
- Our topiary doesn’t have Mickey’s face carved into it, but you could draw it on if you wish!
How Do I Make A Mickey Mouse Pumpkin Topiary?
Just check out the how-to card below with full materials, tools, and instructions. Any demonstration photos do not print out to save your ink.
Mickey Mouse Pumpkin Topiary
Materials
- 1 3″/7.5cm tall Foam Pumpkin
- 2 Mini Foam Pumpkins
- Acrylic Craft Paint – Off-White Light, Medium, and Dark Orange
- 1 2″/5cm Terra Cotta Pot
- Brown Gingham Ribbon
- Green Moss
- Rock – One Large or Several Small
- Scrap Paper
- Paper Towel
Instructions
- Remove any labels or clips from the pumpkins. If the pumpkins are super shiny, rough up the surface with sandpaper so the paint has a surface to stick to.
- Basecoat the large and two mini foam pumpkins with medium orange acrylic craft paint. Set aside to dry and apply a second coat, if necessary. Add a few strokes of light orange and dark orange acrylic craft paint for depth and dimension.
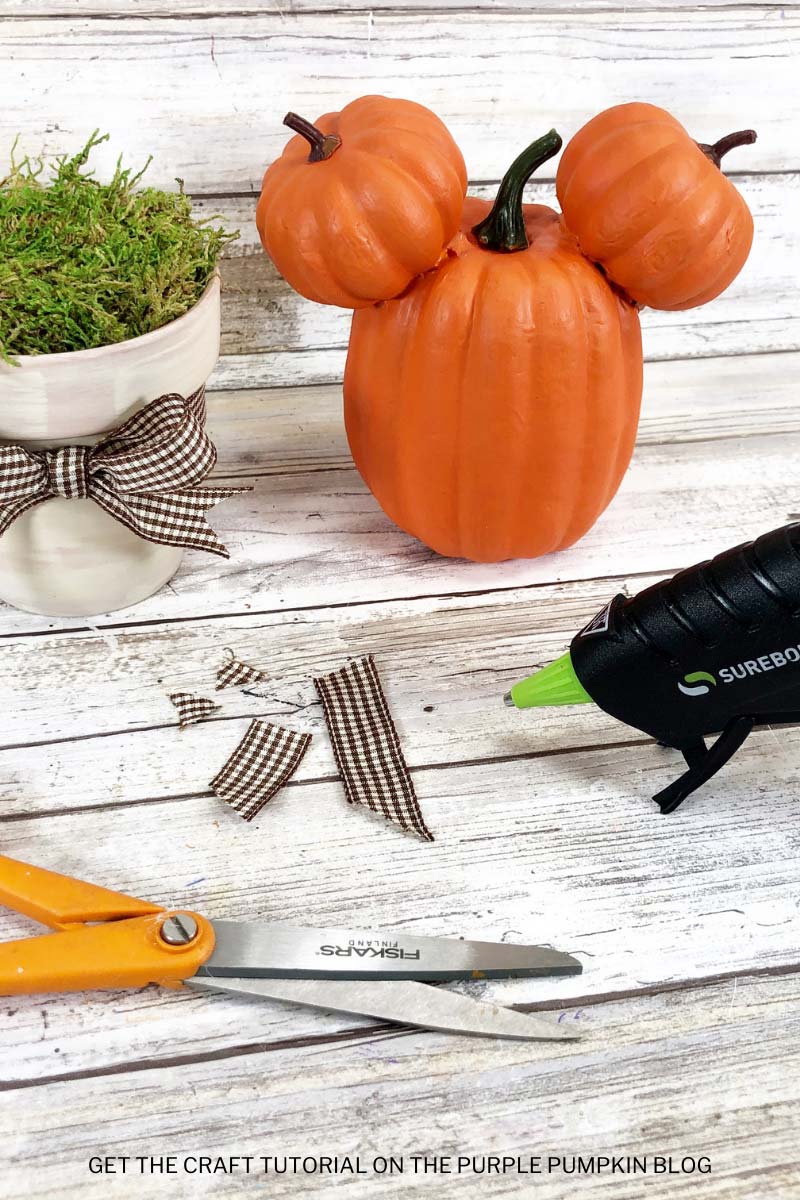
- Mark placement of the mini pumpkins where the ears should be on the large pumpkin. Press the foam in with your thumb on the large pumpkin to flatten the areas where the mini pumpkin ears will be attached. Carefully attach the pumpkin ears with a glue gun and glue sticks.
- Paint the outside of the terra cotta pot with a mixture of off-white paint and water. Before the paint is dry wipe off the excess in certain areas with a paper towel.
- Place rock(s) in the bottom of the terra cotta pot. Crumple up scrap paper and tightly stuff it into the terra cotta pot.
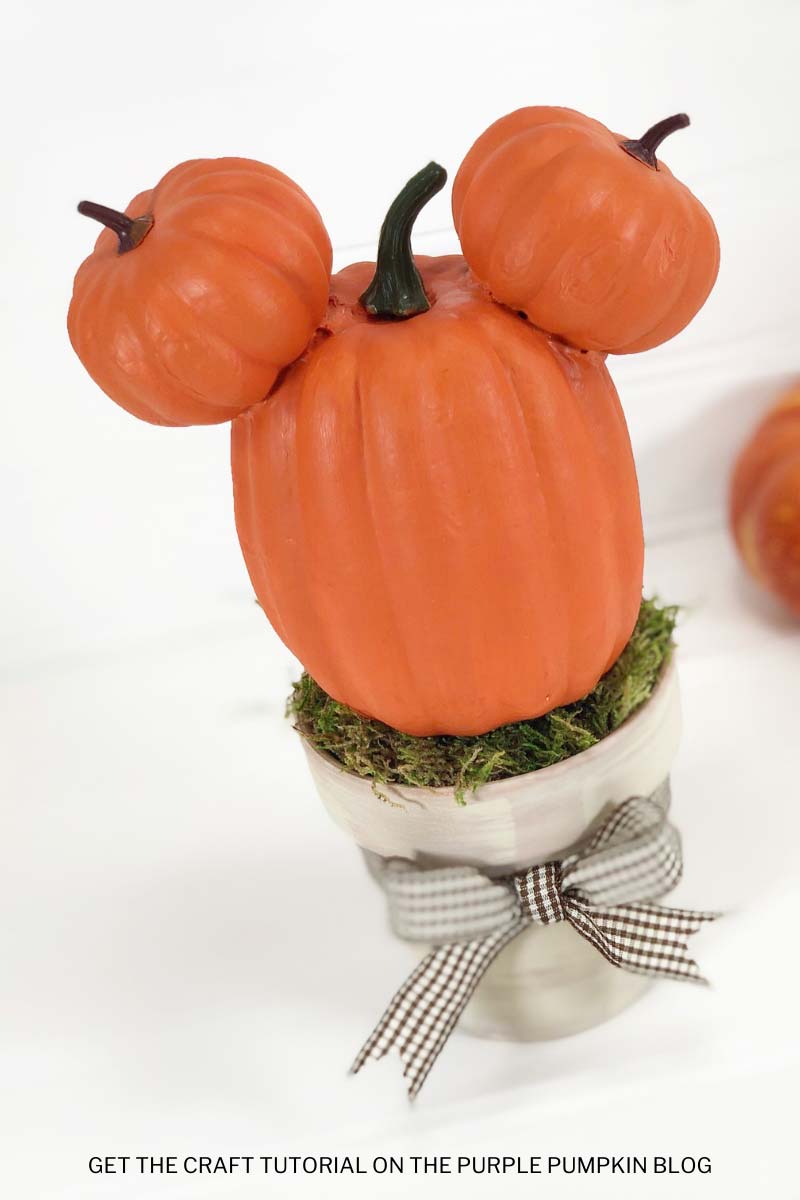
- Top with green moss, secured with a glue gun and glue sticks.
- Wrap gingham ribbon around the terra cotta pot and tie in a bow.
- Glue Mickey Pumpkin in place to finish.
- Leave to dry before displaying where desired.
This post is part of my long-running Crafty October series on The Purple Pumpkin Blog. Since 2012, I’ve shared Halloween recipes, printables, and crafts every October. While I don’t officially run the series anymore, all my new Halloween posts are still part of this decades-long celebration of spooky fun! Browse past Crafty October years for even more inspiration: 2024, 2023, 2022, 2021, 2020, 2019, 2018, 2017, 2016, 2015, 2014, 2013, and 2012.