Framed Paper Quill Pumpkin Craft – Quilling Project for Beginners!
Home » CREATE » Crafts » Halloween Crafts »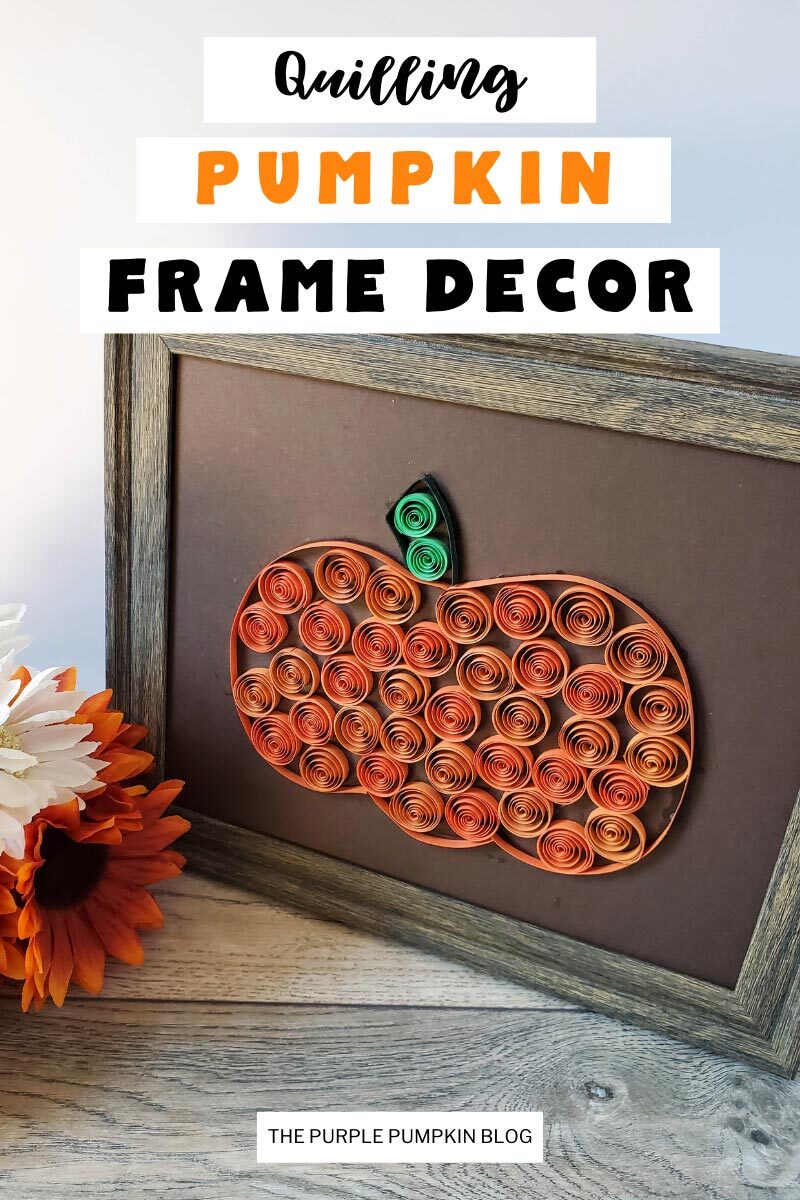

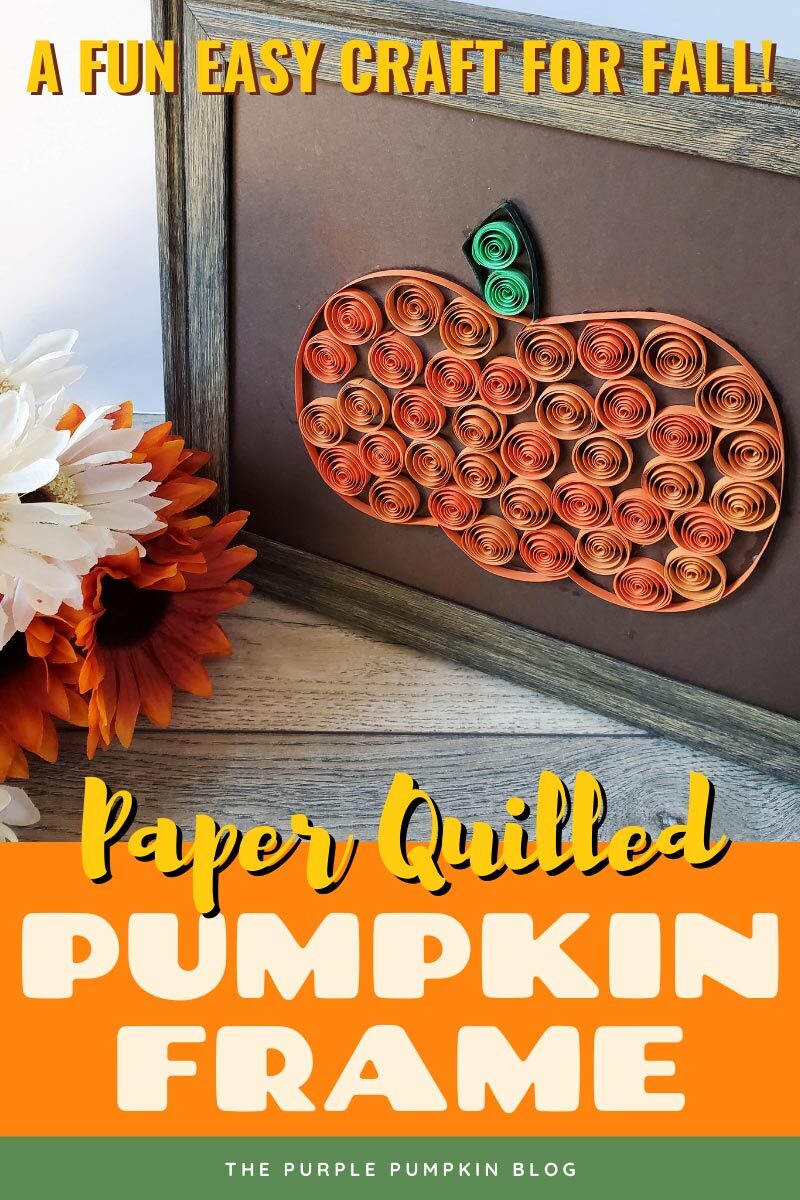
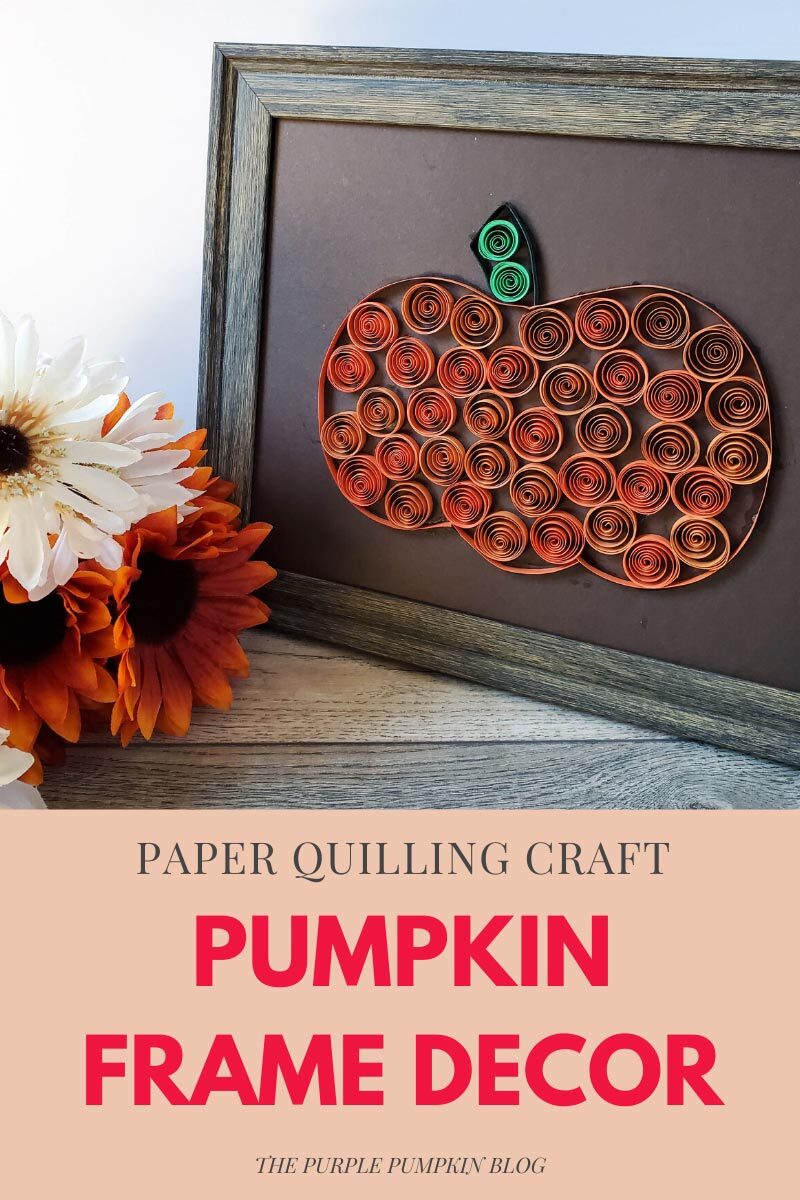
A beautiful statement piece to add to your fall seasonal home decor, this lovely Paper Quill Pumpkin Craft is very easy to make and requires just the basic skills of paper quilling, In fact, this project is absolutely perfect for the beginner paper quilling crafter, and is also easy enough for older kids and teens to make.

Affiliate Disclosure
We have included affiliate links to products and services related to this post.
We may earn a commission if you purchase after clicking on those links.
As an Amazon Associate, I earn from qualifying purchases.
Read Our Full Disclosure Policy and Privacy Policy
Paper Quill Pumpkin Craft
The full list of materials, tools, and instructions are found in the printable tutorial card at the end of this post. I highly recommend reading the blog post all the way through before starting this project to ensure that you have everything required and understand the steps and timings involved.
Paper quilling is something I used to love doing when I was a kid, but then I stopped and haven’t done it for literally decades!
But it seems to have come back into fashion in recent years, and while it looks like it is a tricky craft (and it can be!) this quilled pumpkin project for fall is perfect for beginners!
If you have never done paper quilling before, I recommend watching a few videos on YouTube to learn the basics. This project is pretty basic, so you should have no problem making it after watching a few beginner videos.
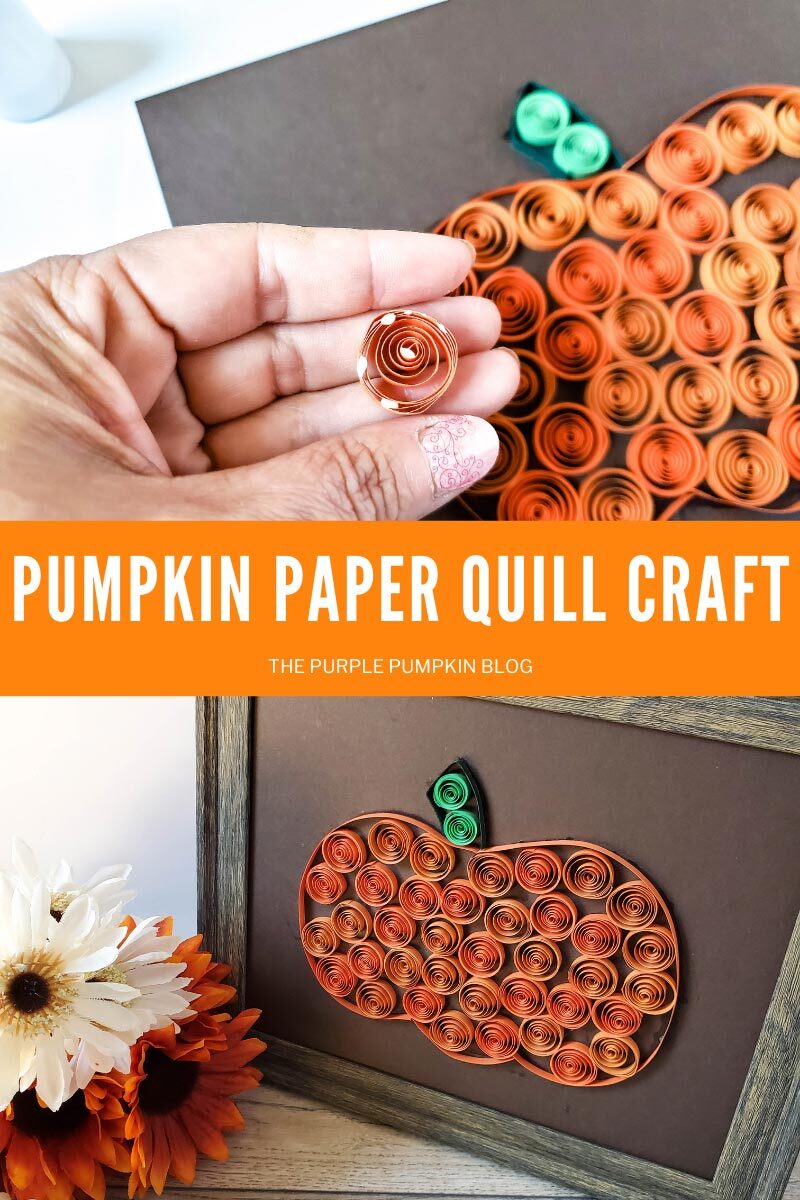
This paper quill pumpkin is displayed beautifully in a rustic wood frame and makes a wonderful gift for anyone who appreciates pumpkins or fall decor.
If you are new to paper quilling, I recommend purchasing this quilling kit which has everything you will need to get started in this delightful craft.
Materials & Tools Used in This Craft
You may have some standard craft supplies like scissors and glue at home already, however, for your convenience, I’ve linked any specialized materials and tools needed for this craft to Amazon below.
- Paper Quilling Kit – specific tools used from the kit:
- Orange Paper Set (3 darkest colors)
- Green Paper Set (2 darkest colors)
- Paper Quilling Pen
- Quilling Board
- Glue Bottle (filled with Tacky craft glue)
- Scissors
- Tweezers
- Photo Frame – rustic wooden 8″ x 10″
- Brown Cardstock – sheet cut to 8″ x 10″
- White PVA/School Glue – this dries clear
- Pen or pencil
More Pumpkin Crafts
Once you’ve made this quilled pumpkin, I’m sure you’ll want to try out some more pumpkin crafts – here are some more for you to check out:
I’ve shared lots of great craft ideas on The Purple Pumpkin Blog over the years, in fact, there are 100+ crafts to make and do at home that you can try!
How Do I Make a Paper Quill Pumpkin?
Just check out the how-to card below with full materials, tools, instructions and demonstration photos. You can print the card out too (don’t worry, the pics don’t print to save your ink!).
Paper Quill Pumpkin Craft
Materials
- Paper Quilling Kit – specific tools used from the kit:
- Orange Paper Set 3 darkest colors
- Green Paper Set 2 darkest colors
- Paper Quilling Pen
- Quilling Board
- Glue Bottle filled with Tacky craft glue
- Scissors
- Tweezers
- Photo Frame – rustic wooden 8″ x 10″
- Brown Cardstock – sheet cut to 8″ x 10″
- White PVA/School Glue – this dries clear
- Pen or pencil
Instructions
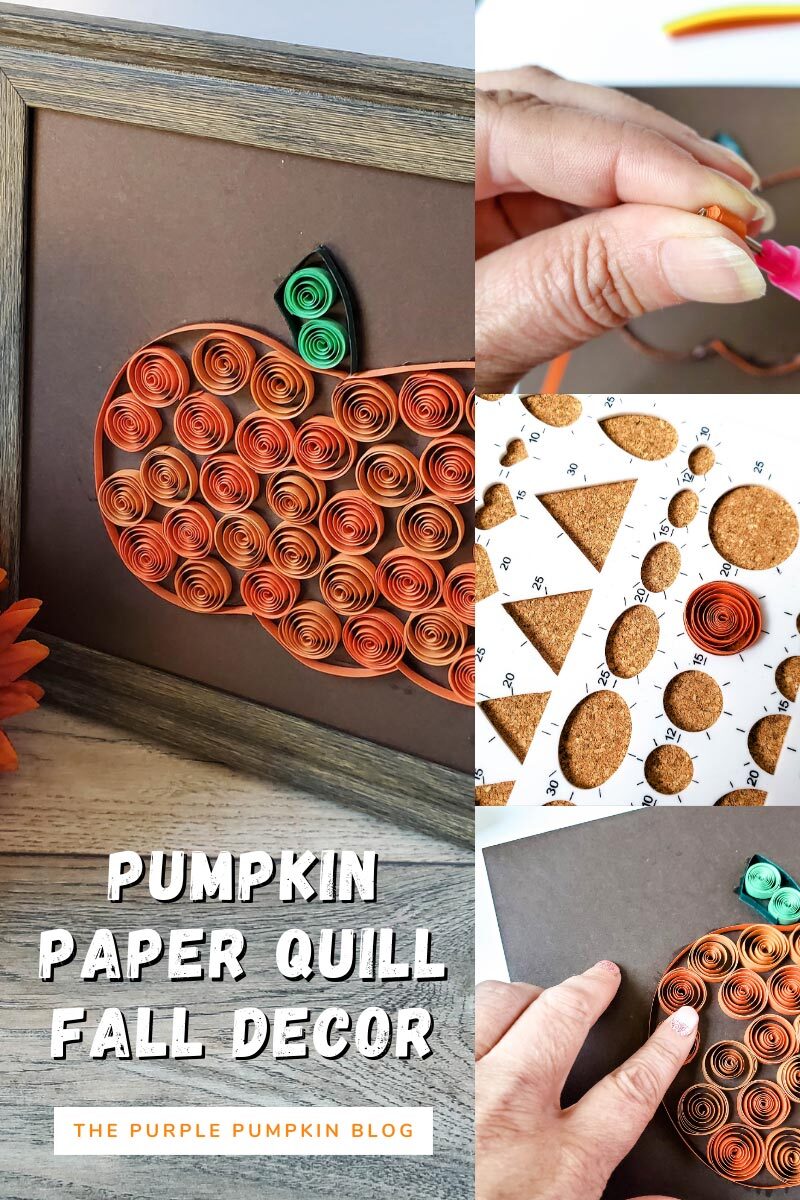
- Start by drawing your pumpkin. You can either print out a shape to trace or just free-hand it.
- Remove the paper strips you will be using from the rest of the stack, and peel them off the glue end. You will be using ALL of the 3 darkest orange colors, as well as one strip of the darkest green color, and two strips of the second darkest green color.
- Fill your glue bottle with glue, and trace your entire drawn pumpkin with a thin layer of glue.
- Take a strip of the darkest orange paper and maneuver it around the pumpkin, on the glue. You will need to cut the paper when you come to a point in the design, then start over with maneuvering over the glue. You may need to hold the paper in place for 30-60 seconds to get it to stay exactly where you want it.
- Repeat step 4 for the stem, with the darkest shade of green paper strip.
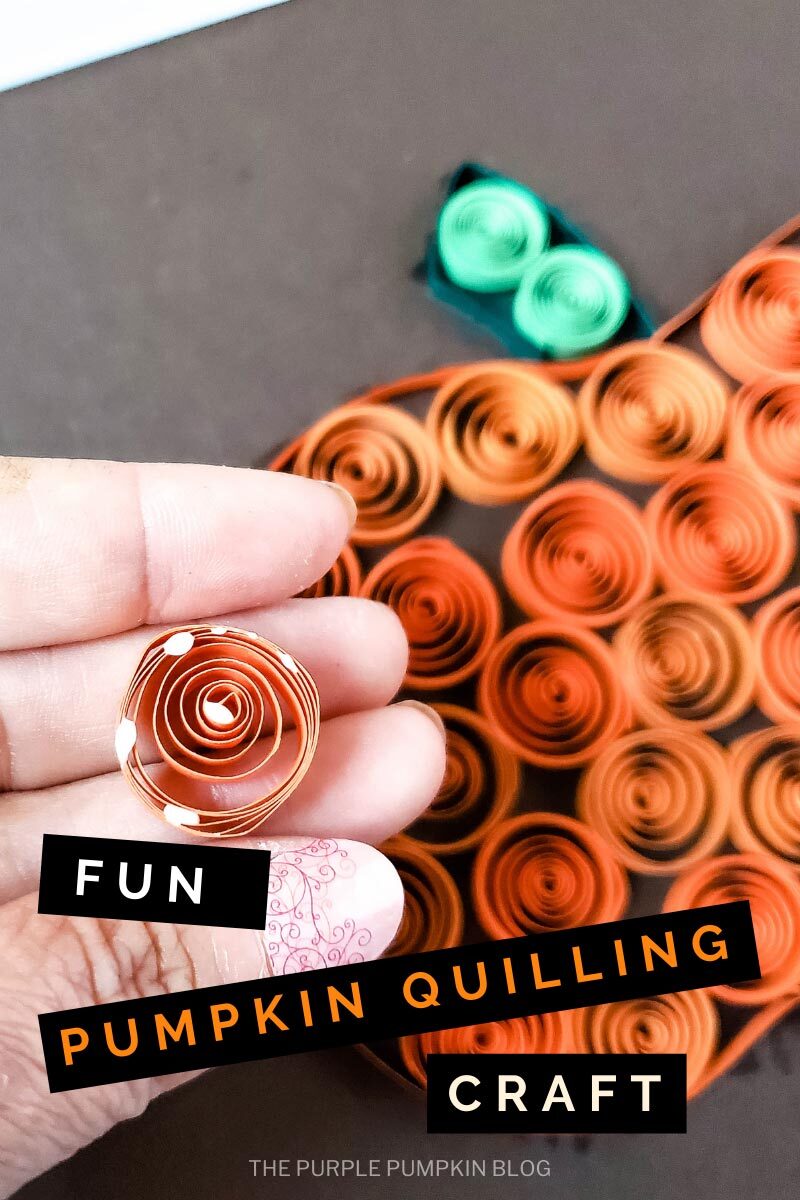
- Now it’s time to start quilling the paper! Using the paper quilling pen, place one end of an orange paper strip inside the tool, then start rolling until you come to the end of the paper.
- Gently pull the paper off the quilling pen, and place it into the #20 circular hole in the quilling board. Push down gently with your finger until it forms the correct size/shape.
- Gently grab your quilled paper strip where the end of the strip is with your tweezers. Apply a small amount of glue to the end of the paper strip, and using your tweezers, attach and hold it for a few seconds.
- You will repeat this quilling process (steps 6-8) until you run out of the darkest 3 colors of orange paper strips, and two strips of the second darkest green.
- Once all of your paper is quilled, arrange them into your pumpkin however you like. For this one, I didn’t do a specific design, rather I just tried to get the 3 shades all over, making the entire pumpkin look blended.
- You will apply a small dot of glue in 3 areas of the back of each quilled circle, then adhere it to the cardstock.
- Repeat steps 11 and 12 for the stem.
- Remove the glass from your frame and place your cardstock quilled pumpkin art inside. You may place the glass behind the cardstock if you’d like for safe keeping.
- Display your paper quill pumpkin where desired!
Handy Tips & More Ideas
This post is part of my long-running Crafty October series on The Purple Pumpkin Blog. Since 2012, I’ve shared Halloween recipes, printables, and crafts every October. While I don’t officially run the series anymore, all my new Halloween posts are still part of this decades-long celebration of spooky fun! Browse past Crafty October years for even more inspiration: 2024, 2023, 2022, 2021, 2020, 2019, 2018, 2017, 2016, 2015, 2014, 2013, and 2012.