Disney Halloween Mickey Mouse Pumpkin Rice Krispies Treats!
Home » COOK » Recipes » Holiday Recipes » Halloween Recipes »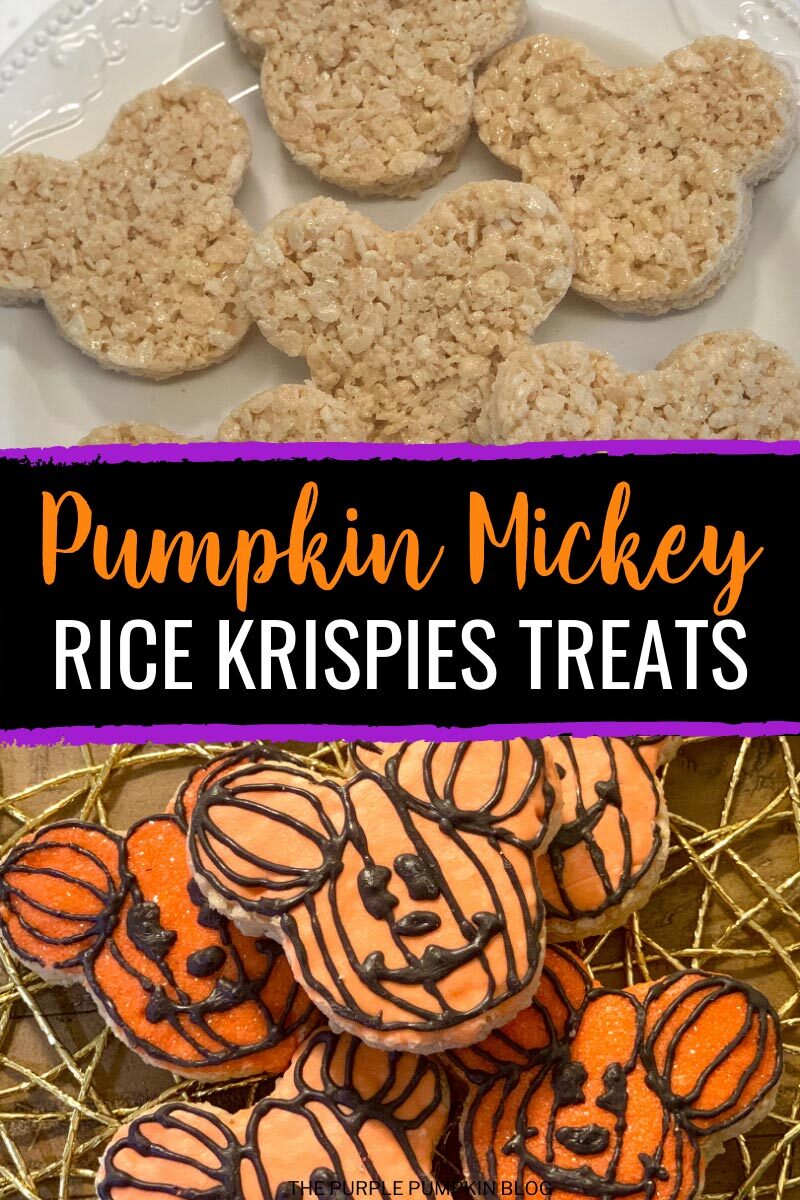
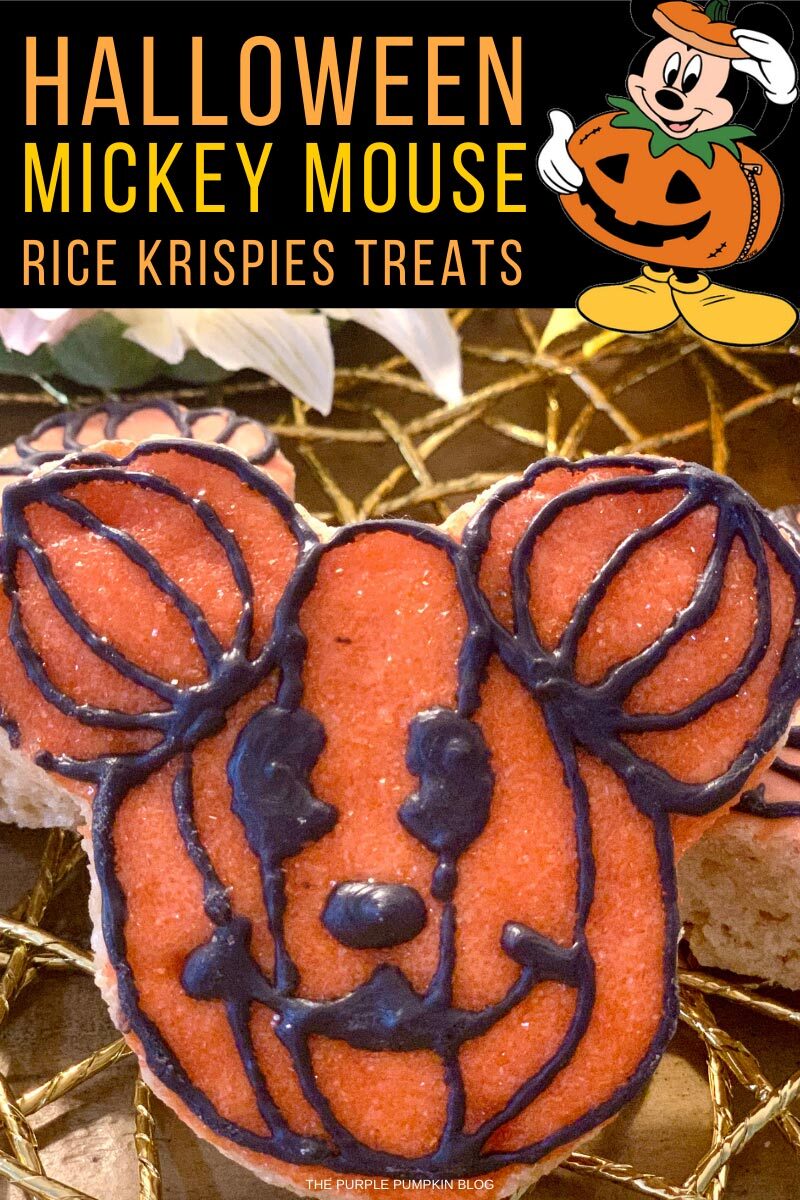
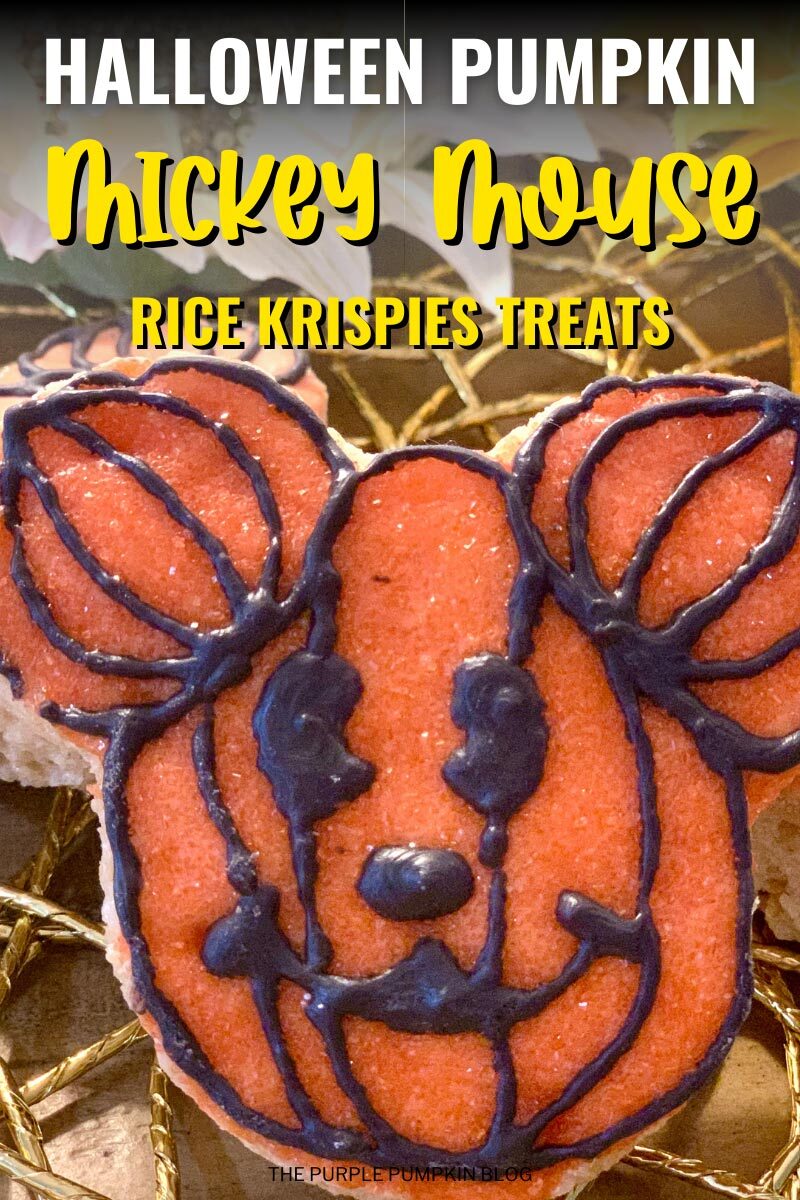
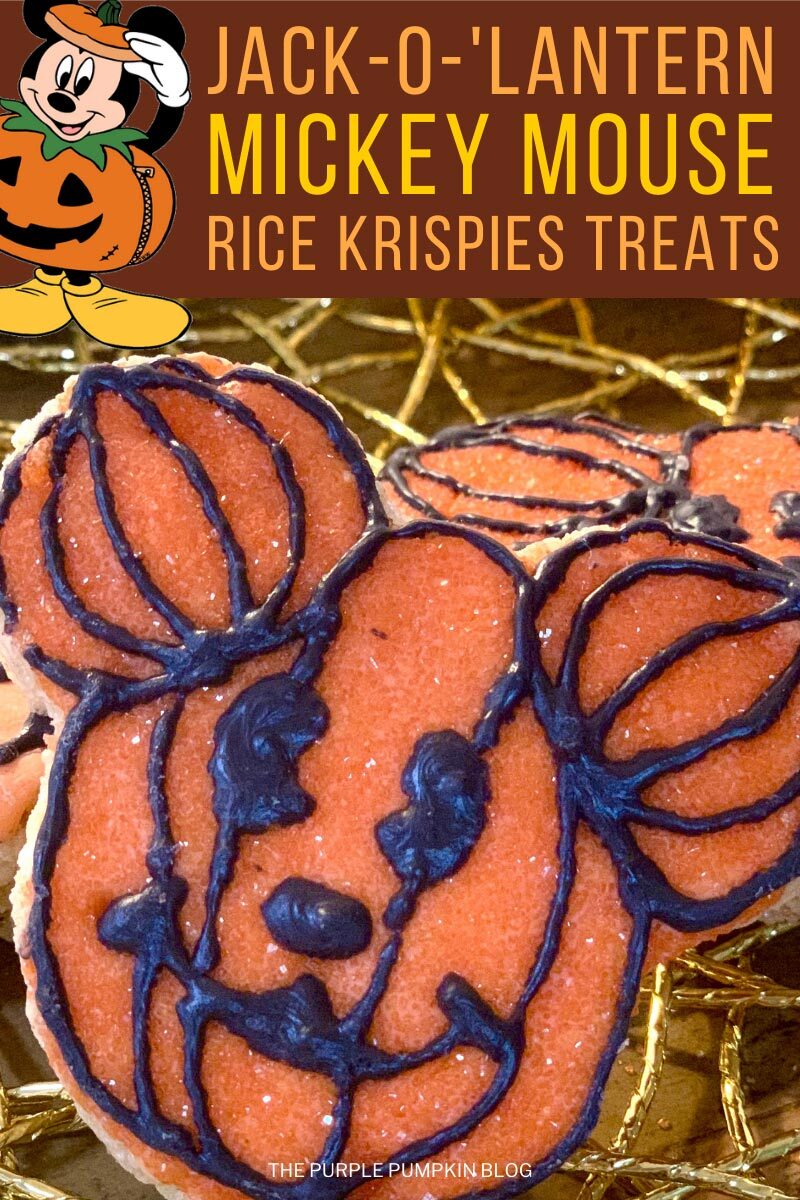
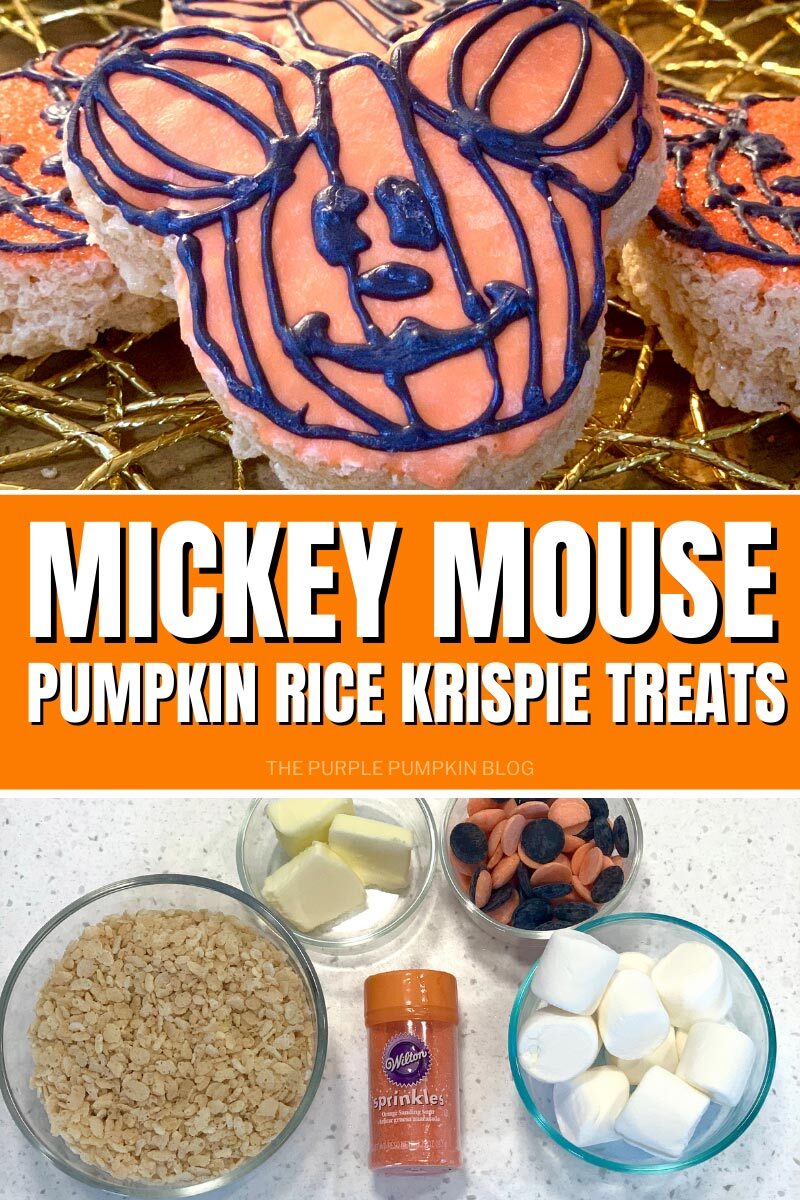
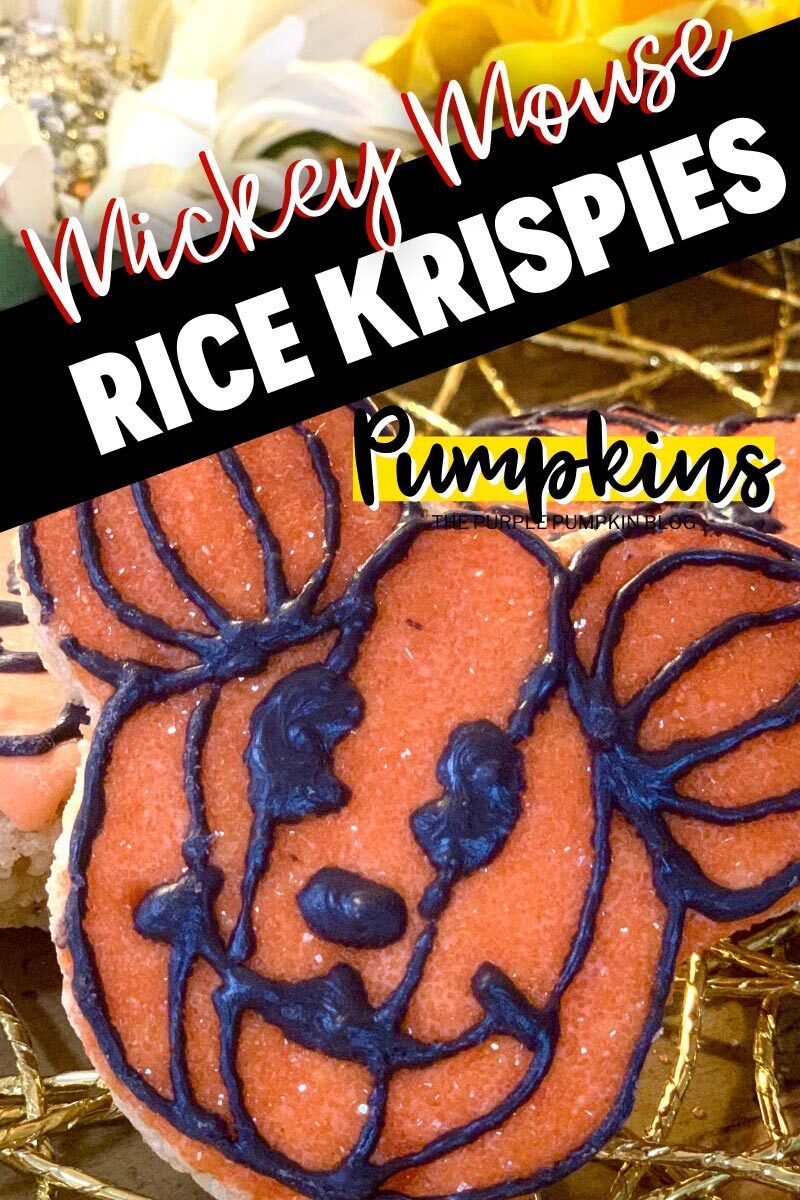
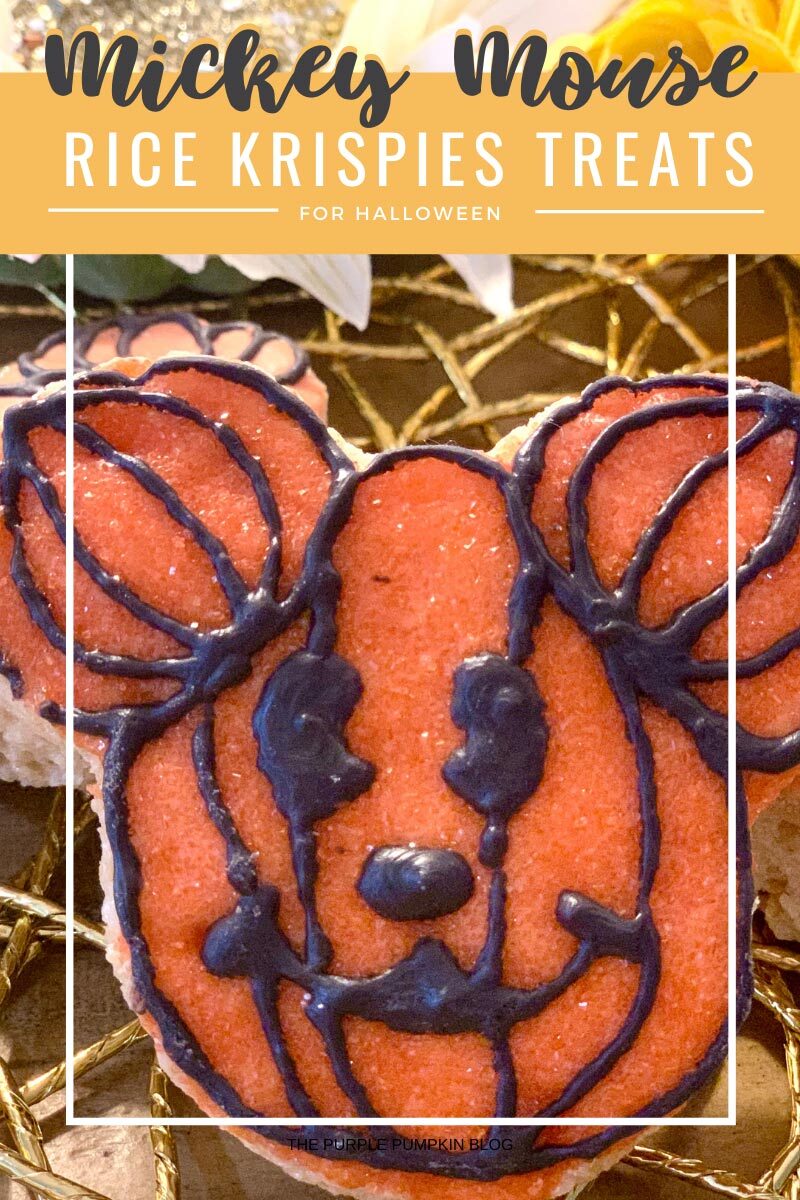

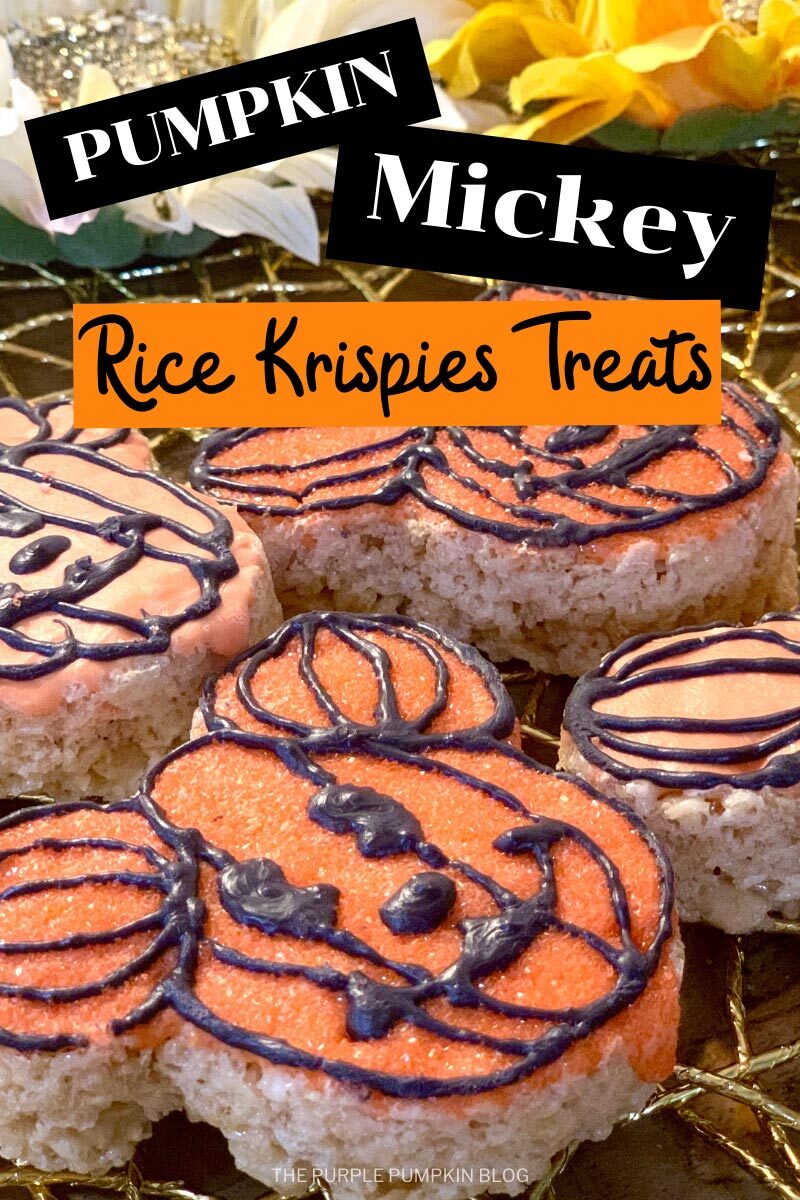
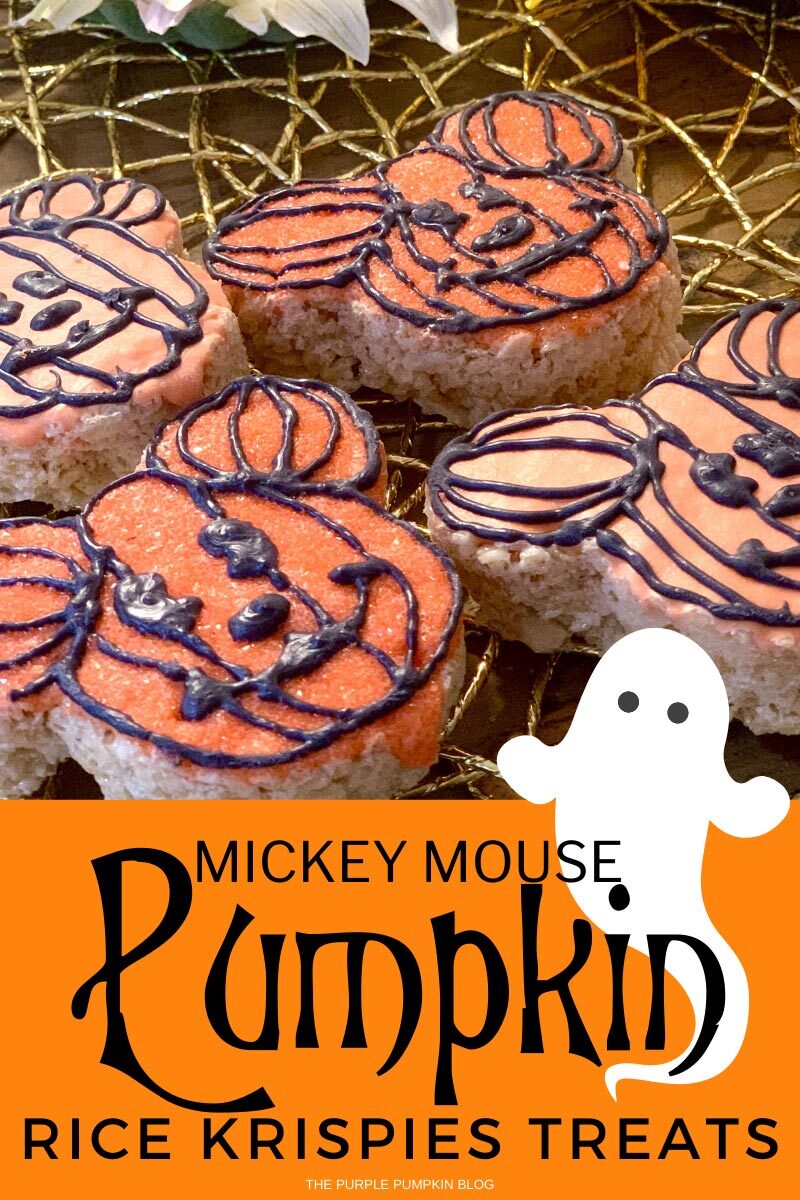
If you can’t get to the Disney Parks for Halloween, then you can make these awesome Mickey Mouse Pumpkin Rice Krispies Treats at home with this step-by-step recipe! They’re not as hard to make as you think, and they’re a must-eat snack for Disney fans everywhere!

Affiliate Disclosure
We have included affiliate links to products and services related to this post.
We may earn a commission if you purchase after clicking on those links.
As an Amazon Associate, I earn from qualifying purchases.
Read Our Full Disclosure Policy and Privacy Policy
Mickey Mouse Pumpkin Rice Krispies Treats
The full ingredients list and instructions are found in the printable recipe card at the end of this post. I highly recommend reading the blog post all the way through so that you don’t miss any tips or substitution suggestions and to ensure that you have all the ingredients and equipment required as well as understand the steps and timings involved.
I LOVE Walt Disney World at Halloween. Visiting during the spooky season is the absolute best! The parks look awesome decked out for Halloween, and then there are all the themed Disney Snacks that you can eat!
However, if you can’t get to the Disney Parks for Halloween, you can bring some to your home with these pumpkin Mickey Mouse shaped Rice Krispies treats!
Every Disney fan knows that Mickey-shaped treats are the BEST treats in the world! And the recipe for these rice krispy treats are no different!
Rice Krispies snacks themselves are really easy to make and can be decorated in so many different ways. Taking inspiration from the Mickey Jack-o’-Lanterns that you see up and down Main Street USA, these treats are fun to make and delicious to eat.
I’ve got a step-by-step tutorial to demonstrate how to make these, so read on and get all the info!
Ingredients & Equipment Used In This Recipe
You may have some of the ingredients for this recipe in your kitchen already – the full list with measurements is found in the recipe card.
For your convenience, any specialized or notable ingredients and equipment needed for this recipe have been listed below and linked to Amazon if available online.
- Rice Krispies – or any brand of puffed rice cereal
- Marshmallows – you’ll need about 40
- Orange Candy Melts Wafers
- Black Candy Melts Wafers
- Orange Sanding Sugar – this is an optional ingredient if you want to mix up the texture of the treats
- Mickey Mouse Head Cookie Cutter
This recipe uses American cups. They’re a handy piece of kitchen equipment to have along with a kitchen food scale. Having both in your kitchen means you’ll be able to make all of the different recipes on my blog as I use both cups and weighted measures.
More Recipes Using Rice Krispies
One of the hero ingredients in this recipe is of course Rice Krispies! So here are some more recipes using the same:
Rice Krispies Treat Tips
Rice Krispies Mixture
Rice Krispies treats are made by melting butter and marshmallows together (you can do this in a microwave, or on the stovetop) and then stirring in the puffed rice cereal to combine everything together.
The mixture is pressed into a pan that has been lined with aluminum foil and greased with a cooking spray. Overhang the foil around the edges as this will provide you something to lift treats out when set.
The cereal mixture is also very sticky, so press it down using a piece of wax paper, or the back of a large spoon that you can either grease with cooking spray, or dip into water to prevent sticking.
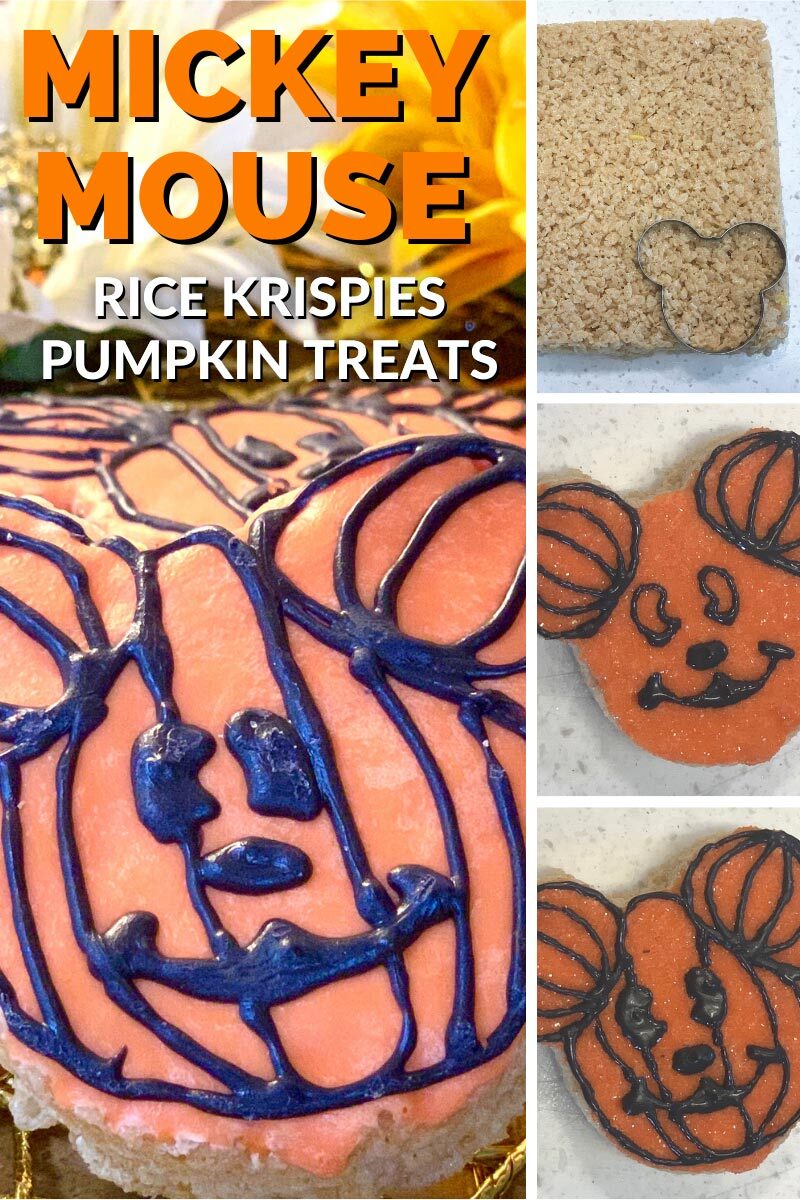
Leave the Rice Krispies to set in the fridge for a couple of hours, and then using a Mickey Mouse head-shaped cookie cutter, cut out your Mickey treats!
How many you get out of the mixture will depend on the size of your cookie cutter.
Melting Tips for Candy Melts
You can melt candy melts/candy wafers in the microwave or a double boiler, or if you plan on making lots of candy covered treats in the future, I recommend investing in a Wilton candy melting pot as treat-making life is then so much easier!
Try this PME one if you’re in the UK, as the Wilton one is not available on Amazon.co.uk.
If you use the Wilton Candy Melting Pot, you can check out Wilton’s demo video on YouTube which is really helpful. They also give tips on how to melt candy melts in the microwave, as well as using the double boiler method.
The two most important things are
- Do not overheat – use an even melting temperature
- Do not add water – it makes the candy seize up and become unusable. Make sure the equipment used is completely dry, and avoid using utensils that retain moisture like a wooden spoon.
If you find that the candy is too thick, add vegetable shortening or (solid) coconut oil in 1 teaspoon increments, up to 1 tablespoon, and stir well.
Another reminder – do not add water. The very first time I used candy melts I managed to get water in the bowl and it was ruined. Learn from my mistakes! Additionally, do not use vegetable oil, butter, milk, or any other liquids as this will also make the candy seize up.
If you are using your microwave, test melt a small amount of candy melts first, to see how it works. You may need to adjust the temperature and time to suit your machine. Heat in 15-30 second increments, stirring the candy melts each time. They may not look melted, but they might have started melting from the inside. Stirring helps to distribute the heat.
More Disney Recipes
Looking for more Disney inspo? Check these recipes out next:
- Mickey Mouse Pretzel Rods – A Fun Disney Snack!
- Cookies & Cream Mickey Mouse Milkshakes
- Disney Haunted Mansion Cupcakes
How Do I Make Mickey Pumpkin Rice Krispies Treats?
Just check out the recipe card below with full ingredients, instructions, and demonstration photos. You can print the card out too (don’t worry, the pics don’t print to save your ink!).
Mickey Mouse Pumpkin Rice Krispies Treats
Ingredients
- 6 cups Rice Krispies cereal
- 1 10 oz bag marshmallows (about 40)
- 3 Tbsp butter
- 1 12 oz bag Orange Candy Melts Wafers
- 1 12 oz bag Black Candy Melts Wafers
- Orange sanding sugar sprinkles optional
SUGGESTED PRODUCTS
Instructions
- Melt the butter in a large saucepan on medium-low heat.
- Once butter is melted, add in about 40 marshmallows and melt on medium heat. Be careful to not burn it.
- Once marshmallows are fully melted, remove from heat, and add in 6 cups of the Rice Krispies cereal
- Mix in the cereal to the melted marshmallows and stir to fully coat all of the cereal.
- Once fully mixed, put the cereal into a lined (with overhang) and greased 9×13 pan and allow the cereal to harden.
- Once hardened, flip the cereal upside down on a cutting board or the counter laid out flat.
- Use a cookie cutter or your knife to cut the shapes of the Mickey head.
- Melt the orange candy melt and fully coat one side of the Mickey Mouse head as close to the edge as you can.
- You can add orange sprinkles and fully coat the treats if you would like. Do this step while the orange candy melt is still wet so the sprinkles can stick well to the treat.
- Next, melt the black candy melt and add to a baggie or piping bag with a small hole (doing it in a bag makes it a lot easier to decorate the treats).
- Outline 2 circles where the ears are.
- Then add a long oval shaped circle in the middle of the circles.
- Next you want to add two more lines on both sides of the oval following the same direction (on the left they curve left and on the right they curve right).
- In the center of the treat, draw an oval nose as close to the middle as you can.
- Now you want to draw a smile. Add the dimple lines as the end and in the middle you want to raise the smile a little bit.
- Above the eyes, draw 2 slanted lines for the bottom of the eyes.
- Next you want to make a bean shaped eye connecting it to the lines at the bottom and fill those in.
- Now to outline the head is similar to outlining the ears. Draw a long oval down the center of his face. When you get to the face, pick up the bag. You do not want to drag the lines along the face so do it in between the face and not on the actual face.
- Then you want to draw the lines (like the ears) on both sides of the long oval to complete the pumpkin look.
- Leave to set and enjoy!
Nutrition
Nutritional information is always approximate and will depend on the quality of ingredients used and serving sizes. If you need exact calories and macros, please do your own calculations.
Make It A Meal!
You’ve made the dessert, but what about the rest of the courses?
Here are additional recipes to make a full meal!
- Appetizer: Halloween Quesadillas
- Main Dish: Slow Cooker Beef, Bean & Pumpkin Chili
- Beverage: Halloween Mocktail – Frogspawn Slushie
There are 500+ Recipes on The Purple Pumpkin Blog for you to enjoy – please feel free to check them out too!
This post is part of my long-running Crafty October series on The Purple Pumpkin Blog. Since 2012, I’ve shared Halloween recipes, printables, and crafts every October. While I don’t officially run the series anymore, all my new Halloween posts are still part of this decades-long celebration of spooky fun! Browse past Crafty October years for even more inspiration: 2024, 2023, 2022, 2021, 2020, 2019, 2018, 2017, 2016, 2015, 2014, 2013, and 2012.