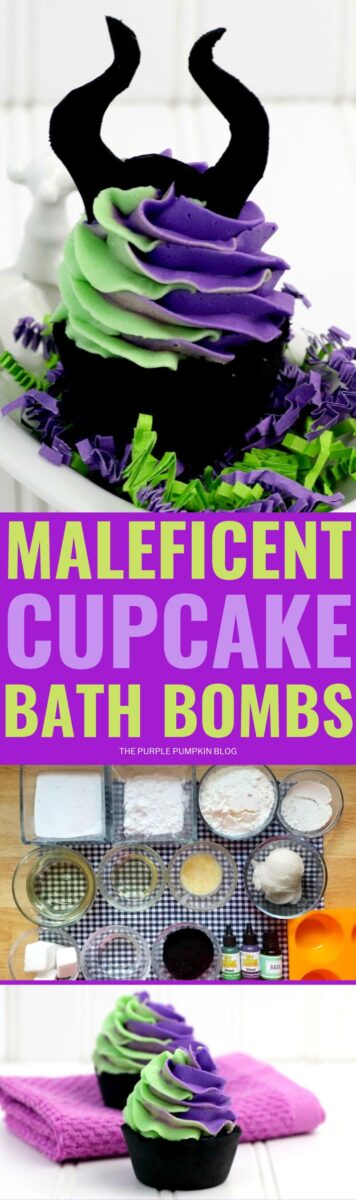
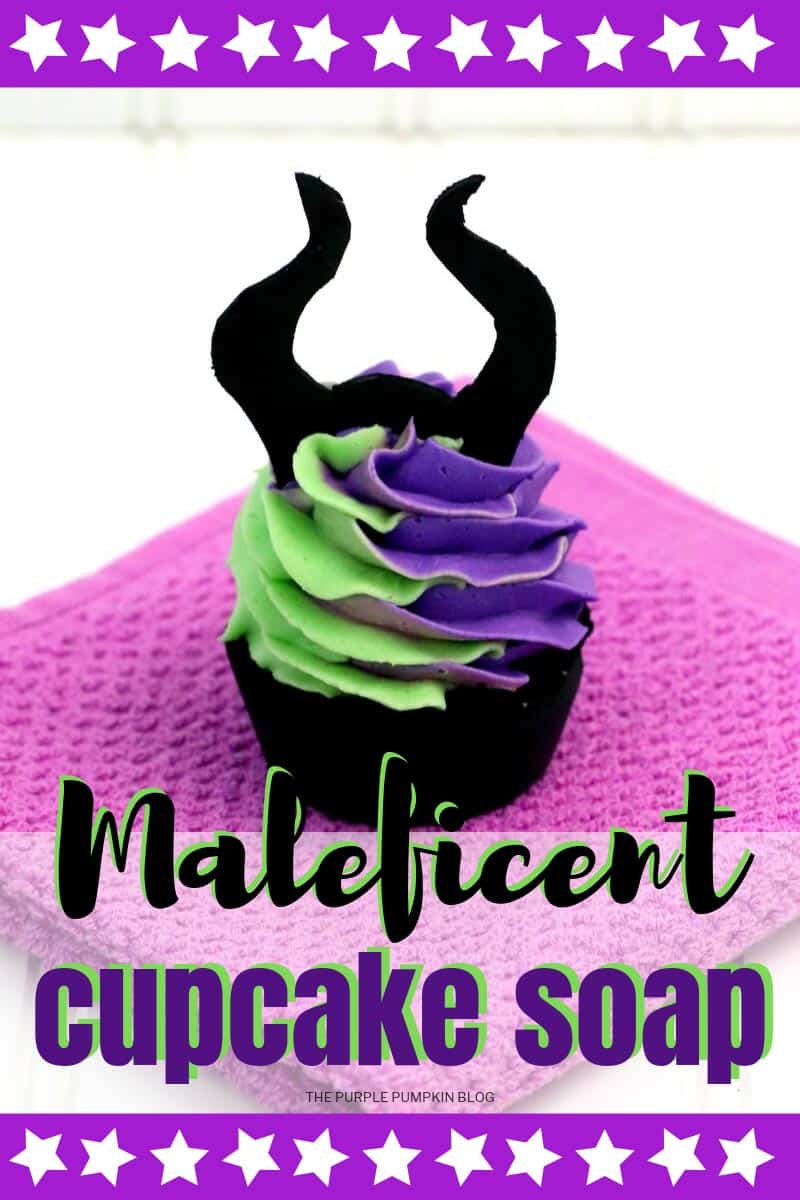
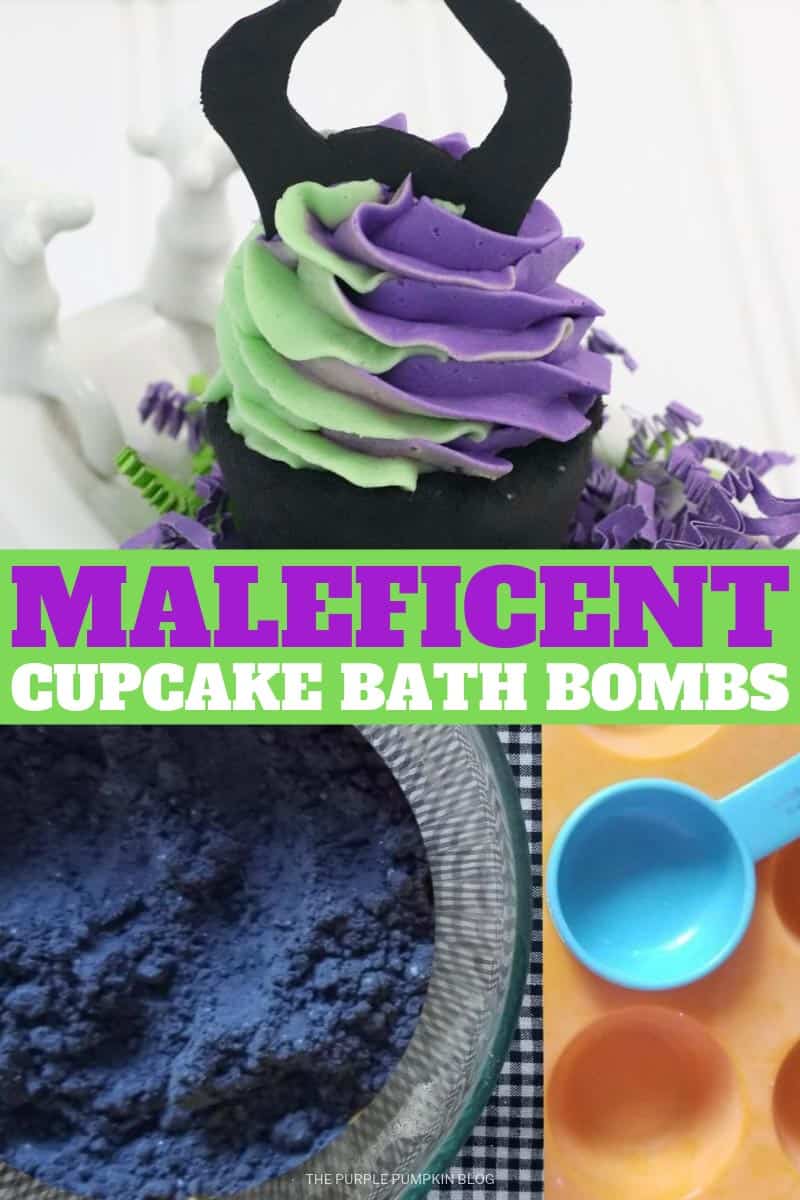
Maleficent Cupcake Bath Bombs with Whipped Soap Frosting!
Home » CREATE » Crafts » Homemade Cosmetics » Bath Bombs »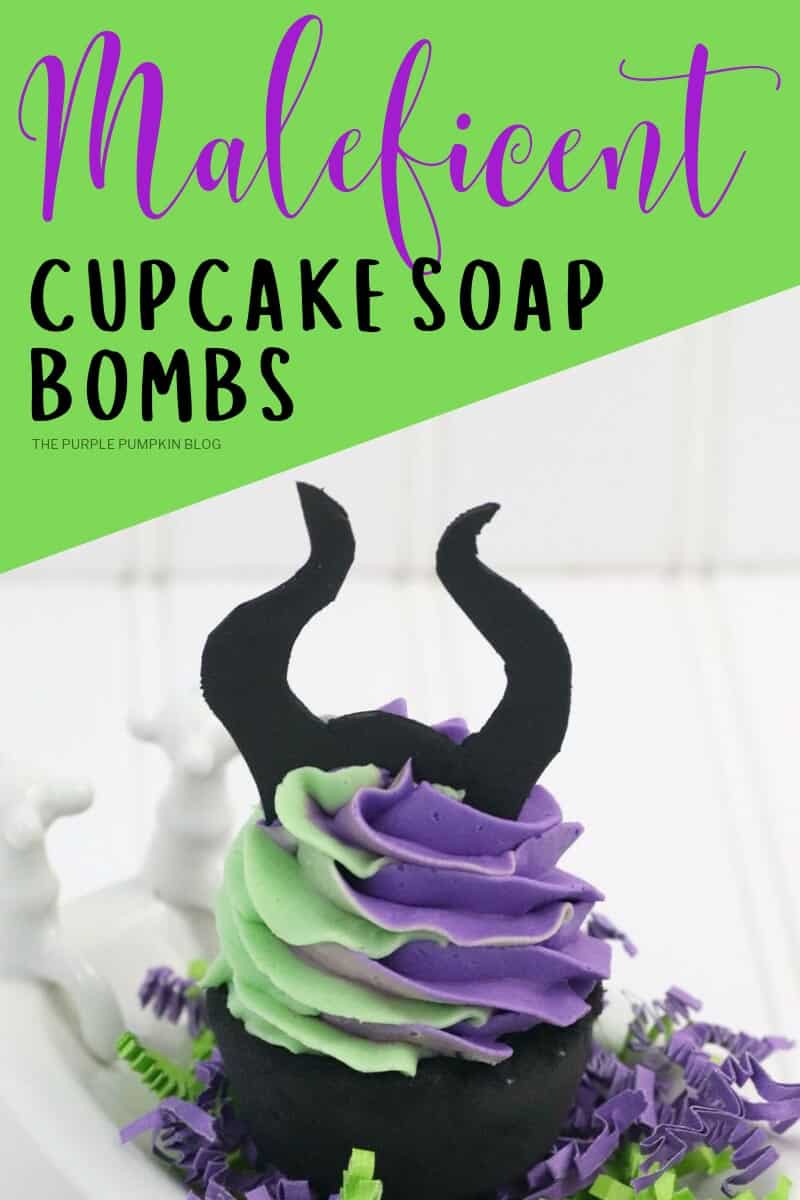
For Halloween, why not make a batch of Maleficent cupcake bath bombs with whipped soap frosting? At first glance, you would think that these are real cupcakes, but you definitely don’t want to be eating these! Drop a cupcake bomb into a hot bath, and transform yourself into the Mistress of Evil as surround yourself with its dark, magical [bath-time] powers!

I’ve shared lots of great craft ideas on The Purple Pumpkin Blog over the years, in fact, there are 100+ crafts to make and do at home that you can try!
Affiliate Disclosure
We have included affiliate links to products and services related to this post.
We may earn a commission if you purchase after clicking on those links.
As an Amazon Associate, I earn from qualifying purchases.
Read Our Full Disclosure Policy and Privacy Policy
Maleficent Cupcake Bath Bombs
Maleficent has always been my favourite Disney Villain, and I can lie back with one of these cupcake bath bombs swirling around me and become at one with the Mistress of Evil!
These homemade soap bombs would not only look awesome in your bathroom for Halloween but also make gorgeous party favors too!
Materials & Tools Used in This Craft
There is no getting around it, but you are going to need specialised ingredients to make these Maleficent bath bombs – all of which you can buy on Amazon, or in your supermarket.
Don’t worry though, I’ve provided the links for [nearly all of] them to make gathering the supplies super easy for you. The quantities of each ingredient can be found in the printable tutorial card at the end of this post.
- Baking Soda/Bicarbonate of Soda – find it in the cake aisle at your supermarket
- Citric Acid – helps to make the bath bombs fizz (along with the baking soda)
- Cornstarch/Cornflour – find it in your local supermarket
- Kaolin Clay – gives bath bombs more stability
- Coconut Oil – helps to bind all the ingredients together
- Cocoa Butter – a great skin moisturiser
- Polysorbate 80 – helps the coconut oil disperse more evenly in bathwater, makes the bath bombs bubbly and prevents the mica from sticking to the side of the tub.
- Essential Oil – use your favourite scent
- Activated Charcoal – to turn the cupcakes black!
- Whipped Soap Base – for the cupcake frosting
- Glycerin – you may also find this in the cake aisle in your grocery store
- Melt & Pour Soap Base – clear or white
- Green, and Purple Soap Dyes –
- 91% Isopropyl Alcohol (Rubbing Alcohol) – in a spray bottle. This helps to add moisture back to the bath bombs if they dry out before you add them to all the mold cavities.
- Black Craft Foam – for Maleficent’s Horns (template in instructions below)
- Standard Silicone Muffin Pan – to shape the cupcake bath bombs
- Piping Kit – this set allows you to easily pipe two or three colors at once
- Hand Mixer – these are fairly inexpensive, and if you plan on making a lot of your own bath and skincare products, it’s worth investing in one just for this purpose.
- Large and small mixing bowls
- Measuring cups and spoons
- Whisk
Don’t be put off by such a long list of supplies – you’ll have plenty of leftovers to experiment with making other bath time products, which I’m pretty sure you’re going to want to do after you make these Maleficent soaps!
How Do You Make Cupcake Bath Bombs?
The full instructions are found in the printable tutorial card at the end of this post, but here is a quick outline so you know what to expect. I highly recommend always reading a tutorial all the way through before starting.
I’ve also got some photos to guide you through making the cupcake bath bombs and there is a slideshow video over on my YouTube channel that you can watch and save to your Playlists for future reference. (Don’t forget to subscribe while you are there!)
In a large mixing bowl, whisk together baking soda, citric acid, cornstarch, and kaolin clay.
You then add coconut oil, polysorbate 80, melted cocoa butter, and essential oil to the dry ingredients and mix together well. You may need to use your hands to break down any lumps that form.
To turn the bath bomb mixture black, add activated charcoal.
The mixture is perfect when it feels like wet sand. When it is at that consistency, pack it into the silicone mold, and leave to dry for a minimum of 24 hours. If you find the mixture becomes dry before you are able to add it to all the muffin cavities, spray some rubbing alcohol a few times into it and it will make it moist enough again.
To make the whipped soap frosting, add the whipped soap base, glycerin, and polysorbate 80 to a mixing bowl and using a hand mixer, mix on low until fluffy, then fold in the cornstarch.
Now melt the melt and pour soap base and allow to cool slightly before adding it to the whipped soap base mixture and mixing on high speed for about a minute or until it forms peaks like when you make a meringue. You can add more cornstarch to help stiffen if required.
Divide the whipped soap mixture between two bowls and color one-half purple, and the other, green. You can add a drop of essential oil if you wish.
Using a dual piping bag, pipe soap frosting on top of each dried cupcake bomb. The frosting will take 36 hours to harden, so patience is a virtue when it comes to making these Maleficent cupcake bath bombs!
You could finish your bath bombs here and they would look amazing, but to truly turn them into Maleficent, you will need her horns! To make those you will need to trace the template onto black craft foam and cut out with scissors or a craft knife. Place into the frosting before it dries.
Once your perfectly evil bath bombs have dried, drop into a hot bath and enjoy!
Download Maleficent horns printable template
More Homemade Bath Products
Once you’ve made these bath bombs, I’m sure you’ll be looking for more homemade bath products to try out. Here are a few for you to look at.
More Maleficent Crafts
If Maleficent is your favorite Disney Villain (like me!) then you’ll love these other Maleficent Crafts!
Maleficent Cupcake Bath Bombs with Whipped Soap Frosting
Materials
For the Cupcake Bath Bombs
- 2 cups baking soda
- 1 cup citric acid
- ½ cup cornstarch
- ¼ cup white kaolin clay
- ⅔ cup coconut oil
- ¼ cup cocoa butter melted
- 2 tsp polysorbate 80
- 10-20 drops essential oil*
- 3-4 tablespoons activated charcoal
For the Whipped Soap Frosting
- ¾ cup whipped soap base
- 1 Tbsp glycerin
- 1 tsp polysorbate 80
- 1 Tbsp cornstarch
- ¼ cup clear or white melt and pour soap base
- 1 tsp green soap dye
- 1 tsp purple soap dye
For the Maleficent Horns
- Horn template
- Thin black craft foam
TOOLS
- Standard silicone muffin pan
- Spray bottle filled with rubbing alcohol
- 2 large mixing bowls
- Multi-bag piping kit
- large mixing bowl
- 2 small bowls
- Hand mixer
- Measuring cups and spoons
- Scissors or craft knife
Instructions
- To make the cupcake bath bombs, place the baking soda, citric acid, cornstarch and kaolin clay in a large mixing bowl, and whisk together to combine. (Use kaolin clay in bath bombs that don’t use the typical round molds to give more stability when you pop them out of their mold.)
- Add the coconut oil (binds ingredients so the bombs don’t crumble when you touch them), polysorbate 80 (helps coconut oil to disperse evenly, makes the bath bombs bubbly, and prevents mica from sticking to side of tub), melted cocoa butter, and essential oil to the dry mixture and mix well. You may need to use your hands to break down any lumps. The mixture is ready when it holds together when you press it into your hands – it will feel like wet sand.
- Add 2 tablespoons of the activated charcoal to start with – you may need to add more to get a blacker mixture. When you add more charcoal you will need to add an extra 1-2 tablespoons of coconut oil or it will become too dry. Remember the wet sand consistency!
- Pack the mixture firmly into 6 cavities of the muffin pan. Allow to dry for a minimum of 24 hours. If these are not completely 100% dry, they will break when you take them out. Ideally, you want to make these when humidity is low. If you find the mixture becomes dry before you are able to add it to all the muffin cavities, spray some rubbing alcohol a few times into it and it will make it moist enough again.
- To make the whipped soap frosting, add the whipped soap base, glycerin, and polysorbate 80 to a mixing bowl. Using a hand mixer, mix on low speed until fluffy – about 1 minute. Add the cornstarch and mix on low for 30 seconds.
- Melt the melt and pour soap base in a microwave-safe bowl in 30-second intervals, stirring after each until melted. Allow to cool for a minute or so, then pour into the whipped soap base mixture. Mix on high speed for 1 minute or until the mixture form peaks like when you make a meringue. If the frosting isn’t stiff enough, add more cornstarch and mix again until firm.
- Divided the whipped soap between 2 small bowls. Add 1-2 drops of purple dye to one of the bowls, and 1-2 drops of green dye to the other. You can always add more color if you want a darker shade. You can also add a few drops of essential oil too.
- Using the multi-bag piping kit, add purple frosting to one bag, and the green frosting to another bag. Place both of these into the larger bag and attach the nozzle (follow directions on the box).
- Pipe frosting swirls on top of each cupcake and leave to harden. This will take about 36 hours.
- You can drop the cupcake bath bomb and the soap into the bath together, or separately.
- To make Maleficent horns decoration, download and print the template and cut out. Use a pencil to trace around it onto black craft foam and cut with scissors or craft knife. Insert into frosting before it hardens. You may have to adjust the size of the horns in your print settings to suit the size of your cupcake bombs.
Video
Notes
This post is part of my long-running Crafty October series on The Purple Pumpkin Blog. Since 2012, I’ve shared Halloween recipes, printables, and crafts every October. While I don’t officially run the series anymore, all my new Halloween posts are still part of this decades-long celebration of spooky fun! Browse past Crafty October years for even more inspiration: 2024, 2023, 2022, 2021, 2020, 2019, 2018, 2017, 2016, 2015, 2014, 2013, and 2012.