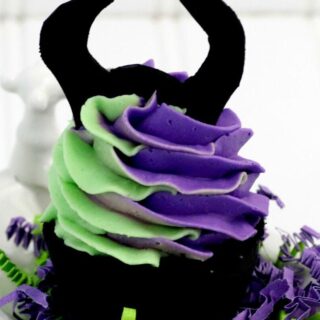
Maleficent Cupcake Bath Bombs with Whipped Soap Frosting
These awesome Maleficent cupcake bath bombs are fun to make, and will look great in your bathroom for Halloween or to hand out as party favors!
Materials
For the Cupcake Bath Bombs
- 2 cups baking soda
- 1 cup citric acid
- ½ cup cornstarch
- ¼ cup white kaolin clay
- ⅔ cup coconut oil
- ¼ cup cocoa butter melted
- 2 tsp polysorbate 80
- 10-20 drops essential oil*
- 3-4 tablespoons activated charcoal
For the Whipped Soap Frosting
- ¾ cup whipped soap base
- 1 Tbsp glycerin
- 1 tsp polysorbate 80
- 1 Tbsp cornstarch
- ¼ cup clear or white melt and pour soap base
- 1 tsp green soap dye
- 1 tsp purple soap dye
For the Maleficent Horns
- Horn template
- Thin black craft foam
TOOLS
- Standard silicone muffin pan
- Spray bottle filled with rubbing alcohol
- 2 large mixing bowls
- Multi-bag piping kit
- large mixing bowl
- 2 small bowls
- Hand mixer
- Measuring cups and spoons
- Scissors or craft knife
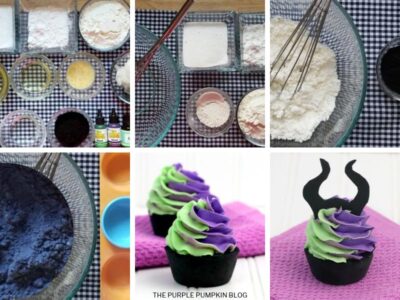
Instructions
- To make the cupcake bath bombs, place the baking soda, citric acid, cornstarch and kaolin clay in a large mixing bowl, and whisk together to combine. (Use kaolin clay in bath bombs that don't use the typical round molds to give more stability when you pop them out of their mold.)
- Add the coconut oil (binds ingredients so the bombs don't crumble when you touch them), polysorbate 80 (helps coconut oil to disperse evenly, makes the bath bombs bubbly, and prevents mica from sticking to side of tub), melted cocoa butter, and essential oil to the dry mixture and mix well. You may need to use your hands to break down any lumps. The mixture is ready when it holds together when you press it into your hands - it will feel like wet sand.
- Add 2 tablespoons of the activated charcoal to start with - you may need to add more to get a blacker mixture. When you add more charcoal you will need to add an extra 1-2 tablespoons of coconut oil or it will become too dry. Remember the wet sand consistency!
- Pack the mixture firmly into 6 cavities of the muffin pan. Allow to dry for a minimum of 24 hours. If these are not completely 100% dry, they will break when you take them out. Ideally, you want to make these when humidity is low. If you find the mixture becomes dry before you are able to add it to all the muffin cavities, spray some rubbing alcohol a few times into it and it will make it moist enough again.
- To make the whipped soap frosting, add the whipped soap base, glycerin, and polysorbate 80 to a mixing bowl. Using a hand mixer, mix on low speed until fluffy - about 1 minute. Add the cornstarch and mix on low for 30 seconds.
- Melt the melt and pour soap base in a microwave-safe bowl in 30-second intervals, stirring after each until melted. Allow to cool for a minute or so, then pour into the whipped soap base mixture. Mix on high speed for 1 minute or until the mixture form peaks like when you make a meringue. If the frosting isn't stiff enough, add more cornstarch and mix again until firm.
- Divided the whipped soap between 2 small bowls. Add 1-2 drops of purple dye to one of the bowls, and 1-2 drops of green dye to the other. You can always add more color if you want a darker shade. You can also add a few drops of essential oil too.
- Using the multi-bag piping kit, add purple frosting to one bag, and the green frosting to another bag. Place both of these into the larger bag and attach the nozzle (follow directions on the box).
- Pipe frosting swirls on top of each cupcake and leave to harden. This will take about 36 hours.
- You can drop the cupcake bath bomb and the soap into the bath together, or separately.
- To make Maleficent horns decoration, download and print the template and cut out. Use a pencil to trace around it onto black craft foam and cut with scissors or craft knife. Insert into frosting before it hardens. You may have to adjust the size of the horns in your print settings to suit the size of your cupcake bombs.
Video
Notes
*Use your favorite scent
Did you make this project? Share it!Tag @_ThePurplePumpkinBlog on Instagram with the hashtag #TPPBCreate!