Golf Ball Pumpkins Craft
Home » CREATE » Crafts » Pumpkin Crafts »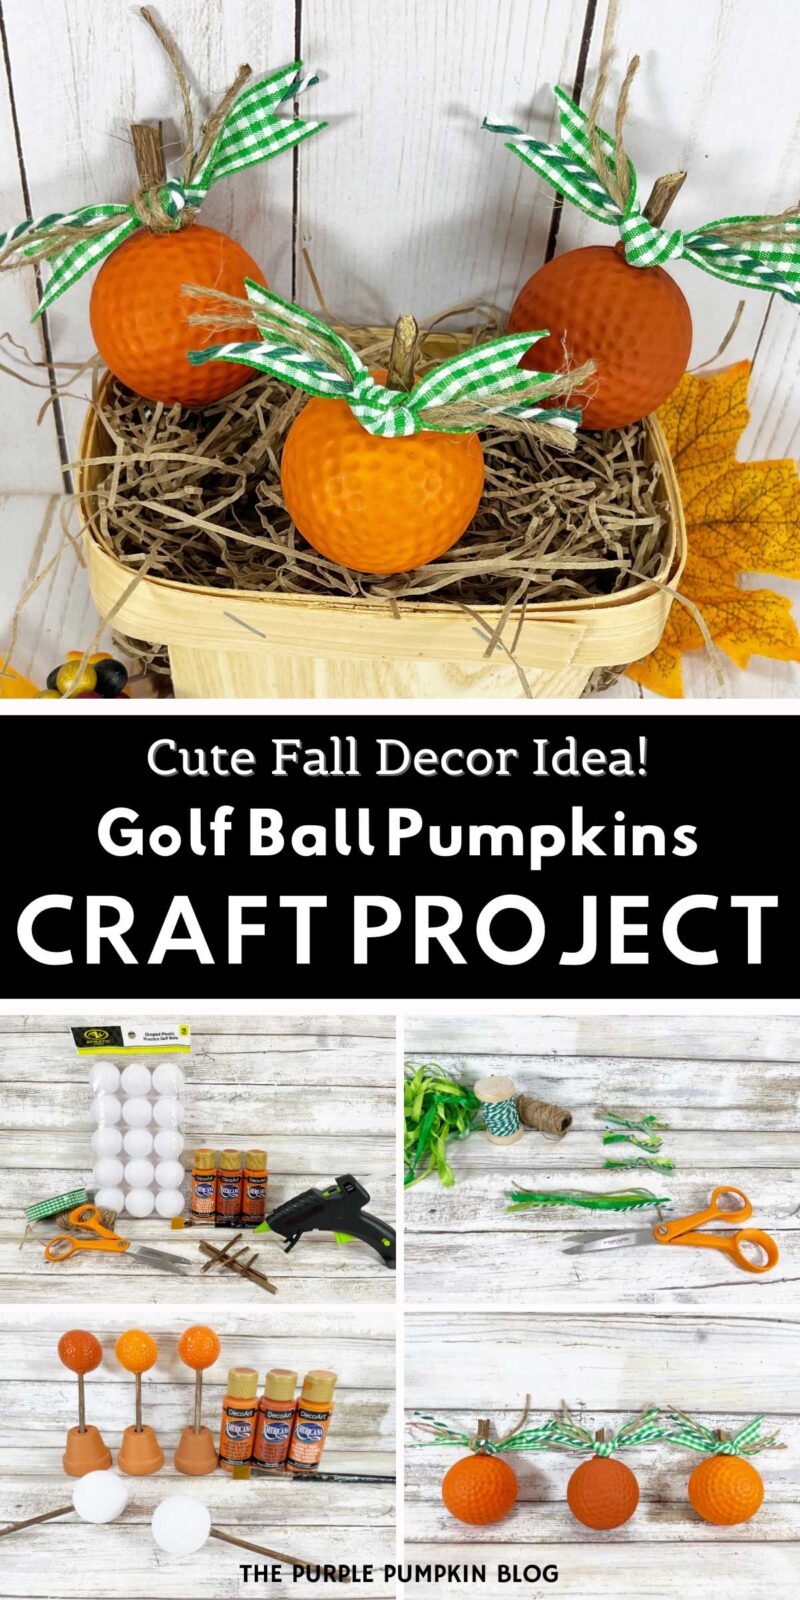


Say hello to our Golf Ball Pumpkins Craft! It is a delightful way to usher in the festive spirit of fall!

This pumpkin craft uses simple materials to transform ordinary plastic golf balls into charming mini pumpkins, perfect for decorating any space.
Don’t have time for this craft now? Tap the share icon in the bottom right of the screen, then tap the heart icon ♥ to save it for later!
Affiliate Disclosure
We have included affiliate links to products and services related to this post.
We may earn a commission if you purchase after clicking on those links.
As an Amazon Associate, I earn from qualifying purchases.
Read Our Full Disclosure Policy and Privacy Policy
The list of materials, tools, and instructions is in the printable tutorial card at the end of this post. We recommend reading the blog post thoroughly before starting this project to ensure you have everything required and understand the steps and timings involved.
Golf Ball Pumpkins Craft
Crafting often brings out the best of our creativity, and the Golf Ball Pumpkins Craft is no exception!
With just a few plastic golf balls and some acrylic craft paint, you can create adorable mini pumpkins that capture the essence of autumn.
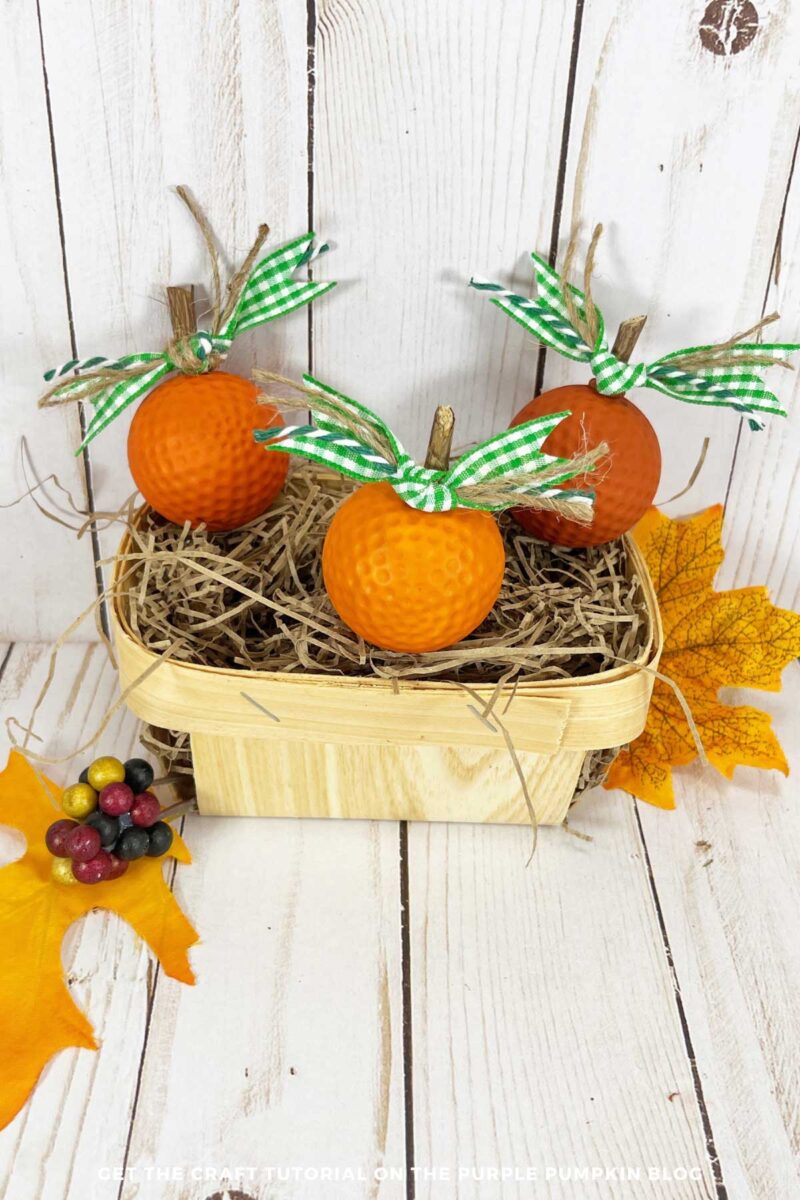
The varying shades of orange paint allow for a more natural and varied look reminiscent of a pumpkin patch.
The tools and materials for this craft are easily accessible—many of them, like the glue gun and paintbrush, might already be in your crafting arsenal.
The inclusion of twigs as stems gives these mini pumpkins an authentic touch, while the assorted green ribbons and twine add a rustic charm.
Once assembled, these golf ball pumpkins can be used in a myriad of ways. Place them in a decorative bowl or vase for a unique centerpiece, scatter them across a mantel, or use them on an autumn-themed tiered tray.
Your family and friends will never know how quick and easy this trendy Autumn decor was to create!
To read next: 23+ Fantastic Fall Crafts For Seniors
Their compact size also makes them perfect for gifting, perhaps as a token to a fellow craft enthusiast or a teacher.
The beauty of this craft lies in its simplicity and versatility.
Whether you’re a seasoned crafter or just starting out, the golf ball pumpkin craft offers a fun and rewarding experience.
Plus, the result is a set of delightful decorations that can be proudly displayed throughout the season.
Materials & Tools Used in This Craft
The materials and tools needed for this project are linked on Amazon below for your convenience. The quantities are on the craft tutorial card at the end of this post.
- Plastic Golf Balls – If you have any old golf balls lying around, why not upcycle them!
- Multi-Surface Acrylic Craft Paint in the following colors:
- Bright Orange
- Burnt Orange
- Medium Orange
- Assorted Green Ribbon, Twine, and Trim Scraps
- Hot Glue Gun and Glue Sticks
- Twigs from your backyard
- Paintbrush – This set of paintbrushes has various sizes and types for different types of paint and glue.
- Scissors
- Pruning Shears or Wire Cutters for trimming twigs.
- Ruler
No time to read now? Tap the buttons below to save the craft to your Pinterest boards or Facebook page for later!
Where Can I Get Cheap Craft Supplies?
This budget-friendly craft uses supplies you may already have or can purchase cheaply at a dollar store (or local equivalent).
Check out your local dollar stores like Dollar Tree if you’re in the USA. If you’re in the UK, the Poundshop, The Range, Wilko, and Baker Ross are great places to shop for cheap and inexpensive craft supplies. To the rest of the world reading this—we’re sorry we don’t know every cheap store out there, but please do hunt the ones out in your location for crafting bargains!
How Do I Make Golf Ball Pumpkins?
The printable tutorial card with the full supplies list and instructions can be found at the end of this post.
Step 1 – Attach Twigs: Attach a twig to each golf ball with a glue gun and glue sticks. Hold in place until the glue dries completely.
NOTE: An industrial adhesive like E6000 would also work for this project, but you would have to wait for it to dry.
Step 2 – Paint Golf Balls: Paint the outside of the golf balls with bright orange, medium orange, and burnt orange acrylic craft paint.
Set aside to dry by turning them upside down and placing the twig stem in the drain hole of a clay pot. Apply a second coat if required.
TIP! Mix and match the colors of orange to create your own personalized colors. Or why not paint them green or red to turn them into golf ball apples!
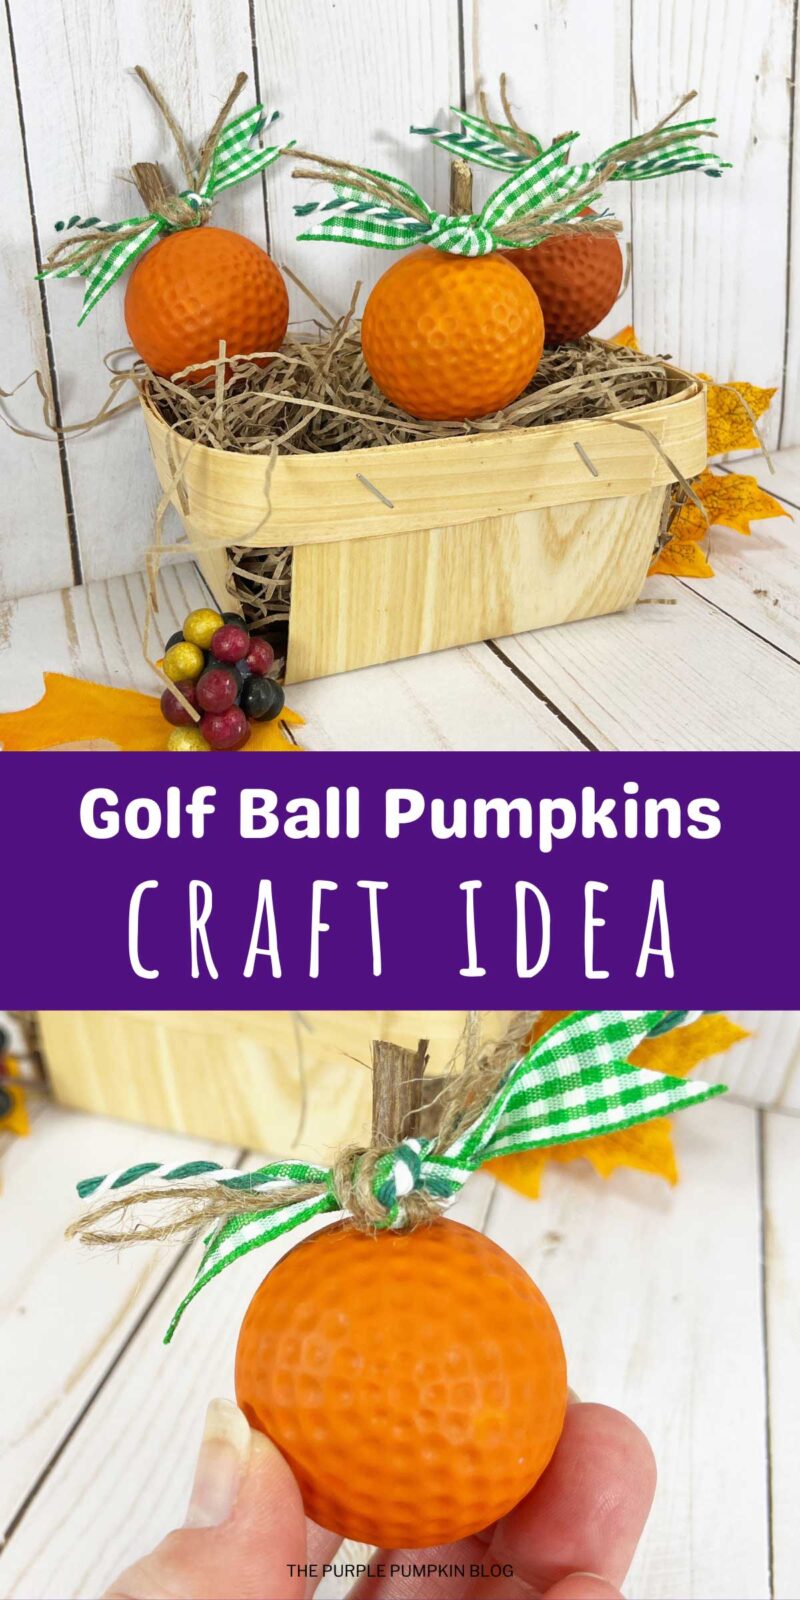
Step 3 – Trim Twigs: When the golf ball pumpkins are dry, trim the long stems with pruning sheers to approximately 1″/2.5cm long.
Step 4- Tie Ribbons: Measure and cut the assorted green ribbon, twine, and trim into 8-inch pieces. Tie in a knot around each golf ball pumpkin stem. Trim any long ribbon ends with scissors. Display where desired.
More Pumpkin Crafts
Looking for more pumpkin crafts? Try these next:
- Wooden Pumpkin Craft Made with Tumbling Tower Blocks
- How To Make a Paperback Book Pumpkin – Fall Decor Craft!
- How to Make Rustic Wooden Pumpkins
We’ve shared over 500+ crafts for all seasons and holidays—why not take a look at them next?
Printable Golf Ball Pumpkins Craft Tutorial Card
The printable tutorial card is below—please leave a star rating and quick review to share your experience with others!
Golf Ball Pumpkins
Materials
- 3 plastic golf balls
- Multi-surface acrylic craft paint in the colors Bright Orange Burnt Orange, Medium Orange
- Assorted green ribbon twine and trim scraps
- Twigs
TOOLS
- Glue Gun and Glue Sticks – Dollar Store
- Pruning Shears or Wire Cutters
Instructions
- Attach a twig to each golf ball with a glue gun and glue sticks. Hold in place until the glue dries completely.
- Paint the outside of the golf balls with bright orange, medium orange, and burnt orange acrylic craft paint. Set aside to dry by turning them upside down and placing the twig stem in the drain hole of a clay pot. Apply a second coat if required. TIP! Mix and match the colors of orange to create your own personalized colors.
- When the golf ball pumpkins are dry, trim the long stems with pruning sheers to approximately 1"/2.5cm long.
- Measure and cut the assorted green ribbon, twine, and trim into 8-inch pieces. Tie in a knot around each golf ball pumpkin stem. Trim any long ribbon ends with scissors. Display where desired.
This post is part of my long-running Crafty October series on The Purple Pumpkin Blog. Since 2012, I’ve shared Halloween recipes, printables, and crafts every October. While I don’t officially run the series anymore, all my new Halloween posts are still part of this decades-long celebration of spooky fun! Browse past Crafty October years for even more inspiration: 2024, 2023, 2022, 2021, 2020, 2019, 2018, 2017, 2016, 2015, 2014, 2013, and 2012.