Reindeer Ornament Craft Using Cricut Cutting Machine
Home » CREATE » Crafts » Christmas Crafts »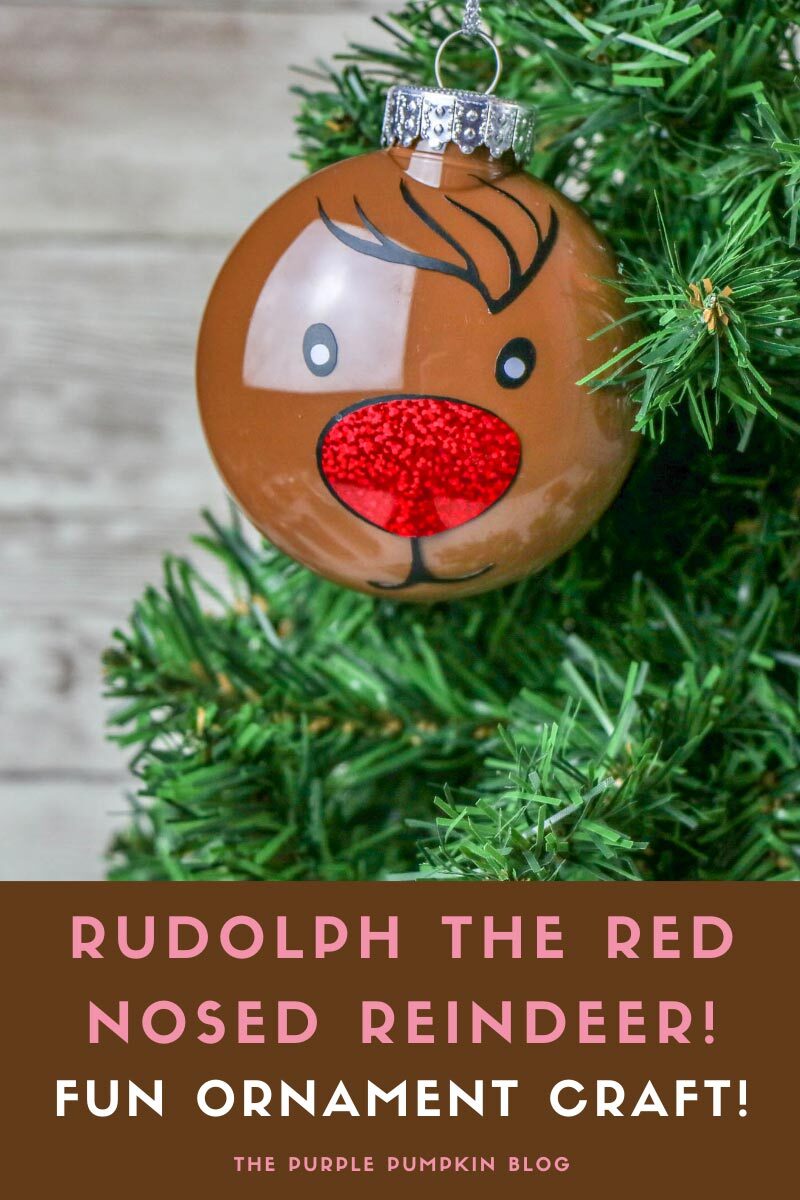
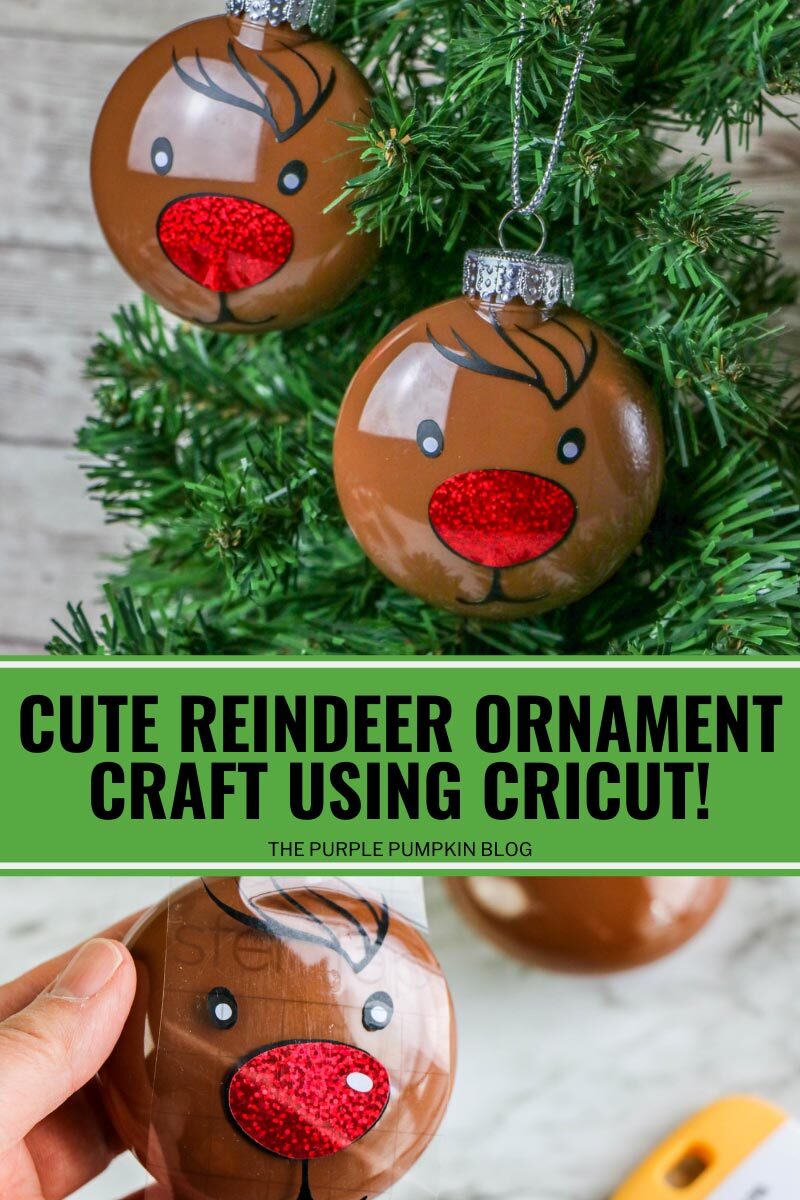
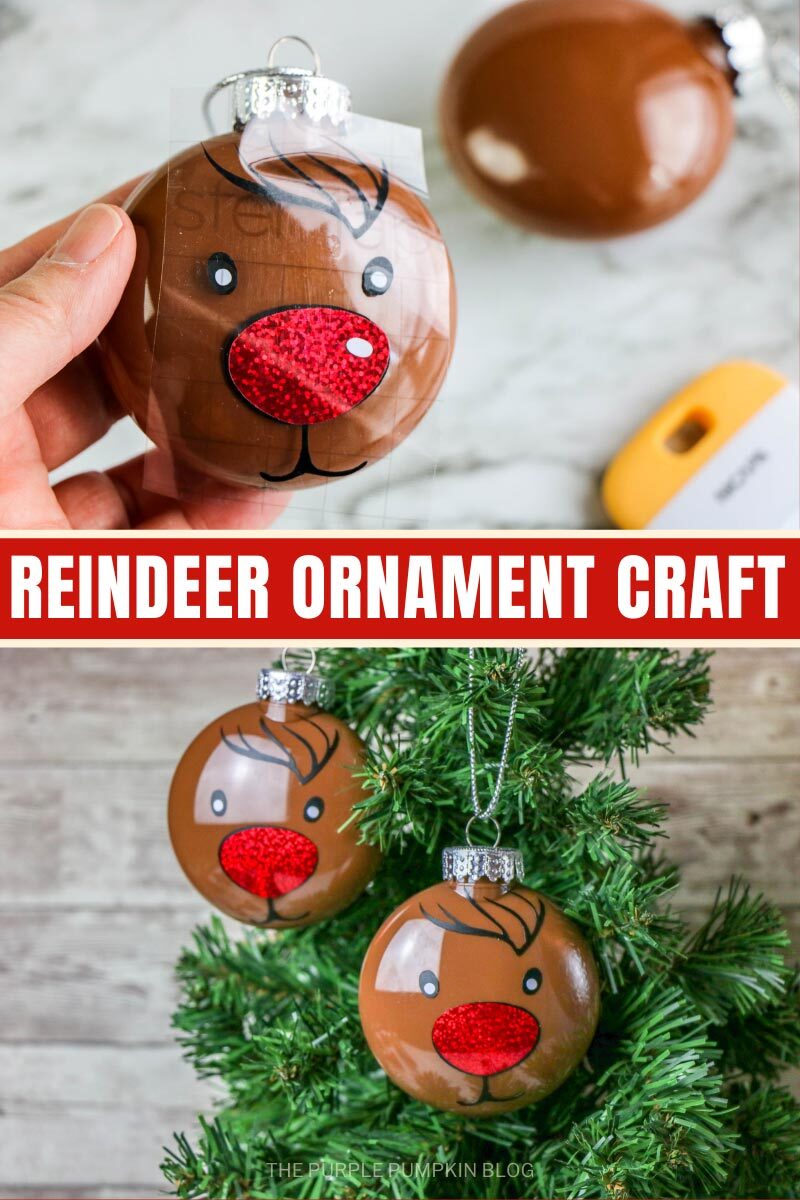
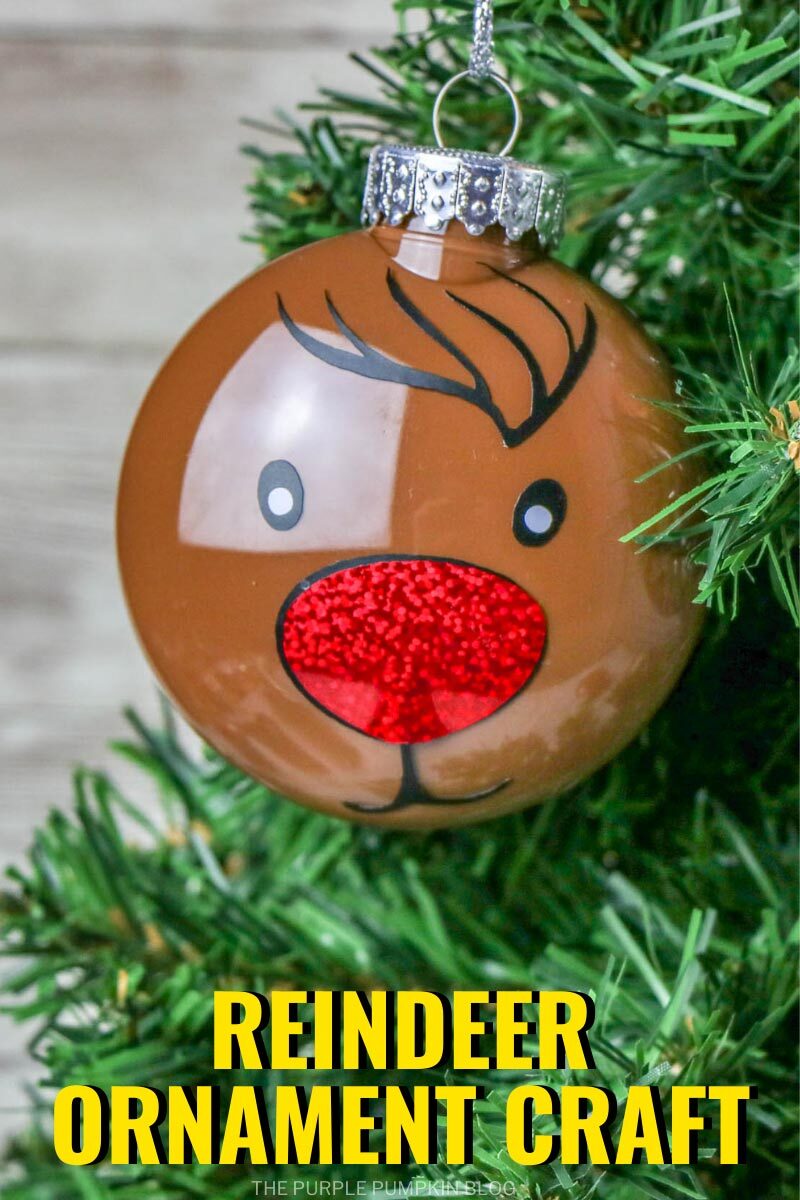
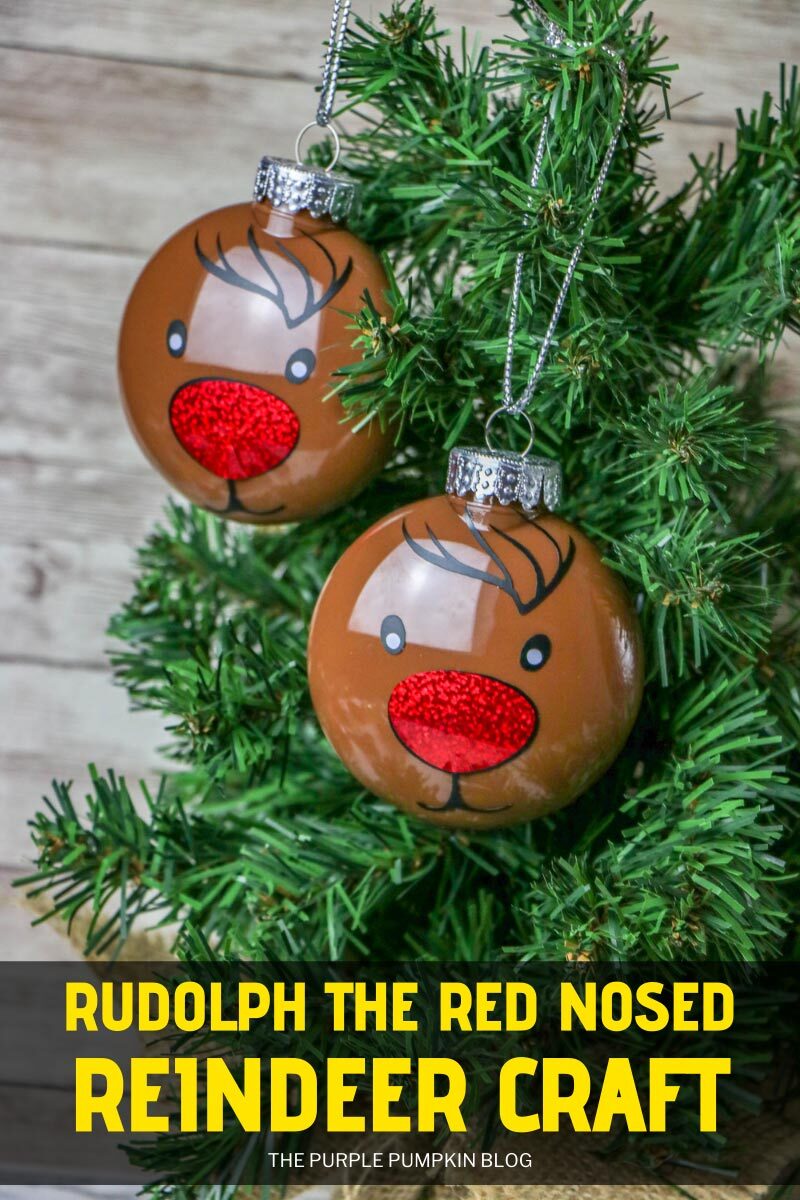
This Reindeer Ornament Craft will make a great addition to your Christmas tree – and it’s so simple to make! Turn a clear ornament into Rudolph the Red-Nosed Reindeer using paint and vinyl decals – made with a Cricut cutting machine.

I’ve got more fun Reindeer Crafts and Recipes for you to enjoy.
Affiliate Disclosure
We have included affiliate links to products and services related to this post.
We may earn a commission if you purchase after clicking on those links.
As an Amazon Associate, I earn from qualifying purchases.
Read Our Full Disclosure Policy and Privacy Policy
Reindeer Ornament Craft
The full list of materials, tools, and instructions are found in the printable tutorial card at the end of this post. I highly recommend reading the blog post all the way through before starting this project to ensure that you have everything required and understand the steps and timings involved.
How adorable are these reindeer ornaments?! They’re so easy to make and a relatively quick project too. You have to wait for the paint to dry, but other than that, it’s a delightful holiday craft activity that takes less than 30 minutes.
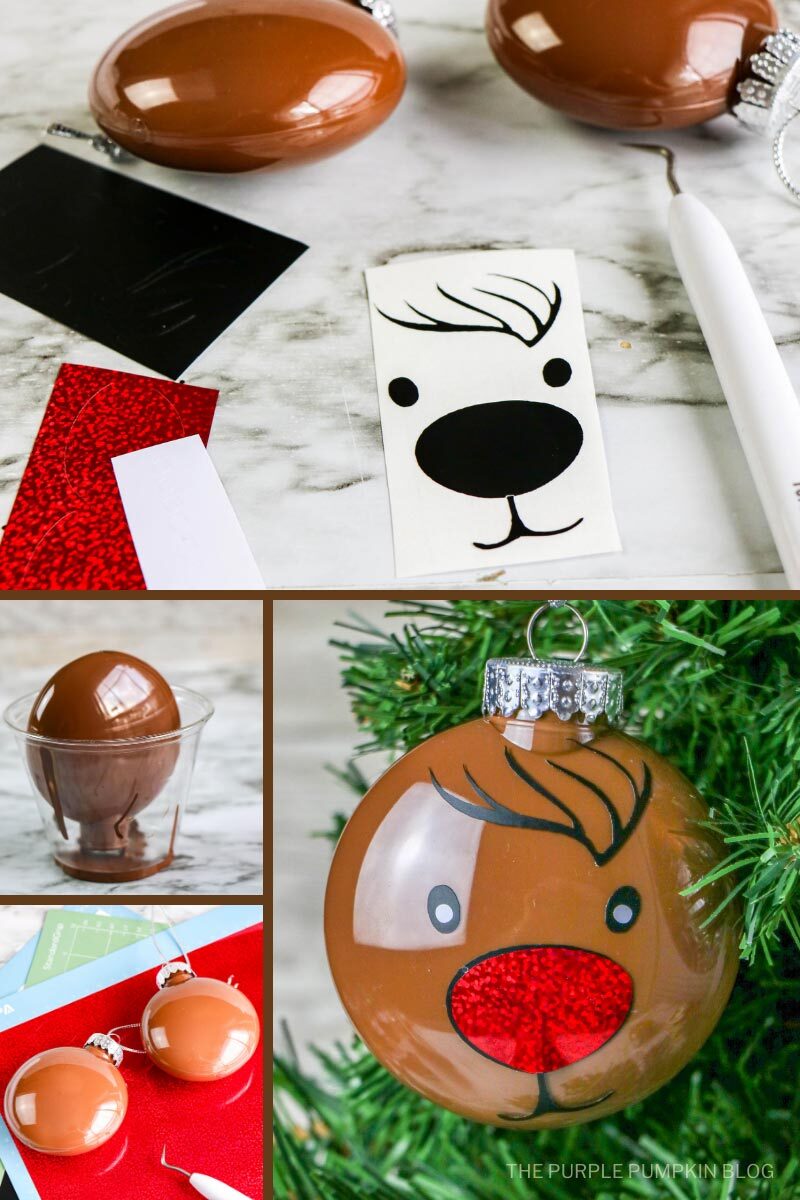
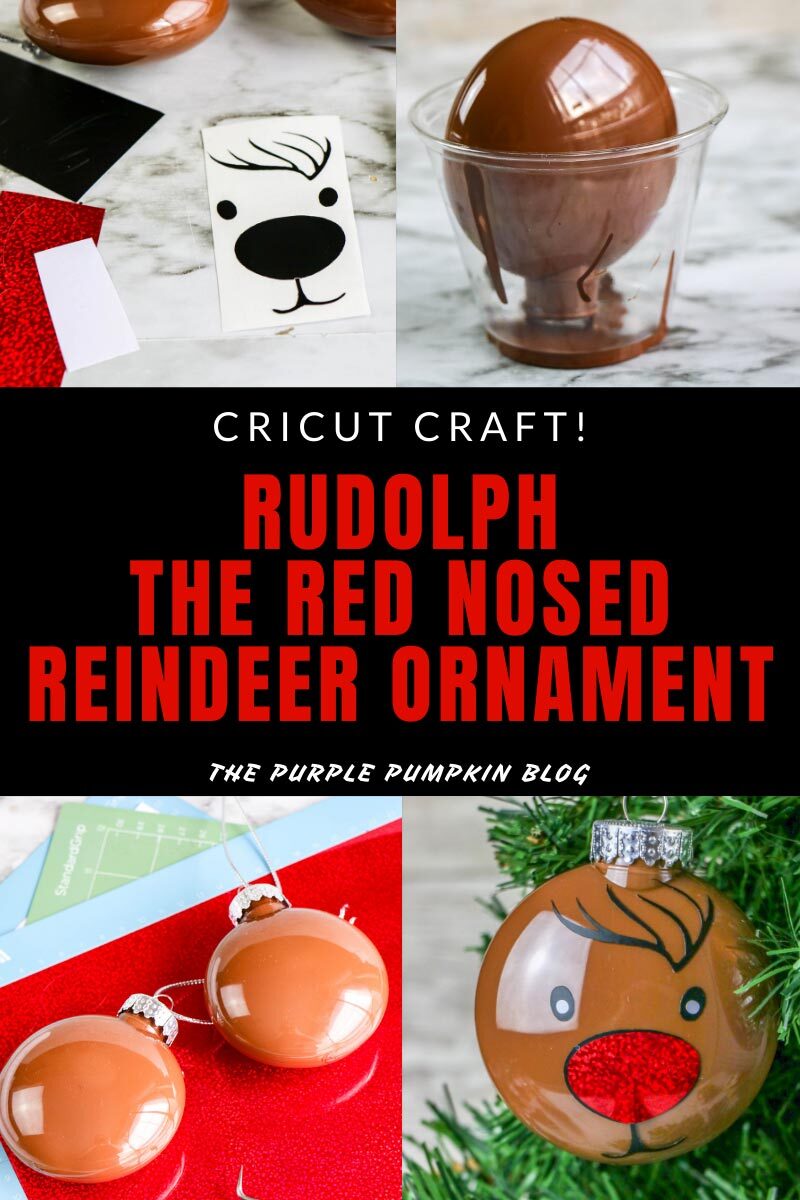
Clear plastic ornaments are painted brown, and the features are cut from vinyl using a Cricut. If you have another brand of cutting machine, you can of course use. And if you don’t have a cutting machine, you could use a small pair of scissors to carefully cut out the vinyl by hand. It is doable!
The ornaments are painted on the inside by pouring in some paint and swirling it around before turning upside down for the excess to drip out and dry.
You could even use bronze colored ornaments and not even worry about painting clear ones!
You could use glitter inside your ornaments if you prefer – similar technique that is all explained in the tutorial card at the end of this post.
You can make as many reindeer ornaments as you like! Make them in an assembly line fashion and you’ll be done in no time at all! You could even give the reindeers different color noses!
For another fun holiday make, try this adorable Reindeer Bell Necklace Craft—a simple and festive project kids will love!
Materials & Tools Used in This Craft
For your convenience, I’ve linked any specialized materials and tools needed for this craft to Amazon below. The full list of supplies, which may include basic crafting items that you already have can be found in the tutorial card at the end of this post.
- Clear Plastic Disc Ornaments – we used ones shaped like discs, but you could use round ones if you prefer.
- Brown Paint – to color the inside of the ornament or you could use bronze (or brown) glitter.
- Vinyl – black, red (glitter), and white.
- Glitter-It! – if using glitter to fill ornament.
- Funnel – if you’re using glitter this will help to pour it into the ornament.
- Plastic Cups – to pour excess paint and glitter into (use separate cups), and to sit the ornaments in while drying.
- Cricut – plus a weeding tool, transfer tape, and scraper.
Reindeer Template
To download the image files for this reindeer ornament craft, you can either click each of the links below which will open in a new tab/window, and then right-click and “save image as” to your device. Or you could right-click each link and “save link as” which will also save the images to your device.
This post is part of Create the Holidays (formerly Create Christmas) – a series of festive recipes, crafts, printables, and more on The Purple Pumpkin Blog!
More Christmas Ornament Crafts
Here are some more homemade ornaments for you to make next:
- Santa Mickey & Minnie Mouse Christmas Ornaments Craft
- Easy No-Sew Felt Christmas Ornament Penguin + Free Printable Pattern
- Homemade DIY Christmas Baubles/Ornaments
I’ve shared lots of great craft ideas on The Purple Pumpkin Blog over the years, in fact, there are 100+ crafts to make and do at home that you can try.
How Do I Make a Reindeer Ornament?
Just check out the how-to card below with full materials, tools, instructions and demonstration photos. You can print the card out too (don’t worry, the pics don’t print to save your ink!).
Reindeer Ornament Craft
Materials
- Clear plastic disc ornaments
- Brown Paint and/or Brown/Bronze Glitter
- Black Vinyl
- Red Glitter Vinyl
- White Vinyl
- Glitter-It! if using glitter to fill ornament
- Funnel
- Plastic Cups
- Reindeer Template:
- Reindeer Outline
- Reindeer Nose
- Reindeer Pupils
TOOLS
- Cricut
- Weeding Tool
- Transfer tape
- Scraper
Instructions
- You can fill your ornaments with paint or glitter (or mix up different ornaments!). Remove the tops from the ornaments.
- To fill with glitter: Pour a small amount of Glitter-It! into the ornament and slowly swirl around until the inside is coated. Remove the excess Glitter-It! by pouring it into a cup.
- Using a funnel, pour brown glitter into the ornament and shake around until completely coated. Tap the ornament upside down over a different cup to remove excess glitter.
- If a thicker coat of glitter inside the ornament is desired, allow the ornament to dry overnight and repeat the previous steps.
- Once the glue is dry, replace the cap.
- To fill with paint: Pour a small amount of brown paint into the ornament and slowly swirl around until the inside is coated.
- Remove the excess paint by pouring it into a cup.
- Let the ornament rest upside down overnight to dry completely.
- Once the paint is dry, replace the cap.
- Upload the reindeer outline template to Cricut Design Space and select to remove the white background of the image. Save it as a cut file. Repeat with the nose and the pupils.
- Insert the images into your project.
- Change the nose to red and the pupils to white.
- Select the images and size to match the dimensions of the ornament.
- Send the project to your Cricut and cut the images from the correct color vinyl.
- Weed the excess away.
- Place the colored layers onto the black layer.
- Use transfer tape to move the designs to the ornament. Press firmly or swipe over the transfer tape with a scraper to make sure the vinyl adheres to the ornament. Pull the transfer tape away.
- Hang reindeer ornament on your Christmas tree!
This post is part of my long-running Create the Holidays series on The Purple Pumpkin Blog. Since 2012, I’ve shared free printables, crafts, recipes, and more for Christmas and the Winter Holidays. While I don’t officially run the series anymore, seasonal inspiration will still be here! Browse past Create the Holidays (formerly Create Christmas) years: 2024, 2023, 2022, 2021, 2020, 2019, 2018, 2017, 2016, 2015, 2014, 2013, and 2012.