Mini Berry Pavlovas
Home » COOK »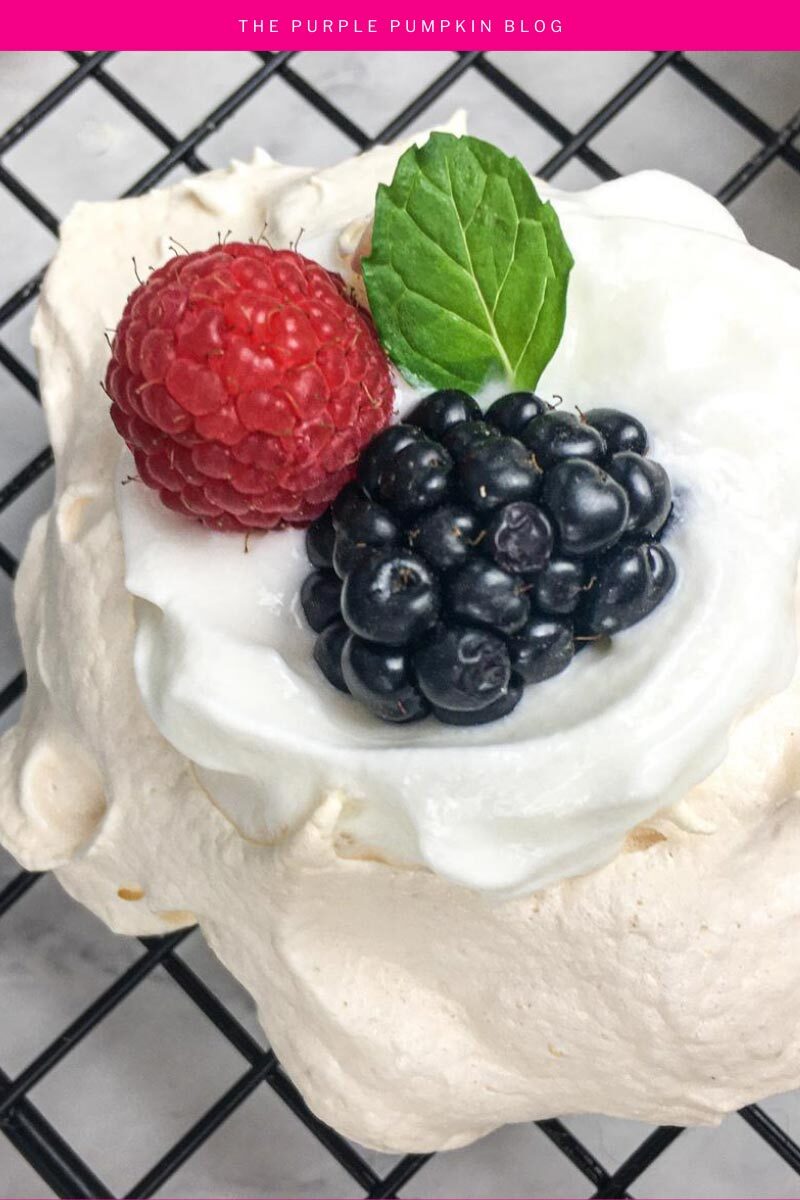
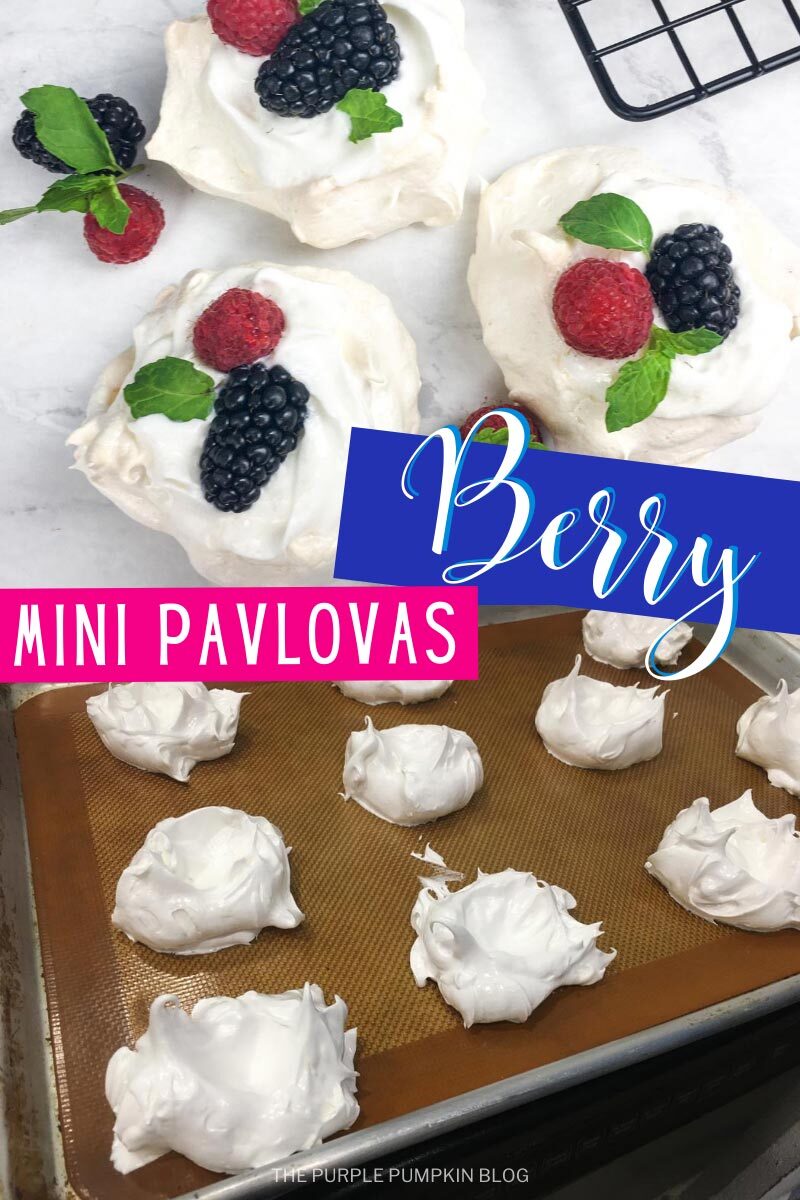
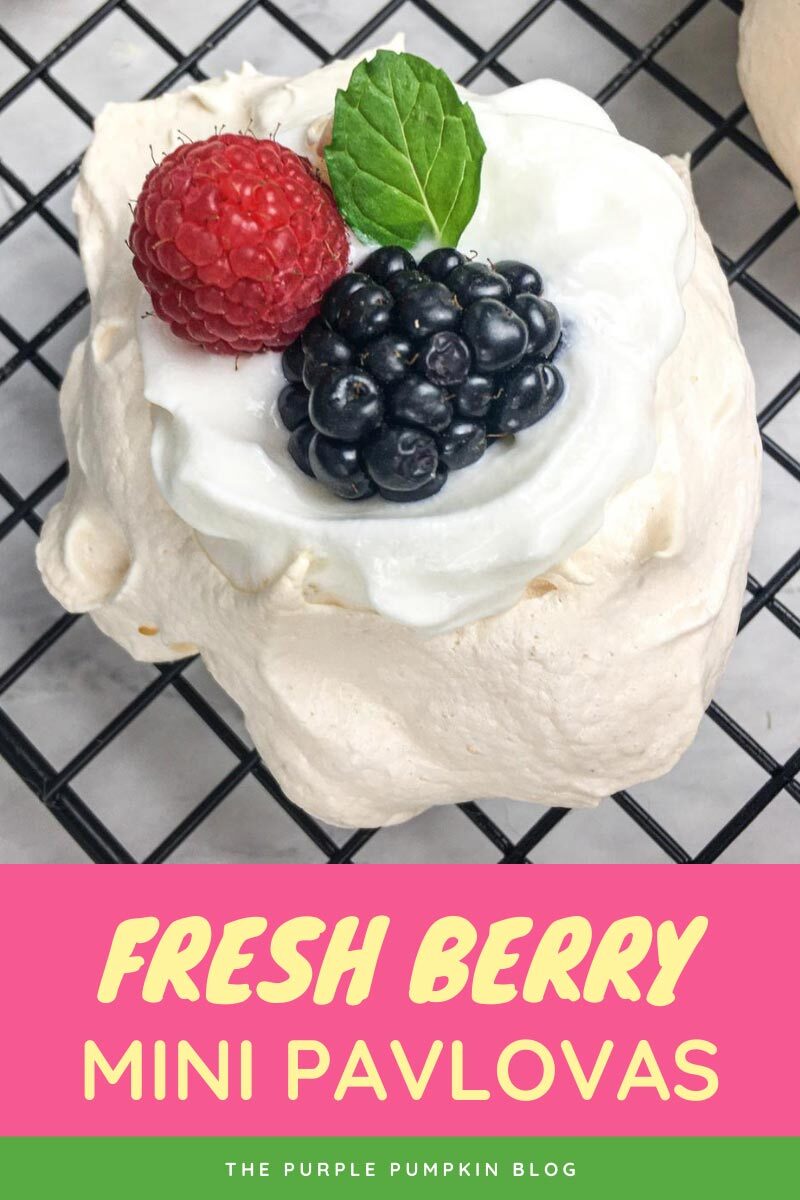
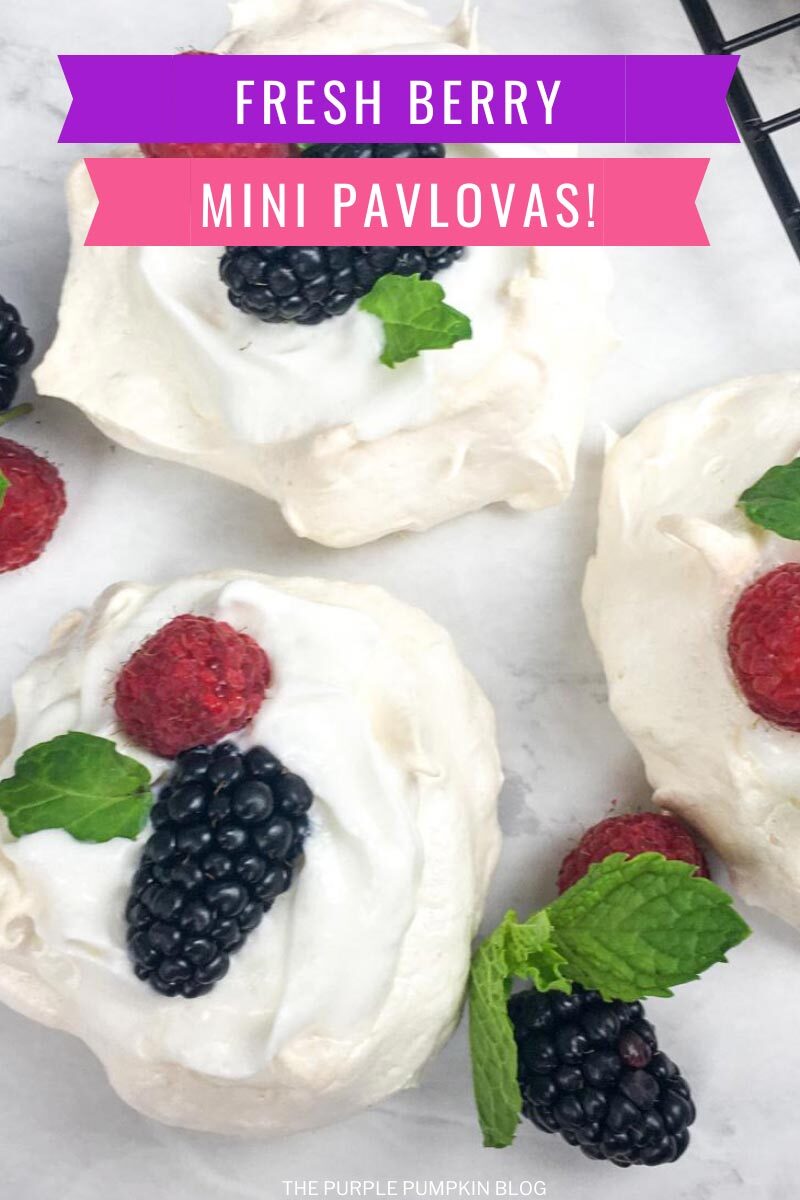
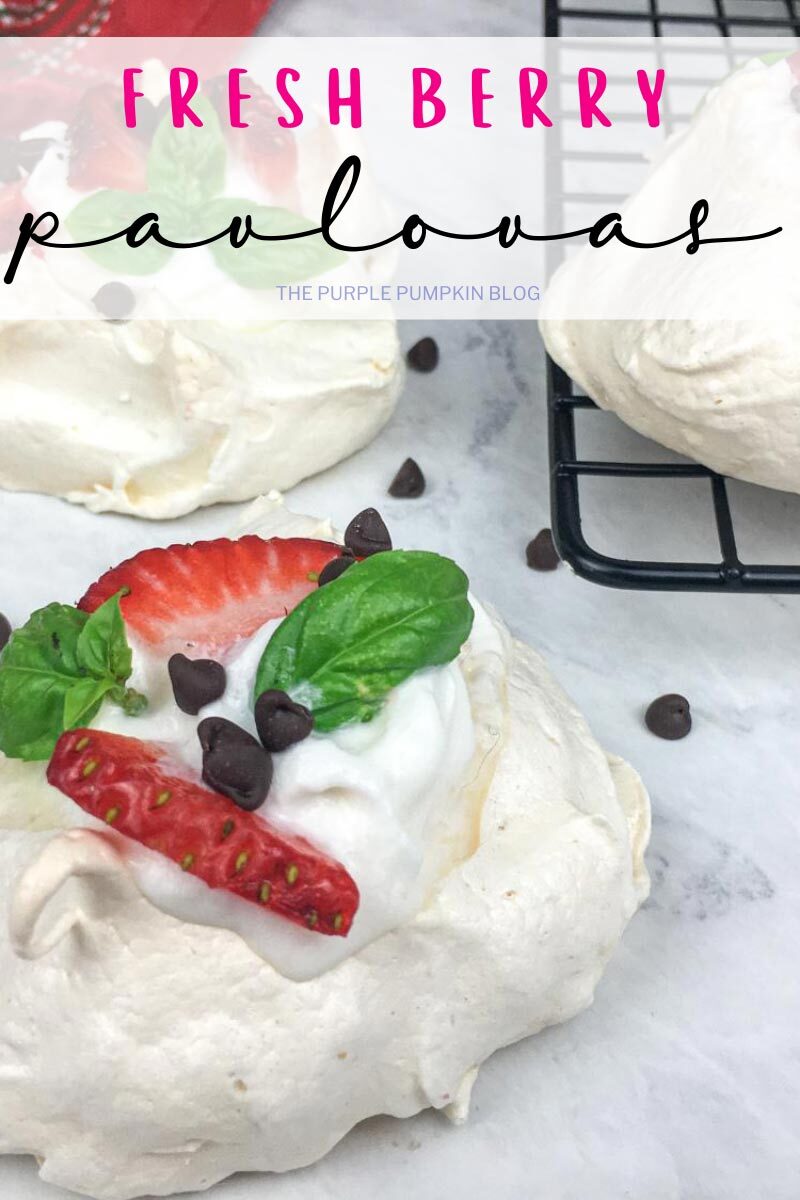

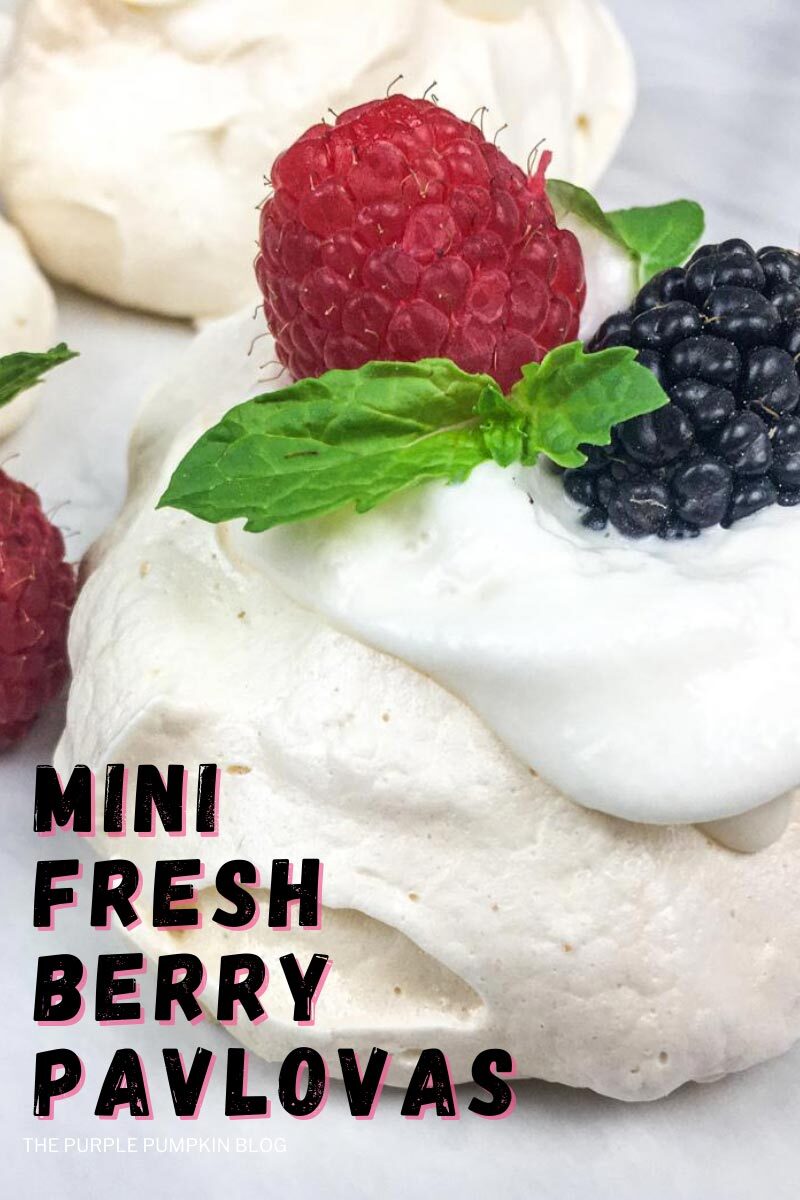
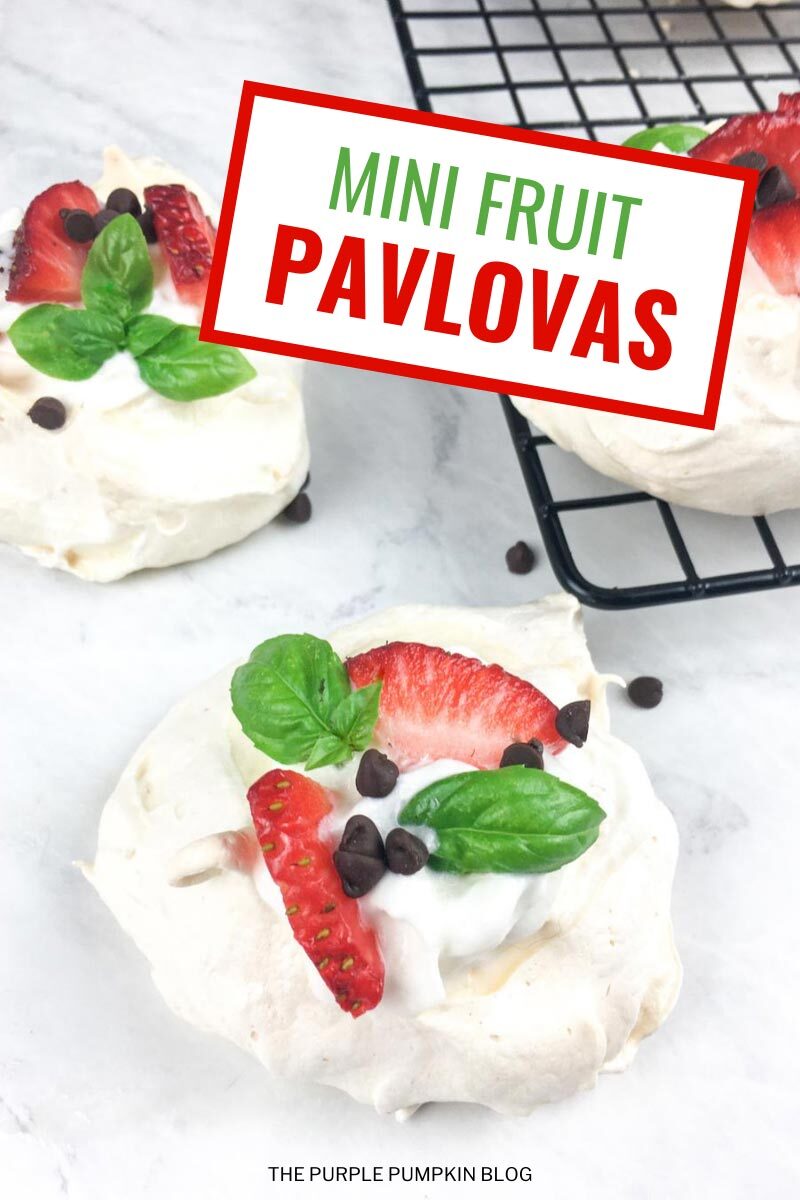

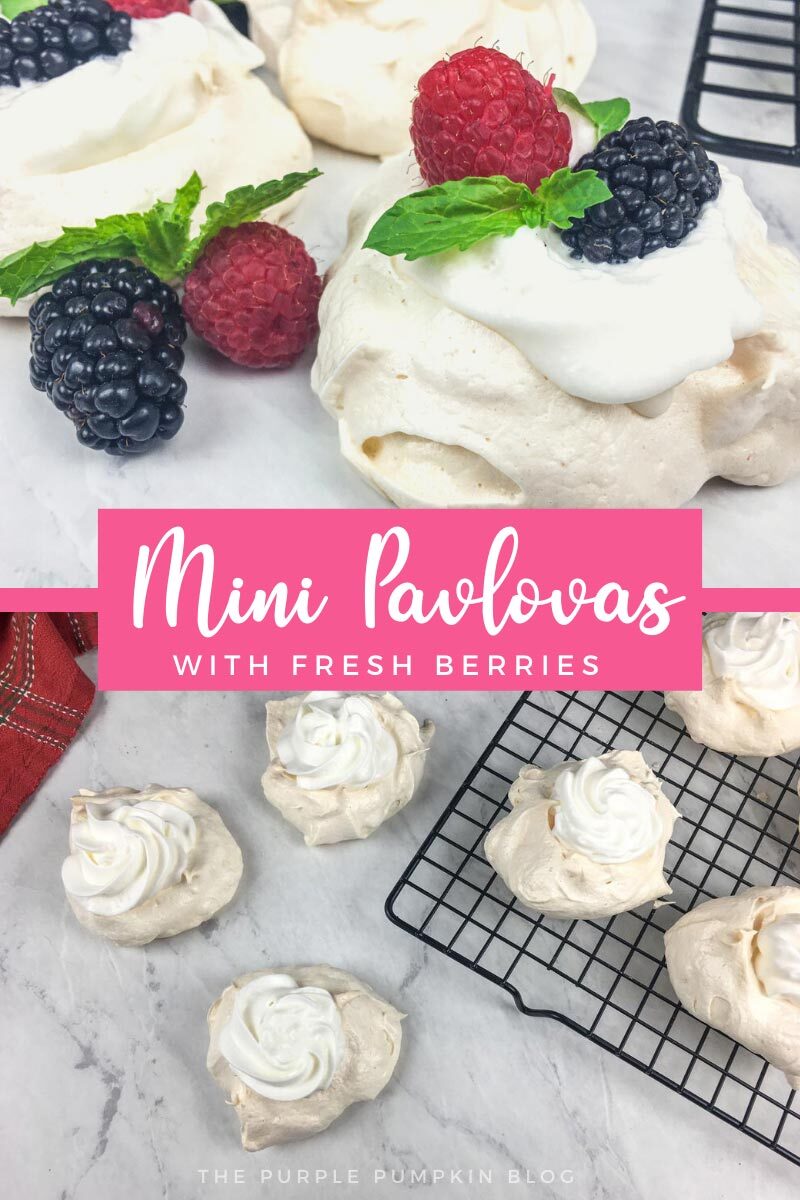
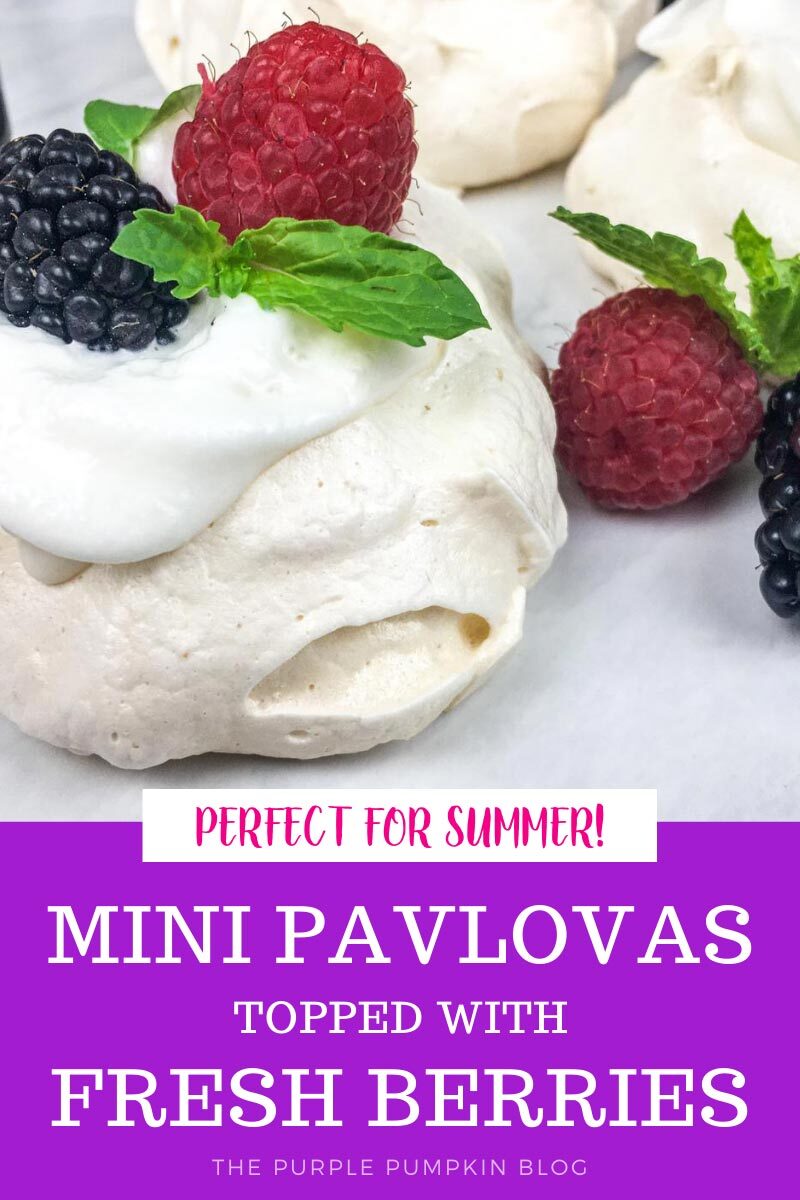
Make these Mini Berry Pavlovas for a summer dinner party to finish off your meal, or to serve on a dessert table at a party. Pavlovas are a dessert made with a delicious type of meringue that has a delightfully crispy exterior and a soft marshmallow-like interior. Topped with whipped cream and fresh berries, these mini pavlovas taste divine!

Affiliate Disclosure
We have included affiliate links to products and services related to this post.
We may earn a commission if you purchase after clicking on those links.
As an Amazon Associate, I earn from qualifying purchases.
Read Our Full Disclosure Policy and Privacy Policy
Mini Berry Pavlovas
The full ingredients list and instructions are found in the printable recipe card at the end of this post. I highly recommend reading the blog post all the way through so that you don’t miss any tips or substitution suggestions and to ensure that you have all the ingredients and equipment required as well as understand the steps and timings involved.
If you’re looking for a simple, yet elegant summer dessert, I don’t think you can go wrong with these Mini Berry Pavlovas. Don’t be scared at the thought of having to make the pavlova meringue, it’s surprisingly easy!
The crunchy, yet marhsmallowy meringue is a yummy contrast to the soft, whipped cream and ripe fresh berries. Pavlova for dessert is just SO good!
Pavlova is a meringue-based dessert with a crisp crust and soft, light inside, usually topped with fruit and whipped cream and named after the Russian ballerina Anna Pavlova. The dessert is believed to have been created in honor of the dancer either during or after one of her tours to Australia and New Zealand in the 1920s. The nationality of its creator has been a source of argument between the two nations for many years.
Wikipedia
Ingredients & Equipment Used In This Recipe
This recipe uses blackberries, strawberries, and blueberries but you can use any berries that are in season in your part of the world to top the mini pavlovas. For kids, or kids at heart you could sprinkle some chocolate chips onto the cream too!
You may have some of the equipment and ingredients in your kitchen already such as eggs (whites only) and sugar, but for your convenience, any specialized items needed for this recipe have been linked to Amazon below. The full list with measurements is found in the recipe card.
- Cream of Tartar – this is an acidic powder that helps to stabilize the egg whites and prevent the meringue from collapsing. You may see meringue recipes use vinegar or lemon juice which does the same job.
- Cornstarch – known as cornflour in the UK. Another stabilizing ingredient, but also helps to create the marshmallow-like texture inside pavlova meringue. Pavlovas may be a meringue but a meringue is not a pavlova!
This recipe uses American cups. They’re a handy piece of kitchen equipment to have along with a kitchen food scale. Having both in your kitchen means you’ll be able to make all of the different recipes on my blog as I use both cups and weighted measures.
You can whisk up the egg whites to make pavlova by hand, but honestly, life is so much easier (and quicker!) when using an electric mixer – handheld or stand mixer.
You will also need a couple of baking sheets lined with parchment paper or Silpat™ baking sheets to cook the meringue.
The meringue (and whipped cream) is spooned out, but if you want to get fancy you can using a piping bag and tip instead.
More Recipes Using Meringue
One of the hero ingredients in this recipe is meringue, so here are some more recipes using the same:
Mini Berry Pavlova Recipe Tips
Making Pavlova Meringue
- Pavlova meringue (and any meringue) is made with egg whites. When separating the eggs, be very careful not to get any yolk in to the whites. Even the tiniest bit will prevent your egg whites from whipping properly.
- You can buy gadgets and gizmos to help separate the eggs, but cracking the egg in half and pouring the yolk from shell to shell is my preferred method.
- Or, crack the egg onto your (meticulously clean) palm and let the white drip through your fingers, cupping the yolk in your hand.
- Use room temperature eggs as they whip up better than cold eggs straight from the refrigerator.
- Use a large bowl to whisk your eggs as they are going to expand a LOT!
- Make sure that bowl and your whisk is super, duper clean and free from any fat or grease. Use a metal, ceramic, or glass bowl rather than plastic. Fat will literally destroy your meringue. I sometimes wipe out the bowl with a little white vinegar or half a lemon, just to make sure.
- Start whisking slowing, increasing the speed as the egg whites begin to thicken to soft peak stage – which essentially means that peaks form if you lift the whisk from the beaten egg white, but kind of flop over.
- If you can get caster sugar which is finer than regular sugar, it will incorporate a lot more quickly.
- Add the sugar slowly, a spoonful or two at a time, but continuing whisking while you add because you also want to whisk quickly so that the meringue turns glossy and smooth. Go too slowly and the meringue goes fluffy instead, which we do not want in a pavlova.
- Do not overbeat your egg whites! Stop when you’ve reached the stiff peak stage (they will hold a peak and leave a trail of “ribbon” when you move the whisk/beaters). Over beaten meringue can crack, which isn’t the end of the world, but you can avoid it!
- If you go past the stiff peak stage and it looks like your egg whites have curdled, toss it out and start again, they cannot be rescued!
Baking Pavlova Meringue
- Meringues are not really cooked per se but are dried out in the oven.
- They are “cooked” on pretty much the lowest setting your oven can go to.
- Humidity, rain, or high levels of moisture in the air isn’t so good for your meringue. It can prevent them from drying out properly. They call it weeping when this happens, as it looks like small sweet tears have formed! They’re still edible, so don’t panic! It’s another “it’s not the end of the world” things, but something to be mindful of if you want perfect looking pavlovas!
- Leave the pavlovas to cool inside the [turned off] oven. This prevents cracks from forming as they cool down.
Don’t Panic About Pavlova Meringue!
- If your meringue cracks, or weeps, or breaks, just do not panic. Just pile on the cream and the fruit anyway!
- And if it’s really bad, break the meringues up and make Eton Mess!
More Dessert Recipes
Need more dessert inspo? Check these recipes out next:
- Iced Cherry Almond Cookies
- Affogato – The Coffee Lovers Quickest + Easiest, Dessert Ever!
- Delicious & Easy Lemon Hand Pies
How Do I Make Mini Berry Pavlovas?
Just check out the recipe card below with full ingredients, instructions, and demonstration photos. You can print the card out too (don’t worry, the pics don’t print to save your ink!).
Mini Berry Pavlovas
Ingredients
- 4 large egg whites room temperature
- 1 cup white sugar
- ½ tsp cream of tartar
- ¾ tsp corn starch
Toppings
- Whipped cream
- Fresh blackberries raspberries, and/or strawberries
- Mini-chocolate chips optional
- Fresh mint and/or basil to garnish
Instructions
- Pre-heat oven to 150C/300F/Gas 2 and line two large, rimmed baking sheets with parchment paper or Silpat™ baking sheets. Set aside.
- Using a stand or hand mixer, beat the egg whites until they thicken and turn white.
- While still mixing, slowly add the sugar, one or two tablespoons at a time, until each addition is thoroughly incorporated into the egg whites.
- Add the cream of tartar and corn starch and continue beating until the mixture is stiff and glossy.
- Spoon the mixture onto the prepared baking sheets in equal-sized portions, as shown, using the back of the spoon to create an indent to place toppings after baking. If you want to get fancy you could pipe the meringue using a pastry bag with a piping tip.
- Place the baking sheets into the preheated oven for 10 minutes, then reduce heat to 105C/225/Gas½. Continue baking for 45 minutes, then turn off the oven. Allow the pavlovas to rest in the oven for one hour without opening the door.
- After one hour, remove from the oven. They can be served immediately from the oven, or stored covered in the refrigerator for a couple of days.
- To serve, top with whipped cream (the whipped cream will soften and break through the crispy meringue exterior, so top them when ready to serve.
- Then add your choice of fresh berries, mini-chocolate chips, and/or fresh herbs to garnish, if desired. Serve immediately after topping. Enjoy!
Notes
Nutrition
Nutritional information is always approximate and will depend on the quality of ingredients used and serving sizes. If you need exact calories and macros, please do your own calculations.
Make It A Meal!
You’ve made the dessert, but what about the rest of the courses?
Here are additional recipes to make a full meal!
- Appetizer: Amazing Roasted Garlic Hummus Dip Recipe
- Main Dish: Greek Steak Salad with Feta & Kalamata Olives
- Beverage: Fresh Blueberry Lime Mocktail
There are 500+ Recipes on The Purple Pumpkin Blog for you to enjoy – please feel free to check them out too!