How To Make A Dreamcatcher
Home » CREATE » Crafts » Summer Crafts »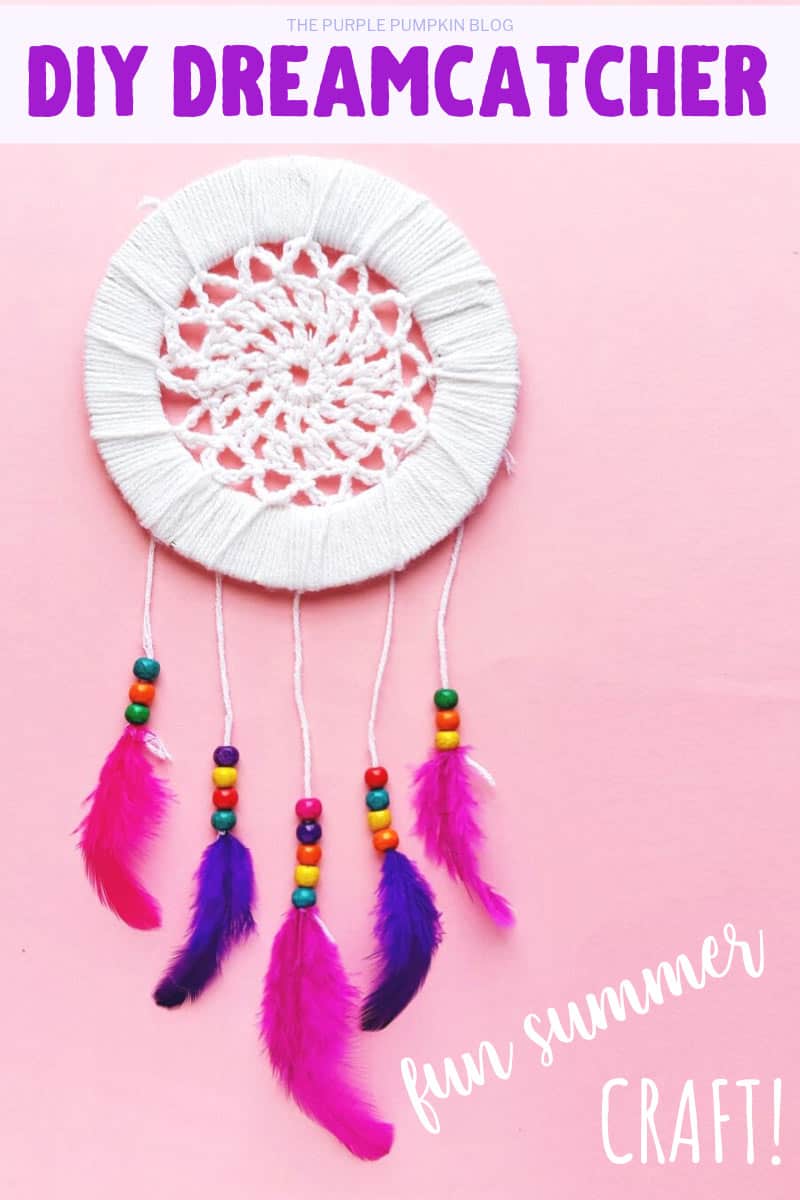
If you have ever wondered how to make a dreamcatcher, wonder no more, as I’ve got a tutorial showing you how easy it can be to make one. This DIY is a fun summer craft for teens and adults, and you can customise it with your favorite colors too.

I’ve shared lots of great craft ideas on The Purple Pumpkin Blog over the years, in fact, there are 100+ crafts to make and do at home that you can try!

Affiliate Disclosure
We have included affiliate links to products and services related to this post.
We may earn a commission if you purchase after clicking on those links.
As an Amazon Associate, I earn from qualifying purchases.
Read Our Full Disclosure Policy and Privacy Policy
How To Make A Dreamcatcher
I’m one of those people who remember pretty much all of her dreams, and you could describe me as a bit of a dreamer in my waking life too. My dreams can be very vivid, very real, and I often know that I am dreaming which is pretty weird! I do suffer from nightmares every now and again, and so, I have always had a dreamcatcher hanging above my bed.
What is a dreamcatcher?
In some Native American cultures, a dreamcatcher or dream catcher (Ojibwe: asabikeshiinh, the inanimate form of the word for “spider”) is a handmade willow hoop, on which is woven a net or web. The dreamcatcher may also include sacred items such as certain feathers or beads. Traditionally they are often hung over cradles as protection. it was said that they “caught any harm that might be in the air as a spider’s web catches and holds whatever comes in contact with it. – Wikipedia
One legend says that the dreamcatcher moves freely in the night air, catching dreams as they drift by. The good dreams know to pass through the center of the webbing; while the bad dreams get caught because they don’t know their way. They are then destroyed by the morning sun. Another legend says that both good and bad dreams are captured, and the good dreams slide down the feathers to those sleeping below.
The Ojibwa are credited as the first people to use dreamcatchers, but many others have adopted them into their culture. Even though the designs and legends of dreamcatchers vary, the underlying meaning and symbolism is universal and is carried across cultures and language barriers. After all, everybody dreams.
I believe in the legend of dreamcatchers, which is why I use one for a real purpose, rather than as decoration. Since I believe that they catch bad dreams, it is wise to cleanse your dreamcatcher from time to time to remove any negative energy.
There is so much more to learn about this Native American object, and I hope that you make this craft to use in your bedroom, and its intended purpose. Let’s get on with the crafting process, shall we?
Craft Supplies
Usually, the web inside the hoop of the dreamcatcher is woven, but to make it easier, this craft uses a pre-made crochet doily. If you are handy with a crochet hook, you could even make your own!
I do have another dreamcatcher craft coming soon, which will demonstrated the traditional way of making the web, but for now, this is a quick and easy craft hack!
- Crochet doily
- Yarn – to match the colour of your doily
- Round dreamcatcher base (made from cardstock)
- Pencil
- Scissors
- Craft feathers x 5 in your choice of colors
- Wooden beads x 19 in your choice of colors
- Craft glue
How do I make a dreamcatcher?
Crochet Doily Pattern
If you would like to make your own doily, and are handy with a crochet hook, here is a pattern for you to follow:
- Start with a slip knot and work 8 chains; form a ring with the chains.
- Round 1: Chain 1 and then do single crochet through the ring. Work 11 more SC through the ring (working a total of 12 SC). Close this round.
- Round 2: Chain 2 and then do Double Crochet through the adjacent chain stitch. Work DC through each chain from the previous round. Close this round.
- Round 3: Chain 2 again and then do 2 DC through the adjacent chain stitch. *Repeat until reaching the first chain again. Close round 3.
- Round 4: Chain 6 and work SC through the next chain; this will create a loop. *Repeat until reaching the first chain again. Work a slip knot and cut off the extra yarn.
Step 1:
Make your dreamcatcher ring base from a piece of cardstock. The size of it will depend on the size of your crochet doily. Make it about 1 inch bigger than your doily, and cut the inner circle just a tiny bit bigger than your doily. For example, if your doily is 6 inches across, cut your base at 7 inches.
Step 2:
Apply a drop of glue to the end of your yarn, and attach it to the base. Then wrap the yearn all around until it is completely covered. Tie a knot, apply a drop of glue to it and cut away the excess yarn. Make sure that the knot is on the back.
Step 3:
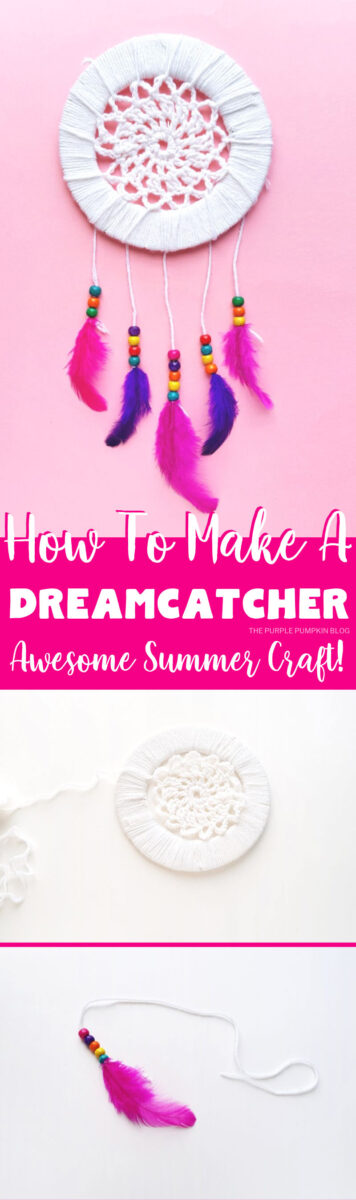
Place the yarn wrapped dreamcatcher base onto a flat surface and then place the crochet doily inside the inner circle.
Use your yarn to attach the doily to the base by drawing the yarn through the crochet patterns along the outer border and then again wrapping it around the base.
Continue doing this until your doily is attached completely to the base. Knot at the end, applying glue, and snipping off excess as before.
Step 4:
Cut 5 long strands of yarn (you can decide on the ideal length for your dreamcatcher) and tie each one to a craft feather (your color choice) with a tight knot around the hollow shaft.
Step 5:
Take a wooden bead and thread it onto the yarn attached to a feather. Push it all the way down to the base of the feather (as shown in the image below). You may find it easier to thread the beads by using a needle.
Step 6:
Thread on more beads – you can use whichever colours and as many as you like. This dreamcatcher use 1 x 5 beads, 2 x 4 beads, and 2 x 3 beads.
Step 7:
With all of your feather and bead hangers completed, attach them to the bottom of your dreamcatcher base. You can variegate the lengths, as demonstrated in the final picture below.
To hang your dreamcatcher, tie a loop with some yarn, and attach it to the top of the base and you are done!
You will find the dreamcatcher craft tutorial video on my YouTube Channel – save it to your Playlists for future reference! Don’t forget to subscribe while you are there!
Dreamcatcher Craft
Materials
- Crochet doily
- Yarn – to match the colour of your doily
- Round dreamcatcher base made from cardstock
- Craft feathers x 5 in your choice of colors
- Wooden beads x 19 in your choice of colors
- Craft glue
TOOLS
- Tapestry needle (optional)
Instructions
- Make your dreamcatcher ring base from a piece of cardstock. The size of it will depend on the size of your crochet doily. Make it about 1 inches bigger than your doily, and cut the the inner circle just a tiny bit bigger than your doily.
- Wrap yarn all around the base to cover completely. Tie knot at the end, and cut off excess yarn. You can add a dab of glue to keep in place.
- Place doily in center of base and use yarn to attach each point. Snip off excess yarn.
- Cut 5 long strands of yarn. Tie a tight knot to a craft feather. repeat for each feather.
- Thread a wooden bead onto on the yarn attached to a feather, push all the way down to the feather base. You can use a needle to make it easier if you wish.
- Thread on more beads – you can use whichever colours, and as many as you like. This dreamcatcher use 1 x 5 beads, 2 x 4 beads, and 2 x 3 beads.
- Attach the feather and bead hangers to the bottom of the base. And tie a loop to the top of the dreamcatcher to hang up.
Video
I would love if you shared this on Pinterest – just use the button below. Your shares are how I grow and I am sincerely grateful. You are welcome to follow me on Pinterest too where I share tons of great ideas and inspiration!
More Crafts for Teens…
If you are looking for more crafts for teenagers, here are some you might enjoy:
- Patriotic USA Wooden Sign
- Homemade Unicorn Soaps
- Easy No-Sew Felt Christmas Ornament Penguin
- Colorful Flip Flop Hello Sign – A Fun Easy Summer Craft!