How To Make A Chocolate Explosion Cake With Chocolate Bars!
Home » COOK » Recipes » Baking » Cakes »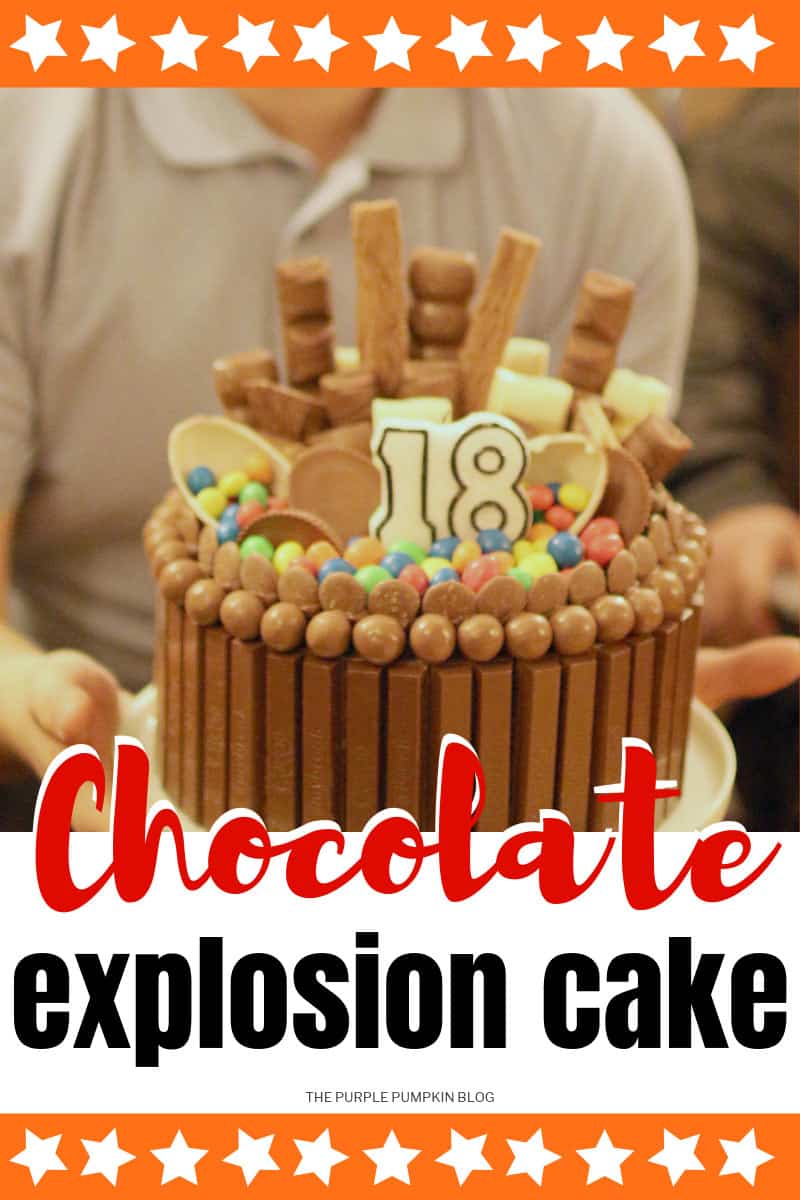
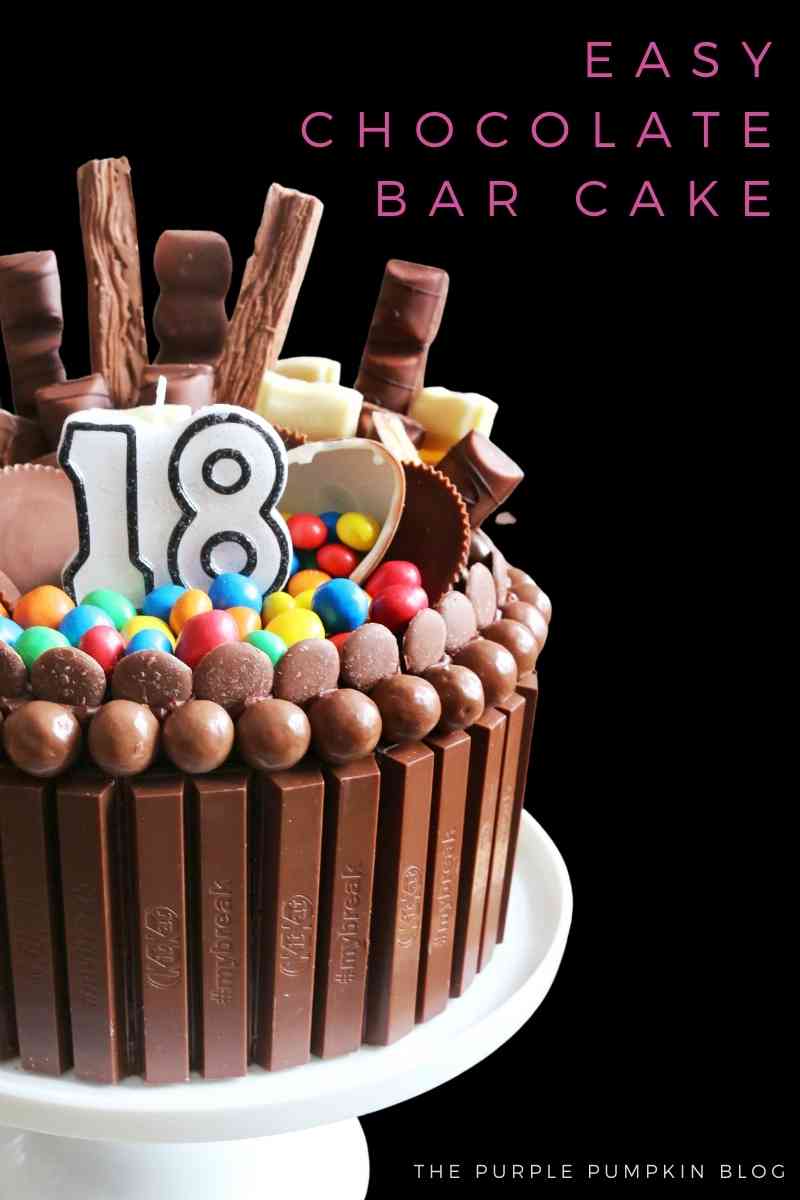
This Chocolate Explosion Cake looks amazing and tastes as good as it looks!

This is a chocoholic, chocolate lover’s dream cake – perfect for birthdays and special occasions!
This chocolate-loaded cake is covered with various chocolate bars and candy and is actually SO easy to make!
There are 500+ Recipes, including more themed birthday cakes, on The Purple Pumpkin Blog for you to enjoy! Please feel free to check them out too.
Affiliate Disclosure
We have included affiliate links to products and services related to this post.
We may earn a commission if you purchase after clicking on those links.
As an Amazon Associate, I earn from qualifying purchases.
Read Our Full Disclosure Policy and Privacy Policy
Chocolate Explosion Cake
I made this cake for my son’s 18th birthday party, and now I will show you how to make a chocolate explosion cake for your *insert family member/friend here*.
It’s a cake that wows guests and is totally Instagram-worthy!
I used to make and sell celebration cakes and cupcakes, and I am the go-to cake maker for friends and family, some of which I’ve shared on my blog.
I actually stopped making cakes regularly a few years ago, so my cake-making skills were at an all-time low when I made this chocoholic’s dream cake for my son’s birthday.
It’s a good thing that this cake is so easy to put together…
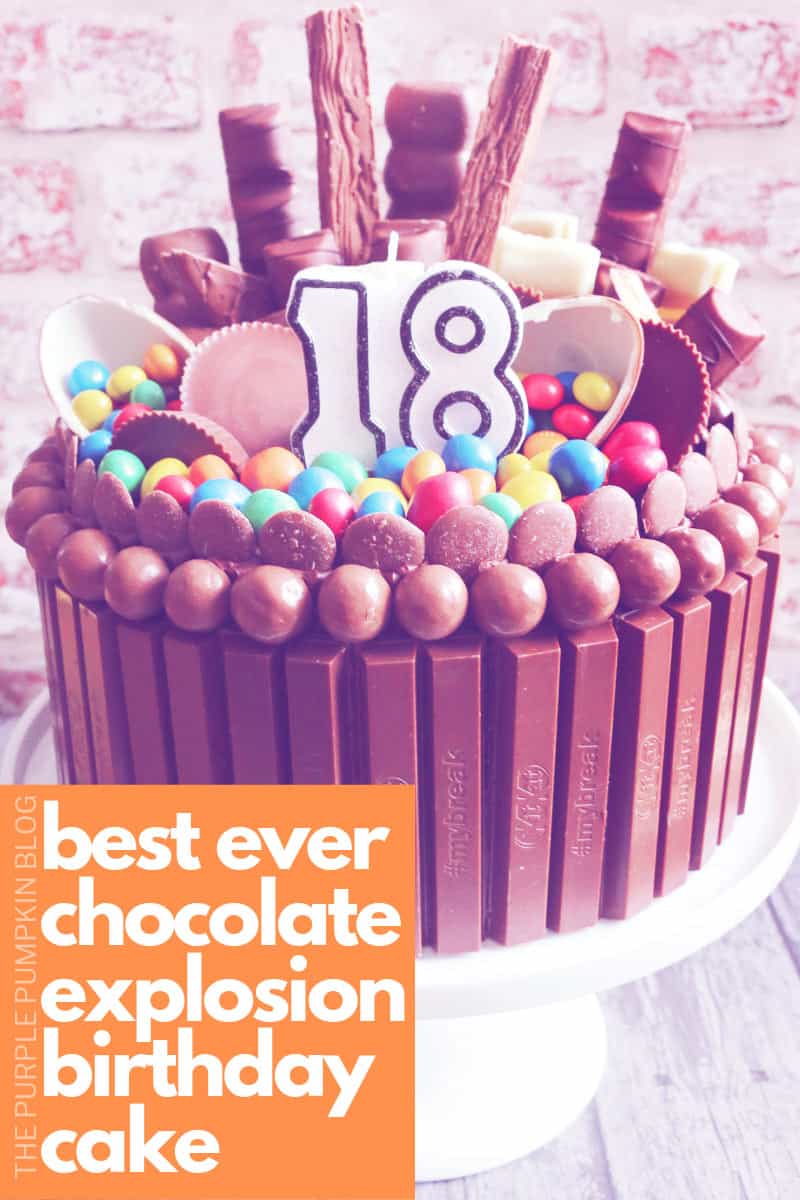
All you need is a chocolate cake, some chocolate frosting, and a whole load of chocolate bars to cover the entire cake!!
I have described this as the easiest birthday cake ever because I didn’t make a thing…
Thanks to store-bought chocolate cakes, frosting, and chocolate bars, it was a complete assembly job.
Don’t get me wrong, if you want to make your own chocolate cake and frosting, please do.
(If I had more time, I would have done the same, but I didn’t.)
I’ve included a chocolate cake recipe at the end of this post.
Chocolate Explosion Cake Ingredients…
I will confess that I had no plan going into this cake.
I just bought some of my son’s favourite chocolates and chocolate bars and hoped I would have enough!
That said, I will give the approximate quantities I used for a better guide to making this chocolate bar cake than my ratchet way of making it!
20cm/8″ chocolate cake – the height needs to be about 10cm/4″ (I stacked two Tesco large chocolate birthday cakes on top of one another, no need for support between the layers.)
1 can Betty Crocker Milk Chocolate Icing/Frosting (400g in the UK, 16oz in the US)
KitKat bars (10-12, 4-finger packs)
40 Maltesers (2-3 regular bags) (US candy: Whoppers)
40 Cadbury Chocolate Buttons (3-4 treat size bags) (US candy: Candy Wafers/Melts)
Kinder Egg (2 – just in case one breaks, if they both do… oh well, hide it with M&Ms!)
M&M’s – your favourite kind, I used Crispy and Peanut (2-3 bags of each)
Reese’s Peanut Butter Cups (2 x 3 cup packs)
Kinder Bueno (2 bars)
Cadbury Dairy Milk (2 bars) (US candy: Hershey’s Bar or Milk Chocolate Lindt bar)
Snickers (2 bars)
Cadbury Flake (2 bars)
Milky Bar (2 bars) (US candy: white chocolate Lindt bar)
Ultimately you can use whatever chocolate bars/candy bars that you like!
You could focus on just 2 or 3 types, or go nuts and use ALL the chocolate!
Equipment Needed…
There isn’t any real need for any special equipment to make this easy chocolate cake, so if you don’t have the things that I have listed below – don’t worry, as there are alternatives.
But if you plan on making more cakes in the future, it’s worth investing in some basic cake-decorating tools.
Cake Stand or a large plate
Spatula, or you could use a knife (to spread some frosting on the back of the KitKat bars so that they stick to the cake)
Piping Bag or plastic food bag (fill the bag with frosting, and snip off the corner for a make-shift piping bag)
Birthday Age Candle (optional)
Personalised Cake Toppers on Etsy
Cake toppers have increased in popularity over the past few years and I think these toppers would work so well with a chocolate explosion cake!
How To Make A Chocolate Explosion Cake
If you make your own cake, you must cover it completely with chocolate frosting.
My store-bought cakes were already frosted, so I didn’t need to frost the whole thing.
However, I added a layer of frosting on the top to cover the writing.
• Place the cake in the middle of the cake stand.
KitKats
• Break the KitKats into two-finger pieces. I used 11 full-size (4-finger) KitKats, plus one finger!
• Spread some frosting on each KitKat’s back and stick them around the sides of the cake.
• Make sure that all the embossings face the same way and that the bottoms touch the cake stand.
Maltesers (Whoppers) and Buttons (Candy Wafers)
I added the Maltesers and Buttons around the cake because it was a bit higher than the KitKats, and I wanted to hide it.
So, if you’re going to do the same, you will need to stick them on with some frosting.
TIP! If you don’t have a piping bag, use a plastic food bag instead—just add a big spoonful of frosting, and squeeze it down into one corner. Snip off the tip, and away you go!
• Squeeze a blob of icing onto each of the Maltesers, and stick it to the cake on top of the KitKats.
• Squeeze a blob of icing just behind and between each of the Maltesers and gently press the Buttons into the icing.
• Use the photo above for reference!
• Now it’s time for the fun part—making the chocolate bar explosion!
Chocolate Bar Explosion!
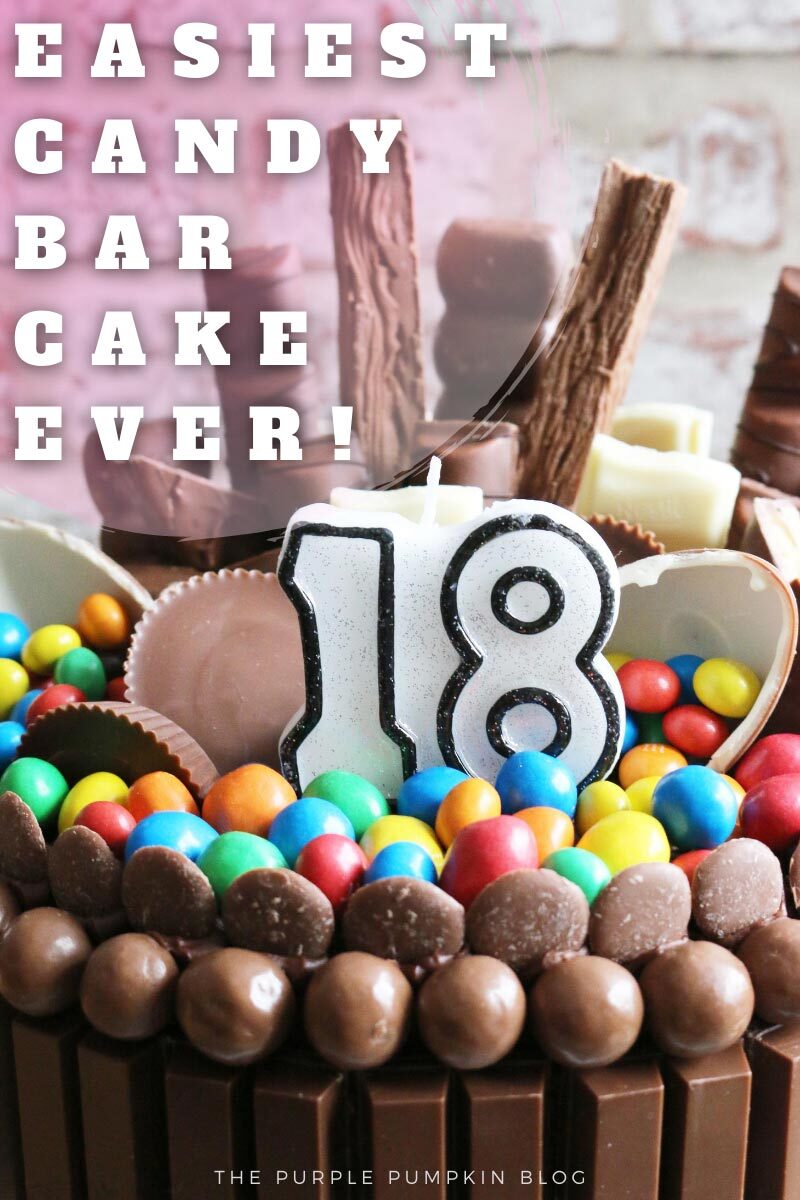
I found it easier to work from a focal point—it was a candle for my cake.
I placed the number 18 candle about a third of the way from the front of the cake and in the center.
If you’re not using a big candle like this, another focal point could be a shaped piece of chocolate like a bear made of chocolate or a chocolate egg.
• Started towards the back of the cake, gently poking the chocolate bars into the cake deep enough so that they stand up.
For added support, add blobs of frosting with the piping bag.
Break chocolate bars as needed
• I broke some of the chocolate bars into pieces.
• I cut the Snickers bar I cut in half on the diagonal.
• Just add chocolate bars until you are happy with how it looks!
• Place taller pieces of chocolate at the back center, and graduate out in height.
• Use my photos as a guide!
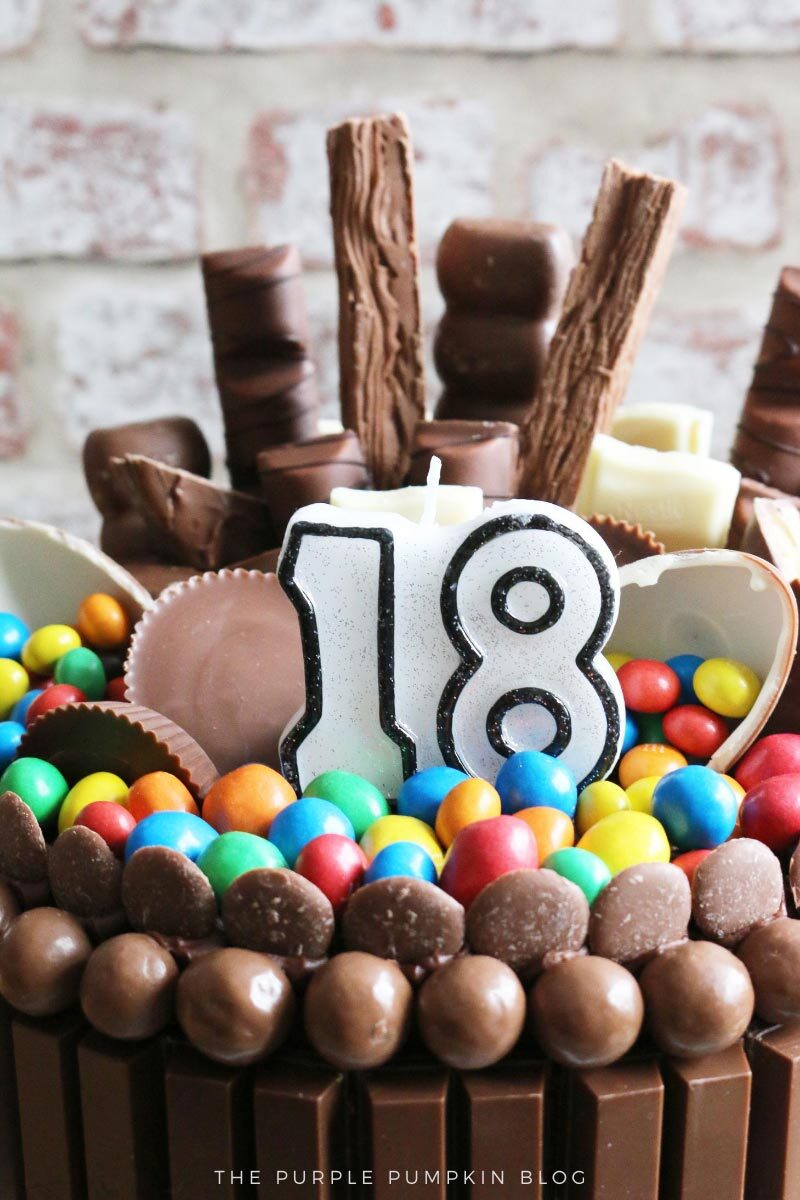
Kinder Eggs
• I split open the Kinder Eggs – one shattered completely, the other one was a lot better, and I hid the broken bottom bit with some M&M’s and added some more to sit inside the egg halves.
Reese’s Peanut Butter Cups and M&Ms
• I tucked in Reese’s Peanut Butter Cups and halved one to make it look like it was stuck inside the cake.
•I then filled in the front of the cake with loads of M&Ms.
And that is IT!
Literally! Stick chocolate bars into a chocolate cake – ta-dah! I told you it was easy, didn’t I?
More 18th Birthday Cake Recipes
If you want more 18th birthday cake recipes and ideas, these cakes would work perfectly!
If they don’t like chocolate cake, try this Classic White Cake Recipe and decorate it with white candy bars instead!
Looking for an even easier cake to bake? A Yellow Sheet Cake with Chocolate Buttercream Frosting is the way to go!
Add candles and a sprinkling of small candies like M&Ms, Maltesers (Whoppers), or even crushed-up chocolate bars like Cadbury Crunchie!
Want to skip the chocolate bars but still want a chocoholic cake? You need to Make the Most Indulgent Chocolate Fudge Cake Ever!
Or how about a Chocolate Cherry Coke Layer Cake – perfect for those that love flavored Coca-Cola!
If you’re throwing a themed party, then Totally Awesome Hippie Tie Dye Cake for 60s Parties is perfect!
Would you rather make cupcakes? I’ve got you covered with these 18th Birthday Cupcakes – Gold with Musical Notes
Have you made this cake? Join 100+ others and share a picture of it on Pinterest! Just scroll down and tap to add a photo in the Tried this Pin section. I love seeing your cakes!
Can I Make This Cake As A Sweet 16 Chocolate Cake?
Yes! Absolutely you can!
In fact, you can make this chocolate bar cake recipe for any age you like – sweet 16, quinceañera, turning into a teenager at 13, and having the key to the door at 21!
Actually, everyone loves chocolate, right?
So think of all the other milestones – ages 30, 40, 50, 60, etc., (and even the ones in between!) and just use the birthday person’s favorite chocolates and candies to decorate with.
Chocolate Explosion Cake
Ingredients
For the Cake
- 1 cup unsalted butter softened to room temperature
- 2½ cups granulated sugar
- 4 large eggs room temperature
- 2 tsp real vanilla extract
- 3 cups all-purpose flour
- 2 tsp baking soda
- 1 tsp baking powder
- ½ tsp salt
- 1 cup unsweetened cocoa powder
- 2¼ cup boiling water
For the Frosting
- 2 cup 16oz/4505g unsalted butter, room temperature
- 1 cup 8oz/200g cocoa powder
- 7 cups 32oz/900g powdered sugar
- 2-4 Tbsp whole milk or heavy cream
- 2 tsp real vanilla extract
To Decorate
- KitKat bars 10-12, 4-finger packs
- 40 Maltesers 2-3 regular bags (US candy: Whoppers)
- 40 Cadbury Chocolate Buttons 3-4 treat size bags (US candy: Candy Wafers/Melts)
- Kinder Egg 2 – just in case one breaks, if they both do… oh well, hide it with M&Ms!
- M&M’s – your favourite kind I used Crispy and Peanut (2-3 bags of each)
- Reese’s Peanut Butter Cups 2 x 3 cup packs
- Kinder Bueno 2 bars
- Cadbury Dairy Milk 2 bars (US candy: Hershey’s Bar or Milk Chocolate Lindt bar)
- Snickers 2 bars
- Cadbury Flake 2 bars
- Milky Bar 2 bars (US candy: white chocolate Lindt bar)
- Ultimately you can use whatever chocolate bars/candy bars that you like! You could focus on just 2 or 3 types or go nuts and use ALL the chocolate!
SUGGESTED PRODUCTS
Instructions
- Preheat oven to 180C/350F/Gas 4. Grease and flour 3 (8-inch) round cake pans, then lthe ine bottom with round parchment paper. Set aside.
- Using an electric handheld or stand mixer, cream the butter and sugars in a large mixing bowl. Add in the eggs and vanilla and mix until well blended.
- In a separate large mixing bowl, sift or whisk the flour, baking soda, baking powder, and salt.
- Mix the cocoa powder and boiling water in a medium bowl until well combined and no lumps remain.
- Alternating between the two, slowly add the dry ingredients and chocolate mixture to the bowl with the butter and sugar. Mix on low speed to incorporate ingredients.
- Divide the cake batter evenly between the three cake pans and place in the preheated oven. Bake for 22-28 minutes, or until a toothpick inserted in the center of the cake comes out clean.
- Remove from the oven and set aside to cool for 10 minutes before transferring the cakes from the pans to a wire rack to cool completely. (Cakes should be cool to the touch before frosting).
- To make the frosting, use an electric mixer to mix the butter and cocoa powder in a large bowl until well blended. Add the powdered sugar to the bowl and mix at low speed until all of the sugar is combined. Stir in milk and vanilla extract, if used, to reach desired consistency.
- To assemble the cake, place the first layer top-side down on a cake plate. Add one-third of the frosting to the top of the cake layer and spread it out evenly.
- Take the second layer and level off the rounded top with a knife or cake leveler. Place the second layer on top of the first layer, top-side down. Add another one-third of the frosting to this layer and spread it out evenly.
- Repeat this with the 3rd layer, and spread the remaining frosting over the top and sides of the cake.
- To decorate the cake break the KitKats into two-finger pieces. I used 11 full-size (4-finger) KitKats, plus one finger!
- Spread some frosting on the back of each KitKat and start to stick it around the sides of the cake. Make sure that all of the embossings are facing the same way, and that the bottoms are touching the cake stand. I added the Maltesers and Buttons around the cake because it was a bit higher than the KitKats and I wanted to hide the cake. So, if you’re going to do the same, you will need to stick them on with some frosting. If you don’t have a piping bag, use a plastic food bag instead – just add a big spoonful of frosting, and squeeze it down into one corner. Snip off the tip and away you go!
- Squeeze a blob of icing onto each of the Maltesers, and stick to the cake on top of the KitKats.
- Squeeze a blob of icing just behind and between each of the Maltesers and gently press in the Buttons.
- I found it easier to work from a focal point. In my case, it was the 18 candle that I placed about a third of the way from the front of the cake, and in the center. If you’re not using a big candle like this, another focal point could be a shaped piece of chocolate like a chocolate bear or chocolate egg.
- I started towards the back of the cake, gently poking the chocolate bars into the cake, deep enough so that they would stay standing. For added support, I added blobs of frosting with the piping bag.
- Some bars I broke up into pieces, and the Snickers bar I cut in half on the diagonal. Basically, just add chocolate bars until you are happy with the way it looks! Use my photos as a guide.
- Place taller pieces of chocolate at the back center, and graduate out in height.
- I then split open the Kinder Eggs – one shattered completely, the other one was a lot better, and I hid the broken bottom bit with some M&M’s and added some more to sit inside the egg halves.
- I tucked in the Reese’s Peanut Butter Cups and halved one to make it look like it was stuck inside the cake. I then filled in the front of the cake with loads of M&Ms.
- And that is IT. Literally, stick chocolate bars into a chocolate cake – ta-dah! I told you it was easy, didn’t I?
Nutrition
Nutritional information is always approximate and will depend on the quality of ingredients used and serving sizes. If you need exact calories and macros, please do your own calculations.
Printable Escape Rooms for Kids!
Escape Rooms have exploded in popularity over the past few years, but why not bring the experience to your home (or party venue) with a printable Escape Room Kit?
We love the kits from Lock Paper Scissors! You can save 60% when you buy their Enchanted Kids Escape Room Box with four different kits—AMAZING value!
The games can be printed and set up in just 20 minutes, so you can enjoy the fun in no time at all! The four kits included are:
- Lost Mummy – Get ready to unearth Egypt’s ancient secrets as your crew investigates the mystery of the Lost Mummy. For ages 10-16.
- Rebel Revolt Spy Mission – Your crew of specialists will need their wits about them if there’s any chance of breaking into the evil government’s W.A.R. facility. For ages 14+.
- Magical Frost – Encounter magical and quizzing characters as you endeavor to aid the forest Wisp in time for the Winter Faire. For ages 8-12
- Time Travel Escape – Work together to find hidden relics from each era and fix the T.I.M.E machine before that hungry dinosaur eats you for dinner. For ages 6-9.
Tracy
May 16, 2022 @ 8:01 am
How early can you put the chocolates into the cake? Would the day before be ok?
Michelle
May 25, 2022 @ 9:24 am
I did mine on the morning of the party, but I’m sure the day before would be fine too – cover the cake and keep it in a cool, dry place.
Jackie
November 23, 2021 @ 5:02 pm
Made this for my 13 yr old grandson. Couldn’t get any Flakes over here in USA so used Twix instead. And Kinder eggs aren’t the same so just used extra white chocolate. Everyone was very impressed. Would gladly send a photo but not on any of the social media you mention.
Michelle
November 24, 2021 @ 3:03 pm
Thanks for emailing me your cake photo – it turned out great! The types of chocolate/candy bars doesn’t matter – it will always taste awesome!
Joanna ponsonby
April 13, 2020 @ 7:55 pm
Hi- may I just ask did you put icing In between the two cakes?
Michelle
April 14, 2020 @ 8:26 am
Hi Joanna
Because I used ready-made cakes that had frosting on them, I didn’t bother to put icing between the cakes. But you can certainly put some between the layers if you want to!
Hannah
February 17, 2020 @ 3:17 pm
Hi, I am attempting to make something similar this weekend for my husband’s Birthday. I am going to be short on time so have decided to buy a cake and decorate it like you did. You mentioned you got yours from Tesco – was it this one?
https://www.tesco.com/groceries/en-GB/products/258300895
Just wondering whether the kitkats would stick to the sides or if I would have to put extra frosting all down the sides too? Thanks!
Michelle
February 18, 2020 @ 9:36 am
That is the exact cake I used! I actually used two cakes stacked on top of each other.
It’s been a while since I made the cake, but I do believe I just slapped some frosting on the back of the Kit Kats and that was enough to stick them to the sides of the cake.
I hope this helps and please share your finished cake with me, I’d love to see how it turned out!
Julie
October 2, 2018 @ 2:42 pm
My cake has been in over for 35 & 25 mins but it is still quite wobbly in the middle? HELP
Michelle Ordever
October 2, 2018 @ 4:19 pm
Have you got the oven at the correct temperature? Have you been opening the oven a lot? There are all reasons why it might still be wobbly – just keep cooking it! Maybe place some foil on top so it doesn’t burn too much!
Lynne snowden
October 14, 2017 @ 5:02 pm
Have you recipe for the frosting please
Michelle Ordever
October 14, 2017 @ 7:28 pm
On this cake I used ready-made frosting (Betty Crocker). You can find my frosting recipe here: https://www.thepurplepumpkinblog.co.uk/red-white-60th-birthday-cupcakes/ – I always use equal measures of butter and icing sugar.
Sandra Clarke
March 4, 2017 @ 8:52 am
Love this idea thank you. My son is 18 in June so I will be attempting this but will just have to source everything which is gluten free so the Kit Kat surround is out which is a shame but I’ll think of something else.
Michelle Ordever
March 4, 2017 @ 7:37 pm
Are Matchmakers gluten free? Or what about a load of Buttons around the edge of the cake? When you make it, please share it with me on Facebook, Twitter or Instagram (#thepurplepumpkinblog) as I would LOVE to see it!