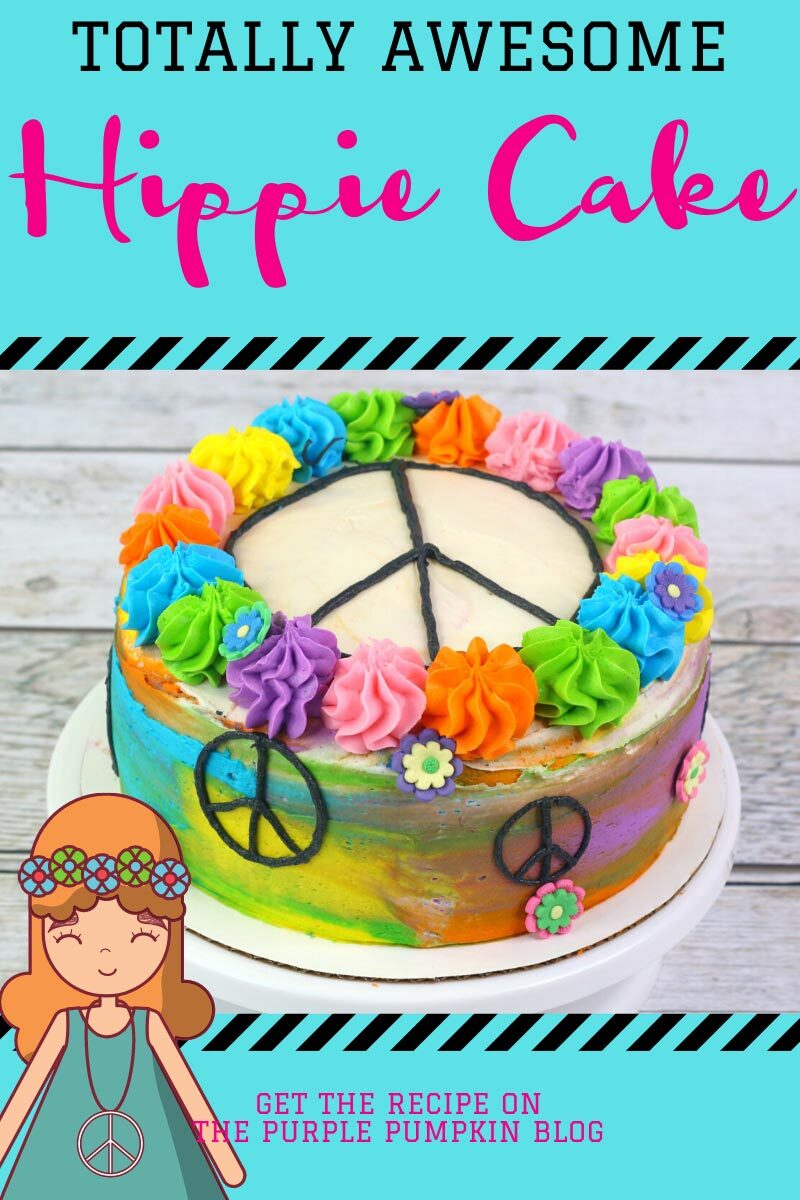
Totally Awesome Hippie Tie Dye Cake for 60s Parties
Home » COOK » Recipes » Baking » Cakes »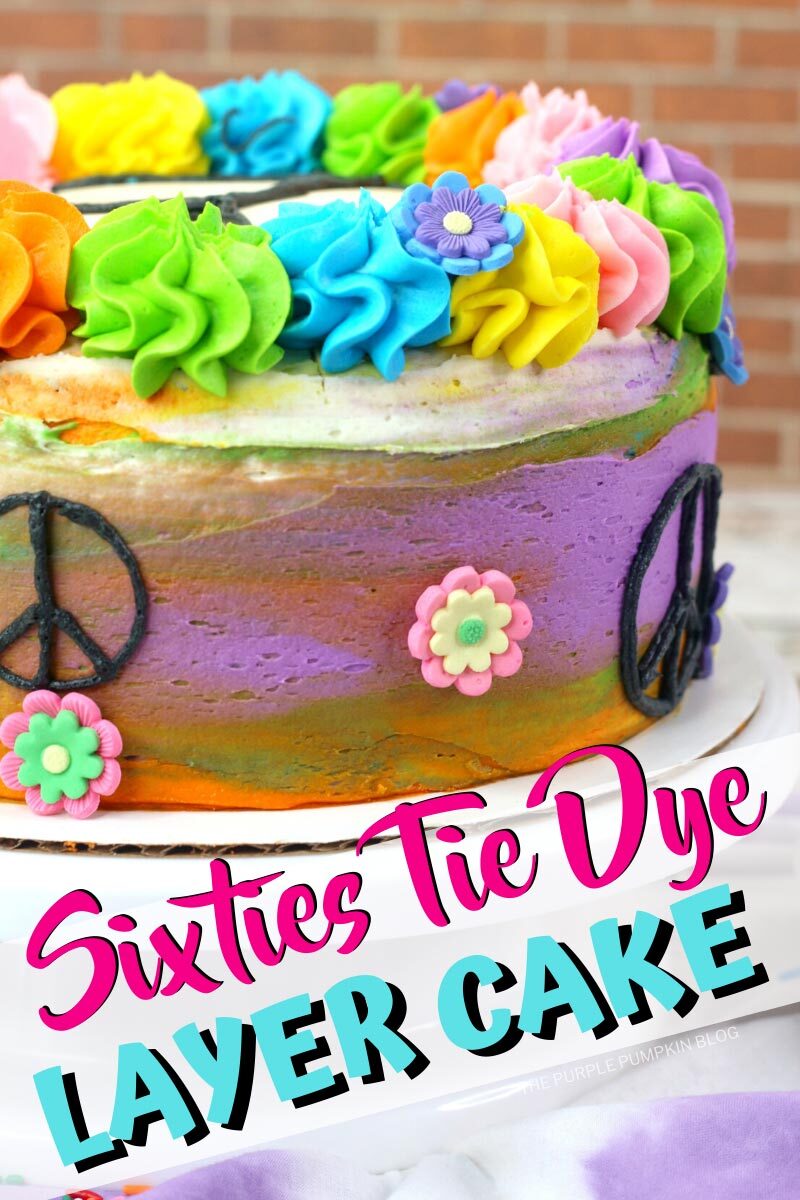
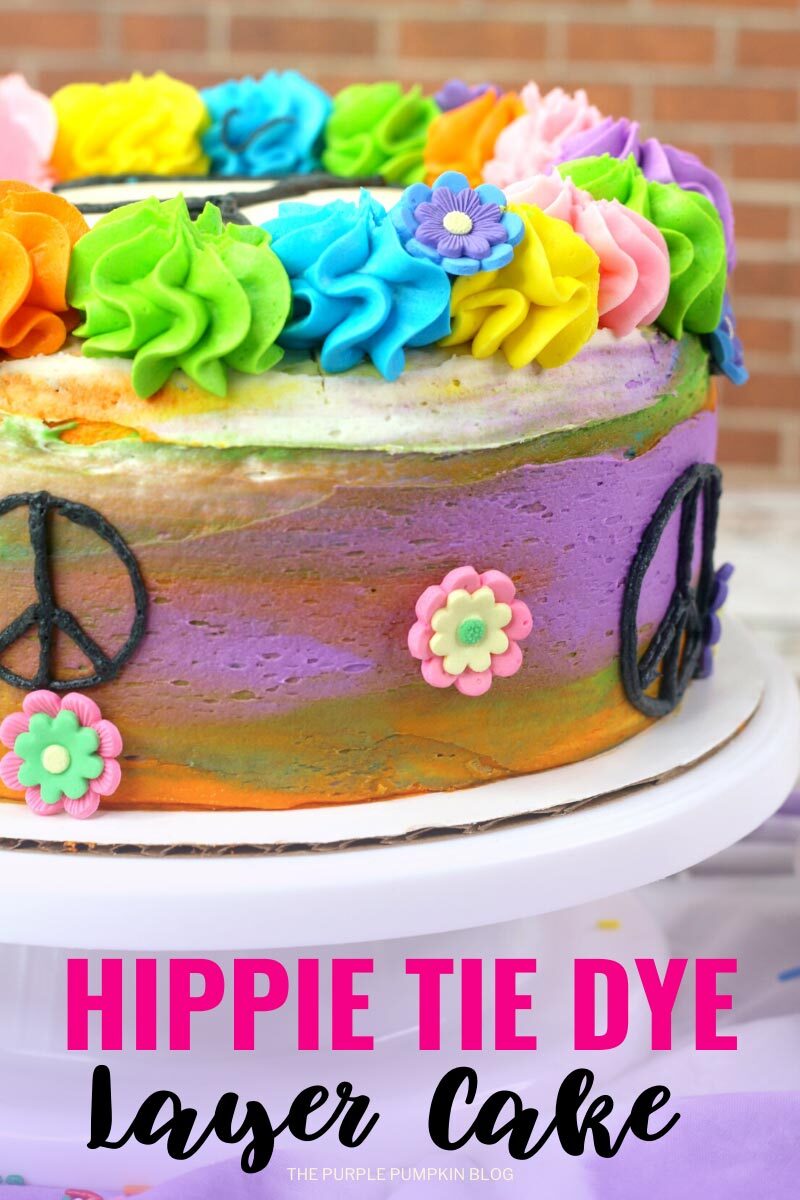
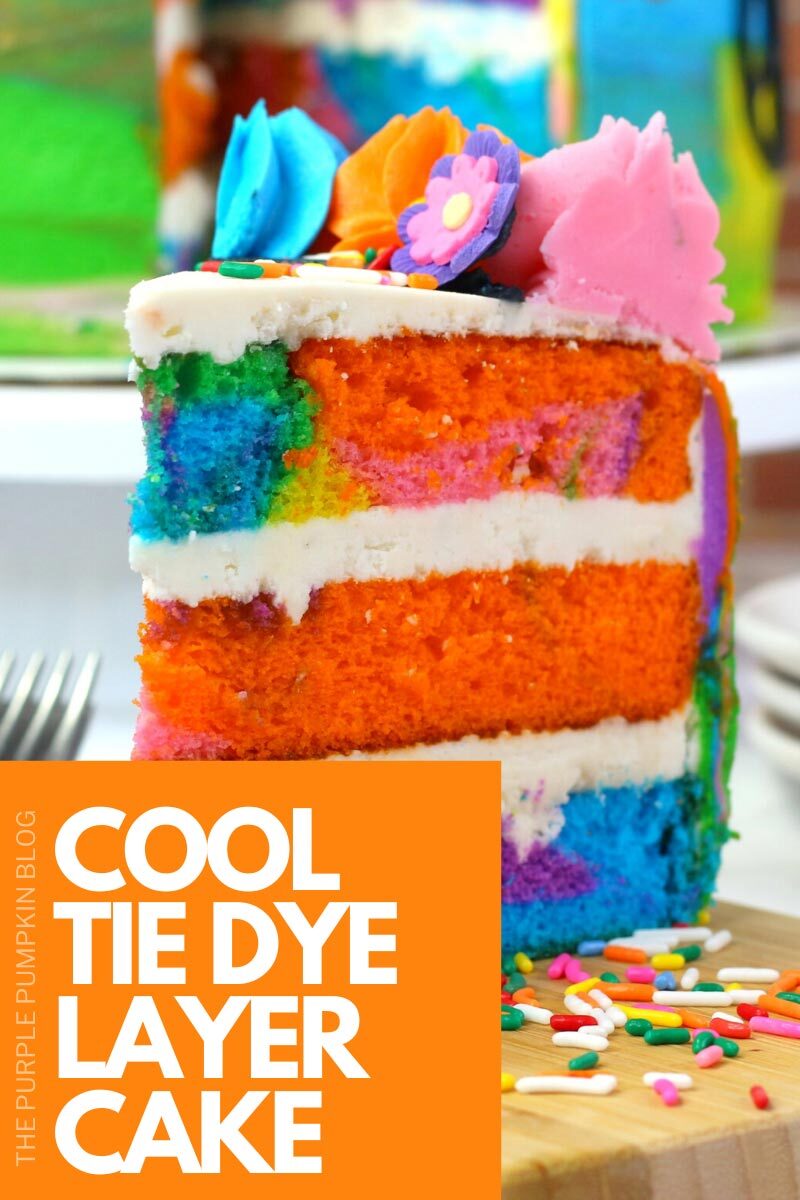

This Hippie Tie Dye Cake is such a fun and colorful cake to make! The 3 layer cake (made with cake mix) and homemade tie dye frosting is perfect if you are hosting a 60s Party, a Hippie Party, or even a Summer Party and you want to add some colorful food choices to your dessert table!

Affiliate Disclosure
We have included affiliate links to products and services related to this post.
We may earn a commission if you purchase after clicking on those links.
As an Amazon Associate, I earn from qualifying purchases.
Read Our Full Disclosure Policy and Privacy Policy
Hippie Tie Dye Cake
The full ingredients list and instructions are found in the printable recipe card at the end of this post. I highly recommend reading the blog post all the way through so that you don’t miss any tips or substitution suggestions and to ensure that you have all the ingredients and equipment required as well as understand the steps and timings involved.
With its bright colorful layers of cake, frosting, and icing decorations, this tie dye cake is a great way to bring the vibes of peace and love to your party!
This cake would be perfect for several different types of party such as the 1960s, the Summer of Love, a Woodstock (at home) music festival party, and of course, a hippie themed party!
You are going to want to set aside a whole morning or afternoon to make this cake, but the end result is just so awesome that I think it is totally worth the time spent!
Ingredients Used In This Recipe
You may already have some of the standard ingredients used in this recipe such as eggs, butter, oil, etc., however, for your convenience, I’ve linked any specialized ingredients needed for this recipe to Amazon below.
- White Cake Mix – you will need two boxes, plus the ingredients to make – usually oil, eggs, and water. Use your preferred brand of cake mix. Or you could make your own cake from scratch if you prefer. You will need enough for three 9-inch cake pans.
- Vanilla Extract – for the frosting
- Gel Food Coloring – in the following colors: Sky Blue, Purple, Pink, Green, Orange, Yellow, and Black
- Wilton Flower Icing Decorations – to decorate the cake with. You could also make your own using fondant and flower cutters.
- Rainbow Sprinkles
Equipment used in this recipe
You are likely to have many standard cooking tools in your kitchen but I’ve added some Amazon links for your convenience should you need to use something specific for this recipe.
- 3 (9-inch) round cake pans
- 10-inch round cake board
- Disposable Piping Bags – you will need seven total
- 6 (1M) Open Star Tips – it’s easier to pipe the top of this cake if you have a tip fitted to each of the bags of colored frosting.
- 1 (No.3) Round Piping Tip
- Angled Spatula – also known as a Palette Knife
Hippie Tie Dye Cake Recipe Tips
- You will need to divide the cake batter between 6 bowls to add gel food coloring to each one.
- The cake is made using 3 (9-inch) round cake pans. Grease them using PAM Baking Spray, Wilton Cake Release, or go old-school with butter and parchment paper.
- Food Coloring Tips: Use good quality food coloring gel or paste as the color will be more vibrant. Do not use liquid color as this will change the consistency of the batter or frosting, and really won’t taste good! Remember that you can always add more color, but not take it away. Add a little to start with and add more to get the shade required.
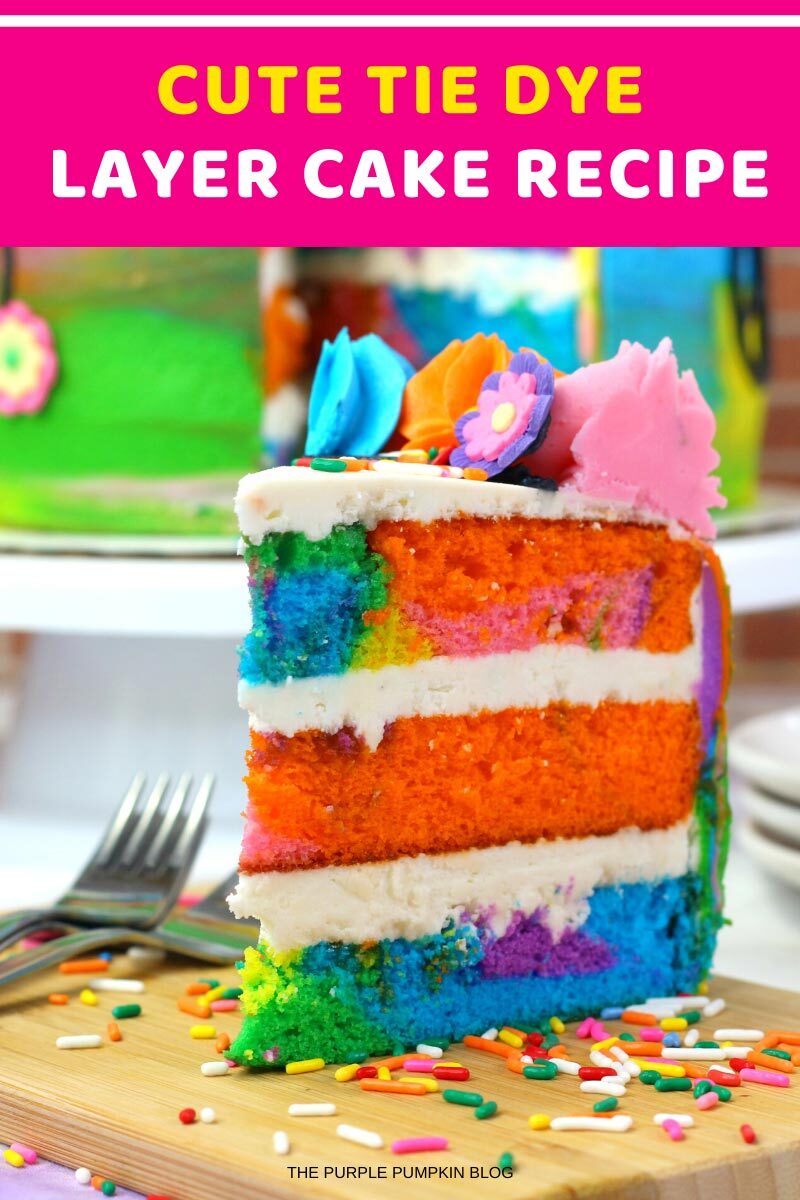
- Scoop out a small amount of each color at a time and place it into the cake pans to create the tie dye pattern. Try not to put the same colors next to each other, and you can add on top of other colors too – see the photo below as a guide (this photo is from the Sally Nightmare Before Christmas Cake which uses the same technique)
- When the cakes have baked and cooled, you will need to level off the tops so that they are flat. You can use a cake leveler which is a really handy tool to get a nice even cut. Or you can use a sharp knife and a steady hand.
- Do NOT throw away the excess cake though! You can use it to make cake pops! Simply crumble up the cake and mix it with some frosting and roll into balls. Insert a lollipop stick and dip into melted chocolate or candy melts. Leave to set, and enjoy!
- Add a blob of frosting into the center of the cake board and place the first cake layer on top. The frosting will help to hold it in place.
- After making a big batch of frosting it will need to be divided into separate bowls to add food coloring too – remember my earlier tips about using food coloring!
- Plain white frosting will cover the cake layers, as well as onto the outside of the cake to give it a crumb coat. This is the base for the tie-dye effect.
- Once you’ve spread frosting between the layers and around the outside of the cake, place it into the fridge to firm up.
- Place blobs of colored frosting randomly around the sides of the cake and then lightly spread out using an angled spatula to get a tie dye effect.
- Black frosting goes into a piping bag fitted with a round tip – this is for piping the peace signs onto the cake.
- The 6 other colors – blue, purple, pink, green, orange, and yellow – go into their own individual bags fitted with a star tip. Ideally, you want to have a star tip for each bag so that you can pipe the frosting swirls evenly around the cake. If you only have one or two piping tips you will have to leave gaps for the other colors to fill in when you swap out the colors.
- If you are not confident with piping swirls, practice first on a piece of parchment paper and scoop the frosting back into the bag to reuse on the cake.
- Pipe the peace signs freehand – again, practice first if you need to.
- Decorate with ready-made icing flowers in matching colors. Or alternatively, you could use rolled colored fondant and cut flower shapes using fondant cutters.
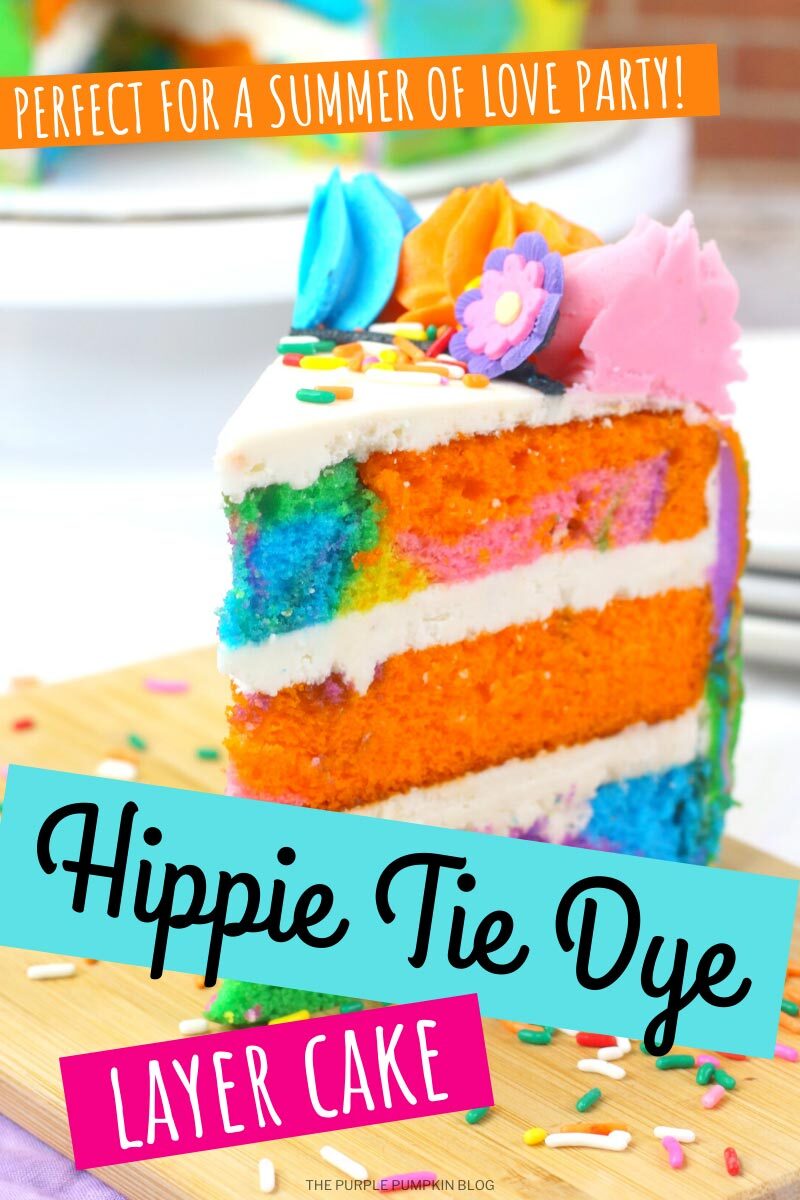
- You can finish the top of the cake in two ways – by piping a peace sign on the top of the cake, or by adding some rainbow sprinkles – or both!
- Refrigerate the cake again so that the frosting can firm up before cutting and serving.
More Cake Recipes
Need some more cake ideas? Take a look at these recipes next:
- A Delicious Pina Colada Layer Cake Perfect for a Tropical Luau Party!
- Gorgeous Mardi Gras Layer Cake
- Candy Cane Chocolate Cake
There are 500+ Recipes on The Purple Pumpkin Blog for you to enjoy – please feel free to check them out too!
How Do I Make a Hippie Tie Dye Cake ?
Just check out the recipe card below with full ingredients, instructions, and demonstration photos. You can print the card out too (don’t worry, the pics don’t print to save your ink!).
Hippie Tie Dye Cake
Ingredients
For the Cake
- 2 boxes of white cake mix
- 6 large egg whites
- 2 cups water
- 1 cup oil
- Gel food coloring in the following colors: Sky Blue Purple, Pink, Yellow, Green, and Orange
- Baking Spray
For the Frosting
- 2 cups unsalted butter softened
- 5 cups powdered sugar icing sugar
- 2 tsp vanilla extract
- 3-6 Tbsp heavy whipping cream double cream
- Gel food coloring in the following colors: Sky Blue Purple, Pink, Yellow, Green, Orange, and Black
For the Decoration
- 1 package of Wilton flower icing decorations
- Rainbow Sprinkles
Equipment
- 3 9-inch round cake pans
- 1 10-inch cake board
- 6 piping bags with open star tip
- 1 piping bag with round no.3 tip
- 1 mini angled spatula
SUGGESTED PRODUCTS
Instructions
- Preheat oven to 180C/350F/Gas 4 and spray 3 (9-inch) round cake pans with baking spray.
- Using a handheld or stand mixer, place the cake mix, egg whites, water, and oil into the mixing bowl and beat to combine.
- Divide the cake batter between 6 bowls. Add gel food coloring to each of the bowls so that you have one of each color – sky blue, purple, pink, yellow, green, and orange.
- Scoop out a small amount of each color at a time and place it into the cake pans to create the tie dye pattern. Try not to put the same colors next to each other, and you can add on top of other colors too.
- Bake the cakes in the oven for 25-30 minutes or until a toothpick comes out clean when inserted in the center.
- Allow the cake to cool in the pan for 5 minutes before transferring to a wire rack to cool completely.
- When the cakes are completed cooled, use a cake leveling tool (or sharp knife) to remove the dome from the cake.* This is so there is a flat top for layering the cake with frosting.
- To make the frosting, using a handheld or stand mixer, combine the softened butter, powdered sugar, and cream and beat until combined, smooth and stiff peaks form.
- Scoop a half-cup of frosting into 7 bowls. Add gel food coloring to each of the bowls so that you have one of each color – sky blue, purple, pink, yellow, green, orange, and black. The rest of the frosting remains white.
- To assemble the cake, place the first layer on a cake board (dab some frosting in the center of the board to stick the cake in place) and spread about 1 cup of frosting in an even layer.
- Place the second cake layer and spread another cup of frosting in an even layer.
- Place the third and final layer on top and frost the top and sides of the cake with the remaining white frosting. The sides of the cake do not have to be perfectly frosted as they will be covered with tie dye frosting, however, you will want a nice layer on the top of the cake. Place in fridge for frosting to firm up.
- Place the black frosting into a piping bag fitted with a round no.3 piping tip. Set aside.
- Place half of each of the frosting colors into a piping bag fitted with an open star tip. Set aside.
- Using a knife, randomly place dollops of colored frosting around the sides of the cake. Use an angled spatula and lightly spread the frosting around the cake to create a tie-dye effect.
- Using the bags of colored frosting, pipe swirls around the top of the cake in any order you like.
- Using the bag of black icing, pipe peace signs of varying sizes randomly around the sides of the cake.
- Place the icing flowers randomly around the sides and on the frosting swirls.
- You can pipe a peace sign on the top of the cake or add some rainbow sprinkles to finish decorating the cake.
- Chill before slicing and serving!
Notes
Nutrition
Nutritional information is always approximate and will depend on the quality of ingredients used and serving sizes. If you need exact calories and macros, please do your own calculations.