Awesome Chocolate Cherry Coke Layer Cake
Home » COOK » Recipes » Baking » Cakes »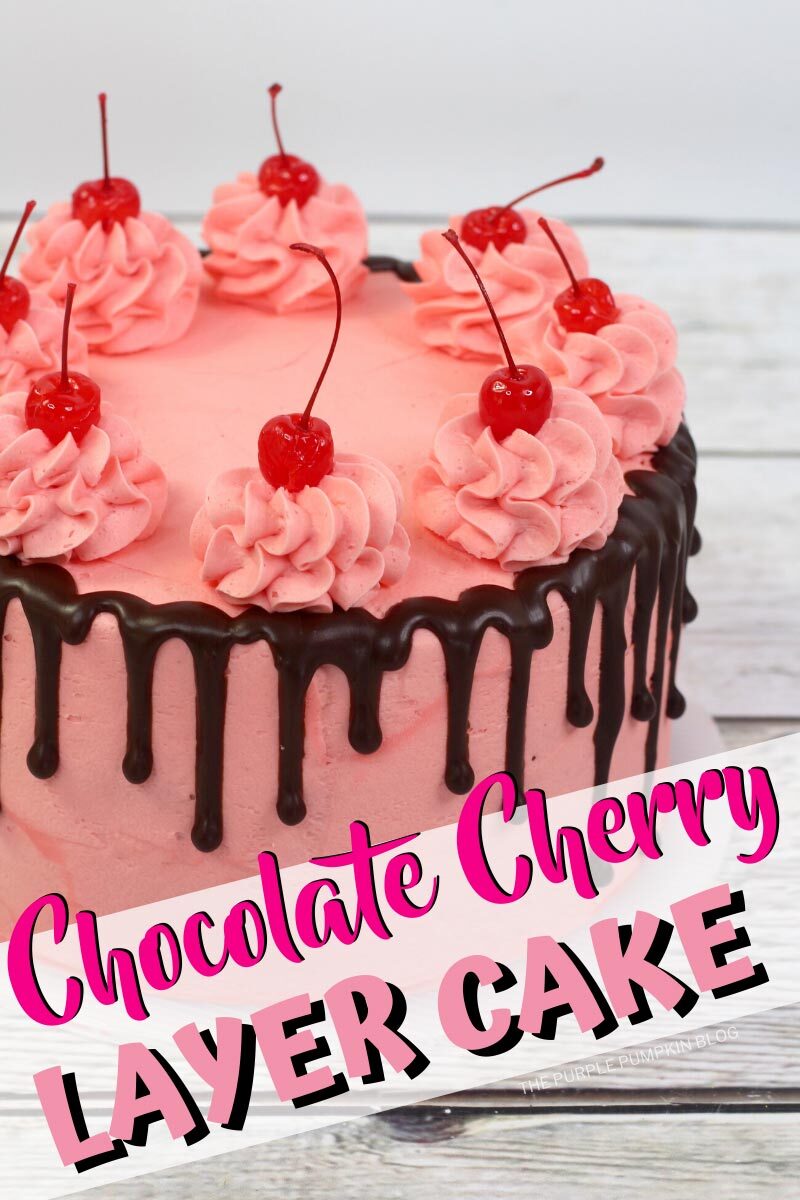
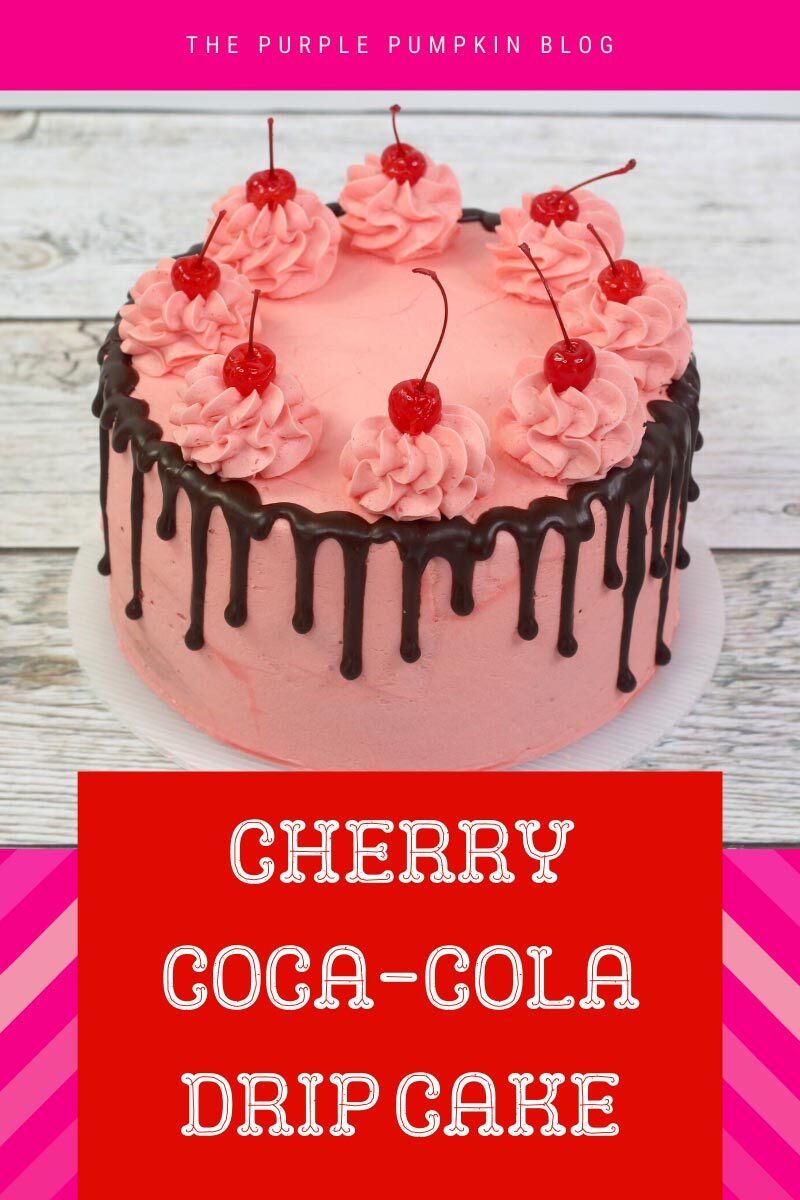
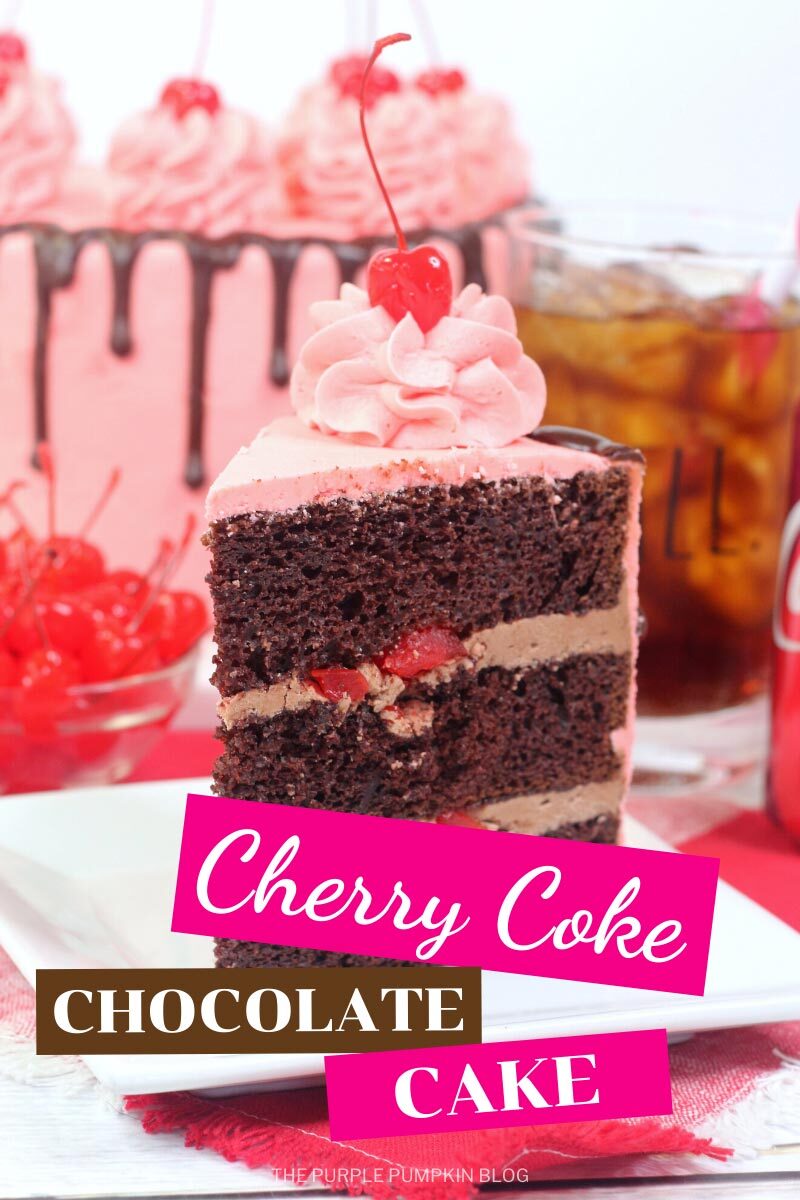
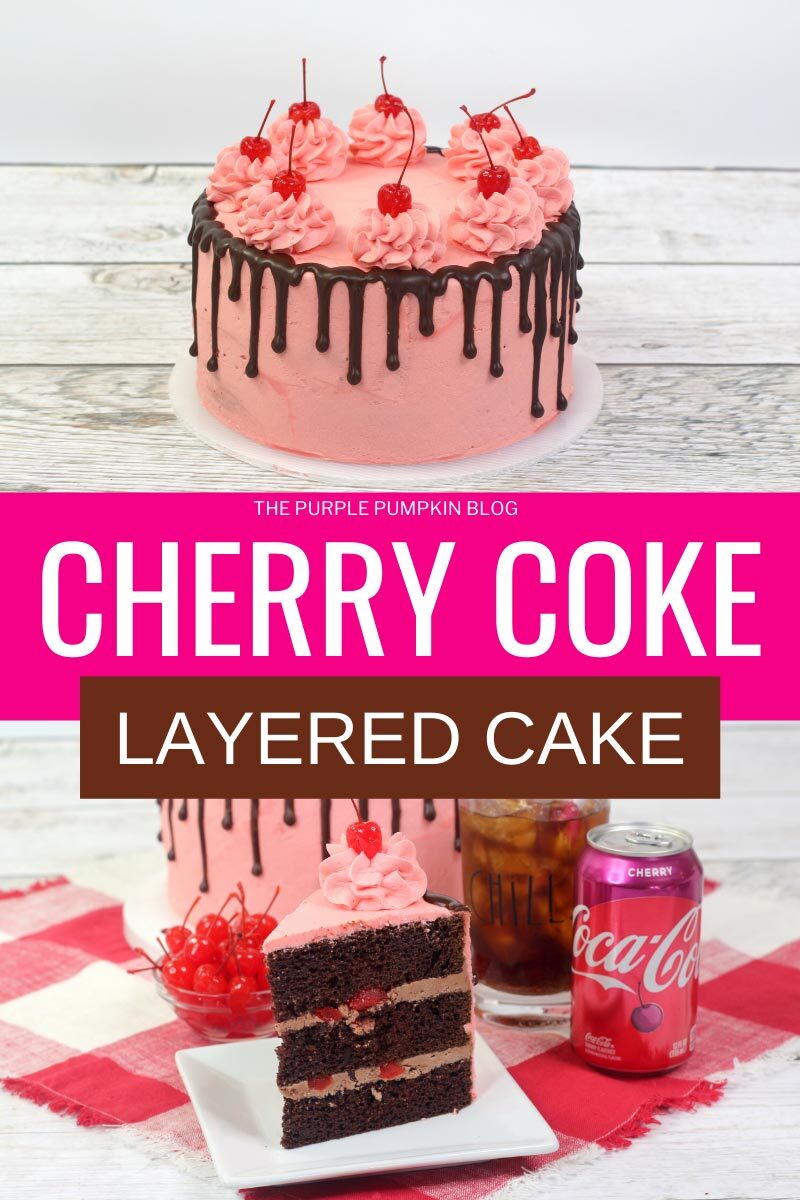
This pretty in pink Cherry Coke Layer Cake tastes as good as it looks! The addition of cherry cola gives this chocolate cake a lovely light texture, and the cherry flavor is infused throughout. If you’re throwing a retro 80s or 50s party, this cherry coke cake would be a gorgeous (and scrumptious) centerpiece for the dessert table!

Affiliate Disclosure
We have included affiliate links to products and services related to this post.
We may earn a commission if you purchase after clicking on those links.
As an Amazon Associate, I earn from qualifying purchases.
Read Our Full Disclosure Policy and Privacy Policy
Cherry Coke Layer Cake
The full ingredients list and instructions are found in the printable recipe card at the end of this post. I highly recommend reading the blog post all the way through so that you don’t miss any tips or substitution suggestions and to ensure that you have all the ingredients and equipment required as well as understand the steps and timings involved.
Of all the flavored colas out there, Cherry Coke is my absolute favorite. Cherries happen to be one of my favorite fruits too, so it’s a match made in heave for me! Now they make Cherry Coke Zero (in the UK at least) I can have the same great taste, but without the sugar – bliss!
I have used Cherry Coke in the past to make cupcakes, and this amazing cake takes it to the next level!
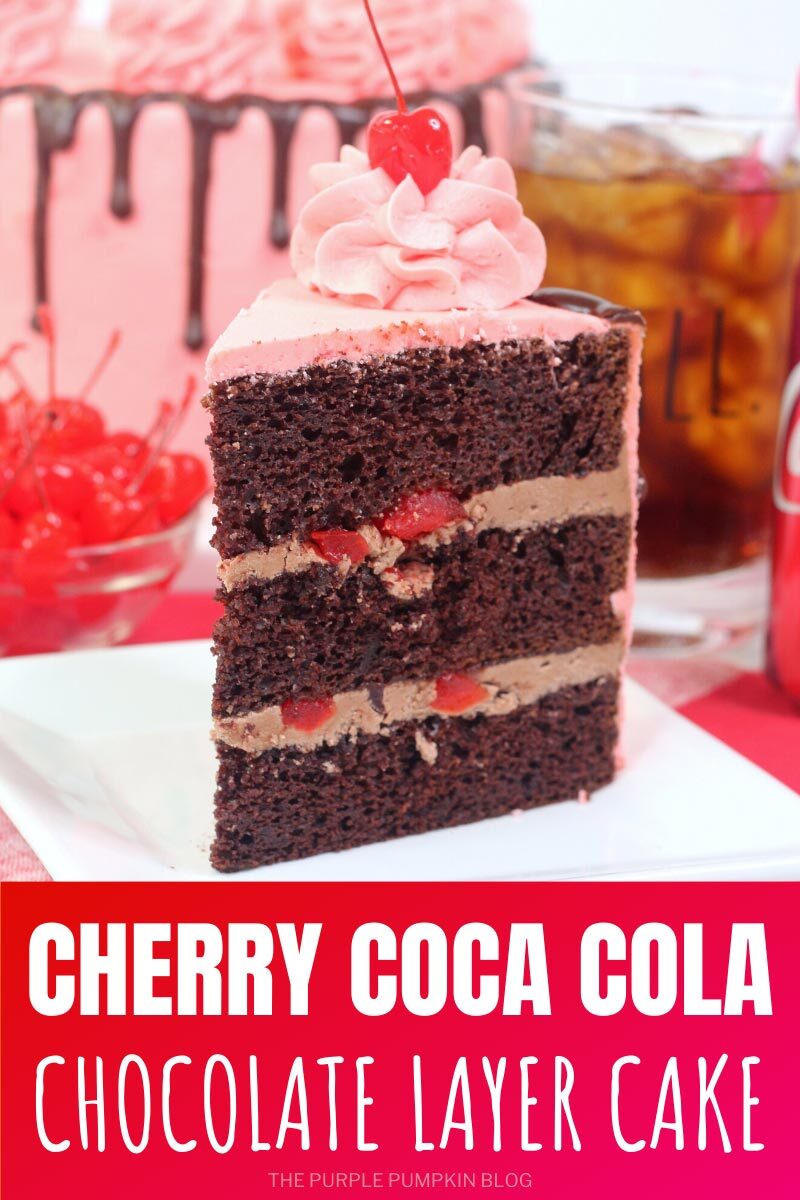
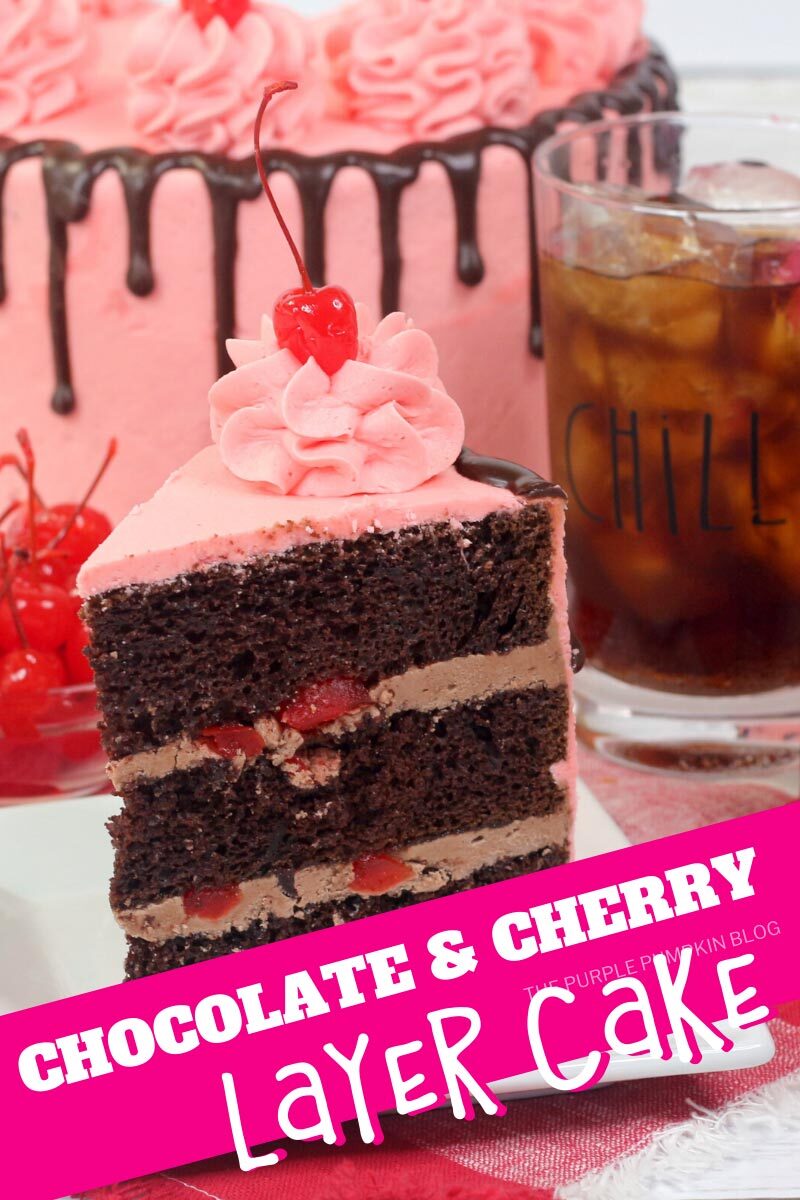
If chocolate and cherries are your jam, then this Cherry Coke layer cake has everything you desire in one slice!
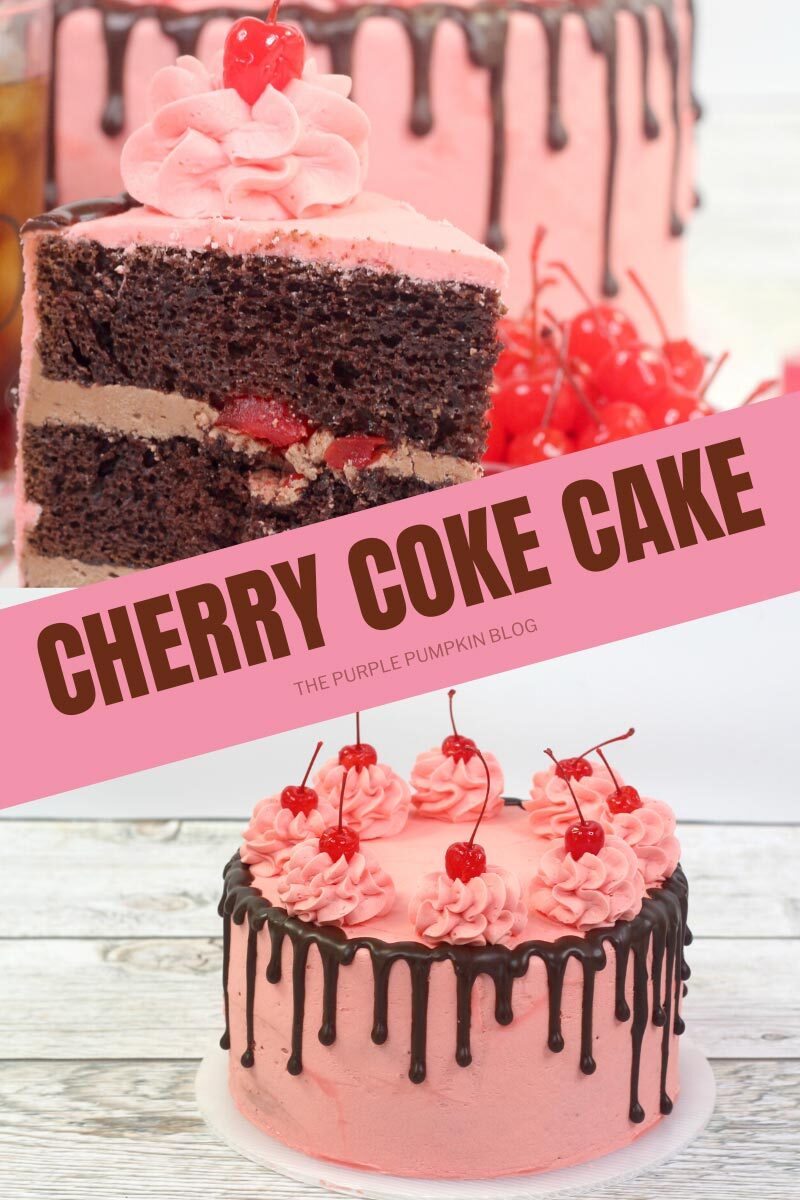
This decadent chocolate and cherry-flavored cake is made from scratch and the use of soda makes the sponge so moist it’s unbelievable! To really amp up the flavor in the cake itself, we also use the juice from a jar of maraschino cherries.
The pink frosting also use maraschino cherry juice and is so bright and pretty covering this cake, but the decoration doesn’t stop there as there are swirls of frosting topped with cherries, and a rich chocolate ganache dripping down the sides – a real show stopper of a cake for sure!
Whenever I share these cakes I worry that you might think they’ll be tricky to make, but honestly, if you take things slowly, and read through all the steps you will be able to make this cake. And the more you make, the better you get!
Ingredients Used In This Recipe
You may already have some of the standard baking ingredients used in this recipe such as flour, sugar, butter, etc., however, for your convenience, I’ve linked any specialized ingredients needed for this recipe to Amazon below.
- Cherry Coca-Cola
- Vanilla Extract
- Maraschino Cherries – both the fruit and the juice are used in this cake. Buy ones with stems for topping the cake, and remove the stems to cut the cherries to inside the cake layer.s
- Cherry Extract
- Pink Gel Food Coloring
- Semi-sweet Chocolate Chips (in the UK this would be plain chocolate)
This recipe uses American cups. They’re a handy piece of kitchen equipment to have along with a kitchen food scale. Having both in your kitchen means you’ll be able to make all of the different recipes on my blog as I use both cups and weighted measures.
Equipment used in this recipe
You are likely to have many standard cooking tools in your kitchen but I’ve added some Amazon links for your convenience should you need to use something specific for this recipe.
- 9-inch Round Cake Pans
- 10-inch Round Cake Board
- Cake Leveler
- Baking Spray
- Wire Cooling Rack
- Ice Cream Scoop
- Icing Spatula
- Piping Bags
- Large Open Star Piping Tip
- Squeeze Bottle
More Recipes Using Cherries
Cherry flavor is the hero of this recipe, so here are some more cherry recipes for you to try:
Cherry Coke Layer Cake Recipe Tips
- This cake is made using the wet/dry method. The wet ingredients are mixed together in one bowl, and the dry ingredients in another and then combined. Like all baking, there is a science behind it (although I’m not sure what it is – just trust the process!).
- Make sure the cakes have cooled completely (on a wire rack) before decorating.
- When the cakes have cooled, you will need to level off the tops so that they are flat. You can use a cake leveler which is a really handy tool to get a nice even cut. Or you can use a sharp knife and a steady hand.
- Do NOT throw away the excess cake though! You can use it to make cake pops! Simply crumble up the cake and mix it with some frosting and roll into balls. Insert a lollipop stick and dip into melted chocolate or candy melts. Leave to set, and enjoy!
Making & Using Frosting
- When making the frosting you can adjust the amount of cream to get the consistency you require. The recipe suggests 3-5 tablespoons of heavy whipping cream (double cream in the UK). Start with 3 tablespoons and add more if needed.
- Place one cake layer onto a cake board or cake stand (I usually put a blob of frosting under the cake to hold it in place).
- Use an offset spatula/palette knife and/or a scraper to spread out the frosting on each layer and to make it smooth all the way around when frosting the whole cake.
- To prevent the frosting getting onto your cake board or cake stand, a tip I learned from Ina Garten (The Barefoot Contessa) is to slip squares of parchment paper just under the cake all the way around. Once the cake is frosted you pull the paper away and you get a nice clean edge.
- If you are not confident with your swirl piping skills you can practice on some parchment paper first and scoop the frosting back into the bag to use on top of the cake.
- How many swirls do you need on top of the cake? Well, that’s up to you and how many servings you want to get! You could serve 6 or 8 huge slices of cake – so a swirl on each, or up to 16 for a 9-inch cake. Or you could do a continuous line of frosting around the cake edge and add cherries to indicate where to portion and cut.
Chocolate Dripping Tips
- You can use a squeeze bottle, piping bag or spoon to drip the chocolate around the cake.
- Place the tip of the bottle (or piping bag) just above the top edge of the cake and gently squeeze the bottle to release the chocolate ganache. When you’ve added enough of a drip, release the pressure on the bottle, but leave a little bit to continue on and around the cake to your next drip, turning the cake around as you go. The more pressure you have the longer the drip will be. Test your dripping pressure technique on the side of a glass or cup first so that you feel confident.
- If you only have a spoon to add the drips, carefully add chocolate to the top edge of the cake, and gently push it over so that it starts to drip down the sides.
- Using a cake turntable will make dripping chocolate onto the cake easier as you can turn the cake as you go around without having to break your flow.
- If you don’t have a cake turntable, what about that lazy Susan you have in the back of the kitchen cupboard? That would work too!
- Alternatively, place the cake on a cake stand which will be easier to turn around than a cake board sat on the counter.
- As with all things cake decorating, practice makes perfect!
More Cake Recipes
Need some more big cake ideas? Take a look at these recipes next:
- Chocolate Cherry Cream Birthday Cake
- A Delicious Pina Colada Layer Cake Perfect for a Tropical Luau Party!
- Candy Cane Chocolate Cake
How Do I Make a Cherry Coke Layer Cake?
Just check out the recipe card below with full ingredients, instructions, and demonstration photos. You can print the card out too (don’t worry, the pics don’t print to save your ink!).
Cherry Coke Layer Cake
Ingredients
For the Cake
- 2 cups all-purpose flour plain flour
- 2 cups sugar caster sugar
- ¾ cup cocoa powder
- 1 tsp baking soda bicarbonate of soda
- ½ tsp baking powder
- ½ tsp kosher salt sea salt flakes
- 1 cup + 3 Tbsp Cherry Coke soda
- ½ cup oil canola or vegetable oil
- 1 cup sour cream
- 2 large eggs
- 2 tsp vanilla extract
- ¼ cup maraschino cherry juice
For the Cherry Coke Frosting
- 1½ cup unsalted butter softened
- 4 cups powdered sugar
- ½ cup cocoa powder
- 3-5 Tbsp Heavy whipping cream
- ¼ cup Cherry Coke
- 1 cup stemless maraschino cherries patted dry and halved
For the Pink Cherry Frosting
- 3 cups unsalted butter softened
- 6 cups powdered sugar icing sugar
- 3-5 Tbsp heavy whipping cream double cream
- 1 tsp cherry extract
- ¼ cup maraschino cherry juice
- Pink gel food coloring
For the Chocolate Ganache
- ½ cup heavy whipping cream double cream
- 1 cup semi-sweet chocolate chips plain chocolate chips
For Decoration
- Maraschino cherries with stems
Instructions
- Preheat the oven to 180C/350F/Gas 4 and spray three 9-inch cake pans with baking spray.
- Place the flour, sugar, cocoa powder, baking soda, baking powder, and salt into a large mixing bowl and whisk to combine. Set aside.
- In another large bowl, whisk together the Cherry Coke, oil, and sour cream until combined and smooth, then whisk in the eggs, vanilla extract, and maraschino cherry juice.
- Gradually pour the wet ingredients into the dry and whisk until combined.
- Divide the batter into the three prepared cake pans and bake in the oven for 25-30 minutes or until a toothpick inserted into the center of the cakes comes out clean.
- Allow the cakes to cool for 5 minutes in the pans before turning out onto a wire rack to cool completely.
- When the cakes have cooled and before assembling the cake, level off the dome that may have formed during baking.
- To make the Cherry Coke frosting, using a handheld or stand mixer, combine the softened butter, powdered sugar, cream, and Cherry Coke and beat until combined, smooth and stiff peaks form.
- To assemble the cake, place one (cooled) layer onto the cake board (secure in place with a little frosting on the bottom).
- Use an ice cream scoop to place 4-6 scoops of Cherry Coke frosting onto the cake layer spread out evenly to the edges.
- Sprinkle half of the chopped cherries on top of the frosting and lightly push down into the frosting.
- Repeat with the second cake layer, adding frosting and the rest of the chopped cherries.
- Place the last layer on top and use the remaining Cherry Coke frosting to add a thin crumb coat layer around the cake. Place in the fridge to firm up.
- To make the pink cherry frosting, using a handheld or stand mixer, combine the softened butter, powdered sugar, cream, cherry extract, maraschino juice, and pink gel food coloring and beat until combined, smooth and stiff peaks form. Add the food coloring to your desired shade of pink.
- Scoop 1½ cups of cherry frosting into a piping bag fitted with a large star tip. Set aside.
- Spread the remaining cherry frosting around the sides and top of the cake in an even layer. Place in the fridge to firm up.
- To make the chocolate ganache, use a small pot to heat up the heavy whipping cream until steaming.
- While the cream is heating up, place the chocolate chips into a heat-proof bowl.
- Pour the heated cream over the chocolate chips and allow to sit for 1 minute before whisking until smooth.
- Pour ganache into a squeeze bottle and allow it to cool for 10 minutes.
- Squeeze the bottle of chocolate ganache around the top edges of the cake to form a drip effect.
- Using the piping bag filled with cherry frosting, pipe swirls around the top of the cake, and add a maraschino cherry to each one.
- Chill before slicing and serving.
Nutrition
Nutritional information is always approximate and will depend on the quality of ingredients used and serving sizes. If you need exact calories and macros, please do your own calculations.
Make It A Meal!
You’ve made the dessert, but what about the rest of the courses?
Here are additional recipes to make a full meal!
- Appetizer: Amazing Roasted Garlic Hummus Dip Recipe
- Main Dish: Sheet Pan Steak Dinner: Garlic Parmesan Steak with Asparagus
- Side Salad: Caesar Salad
- Beverage: Skittles Vodka Cocktail + How To Infuse Vodka with Skittles Candy
There are 500+ Recipes on The Purple Pumpkin Blog for you to enjoy – please feel free to check them out too!