Gorgeous Mardi Gras Layer Cake
Home » COOK » Recipes » Holiday Recipes » Mardi Gras Recipes »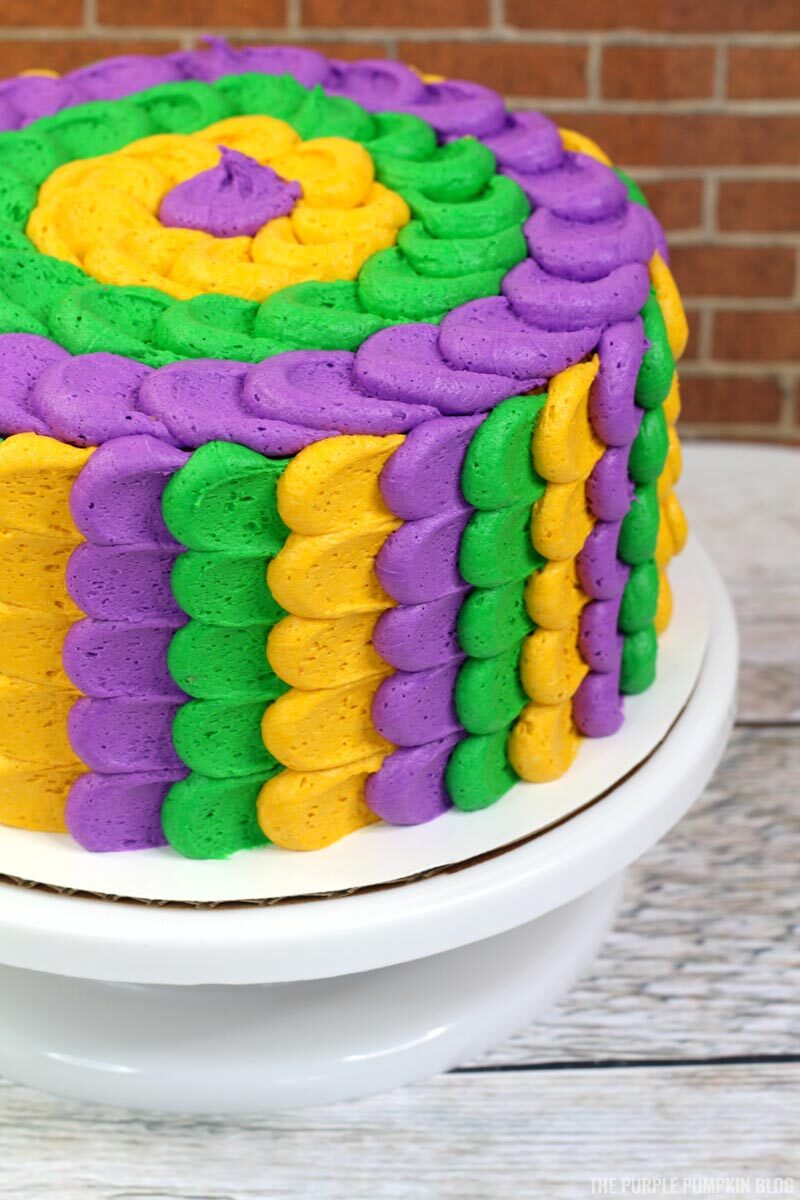
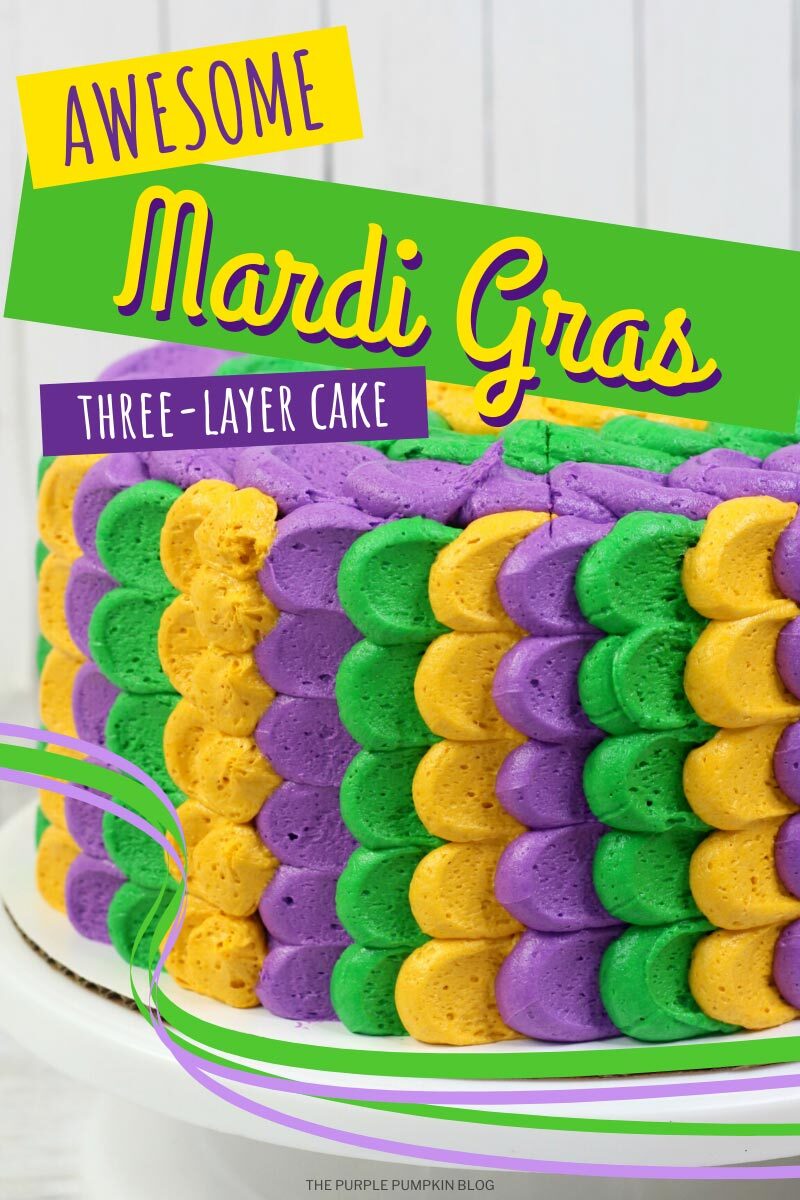
Make this gorgeous Mardi Gras layer cake and get into the spirit of the carnival! Three layers of cake are sandwiched between vanilla frosting in a trio of colors – purple, gold, and green. It’s so bright and festive and is a real showstopper for your Mardi Gras soiree! Laissez les bon temps rouler!

Affiliate Disclosure
We have included affiliate links to products and services related to this post.
We may earn a commission if you purchase after clicking on those links.
As an Amazon Associate, I earn from qualifying purchases.
Read Our Full Disclosure Policy and Privacy Policy
Mardi Gras Layer Cake
I’ve been wanting to visit New Orleans for many years now, specifically to experience Mardi Gras. I’ve not quite got there yet… However, the closest I have got is being at Disney’s Port Orleans Resort – French Quarter on Fat Tuesday 2019!
Mardi Gras, also called Shrove Tuesday, or Fat Tuesday, in English, refers to events of the Carnival celebrations, beginning on or after the Christian feasts of the Epiphany and culminating on the day before Ash Wednesday. Mardi Gras is French for “Fat Tuesday”, reflecting the practice of the last night of eating richer, fatty foods before the ritual fasting of the Lenten season.
Wikipedia
Mardi Gras is also celebrated in other countries around the world, but NOLA is the place I think of when I hear the words Mardi Gras!
This Mardi Gras layer cake is just gorgeous, wouldn’t you agree? I love the combination of purple, green, and gold which are the colors most associated with Mardi Gras.
The cake itself is a simple box mix, but you could make your own recipe from scratch if you prefer.
The technique of frosting is called petals, scallops, or scales – I guess it depends on who you ask!
The frosting on the sides and top of the cake may look tricky, but I promise you, it is easier than it looks. You just need some patience and a strong arm as it can take a while to pipe everything out!
If this cake looks like it’s too much for you, why not try out my Mardi Gras King Cake recipe instead?
Ingredients used in this recipe
The full ingredients list and instructions are found in the printable recipe card at the end of this post, but here is a brief outline so you know what to expect from the recipe.
I highly recommend always reading a recipe all the way through before starting.
Alongside some regular baking ingredients like butter, powdered sugar, etc., you will need some more specialized ingredients which I’ve linked below to Amazon for your convenience.
- Betty Crocker White Cake Mix – you will need two packs (16.25oz/461g) + ingredients to make – usually oil, water, and eggs.
- Gel Food Coloringin the following colors:
- Purple
- Gold – or yellow
- Leaf Green
- Vanilla Extract
Equipment used in this recipe
You are likely to have most standard cooking tools in your kitchen but I’ve added some Amazon links for your convenience should you need something more specific for this recipe.
- 3 (9-inch) Cake Pans
- 1 (10-inch) Cake Board
- Cake Leveller (optional, you could use a knife to level off your cakes)
- Cake Turntable (optional, can help to turn the cake around as you decorate)
- Cooking Spray
- Disposable Piping Bags
- 3 Large Round Piping Tip – about ½”/1cm such as a Wilton 2A tip
- Small Angled Spatula – for spreading out the icing petals, or you could use the back of a spoon
Mardi Gras Cake Recipe Tips
Making the Cake
- This recipe uses two boxes of white cake mix – use your preferred brand – plus the ingredients to make them which is usually eggs, water, and oil.
- Once the cakes are baked (temperature/time according to box instructions) leave to cool for 5 minutes in the pan before removing and transferring to a wire rack to cool completely.
- When the cakes have cooled, you will need to level off the tops so that they are flat. You can use a cake leveler which is a really handy tool to get a nice even cut. Or you can use a sharp knife and a steady hand.
- Do NOT throw away the excess cake though! You can use it to make cake pops! Simply crumble up the cake and mix it with some frosting and roll into balls. Insert a lollipop stick and dip into melted chocolate or candy melts. Leave to set, and enjoy!
Making & Using Frosting
- Place one cake layer onto a cake board or cake stand (I usually put a blob of frosting under the cake to hold it in place).
- Use an offset spatula/palette knife and/or a scraper to spread out the frosting on each layer and to make it smooth all the way around when frosting the whole cake.
- To prevent the frosting getting onto your cake board or cake stand, a tip I learned from Ina Garten (The Barefoot Contessa) is to slip squares of parchment paper just under the cake all the way around. Once the cake is frosted you pull the paper away and you get a nice clean edge.
- Food Coloring Tips: Use good quality food coloring gel or paste as the color will be more vibrant. Do not use liquid color as this will change the consistency of the frosting, and really won’t taste good!
- Once you’ve added frosting between each cake layer and crumb coated the outside of the cake, place it in the fridge for an hour or so to firm up before decorating the outside.
Petal Piping Technique
- To make the first verticle line of petals, pipe evenly sized round blobs of icing up the side of the cake.
- Then with an angled spatula or back of a spoon, gently press and swipe to smear the icing and create the petal.
- Pipe blobs of the next color just overlapping and press and swipe as before. And repeat with the third color.
- Repeat the order all the way around the cake, and in a circle on the top of the cake.
- Take your time and give your arm a rest every now-and-then!
- You could practice the pipe and swipe technique where you pipe the circle blob and swipe away the piping bag to save you using the spatula, but this is a more advanced technique. Of course, you could practice on a piece of parchment paper with one color and scoop it back into the bag.
- For the last line of petals, just leave the blob whole to fill in the empty space – no need to smear.
- Place the frosted cake back in the fridge to firm up before cutting and serving.
Make It A Mardi Gras Meal!
You’ve made the dessert, but what about the rest of the courses?
Here are additional recipes to make a full meal for Mardi Gras!
- Appetizer: Cajun Crab Cakes
- Main Dish: Jambalaya
- Side Dish: Cayenne Buttered Corn on the Cob
- Beverage: Mardi Gras Rum Punch
- Dessert: How To Make Beignets At Home for Mardi Gras!
There are 500+ Recipes on The Purple Pumpkin Blog for you to enjoy! Please feel free to check them out too.
More Recipes Using Cake Mix
If you want some more recipes that use a cake mix, take a look at these awesome ones next:
- The Nightmare Before Christmas Sally Cake
- Pineapple Upside Down Cake Fudge
- Red, White & Blue M&M’s Cookie Bars
More Decorated Cake Recipes
Want to make more decorated cakes? Try these:
- How To Make A Chocolate Explosion Cake
- Apple Pie Layer Cake with Cinnamon Frosting & Walnut Crumble Topping
- Candy Cane Chocolate Cake
Mardi Gras Layer Cake
Ingredients
For the Cake
- 2 boxes of white cake mix
- 8 large Egg whites
- 2 ½ cups water
- 1 cup canola oil
For the Frosting
- 3 cups unsalted butter softened
- 6 cups powdered sugar
- 5 Tbsp heavy whipping cream
- 2 tsp vanilla extract
- Purple Gold, and Leaf Green Gel Food coloring
SUGGESTED PRODUCTS
Instructions
- Preheat oven to 180C/350F/Gas 4 and spray three 9-inch cake pans with baking spray.
- Place all the cake ingredients into a bowl and use an electric mixer to beat until combined and smooth.
- Divide the cake batter into the prepared pans.
- Place into the oven and back for 28-30 minutes or until a toothpick comes out clean.
- Allow the cakes to cool in the pans for 5 minutes then transfer to a wire rack to cool completely.
- To make the frosting, use an electric mixer to combine the butter, powdered sugar, heavy whipping cream, and vanilla on medium speed until combined and smooth.
- Scoop three cups of frosting into one bowl and mix in purple food coloring gel to desired shade.
- Scoop three cups of frosting into another bowl and mix in leaf green food coloring gel to desired shade.
- Color the remaining frosting with gold food coloring gel to desired shade.
- When cakes are cooled, use a cake leveler or sharp knife to cut the dome off each cake to make an even layer.
- Add a blob of frosting into the center of the cake board and place the first cake layer on top. The frosting will help to hold it in place.
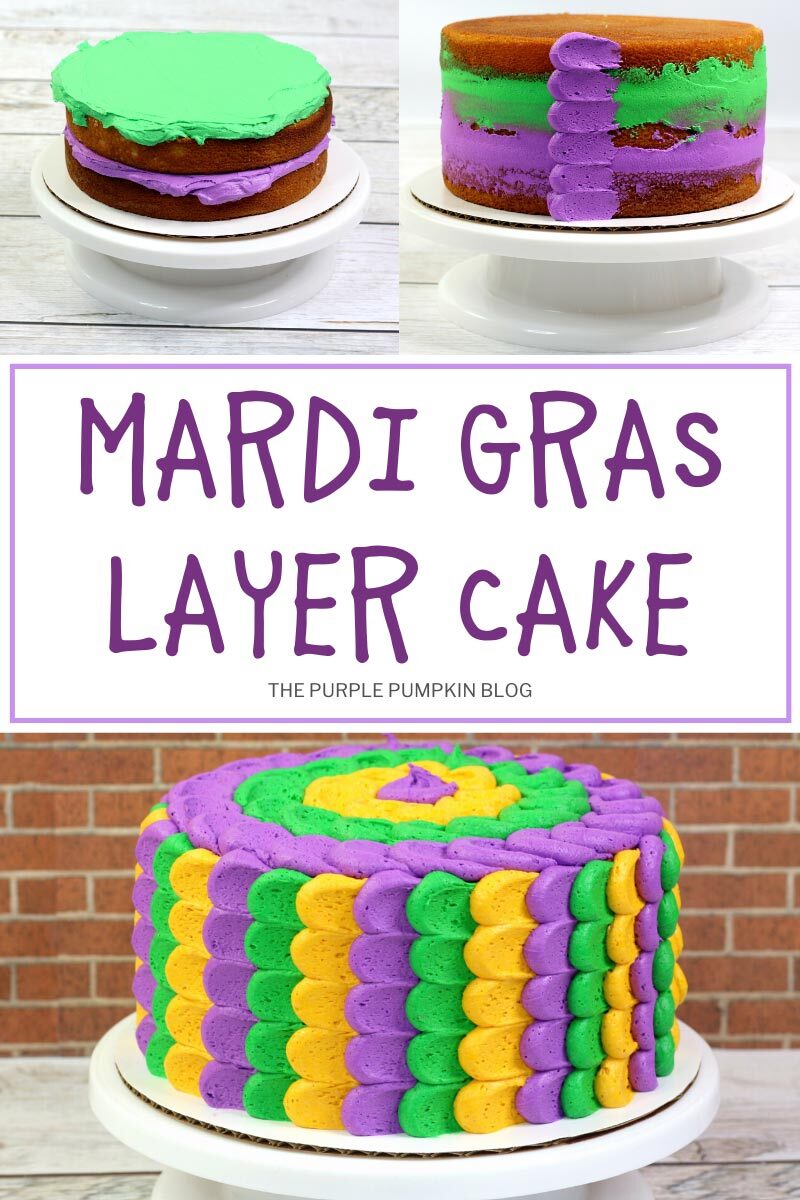
- Evenly spread about one cup of purple frosting onto the bottom layer of the cake.
- Place the second cake player on top.
- Add about one cup of green frosting to the second layer and spread out evenly.
- Smooth out any of the frosting that has squidged out from the layers to lightly coat the sides of the cake. and place the cake in the fridge for about an hour to firm up.
- Place the purple, green, and gold frosting into piping bags fitted with a large round piping tip.
- Start with the purple frosting and pipe large blobs/dots in a line going from top to bottom of the cake. Try and keep the dots similar in size and in a straight line. You should be able to fit about six blobs of icing.
- Use the angled spatula (or the back of a spoon) to swipe and smear out the dots to create "petals". Hold the spatula horizontally and apply pressure to the first dot. Press hard enough so that the dot smushes down, but not so hard that it loses its shape. When you reach the crumb coat, pull the spatula away to the side, smearing the dot across the surface of the cake. Repeat down the line until all of the dots have been smeared.TIP: practice the technique on a piece of parchment paper first!
- Repeat the process with the green frosting, making sure that the initial dots of frosting overlap the smeared parts of the previous color. And do the same with the gold frosting.
- Continue piping blobs/dots and smearing out the petals until you have filled the whole sides of the cake.
- For the last line just pipe a row of dots to hide the previous section of smeared frosting.
- Create petal shapes in the same way on the top of the cake in a circular pattern.
- Place in the fridge overnight to allow frosting to set before cutting and enjoying!
Notes
- 3 (9-inch) round cake pans
- 1 (10-inch) round cake board
- 3 medium piping bags fitted, each fitted with a large round tip
- 1 small angled spatula
Nutrition
Nutritional information is always approximate and will depend on the quality of ingredients used and serving sizes. If you need exact calories and macros, please do your own calculations.
Diane Worrest
February 8, 2025 @ 4:22 pm
I’d like to verify, please. The frosting calls for 3 cups, or six sticks, of butter? Not 3 sticks if butter? Thank you.
Michelle Ordever
February 10, 2025 @ 12:12 pm
The recipe says 3 cups; 1 cup = 1 stick of butter, so it would be 6 sticks.