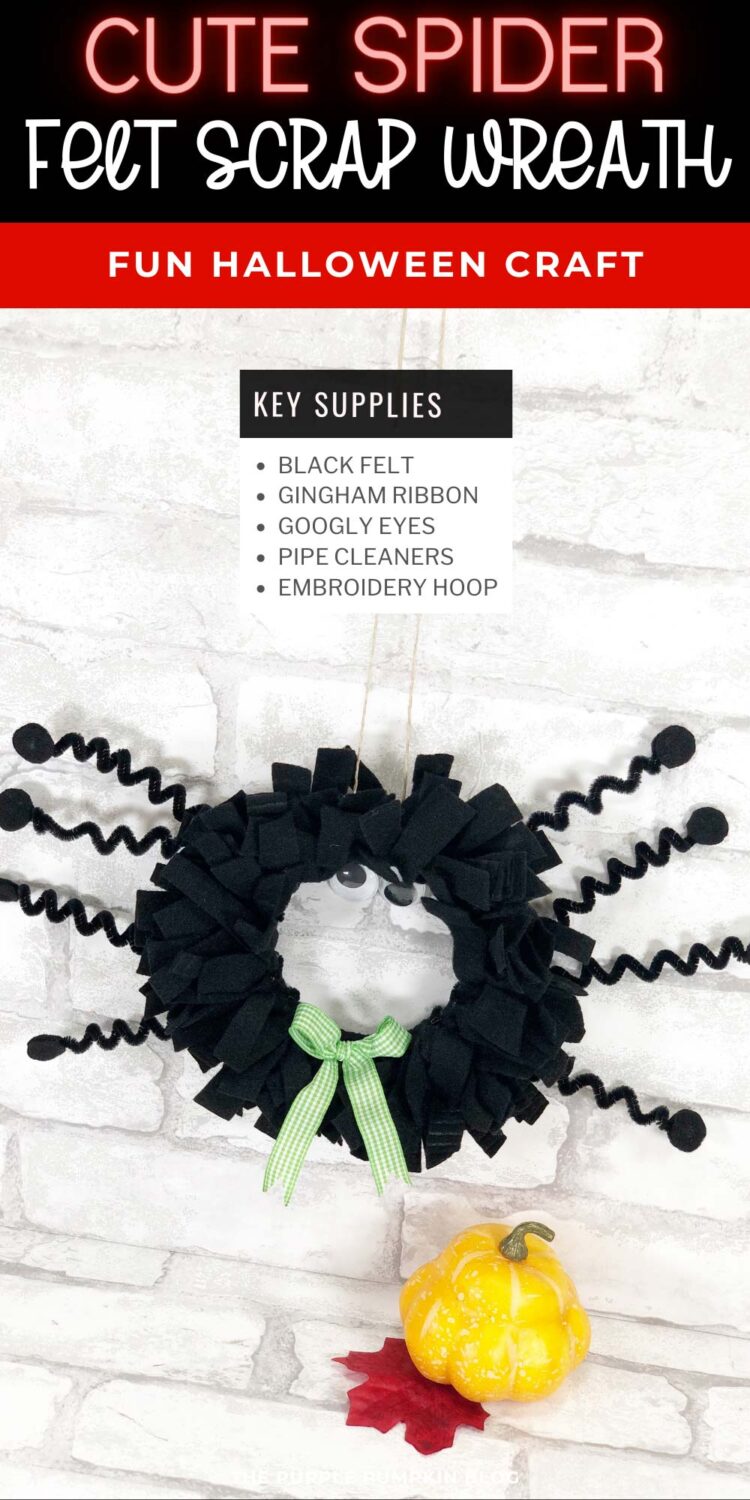
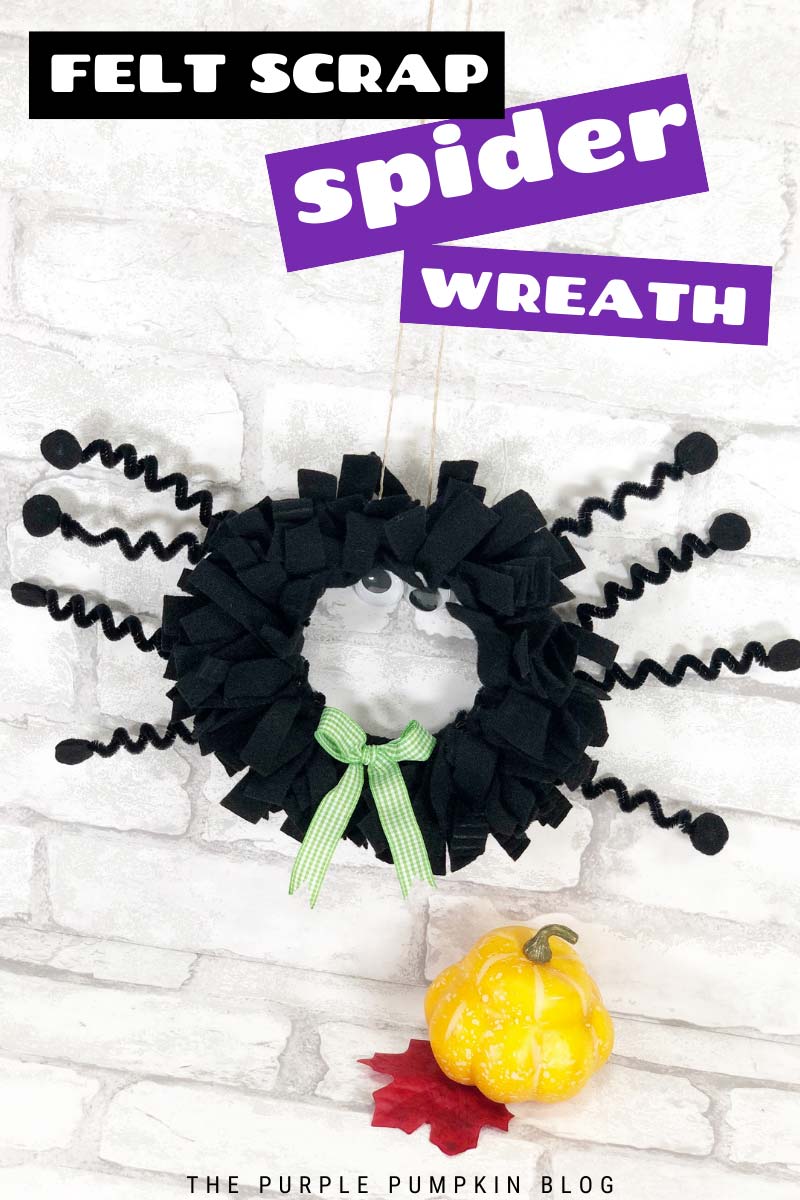
Spider Felt Scrap Wreath Craft! DIY Decoration for Halloween!
Home » CREATE » Crafts » Halloween Crafts »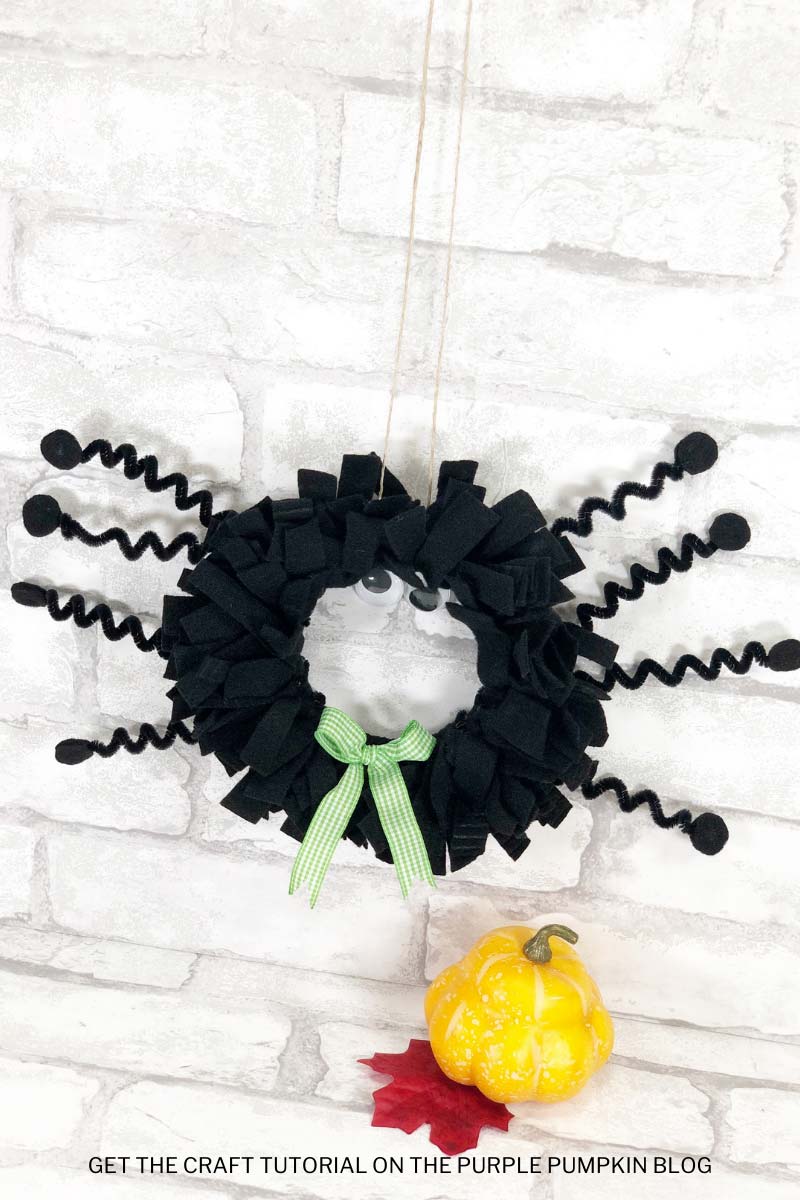
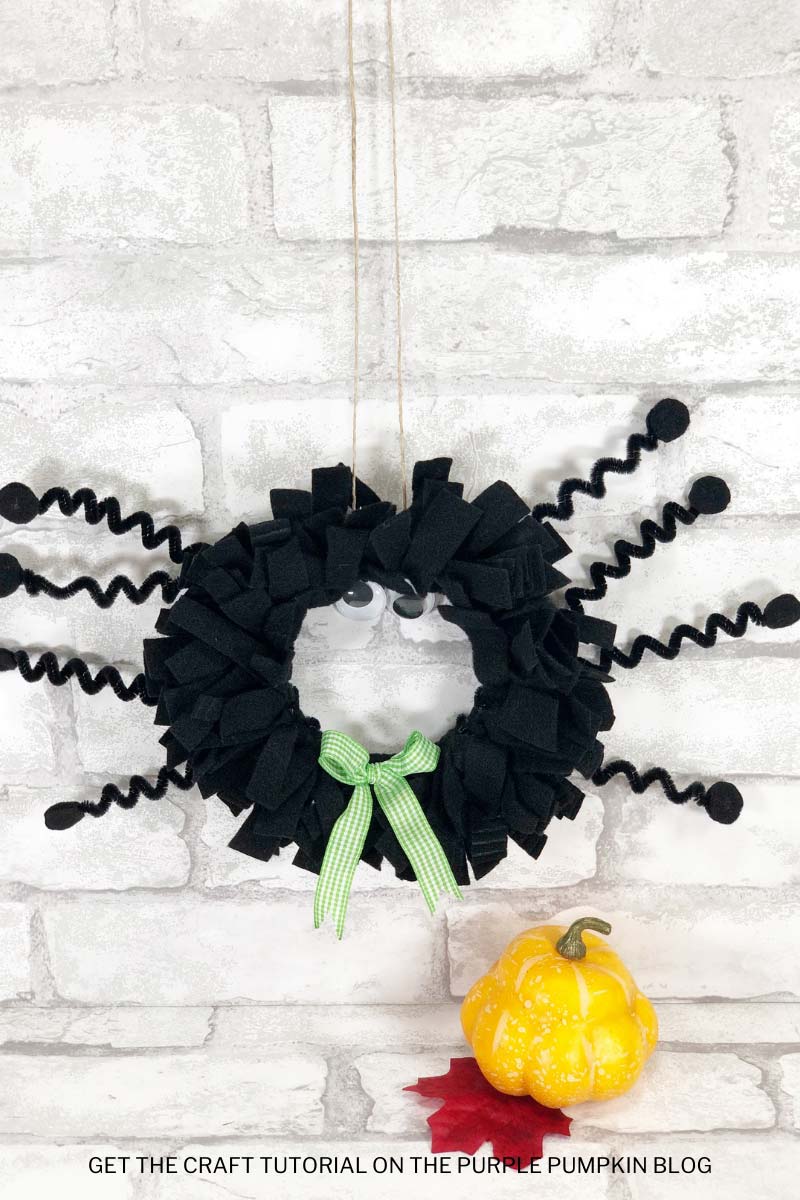
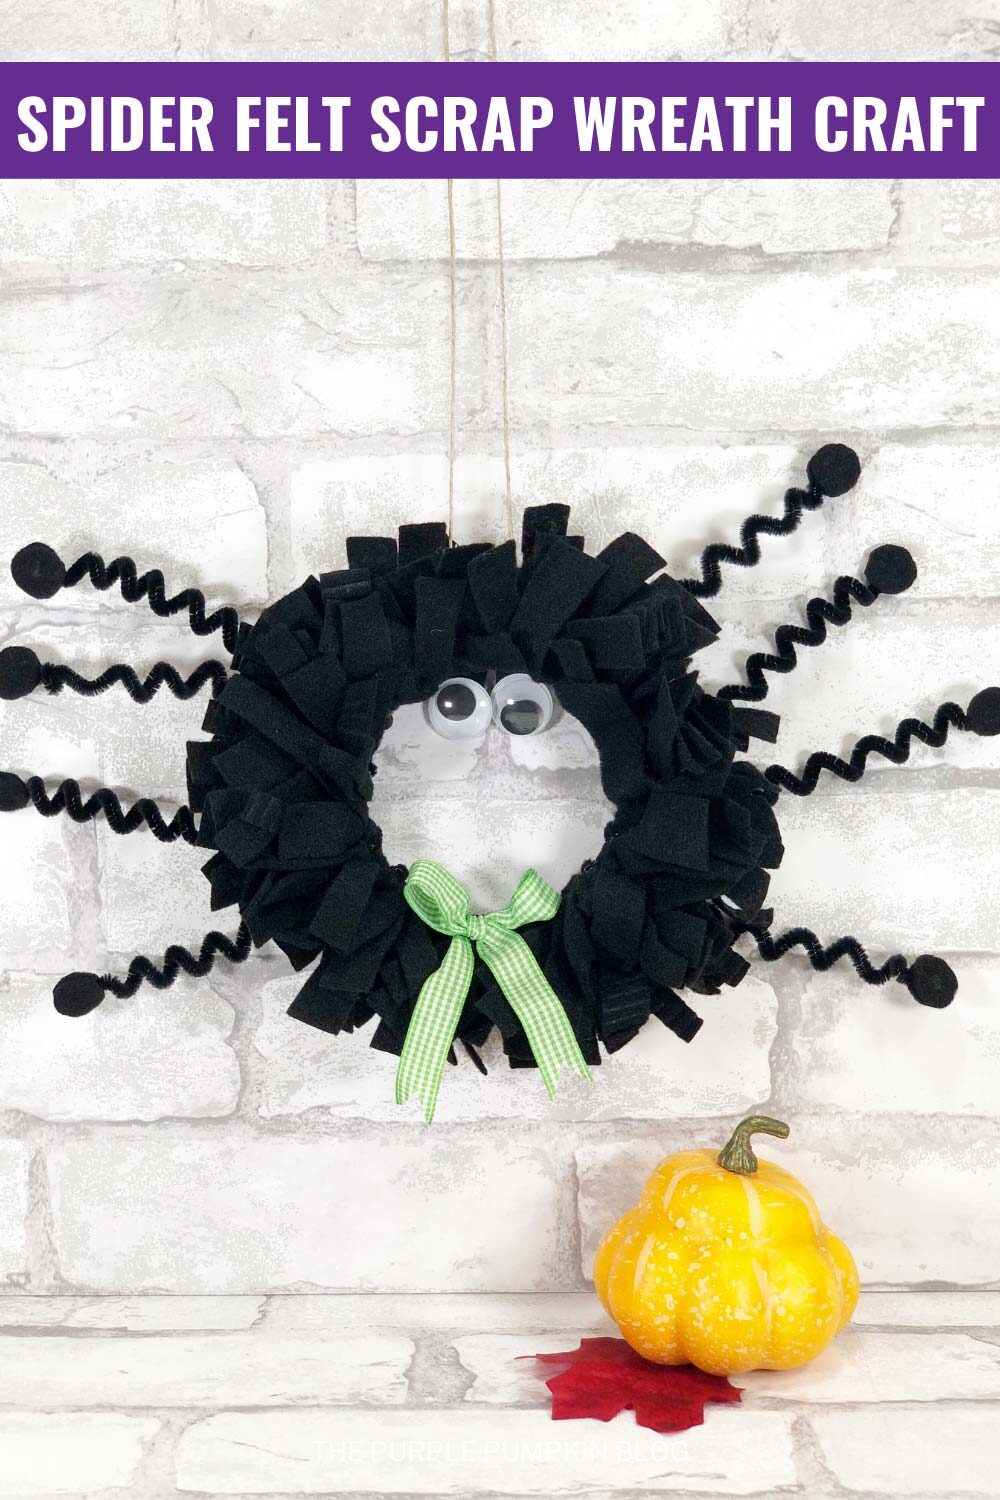
Nobody could be scared of this cheeky little guy! Get your Halloween craft on and make this awesome Spider Felt Scrap Wreath to pop on your front door to greet your trick-or-treat visitors!

Affiliate Disclosure
We have included affiliate links to products and services related to this post.
We may earn a commission if you purchase after clicking on those links.
As an Amazon Associate, I earn from qualifying purchases.
Read Our Full Disclosure Policy and Privacy Policy
Spider Felt Scrap Wreath
The full list of materials, tools, and instructions is found in the printable tutorial card at the end of this post. I highly recommend reading the blog post all the way through before starting this project to ensure that you have everything required and understand the steps and timings involved.
Looking for a quick, easy, and inexpensive way to decorate for Halloween? This spider felt scrap wreath craft is perfect!
All you need is a few supplies that you may already have on hand, and in no time you’ll have a spooky addition to your home décor.
Kids will love helping to make this spider wreath, complete with googly eyes, and it can also be a sneaky way to teach them how to tie knots!
So get creative and have some fun with this Halloween project – read on for all the things you need.
The post is part of the Crafty October series on The Purple Pumpkin Blog and is filled with free printables, crafts, recipes, and more for Halloween! You can check out Crafty October from 2022, 2021, 2020, 2019, 2018, 2017, 2016, 2015, 2014, 2013, and 2012 for tons of awesome Halloween ideas and inspiration!
Materials & Tools Used in This Craft
For your convenience, I’ve linked [some of] the materials and tools needed for this project to Amazon below. The quantities are on the tutorial card at the end of this post.
- Black Felt Craft Sheets
- 4-inch Wooden Embroidery Hoop
- Black Pipe Cleaners – also known as Chenille Stems
- Googly Eyes
- Glue Gun and Glue Sticks
Cheap Craft Supplies
A great thing about this craft idea is that it can be budget-friendly using supplies you may already have or can be purchased cheaply in stores:
If you’re in the USA, check out your local Dollar Store or Dollar Tree; and if you’re in the UK, the Poundshop, The Range, Wilko, and Baker Ross are great places to shop for cheap and inexpensive craft supplies. The rest of the world reading this – I don’t know every cheap store – sorry! But hunt the ones out in your location for crafting bargains!
More Halloween Crafts
Looking for more crafts to make for Halloween? Right-click and open these in a new tab to read next!
- Frankenstein Mickey & Minnie Paper Ornaments Craft
- How to Make Rustic Wooden Pumpkins
- Milk Bottle Ghosts
I’ve shared lots of great craft ideas on The Purple Pumpkin Blog over the years, in fact, there are 100+ crafts to make and do at home for you to try!
How Do I Make A Spider Felt Scrap Wreath?
Just check out the how-to card below with full materials, tools, and instructions. Any demonstration photos do not print out to save your ink.
Spider Felt Scrap Wreath
Materials
- Black Felt Craft Sheets approx 9″/22cm wide
- 1 4″/10cm Wooden Embroidery Hoop
- 8 Black Pipe Cleaners/Chenille Stems
- 2 Large Googly Eyes
- Gingham Ribbon – your color choice
Instructions
- Remove the label from the embroidery hoop. Loosen the screw at the top of the hoop and separate the inside hoop from the outside hoop. Tighten the screw back up. Use the inside part of the hoop for another project.
- Cut the black felt into 50 (approximately) 9"/22cm long strips, some thin and some thick.
- Start tying the strips of felt around the embroidery hoop in double knots. Use the 12, 3, 6, and 9 o’clock marks as a starting point. Continue working around the entire hoop, pushing the strips together to get as many tied on as possible. The more scrap strips tied onto the hoop the fluffier the wreath will be. You can use scissors to neaten up any overhanging pieces of felt if you wish.
- Wrap a black pipe cleaner around a pencil then slide off to reveal a coil. Repeat with the remaining pipe cleaners to create the spider’s legs. Cut a ½"/0.5cm wide (approximately) strip of black felt, trim the strip into 16 squares, and then into 16 circles. Glue two circles to one end of each coil, sandwiching the chenille stem in the center. Repeat with remaining felt circle pairs and spider legs.
- Flip the hoop to the back and attach four legs on each side of the hoop with a glue gun and glue sticks.
- Flip the hoop to the back. Take one black scrap strip and fold over the screw, so that the tails are hanging down into the center of the hoop. Attach two large googly eyes, one on each tail with a glue gun and glue sticks. Trim excess black felt from under the eyes.
- Tie the gingham ribbon into a bow and attach it to the ghost with a glue gun and glue stick.
- Create a hanging loop with ribbon or twine if desired, then hang (or place) where desired. Happy Halloween!
This post is part of my long-running Crafty October series on The Purple Pumpkin Blog. Since 2012, I’ve shared Halloween recipes, printables, and crafts every October. While I don’t officially run the series anymore, all my new Halloween posts are still part of this decades-long celebration of spooky fun! Browse past Crafty October years for even more inspiration: 2024, 2023, 2022, 2021, 2020, 2019, 2018, 2017, 2016, 2015, 2014, 2013, and 2012.