Upcycled Mini Cake Pan Pumpkins Craft
Home » CREATE » Crafts » Pumpkin Crafts »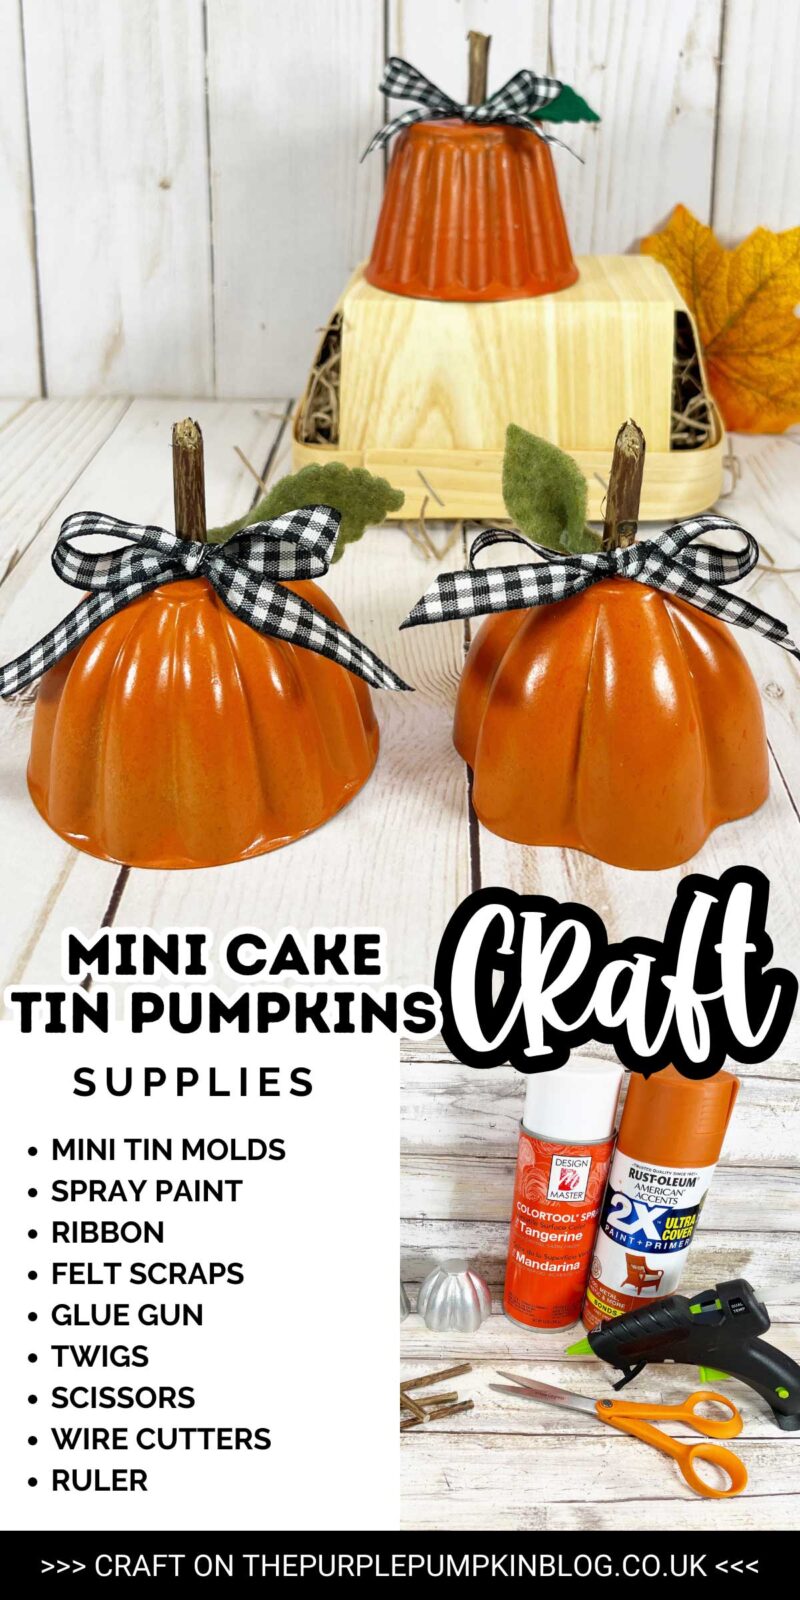
Mini Cake Pan Pumpkins are the perfect autumnal craft to bring a touch of festive charm to your home!

You can transform ordinary mini cake tins into delightful pumpkin decorations with a few simple materials and a sprinkle of creativity.
Don’t have time for this craft now? Tap the share icon in the bottom right of the screen, then tap the heart icon ♥ to save it for later!
Affiliate Disclosure
We have included affiliate links to products and services related to this post.
We may earn a commission if you purchase after clicking on those links.
As an Amazon Associate, I earn from qualifying purchases.
Read Our Full Disclosure Policy and Privacy Policy
The list of materials, tools, and instructions is in the printable tutorial card at the end of this post. We recommend reading the blog post thoroughly before starting this project to ensure you have everything required and understand the steps and timings involved.
Mini Cake Pan Pumpkins
With all of the fun Pumpkin Crafts we have on The Purple Pumpkin Blog, there isn’t much we can’t turn into a pumpkin!
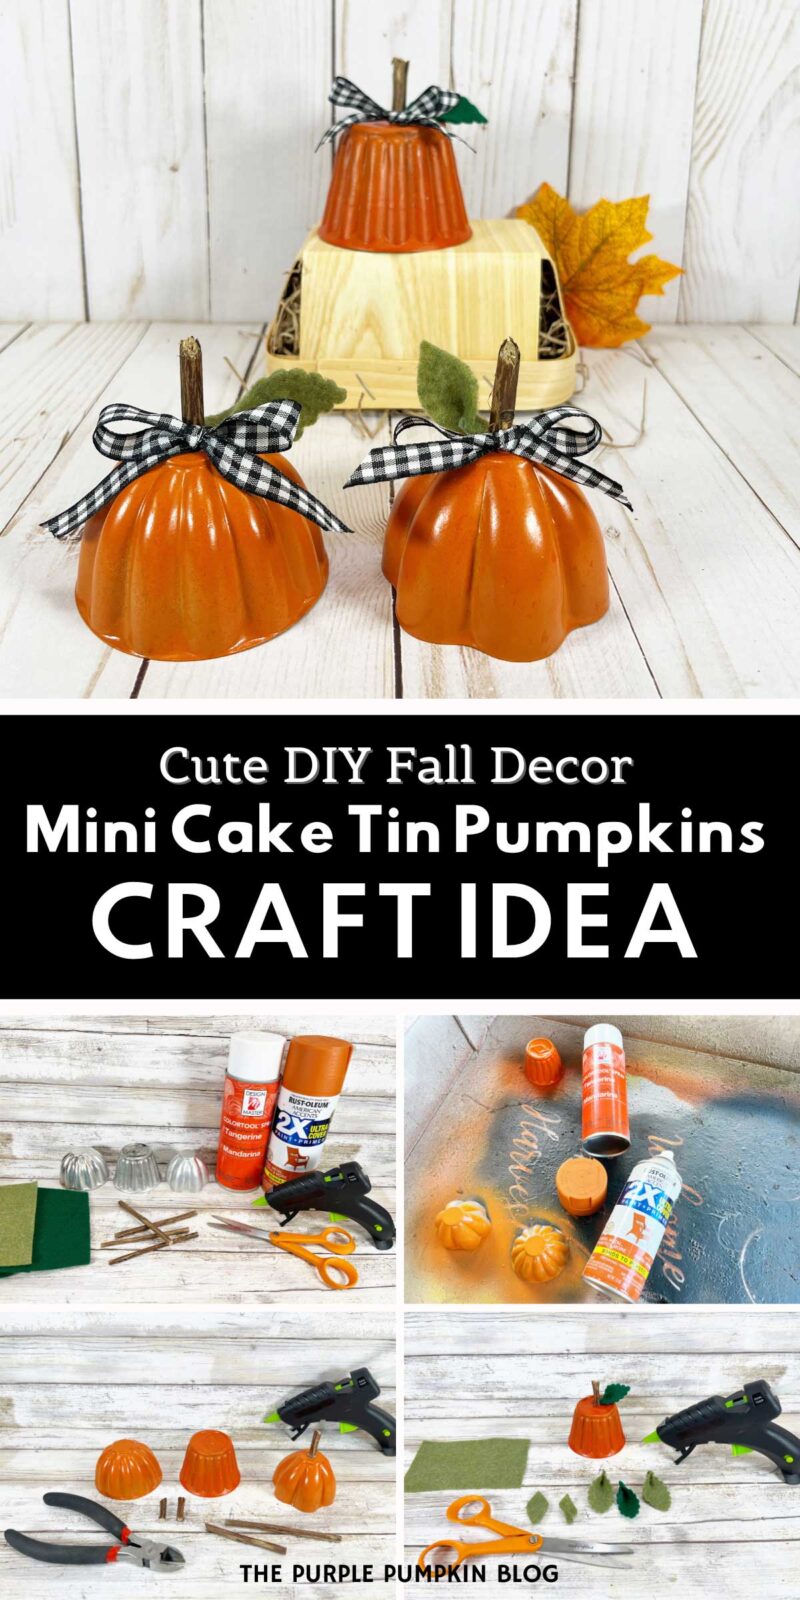
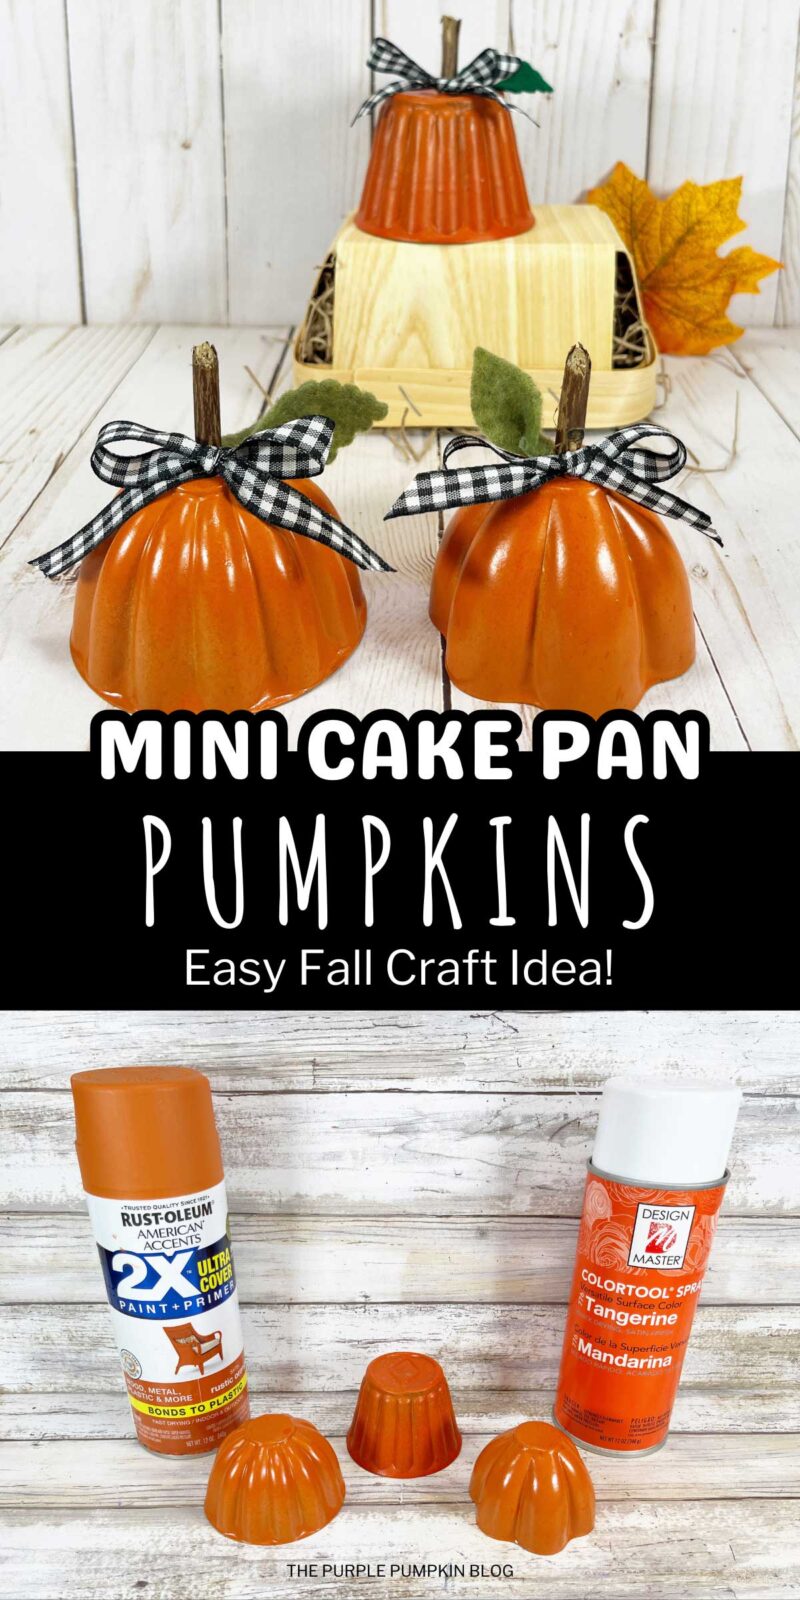
These mini cake pan pumpkins are a great upcycling project using vintage mini tin molds found in thrift stores or at garage sales/car boot sales.
The cake tin molds serve as the base, giving the pumpkins their unique shape.
The bright and burnt orange spray paints capture the essence of fall, while the black and white gingham ribbon, felt leaves, and real twig stem add a rustic charm.
You can, of course, use new mini bundt cake molds in this craft. Plastic or silicone molds are more popular these days, so you may need to adjust the type of paint you use on those kinds of materials.
And instead of making mini cake tin pumpkins, you could make a large one as a funky fall centerpiece for your dinner table!
Cake Tin Pumpkin Craft
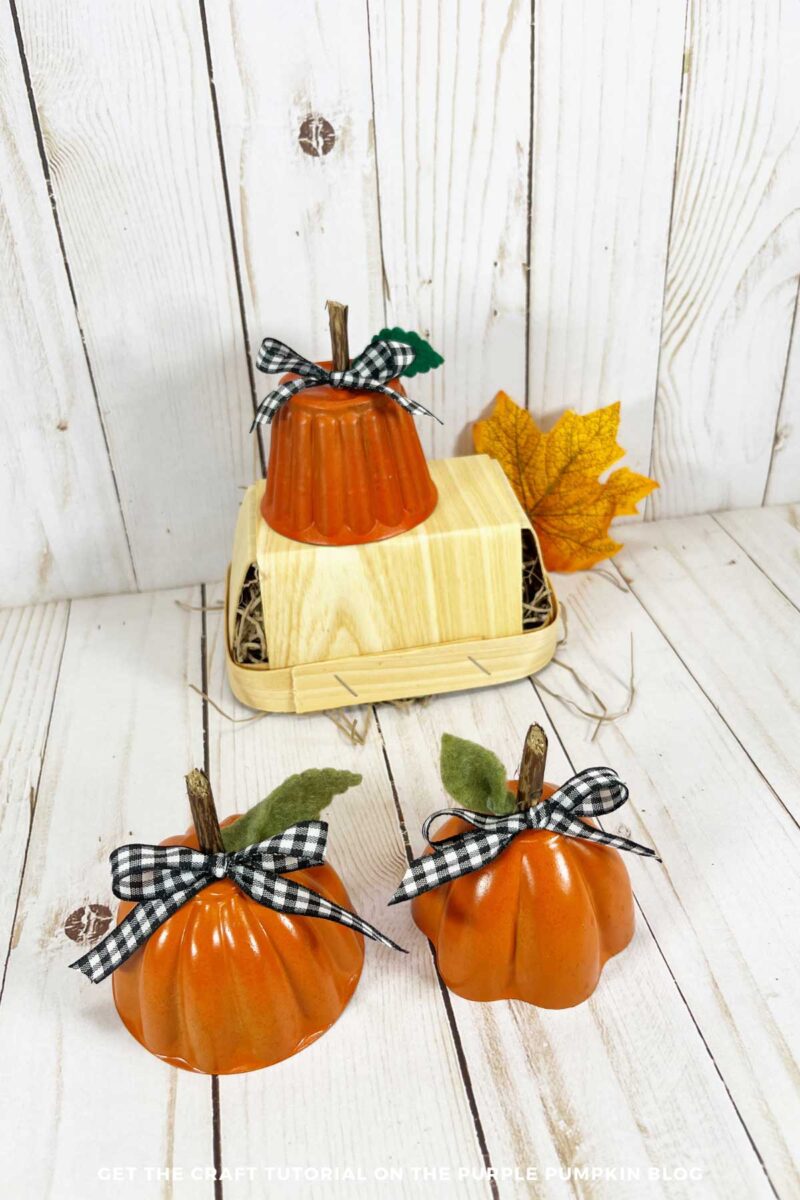
One of the best things about these mini cake pan pumpkins is their versatility.
They can be used as table centerpieces, mantle decorations, or even as part of a larger fall-themed display.
The combination of materials ensures that these pumpkins will stand out, no matter where they’re placed.
Lastly, the craft is not just about aesthetics; it’s also about the joy of creation. From spray painting the tins to attaching the felt leaves and ribbon, each step offers a chance to put your personal touch on these pumpkins.
So, whether you’re crafting alone or with loved ones, this project promises fun and fulfillment!
Let’s dive into this crafty adventure!
Materials & Tools Used in This Craft
The materials and tools needed for this project are linked on Amazon below for your convenience. The quantities are on the craft tutorial card at the end of this post.
- Mini Cake Tin Molds – You can find these in thrift stores or garage sales, or you may even have some in your kitchen that you no longer use!
- Orange Spray Paint – You will need two different shades.
- Black and White Gingham Ribbon
- Green Felt Scraps – You will need Olive Green and Dark Green Felt.
- Hot Glue Gun and Glue Sticks
- Twigs from your backyard
- Scissors
- Pruning Shears or Wire Cutters for trimming twigs.
- Ruler
- Leaf Pattern – click to download the PDF, which you can print on either US Letter or A4 paper sizes. Opens in a new tab.
No time to read now? Tap the buttons below to save the craft to your Pinterest boards or Facebook page for later!
How Do I Make Mini Cake Pan Pumpkins?
The printable tutorial card with the full supplies list and instructions can be found at the end of this post.
Step 1 – Paint Tins: Wash and dry the mini cake tins well. In a well-ventilated area (or outside), spray the outside of the mini tin molds with bright orange and burnt orange paint. Set aside to dry. Apply a second coat if required.
TIP! Mix the colors slightly by lightly spraying one color on the other.
Step 2 – Cut Twigs: Cut a twig into 1″/2.5cm sections with a pair of pruning shears. Use a hot glue gun and glue sticks to attach the twigs to the top center of the cake tins.
Step 3 – Cut Felt Leaves: Cut small leaf shapes from green felt freehand or by using the printable leaf pattern. To create dimension, apply a glue dot at the base of each leaf and fold it in half. Attach leaves to the top of the mini tin mold pumpkins with a glue gun and glue sticks.
Step 4 – Attach Ribbon: Measure and cut 8″/20cm lengths of ribbon. Tie the ribbon into a bow and secure it to the stalk with hot glue. Display where desired.
More Pumpkin Crafts
Looking for more pumpkin crafts? Try these next:
We’ve shared over 500+ crafts for all seasons and holidays—why not take a look at them next?
Printable Mini Cake Pan Pumpkins Craft Tutorial Card
To save ink, any demonstration photos on the tutorial card do not print.
Mini Cake Pan Pumpkins
Materials
- Mini Cake Pan Molds
- Bright Orange Spray Paint
- Burnt Orange Spray Paint
- Black and White Gingham Ribbon
- Olive Green Felt Scraps
- Dark Green Felt Scraps
- Small twigs
- Leaf Pattern
TOOLS
- Pruning Sheers/Wire Cutters
Instructions
- Wash and dry the mini cake tins well. In a well-ventilated area (or outside), spray the outside of the mini tin molds with bright orange and burnt orange paint. Set aside to dry. Apply a second coat if required. TIP! Mix the colors slightly by lightly spraying one color on the other.
- Cut a twig into 1"/2.5cm sections with a pair of pruning shears. Use a hot glue gun and glue sticks to attach the twigs to the top center of the cake tins.
- Cut small leaf shapes from green felt freehand or by using the printable leaf pattern. To create dimension, apply a glue dot at the base of each leaf and fold it in half. Attach leaves to the top of the mini tin mold pumpkins with a glue gun and glue sticks.
- Measure and cut 8"/20cm lengths of ribbon. Tie the ribbon into a bow and secure it to the stalk with hot glue. Display where desired.
This post is part of my long-running Crafty October series on The Purple Pumpkin Blog. Since 2012, I’ve shared Halloween recipes, printables, and crafts every October. While I don’t officially run the series anymore, all my new Halloween posts are still part of this decades-long celebration of spooky fun! Browse past Crafty October years for even more inspiration: 2024, 2023, 2022, 2021, 2020, 2019, 2018, 2017, 2016, 2015, 2014, 2013, and 2012.