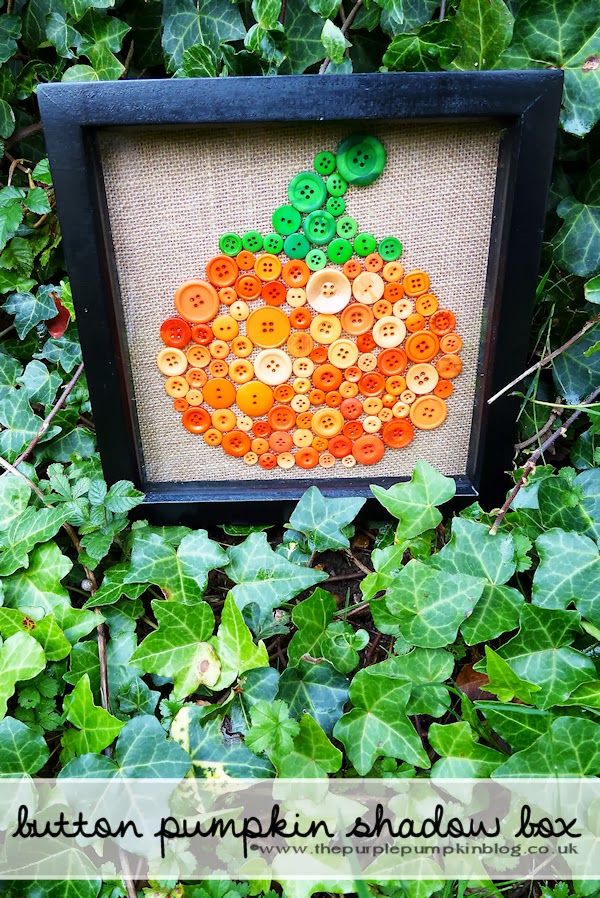
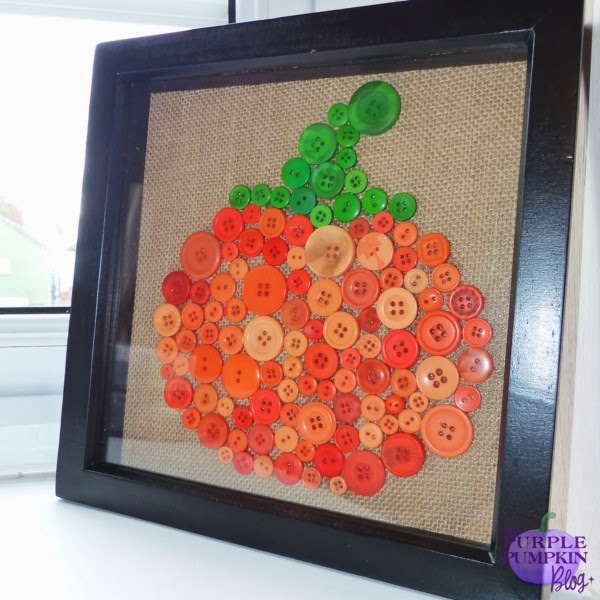
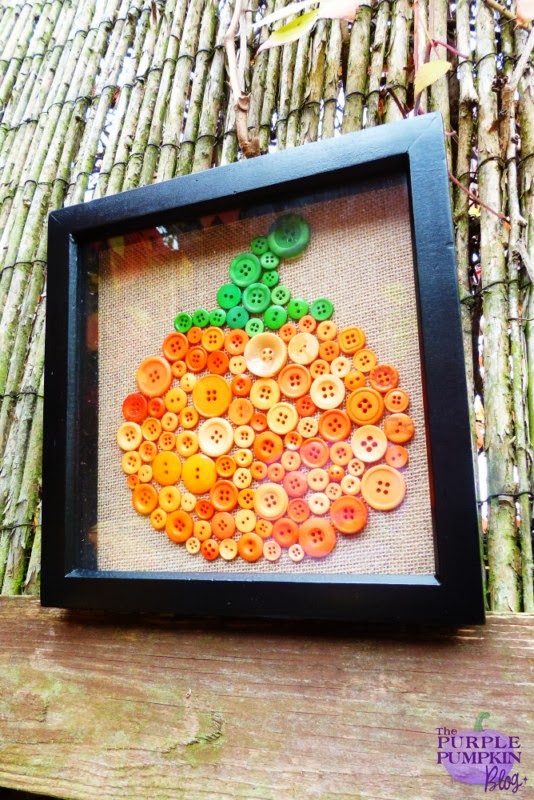
Button Pumpkin Shadow Box
Home » CREATE » Crafts » Pumpkin Crafts »Welcome to Day 21 of Crafty October – a month of Halloween ideas at The Purple Pumpkin Blog! Don’t forget to check out last year’s ideas if you need more inspiration.
Only 10 days to the big event and my favourite time of year – Halloween! Last week I took myself off to Hobbycraft to buy a circle cutter (mine had gone AWOL); sadly, they didn’t have one in stock, but I did end up buying quite a few *ahem* craft supplies to add to my ever growing stash! Amongst the bits and bobs that I bought were tubs of buttons and a shadow box. I combined these two things today and am sharing with you my Button Pumpkin Shadow Box!
I am weird – I love buttons! My grandfather was a tailor. Sadly, I didn’t know him (he died before I was born) but my mum kept all of his sewing bits and bobs, including a huge tin of buttons. When I was a child I used to love sitting there with this huge box of buttons, sorting through them and marvelling at all the different styles in the tin! When I saw that Hobbycraft were stocking buttons as a craft supply, I jumped at the chance to buy up lots of different colours to craft with…must have hit me with some childhood nostalgia memories!
Inspiration comes to me at the random of moments. I very rarely prepare my posts well in advance – if I’m posting today, it usually means I’m making something today to share with you. It does put a bit of pressure on me, but I seem to thrive on that! So I’m sitting here earlier, at the computer wondering what to make for today’s Crafty October post, and then the idea of a button picture came into my head.
I ransacked my supplies to find some unopened glue, as well as a jute bag, then there was also the shadow box I had bought and of course the buttons! Now, what to do with this little lot…
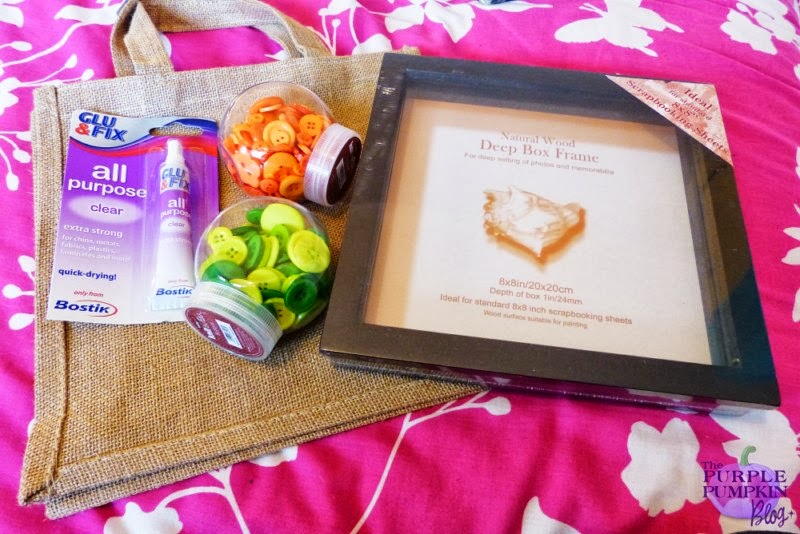
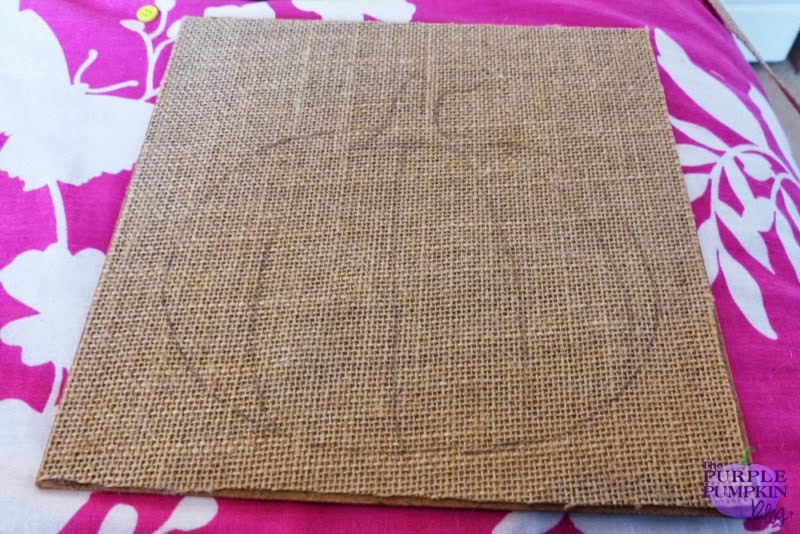
I started by cutting the jute bag (which is kind of like a hessian/burlap type material) to the size of the frame. I then stuck it to the backboard of the frame and sketched on with pencil the shape of a pumpkin. You may think this a waste of a bag…well, I wanted to have some texture to the background of my pumpkin, and plain paper just wasn’t going to do the job!
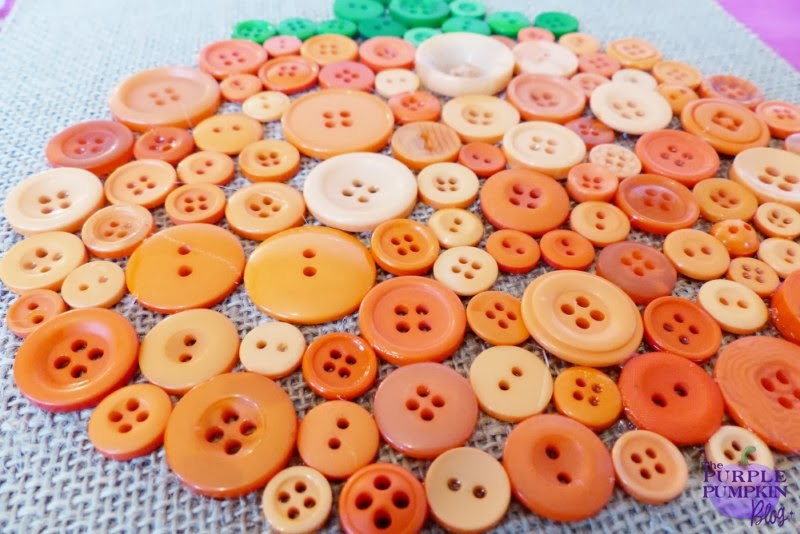
Following the lines roughly, I started to fill in the shape with orange buttons for the skin and green buttons for the stalk. I tried to keep to the ridge lines as best I could, glueing smaller buttons in place and then filling in each section, but feel free to fill in your pumpkin (or any other shape for that matter!) as you wish.
I found that spreading glue out first in sections and then placing the buttons on top was the easier way to affix the buttons to the jute. I then left the buttons to dry – I placed a heavy book on top to press them down to make sure they would stick.
When I was satisfied that they were all dried, I placed the backboard into the frame and voilà – a button pumpkin shadow box decoration for Halloween!
I love how this turned out, and can see me getting busy with button crafts again very soon!
I am hosting a month long Halloween Link Party to celebrate Crafty October and would love for you to share your Halloween ideas – crafts, recipes, costumes, parties…anything goes, as long as it is family friendly! It’s my favourite time of year, (as you may well know!) and I can’t wait to see what you link up!

Zing Zing Tree
October 22, 2013 @ 9:01 pm
That’s a rather classy pumpkin … love it! (aka BlueBearWood)
Michelle Ordever
October 23, 2013 @ 2:19 pm
Thank you! I really do love how this turned out :)
Sam
October 21, 2013 @ 10:28 pm
I absolutely love this! It is so cute xx
Michelle Ordever
October 22, 2013 @ 9:55 am
Me too! Turned out better than expected ^_^ xx
Melanie Edjourian
October 21, 2013 @ 5:49 pm
wow the kids would love to do something like that ;-)
Michelle Ordever
October 21, 2013 @ 6:12 pm
I’m sure they would! You don’t even have to make permanent pictures with them – just use buttons to fill in shapes :)
Melanie Edjourian
October 21, 2013 @ 6:21 pm
they love to glue things, including me lol ;-)
Michelle Ordever
October 21, 2013 @ 6:24 pm
lol!! Have fun!!