Pom Pom Ice Cream Cone Necklace Craft
Home » CREATE » Crafts »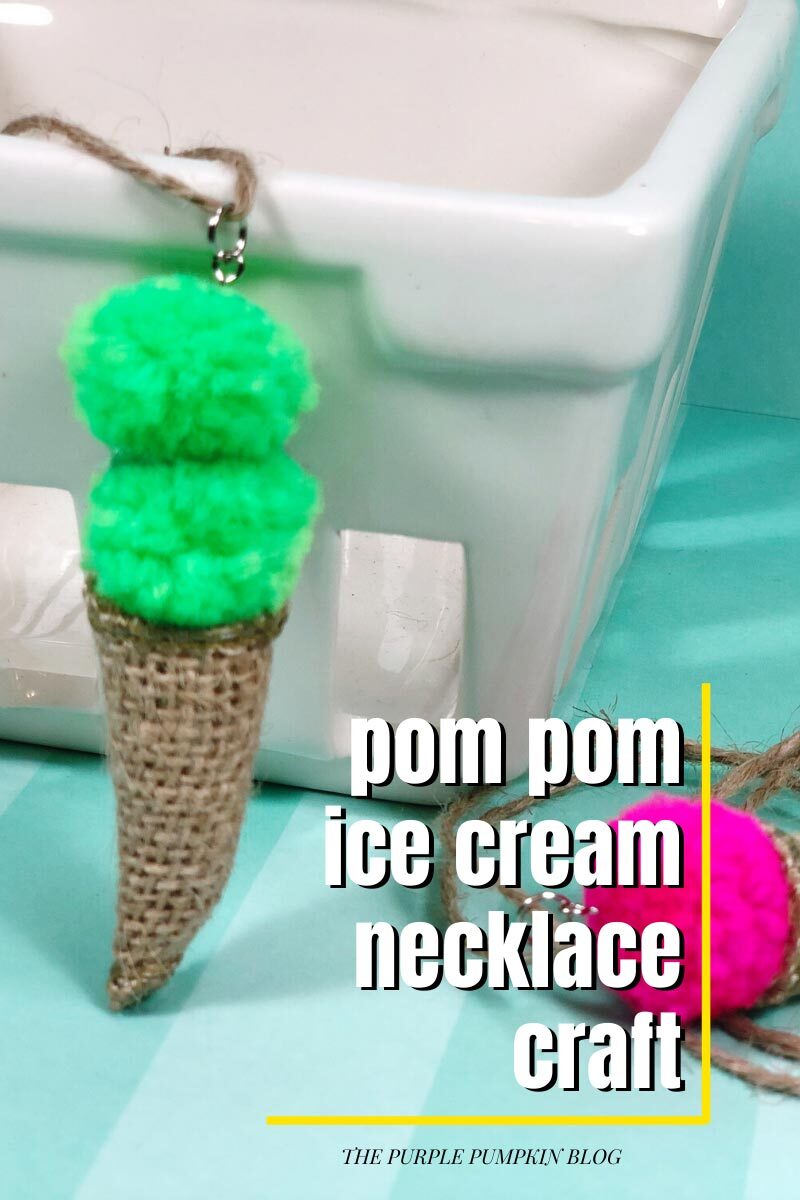
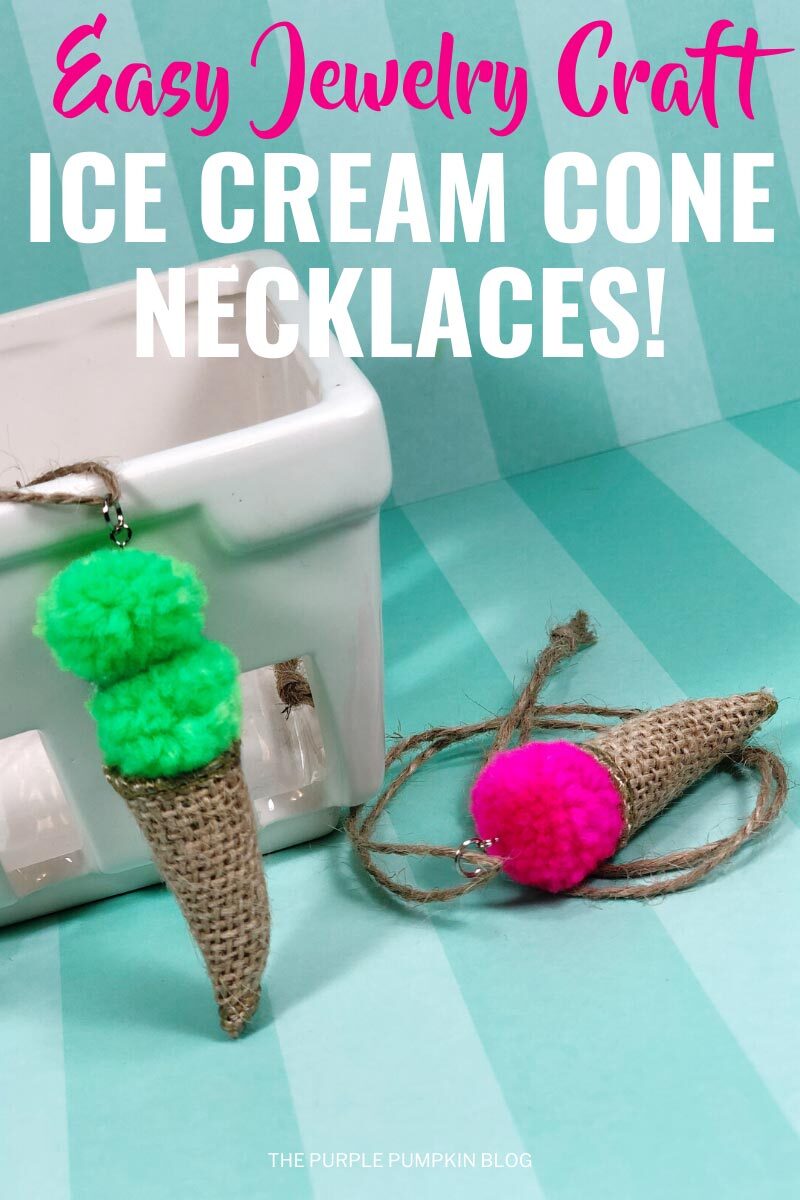
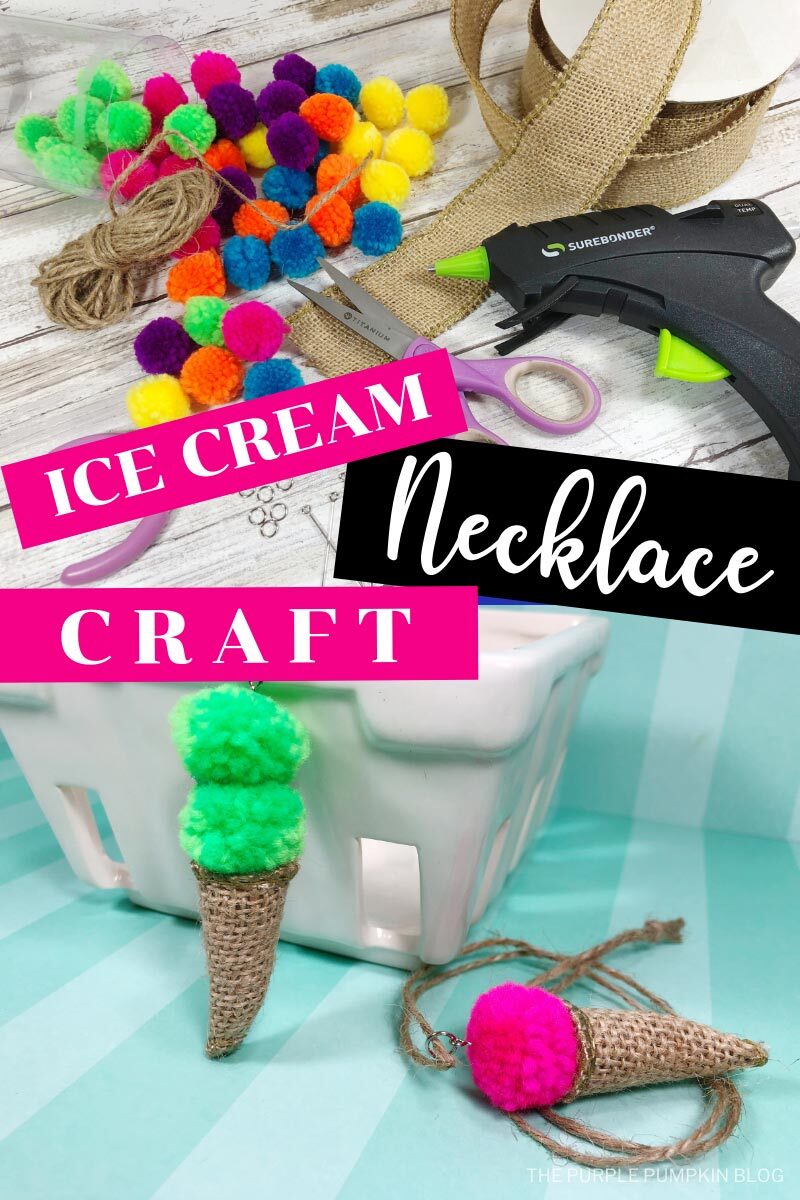

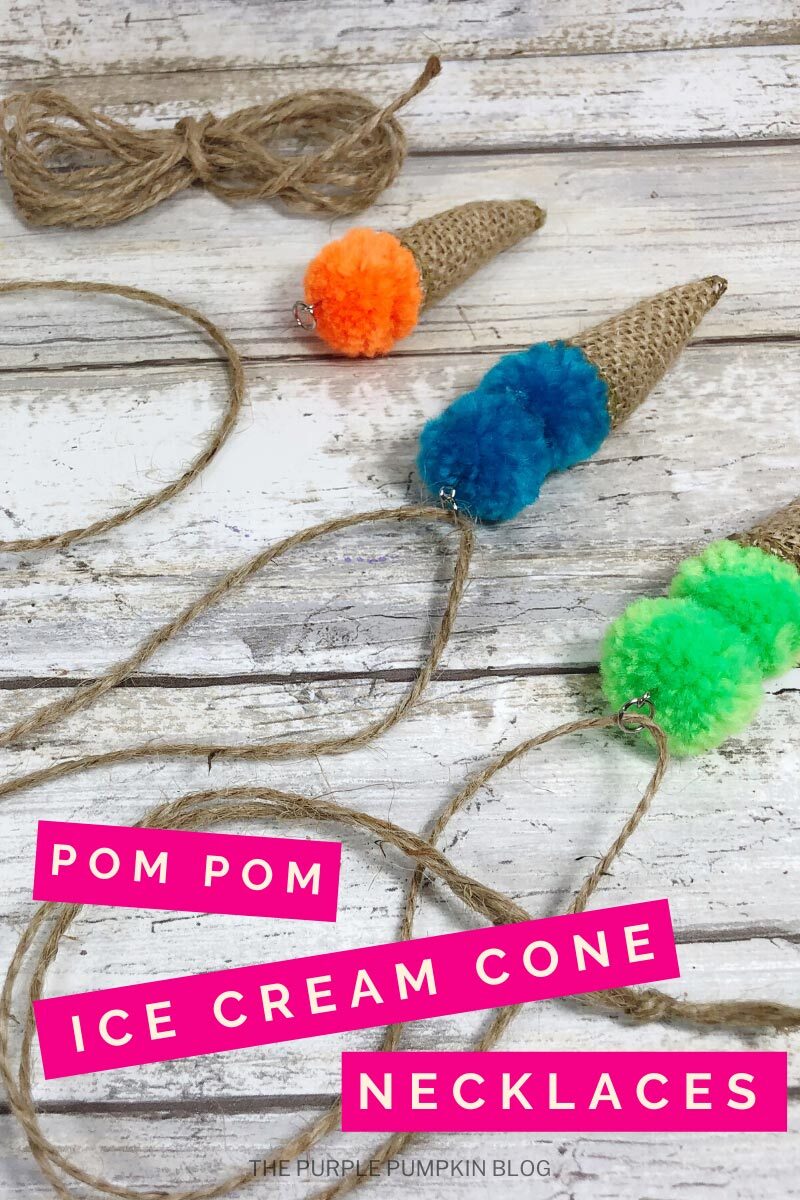
This DIY Ice Cream Cone Necklace craft made with burlap ribbon, brightly colored pom poms, jewelry fixings, and hot glue is a perfect Summer Camp craft! The weave in the burlap is very reminiscent of a waffle cone, so this is an awesome summer craft activity for an Ice Cream Party!

Affiliate Disclosure
We have included affiliate links to products and services related to this post.
We may earn a commission if you purchase after clicking on those links.
As an Amazon Associate, I earn from qualifying purchases.
Read Our Full Disclosure Policy and Privacy Policy
Ice Cream Cone Necklace Craft
The full list of materials, tools, and instructions are found in the printable tutorial card at the end of this post. I highly recommend reading the blog post all the way through before starting this project to ensure that you have everything required and understand the steps and timings involved.
Creating an Ice Cream Cone Necklace is easy, requires just a few supplies, and is so cute!
One of my favorite things about making this DIY necklace is that your imagination is limitless! Make them in different “flavors” with single, double, or even triple scoops on top of the cones! Best of all these pompom ice creams won’t melt!
When the summer weather doesn’t play nicely and the kids are bored while stuck inside, this is a fun craft for them to try (use a low-temp cool glue gun for kids). This craft just may stir some creative juices and before you know it, you will have a jewelry maker on your hands!
If your kids love all things ice cream, why not pair this fun craft with a meaningful activity like this ice cream kindness challenge? It’s a sweet way to spread kindness while enjoying a favorite treat theme!
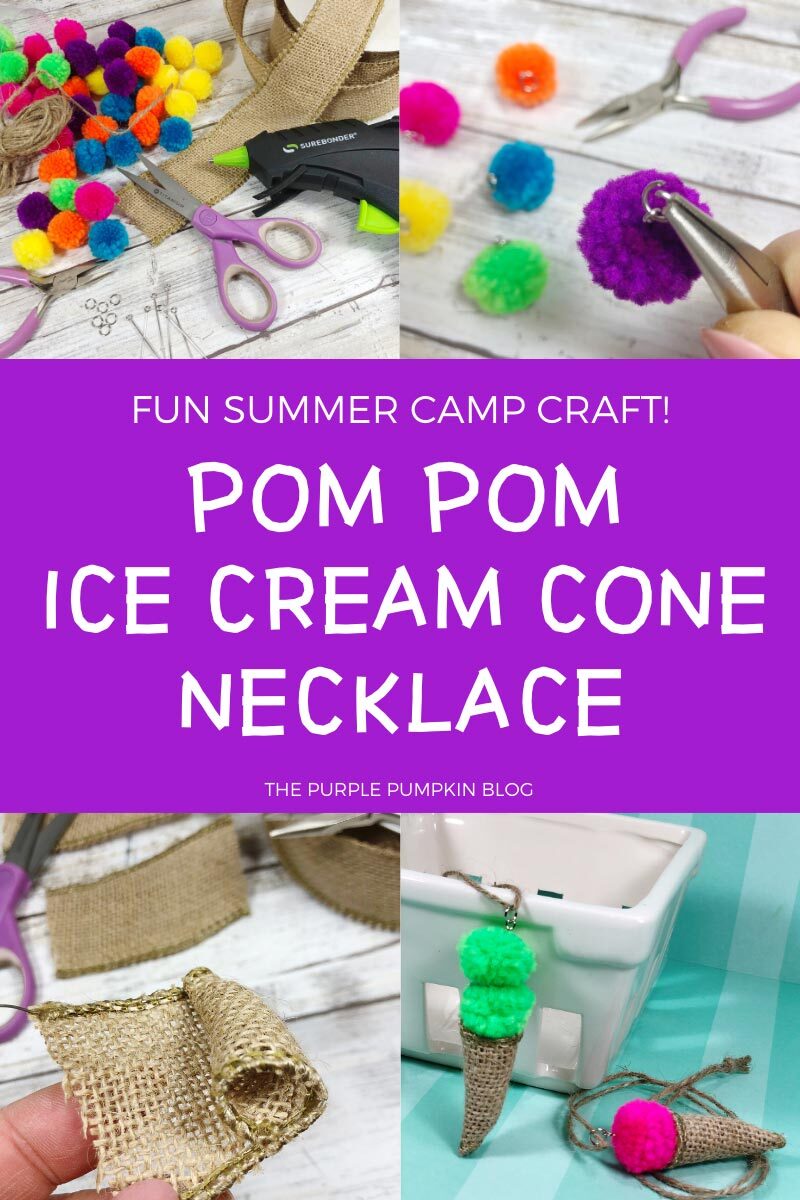
Materials & Tools Used in This Craft
You may have some standard craft supplies like scissors and glue at home already, however, for your convenience, I’ve linked any specialized materials and tools needed for this craft to Amazon below.
- Burlap Wired Ribbon – 1½” wide
- Pom Poms – assorted colors
- Twine – natural
- Jewelry Eye Pins
- Jewelry Jump Rings
- Hot Glue Gun – and Glue Sticks
- Needle Nose Pilers with Wire Cutters – two pairs
More Summer Crafts
Here are a few more fun summer crafts to add to your to-do list!
- Colorful Flip Flop Hello Sign – A Fun Easy Summer Craft!
- How To Make Star Sugar Scrub Bars
- Crepe Paper Ginger Flowers Craft
I’ve shared lots of great craft ideas on The Purple Pumpkin Blog over the years, in fact, there are 100+ crafts to make and do at home that you can try.
If you’re in the mood for more sweet creativity, this adorable Ice Cream Cone Craft is another fun project kids will love.
How Do I Make an Ice Cream Cone Necklace?
Just check out the how-to card below with full materials, tools, instructions and demonstration photos. You can print the card out too (don’t worry, the pics don’t print to save your ink!).
Save my Ice Cream Cone Necklace craft tutorial video to your Crafts To Make YouTube Playlists so that it’s always there when you need it – don’t forget to subscribe to my YouTube Channel while you are there!
Ice Cream Cone Necklace
Materials
- Burlap Wired Ribbon – 1 ½” wide
- Pom Poms – assorted colors
- Twine – natural
- Jewelry Eye Pins
- Jewelry Jump Rings
TOOLS
- Hot Glue Gun and Glue Sticks
- Needle Nose Pilers with Wire Cutters – two pairs
Instructions
- Cut a 2”/5cm section of burlap ribbon with scissors.
- Using needle nose pliers, roll the bottom wired edge into a tight coil. Continue to roll the wired ribbon forming the wider top of the cone with your fingers.
- Trim the cone to size with scissors and then secure the cut edge of the ribbon to the cone with glue, working carefully so as not to get burned. Press the blade of your scissors along The cut edge of the cone until the hot glue has cooled.
- Insert the jewelry eye pin into the center of the pom pom. Trim the bottom of the pin with wire cutters. Secure the cut end of the pin with a small amount of hot glue.
- Using two sets of needle nose pliers, open the jewelry jump rings by twisting at the opening in a front (right hand) and back (left hand) motion. Thread the eye pin loop onto the jump ring and close using the opposite motion.
- For some of the cones, stack two pom poms on top of each other and secure them with hot glue. Glue pom poms inside the cone.
- Cut 36”/91cm lengths of twine with scissors and then thread twine through the jump ring. Knot the necklace, so that it can easily be placed over the head of the wearer. Trim ends of twine with scissors.