Gorgeous Mickey Mouse Topiary Craft with Looped Ribbons
Home » CREATE » Crafts » Disney Crafts »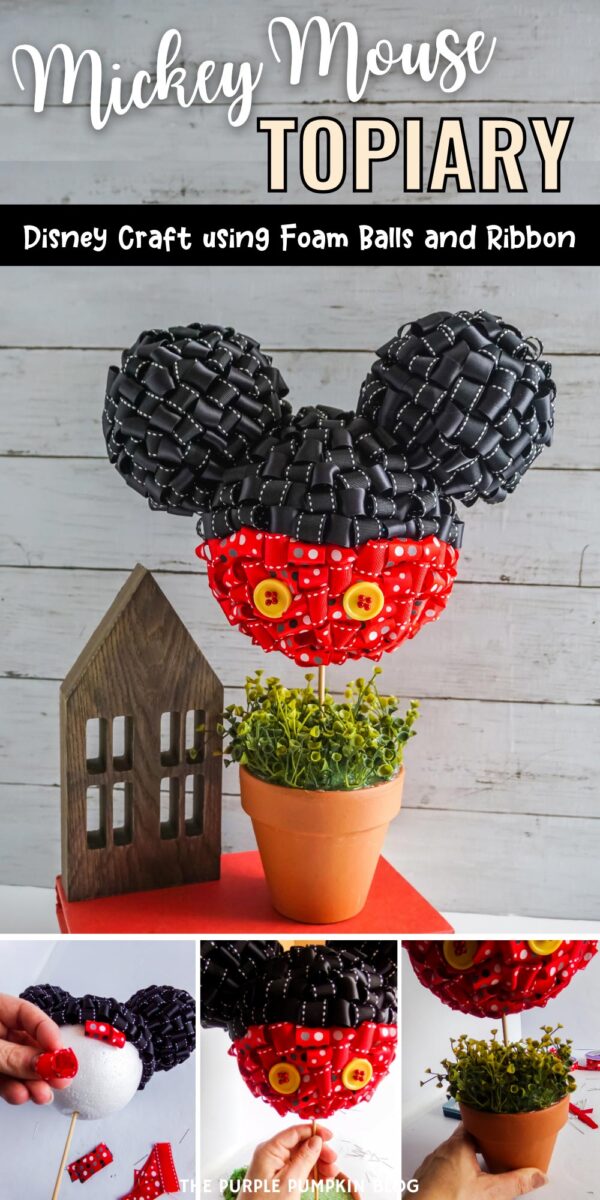
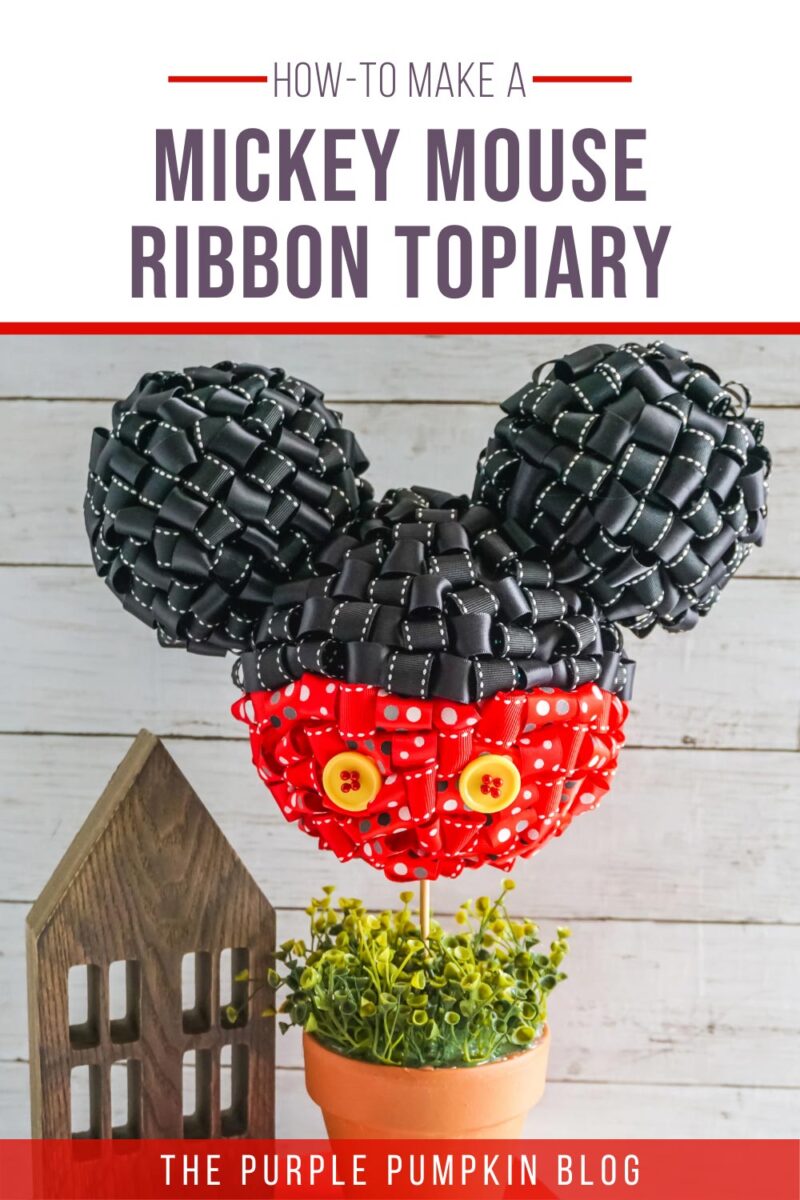
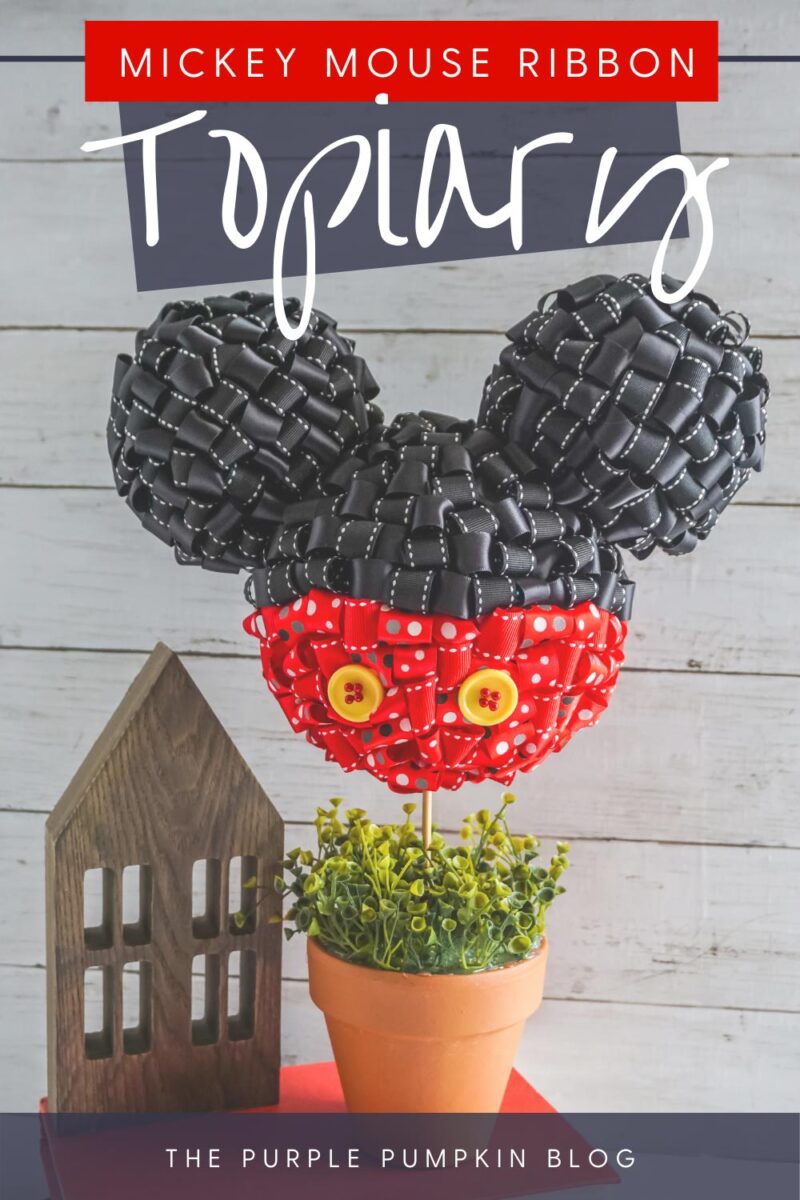
If you love Disney décor and crafts you are going to just love making this Mickey Mouse Topiary! Using looped ribbons and lots and lots of pins, you can make this gorgeous Mickey-head topiary in an afternoon! So if you can’t get to Epcot’s Flower & Garden Festival to see the topiaries, you can make your very own at home instead!

Affiliate Disclosure
We have included affiliate links to products and services related to this post.
We may earn a commission if you purchase after clicking on those links.
As an Amazon Associate, I earn from qualifying purchases.
Read Our Full Disclosure Policy and Privacy Policy
Mickey Mouse Topiary
The full list of materials, tools, and instructions is found in the printable tutorial card at the end of this post. I highly recommend reading the blog post all the way through before starting this project to ensure that you have everything required and understand the steps and timings involved.
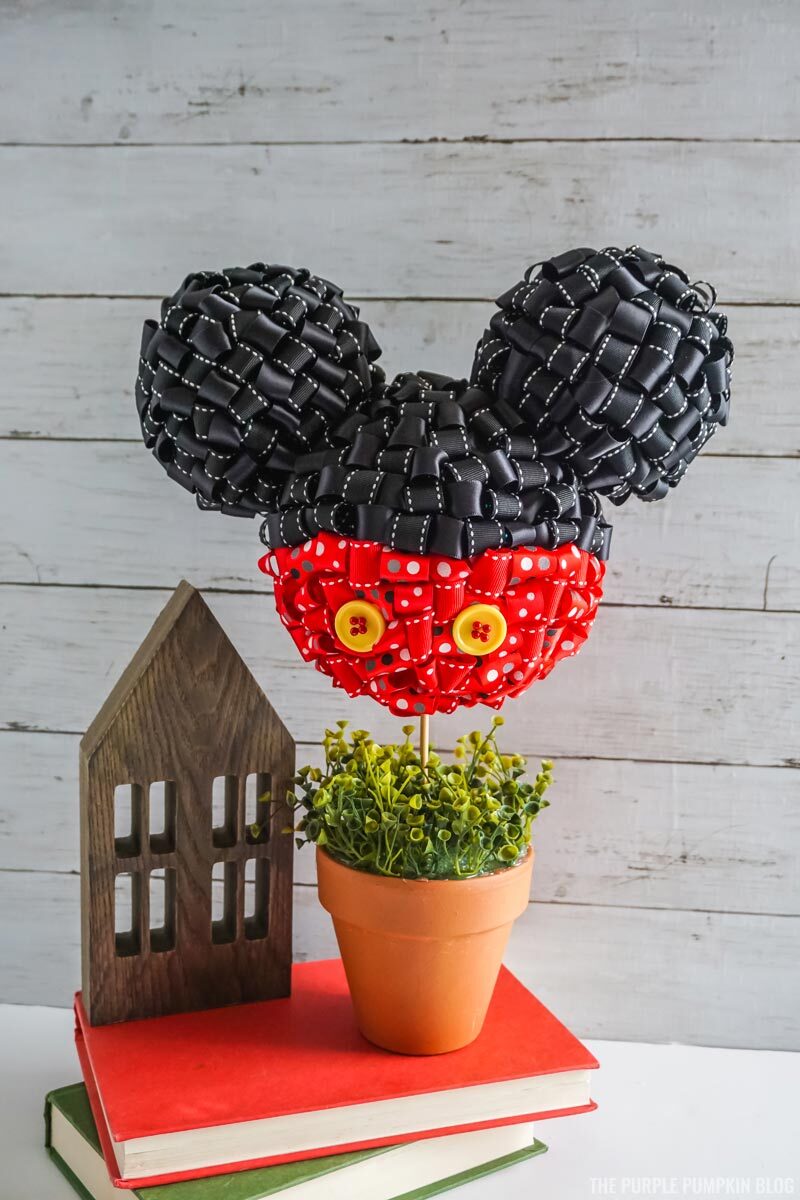
Add some Disney magic to your home with this awesome Mickey Mouse topiary, that your friends and family will be asking where you bought it from!
You won’t help but feel proud when you say that you actually MADE it!
It’s one of those craft projects that looks really difficult. However, once you know how, it’s actually pretty simple – it just takes a little time and patience.
Many, many years ago I made a Felt Ruffle Pumpkin which uses pretty much the same technique with felt instead of ribbon. And I still have that pumpkin, so it’s a type of craft that is built to last!
So read on to see what supplies you need and how you make this awesome Mickey topiary!
Another great thing about this craft idea is that it’s budget-friendly using supplies you may already have, or can be purchased at a dollar store.*
Cheap Craft Supplies
*If you’re in the USA, check out your local Dollar Store or Dollar Tree; and if you’re in the UK, the Poundshop, The Range, Wilko, and Baker Ross are great places to shop for cheap and inexpensive craft supplies. The rest of the world reading this – I don’t know every cheap store – sorry! But hunt the ones out in your location for crafting bargains!
Materials & Tools Used in This Craft
The complete list of supplies, which may include basic crafting items that you already have can be found in the tutorial card at the end of this post. For your convenience, I’ve linked any notable materials and tools needed for this project to Amazon below.
- 3-inch Foam Balls – 2 for Mickey’s ears.
- 5-inch Foam Ball – 1 for Mickey’s head.
- ¼-inch Dowel
- Toothpicks
- 4-inch Terra Cotta Pot
- Green Foam – to fill the pot, also known as floristry foam or Oasis.
- Faux Greenery Plants – to Cover Foam in Pot
- ½-inch Red Ribbon – 12 yards/11m – you can use any design or solid red ribbon you like, or even mix designs like we did.
- ½-inch Black Ribbon – 12 yards/11m – you can use any design or solid black ribbon you like, or even mix designs like we did.
- ½-inch Yellow Buttons
- Sewing Pins – or dressmaker’s pins. You will need 100-150!
More Disney Crafts
Looking for more Disney crafts to make? Here are some more for you to check out:
- Disney-Inspired Mickey & Minnie Photo Frames Craft
- Mickey & Minnie Love Signs Craft – Cute Home Decor for Valentine’s Day!
- Minnie & Mickey Mouse Mason Jars Disney Craft!
I’ve shared lots of great craft ideas on The Purple Pumpkin Blog over the years, in fact, there are 100+ crafts to make and do at home that you can try.
Mickey Mouse Topiary Tips
- The instructions tell you to insert and secure the dowel in place then add the foam balls for Mickey’s head and ears, before adding the ribbons. However, you could add the foam balls to the dowel first, decorate with ribbon and then glue them into the pot. The choice is up to you and how easy you find it.
- In either case, make sure you use some glue to secure everything in place.
- Speaking of glue, use a cool glue gun, as hot glue has a habit of melting foam balls! I suggest one with a dual temperature so that you always have the correct type of glue to hand.
- If possible, buy pins that have got red and black ends. This will blend them in with the ribbon, and you can also use the red-ended ones to pin the buttons onto the topiary.
- You can use solid-color ribbon, or a mixture of patterns (polka dots feel super Disney to me!) to decorate your topiary.
- Place them randomly in any direction, or be more methodical and create repeating patterns if you prefer.
- Of course, red and black are classic Mickey Mouse colors, but you could use any colors that you like! It’s Walt Disney World’s 50th anniversary in 2021, so why not go traditional with gold colors? Rose gold and yellow gold to match the new Cinderella Castle paint job would look amazing!
- Why not make a Minnie Mouse topiary to accompany Mickey? Make in exactly the same way but create a large bow to sit on top between the ears.
- The Mickey-head shape is classic and can be used for all of your favorite characters (a bit like Mickey/Minnie ears!), so why not use blue, white, and yellow ribbon to make Donald, or orange, blue, and green to make Goofy? The possibilities are endless!
How Do I Make a Mickey Mouse Topiary?
Just check out the how-to card below with full materials, tools, and instructions. Any demonstration photos do not print out to save your ink.
Mickey Mouse Topiary Craft with Looped Ribbons
Materials
- 2 3″/7.5cm Foam Balls
- 1 5″/12.5cm Foam Ball
- 1 ¼”/½cm Wooden Dowel
- 4 Toothpicks
- 1 4″/10cm Terracotta Pot
- ⅓ Green Floristry Foam Brick approx, to fill the pot
- Faux Greenery/Plants/Moss to cover the foam in the pot
- 12 yds/11m ½”/1cm Red Ribbon, solid color or patterned
- 12 yds/11m ½”/1cm Black Ribbon, solid color or patterned
- 2 ½”/1cm Yellow Buttons
- 100-150 Sewing/Dressmaker’s Pins – with red and black ends if possible
Instructions
- Cut the foam to fill the terracotta pot. Place the foam into the pot, and glue it in place with a glue gun.
- Press the dowel at least 3"/7.5cm into the foam in the pot and add some glue to secure it in place.
- Slide the large foam ball about 2"/5cm deep onto the dowel, gluing it to secure it in place.
- Slide two toothpicks halfway into the large foam ball on either side of the ball, about 6"/15cm apart. Add hot glue to ensure that the toothpick doesn’t go any deeper.
- Press the two smaller balls onto the toothpicks, all the way to touch the large one. You now have Mickey’s head and ears!
- Cut the black ribbon into 2"/5cm lengths.
- Roll a 2"/5cm length of black ribbon into a circle, overlapping the two ends by about ¼"/½cm.
- Slide a pin from inside the loop, through the two ends of the ribbon, then press the ribbon loop into the upper half of the large ball or either of the ears. Press the pin all the way into the foam ball to ensure that the ribbon loop is secure.
- Repeat making black looped ribbons, filling the entire upper half of the large ball and the entire surface of both of the ears.
TIP! Work across the midline of the large ball in a clean row, then worked up from there. - When the top half and the ears of the topiary are complete it’s time to fill in the red! Cut the red ribbon into 2"/5cm lengths.
- Roll a 2"/5cm length of red ribbon into a circle, overlapping the two ends by about ¼"/½cm.
- Slide a pin from inside the loop, through the two ends of the ribbon, then press the ribbon loop into the lower half of the large ball, working along the black edge and down. Press the pin all the way into the foam ball to ensure that the ribbon loop is secure. Continue until the lower half is completely covered.
- Slide red pins through the holes in your buttons, then press the pins into the bottom half of the large foam ball, about 3"/7.5cm apart.
- Use a glue gun to attach faux greenery on top of the floristry foam in the pot.
- Display your Mickey Mouse Topiary with pride and have a magical day!