Mickey & Minnie Love Signs Craft – Cute Decor for Valentine’s Day!
Home » CREATE » Crafts » Valentine's Day Crafts »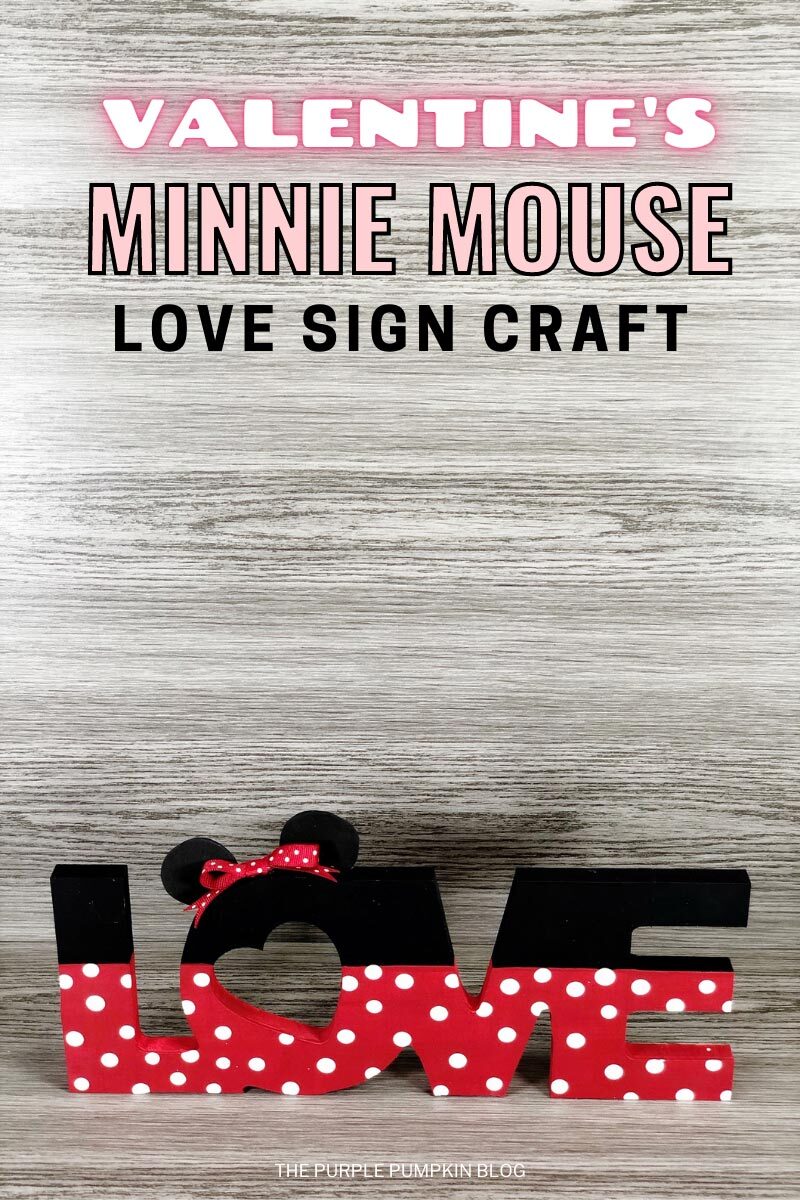
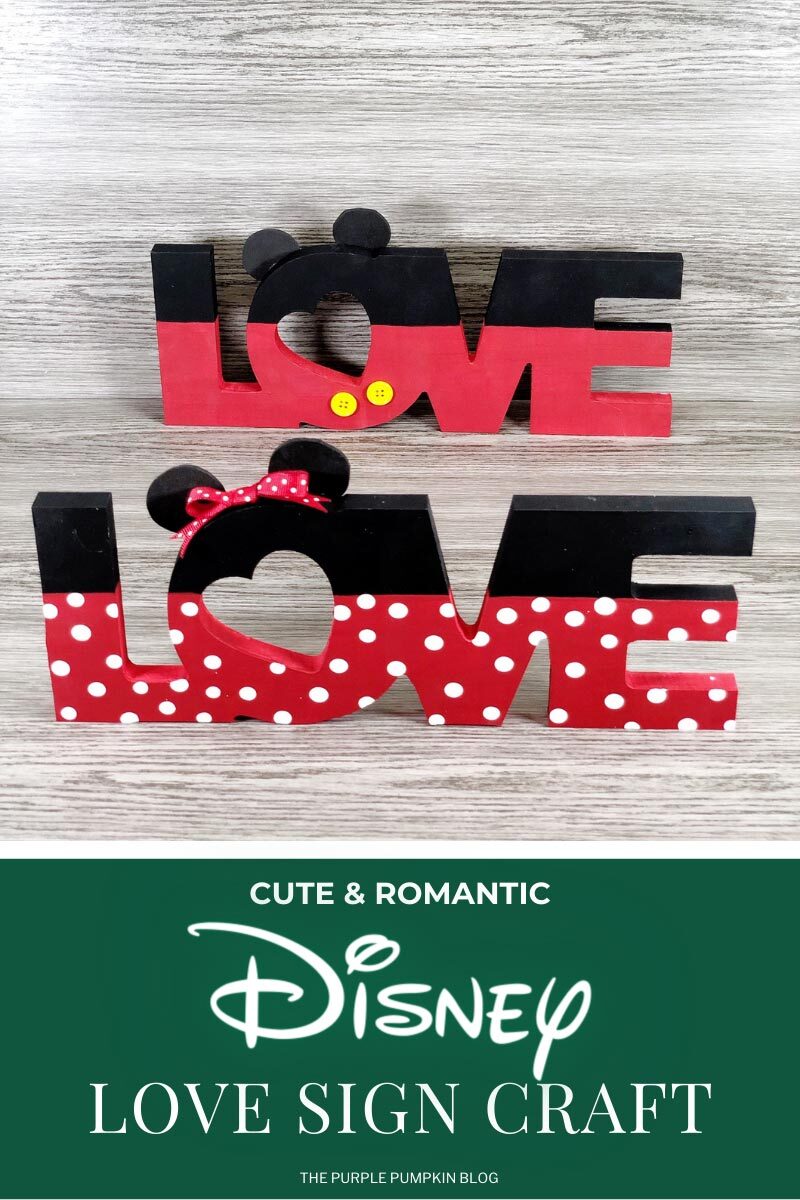

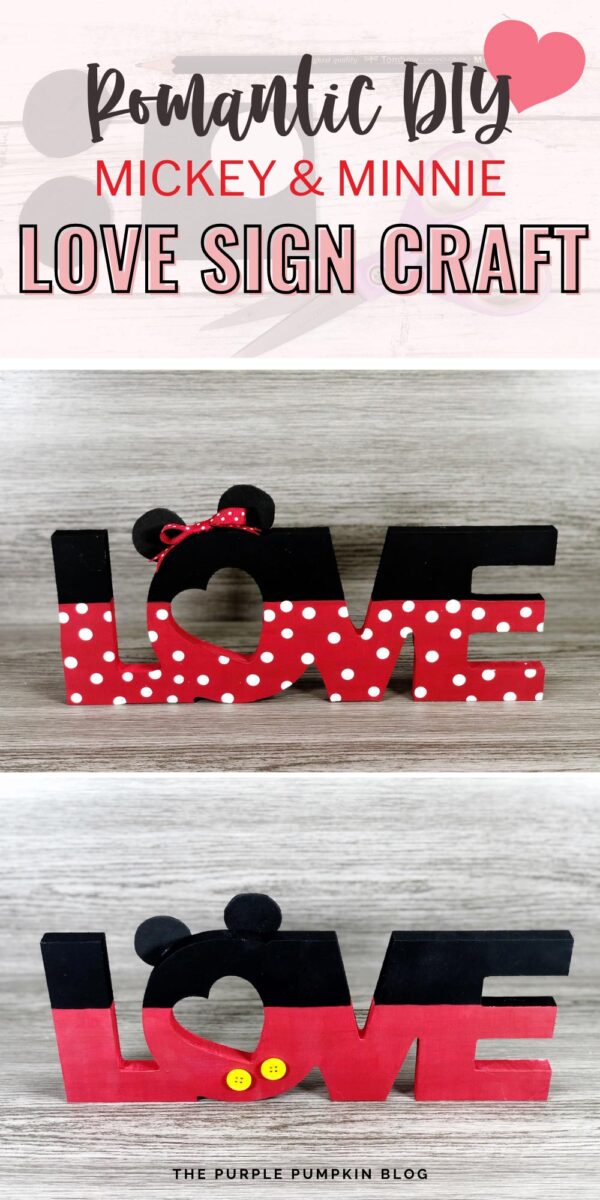
Love and Disney go hand in hand and that’s what makes these Mickey and Minnie Love Signs Craft perfection for Valentine’s Day! Homemade gifts are always a great way to show someone how much you love them – and without breaking the budget, since this Valentine’s craft is made from inexpensive supplies!

Affiliate Disclosure
We have included affiliate links to products and services related to this post.
We may earn a commission if you purchase after clicking on those links.
As an Amazon Associate, I earn from qualifying purchases.
Read Our Full Disclosure Policy and Privacy Policy
Mickey and Minnie Love Signs Craft
The full list of materials, tools, and instructions are found in the printable tutorial card at the end of this post. I highly recommend reading the blog post all the way through before starting this project to ensure that you have everything required and understand the steps and timings involved.
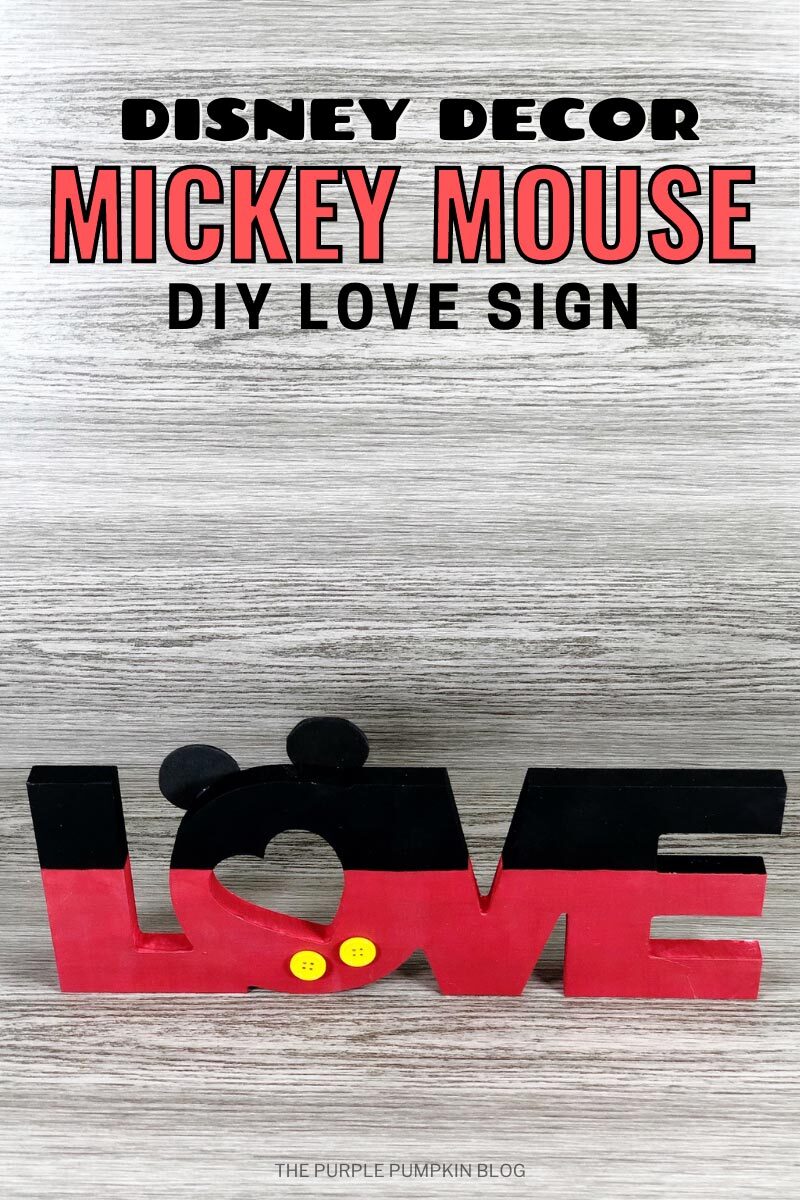
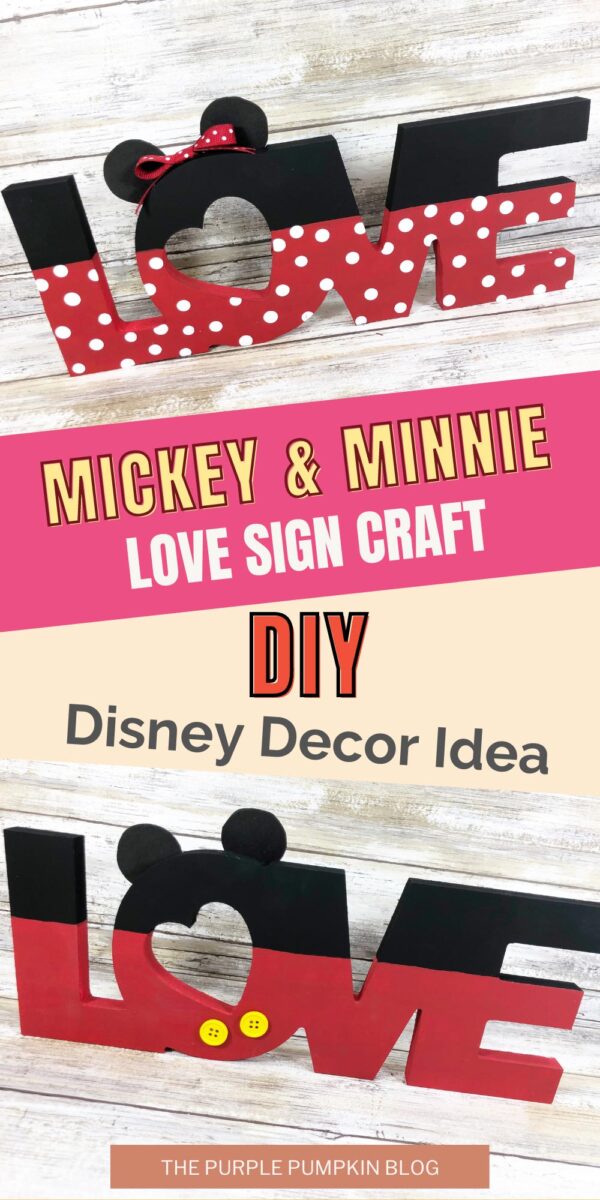
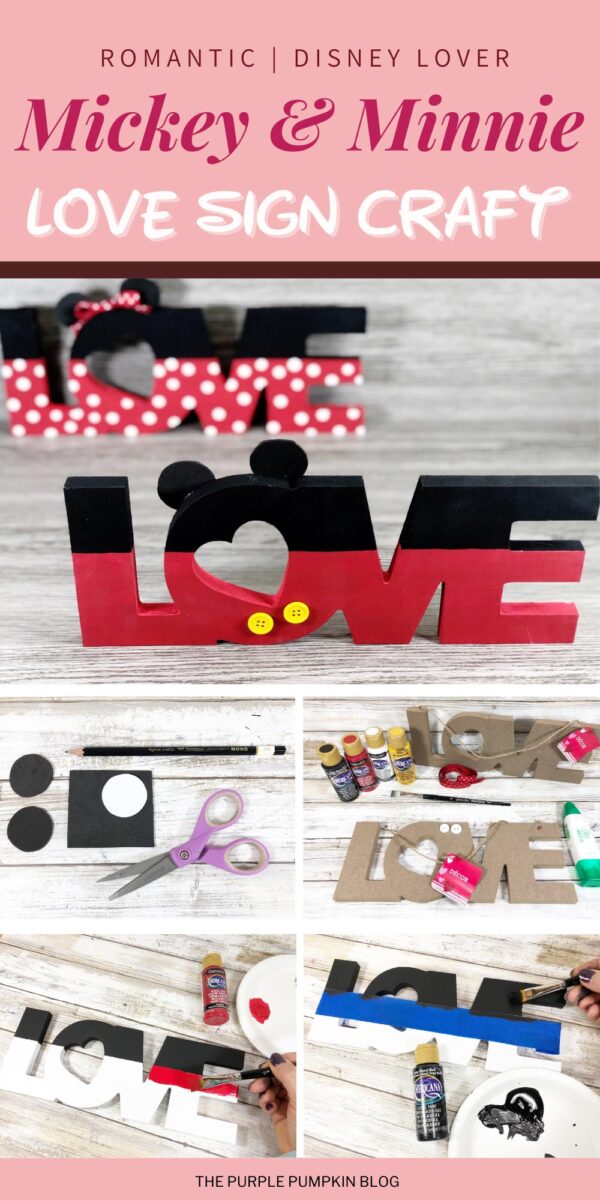
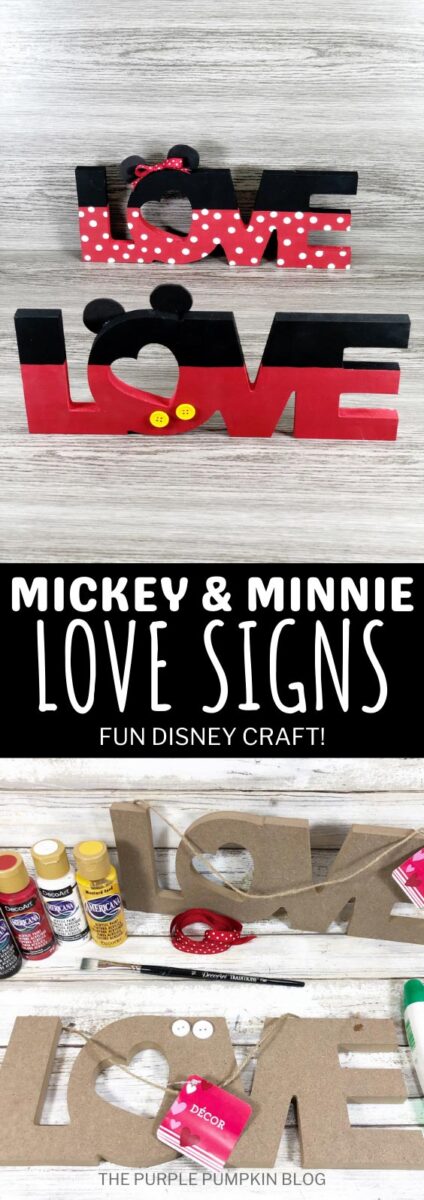
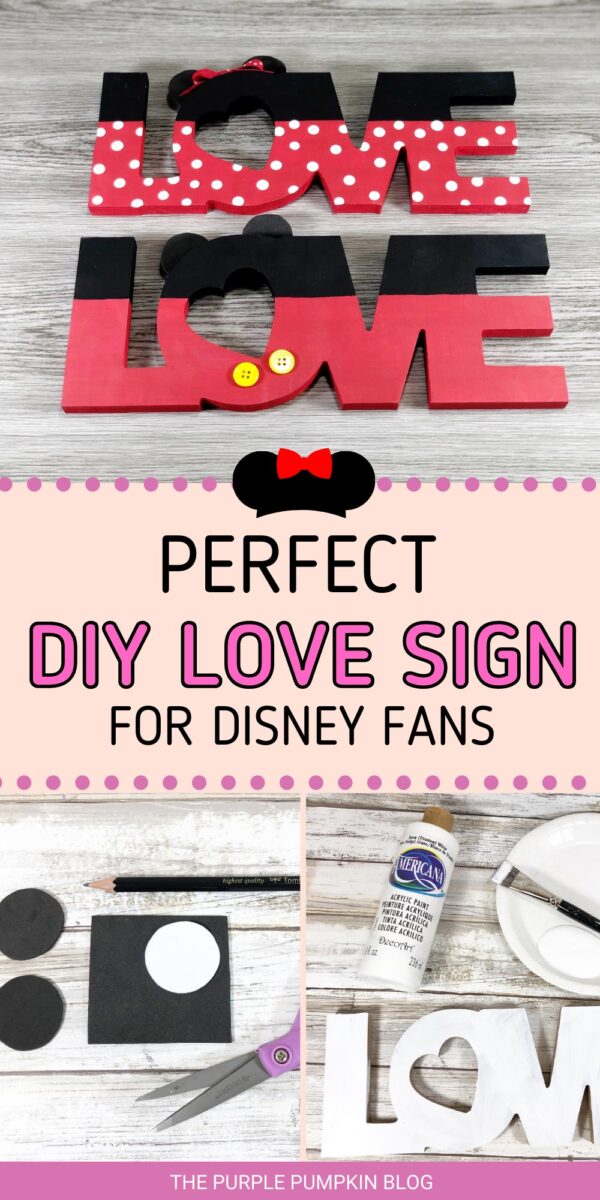
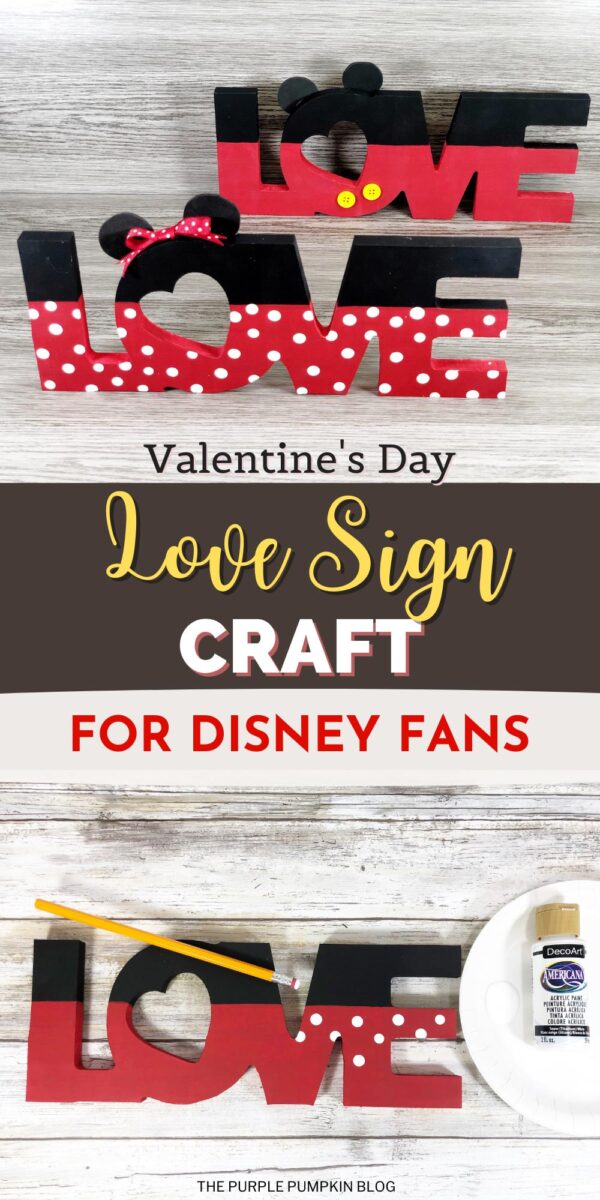
If you’re a Disney fan (like me!) you’re going to have so much fun making these LOVE signs which are decorated to resemble Mickey and Minnie.
Wooden LOVE signs and some simple craft supplies transform into a lovely reminder of the most magical couple, Mickey, and Minnie Mouse!
They would be the perfect décor for your mantle or in the kiddos bedroom. Or maybe make them as a gift for the Disney lover in your life!
If you’re in the USA, check out your local Dollar Store; and if you’re in the UK, the Poundshop, The Range, Wilko, and Baker Ross are great places to shop for cheap and inexpensive craft supplies. The rest of the world reading this – I don’t know every cheap store – sorry! But hunt the ones out in your location for craft bargains!
Materials & Tools Used in This Craft
For your convenience, I’ve linked any specialized materials and tools needed for this craft to Amazon below. The full list of supplies, which may include basic crafting items that you already have can be found in the tutorial card at the end of this post.
- Wooden LOVE Sign – you will need two, one for Minnie Mouse and one for Mickey Mouse. The signs shown in our photos are from the Dollar Store, but you can use any style of sign that you like.
- Yellow Buttons – but you could paint white buttons if you have them already.
- Red & White Polka Dot Ribbon
- Craft Paint – you will need white, black, and red.
- Black Craft Foam
- Painter’s Tape – also known as masking tape.
More Disney Crafts
Once you’ve made these Mickey & Minnie signs you’ll be wanting to make more Disney crafts – here are some more for you to check out:
- Minnie & Mickey Mouse Mason Jars Disney Craft!
- Disney Villain Maleficent’s Diablo Raven Wreath for Halloween
- John Smith & Pocahontas Craft – Paper Ornaments
I’ve shared lots of great craft ideas on The Purple Pumpkin Blog over the years, in fact, there are 100+ crafts to make and do at home that you can try.
Mickey & Minnie Love Signs Craft Tips
- A simple but cute addition to these signs would be to add a photo in the heart-shaped center of the “O” in these Micky and Minnie Love Signs.
- Want to make these but can’t find wooden signs? Type out the word “LOVE” in a document on your computer and print it out. Use it as a template to cut out a cardboard sign instead and follow the directions. You could add twine or ribbon to hang it up or add a cardboard hinge at the back to make it stand up.
- Why not make other Disney couples using different colors? White and Blue/White and Pink for Donald and Daisy for example.
How Do I Make Mickey & Minnie Love Signs?
Just check out the how-to card below with full materials, tools, instructions and demonstration photos. You can print the card out too (don’t worry, the pics don’t print to save your ink!).
Mickey & Minnie Love Signs
Materials
- 2 Wooden LOVE Signs
- 2 Small Yellow Buttons
- Red with White Polka Dots Ribbon
- White Craft Paint
- Red Craft Paint
- Black Craft Paint
- Black Craft Foam
TOOLS
- Pencil with New Eraser
- Painter’s Tape (Masking Tape)
Instructions
- Remove tags from wooden LOVE signs. Since these signs are made of a wooden particle board, basecoat the front, back, and sides with white acrylic craft paint. Let dry and apply a second coat, if necessary. The white basecoat will allow the red and black colors to pop.
- Using the center of the letter “E” apply painter’s tape across the front and sides of each sign. Paint the top section of both signs with black acrylic craft paint. Apply a second coat, if necessary, and then carefully remove the painter’s tape. Set both signs aside to dry.
- Carefully topcoat the front, back, and sides of the bottom section of each sign with red acrylic craft paint. You could use painter’s tape again here or freehand it. Apply a second coat, if necessary, and set aside to dry.
- Create polka dots with white acrylic craft paint and a new pencil eraser over the red section of the Minnie Love sign. Dip the pencil eraser into white craft paint and dab it onto the sign in a random fashion. This will give consistent size polka dots. Set aside to dry.
- To make the ears, create a one-inch circle template with a scrap of paper. Use a craft punch, circle template, cookie-cutter, or anything you can find around the house. Trace the one-inch circle onto black craft foam four times, and then cut out with scissors.
- To assemble Mickey, attach two craft foam ears to the top of the “O” and two yellow buttons to the bottom with a glue gun and glue sticks.
- To assemble Minnie, attach two craft foam ears to the top of the “O” with a glue gun and glue sticks. Tie the red and white polka dot ribbon into a bow, trimming ends to finish. Glue the bow to the top of the “O” in the center of the two ears.