How To Make Layered Hearts Valentines Soap Bars (Melt & Pour)
Home » CREATE » Crafts » Homemade Cosmetics » Soap Making »
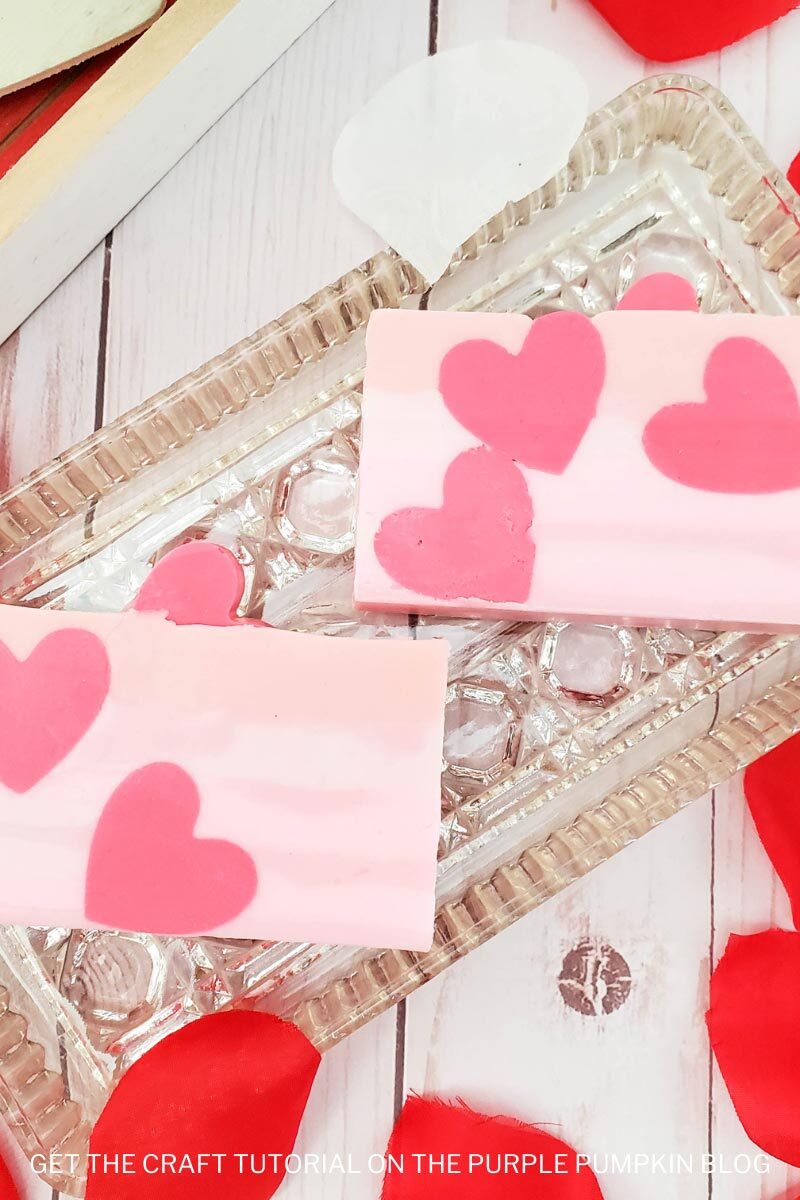
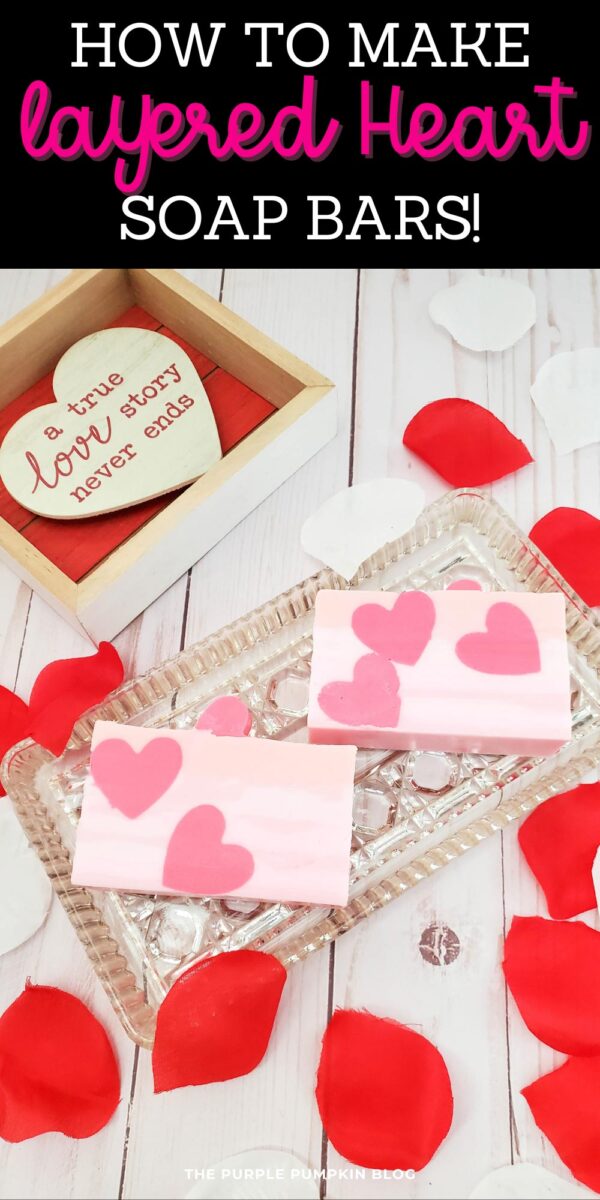
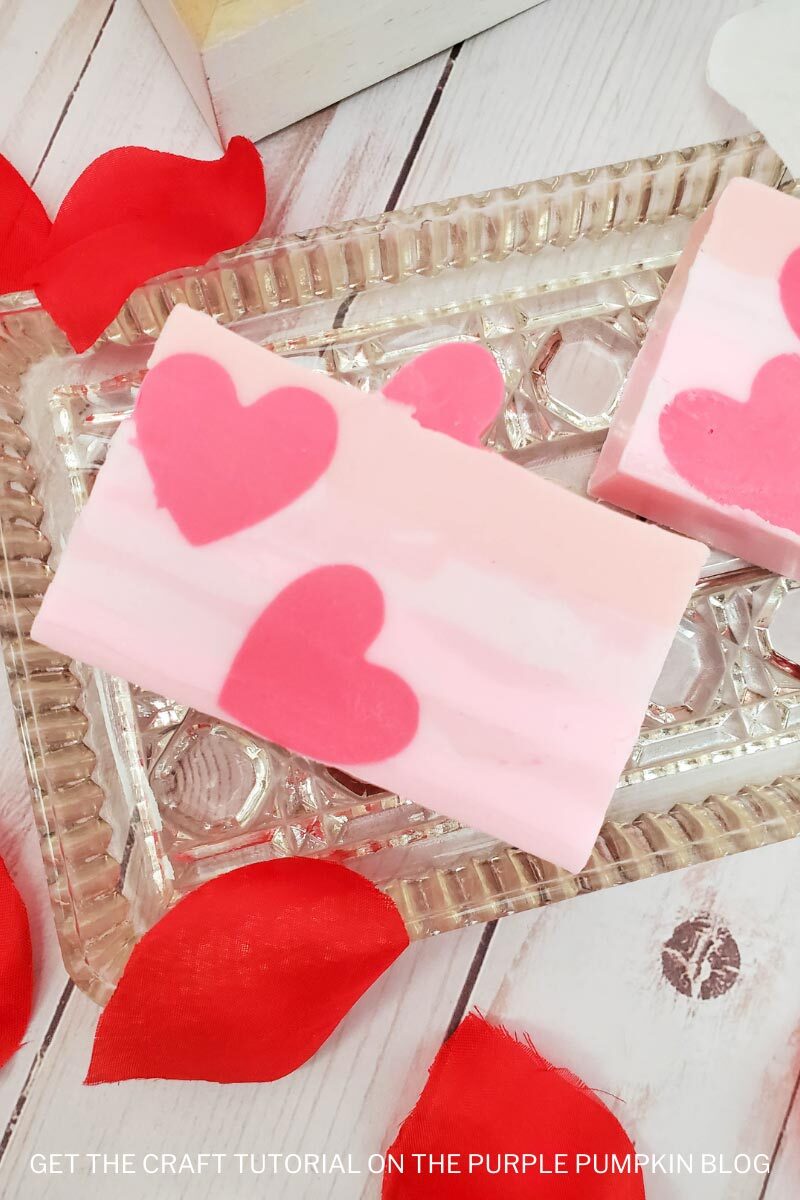
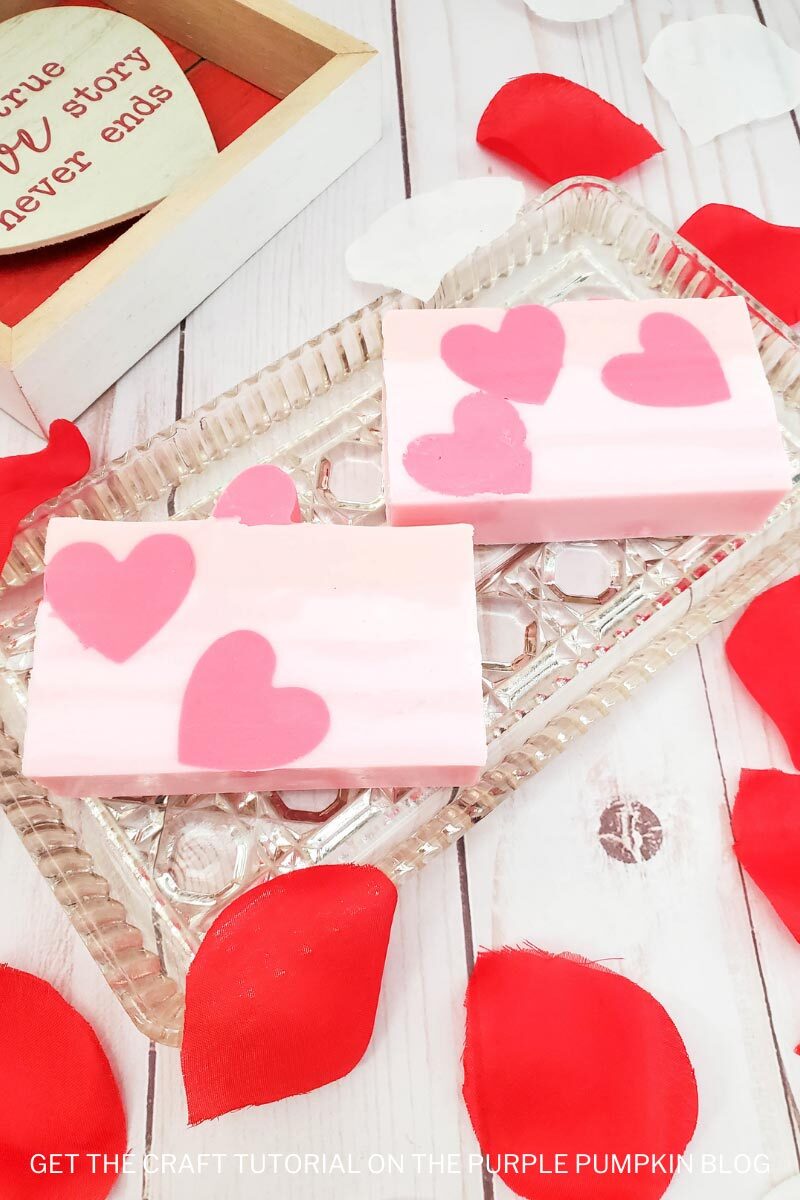
These Layered Hearts Valentines Soap Bars are such a cute DIY for Valentine’s Day. Easily make this homemade soap in just a few steps using melt and pour soap. The different colors in the layering effect and placement of the hearts make each bar one of a kind!

Affiliate Disclosure
We have included affiliate links to products and services related to this post.
We may earn a commission if you purchase after clicking on those links.
As an Amazon Associate, I earn from qualifying purchases.
Read Our Full Disclosure Policy and Privacy Policy
Layered Hearts Valentines Soap Bars
The full list of materials, tools, and instructions is found in the printable tutorial card at the end of this post. I highly recommend reading the blog post all the way through before starting this project to ensure that you have everything required and understand the steps and timings involved.
Valentine’s Day is coming up and if you still haven’t figured out what to get your loved one, why not make them something special this year?
Making soap using melt and pour soap base is so easy! It really is as easy as melting cubes of the soap in the microwave, adding coloring and scent, and pouring into molds.
The tutorial card takes you step-by-step through the process, and once you make your first bar of soap you’ll want to make more!
You will need to allow up to 24 hours for the large block of soap to set before cutting into bars, but the process of making the soap doesn’t take too long.
Package the bars into cello bags, or place them in a pretty box to give to your valentine (or keep them for yourself!).
Materials & Tools Used in This Craft
The complete list of supplies, which may include basic crafting items that you already have can be found in the tutorial card at the end of this post. For your convenience, I’ve linked any notable materials and tools needed for this project to Amazon below.
- Goat’s Milk Melt and Pour Soap Base
- 4” Square Soap Mold
- Heart Candy Mold
- Red, Pink, Blush, and Rosy Mica Powder
- 3 Microwave-Safe Measuring Cups or Bowls – for melting the soap
- Wooden Craft Sticks – for stirring the soap
- Rubbing Alcohol – place in a spray bottle to spritz over soap to disperse bubbles, and to help the hearts shapes stick.
- Soap Cutter – for cutting the 4″ mold into soap bars
- Soap Fragrance – optional, use a scent you enjoy
More Valentines Crafts
Looking for more crafts to make for Valentine’s Day? Here are some more for you to check out! Just right-click and open a new tab to read next!
- Valentine’s Day Gnome Craft + Free Printable Template
- Mickey & Minnie Love Signs Craft – Cute Home Decor for Valentine’s Day!
- Decorated DIY Valentine’s Day Candle Craft
I’ve shared lots of great craft ideas on The Purple Pumpkin Blog over the years, in fact, there are 100+ crafts to make and do at home for you to try!
How Do I Make Layered Hearts Valentines Soap Bars?
Just check out the how-to card below with full materials, tools, and instructions. Any demonstration photos do not print out to save your ink.
Layered Hearts Valentines Soap Bars
Materials
- 1 ¾ lb 800g goat’s milk melt and pour soap base
- ½ tsp each of red pink, blush, and rosy mica powder
- Soap Fragrance optional – use any scent you enjoy
TOOLS
- [4” square soap mold]
- [Heart candy mold]
- [3 microwave-safe measuring cups or dishes]
- [Wooden craft sticks]
- [Spray bottle with rubbing alcohol]
- [Soap cutter]
Instructions
- Cut the soap base into 1-inch chunks.
- Put 8 cubes of the soap base into a measuring cup and heat in the microwave for 30 seconds. Remove and stir very well for about 30 seconds. If the soap base is not quite melted yet, heat for an additional 30 seconds, then remove and stir until melted.
- Add the red mica powder and stir until the color is solid. Add a few drops of fragrance if using.
- Pour into 2 of the heart soap molds, filling 20 of the heart cavities.
- Allow soap to sit undisturbed for about 1 hour.
- Once set, unmold all 20 heart soap bars.
- Divide the rest of the soap base into 3 measuring cups or dishes and heat according to step 2.
- Once completely melted, stir one of the remaining colors into each of the melted soap bases, and stir well until a solid color has formed. Leave to cool slightly, as you do not want to pour hot soap.
- Pour a small amount of one color into the 4” square soap mold, just enough to coat the bottom a bit.
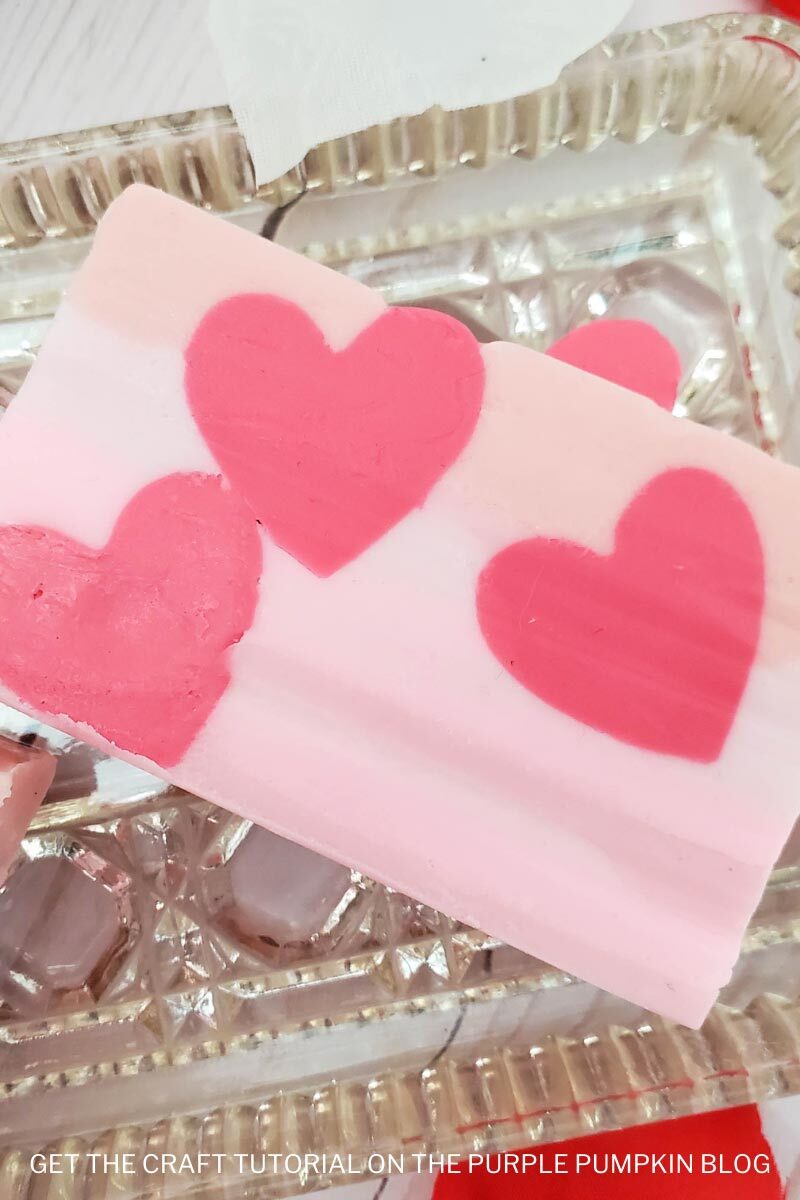
- Arrange a few red hearts in the mold, either standing up and/or on their side to ensure that you see a complete heart shape when you cut the soap. Spray with rubbing alcohol to help the layers stick.
- Pour a small amount of another color in, allow to set slightly, then add a small amount of the third color, and allow to set slightly. Spray with rubbing alcohol to help the layers stick.
- If needed, reheat the soap bases for 10-20 seconds, and stir well. Leave to cool slightly again, as you do not want to pour hot soap.
- Proceed with a second layer of adding red hearts standing up and/or on their side. Then alternate pouring small amounts of each color into the mold. Spray rubbing alcohol between each layer to help the layers stick.
- Proceed with a third layer of adding red hearts standing up and/or on their side. Then alternate pouring small amounts of each color into the mold. Spray rubbing alcohol between each layer to help the layers stick.
- Proceed with a fourth layer of adding red hearts standing up and/or on their side. If the hearts are above the rim of the mold, that is ok, as it will be a cool design when you cut the soap into bars. Then alternate pouring small amounts of each color into the mold, until full. Spray rubbing alcohol between each layer to help the layers stick.
- Allow the soap to set for 12-24 hours, then remove from the mold.
- Use a soap cutter or large knife to cut the soap into 1-inch bars.
- Use in your own bathroom, or package up to give as a gift!