How To Make Creepy Skull Cupcakes for Halloween
Home » COOK » Recipes » Baking » Cupcakes »Ready to wow your guests? Our Skull Cupcakes for Halloween are a must for your upcoming creepy celebration!
These cupcakes are more than just spooky treats—they’re a conversation starter, a centerpiece, and, let’s be honest, Instagram gold!
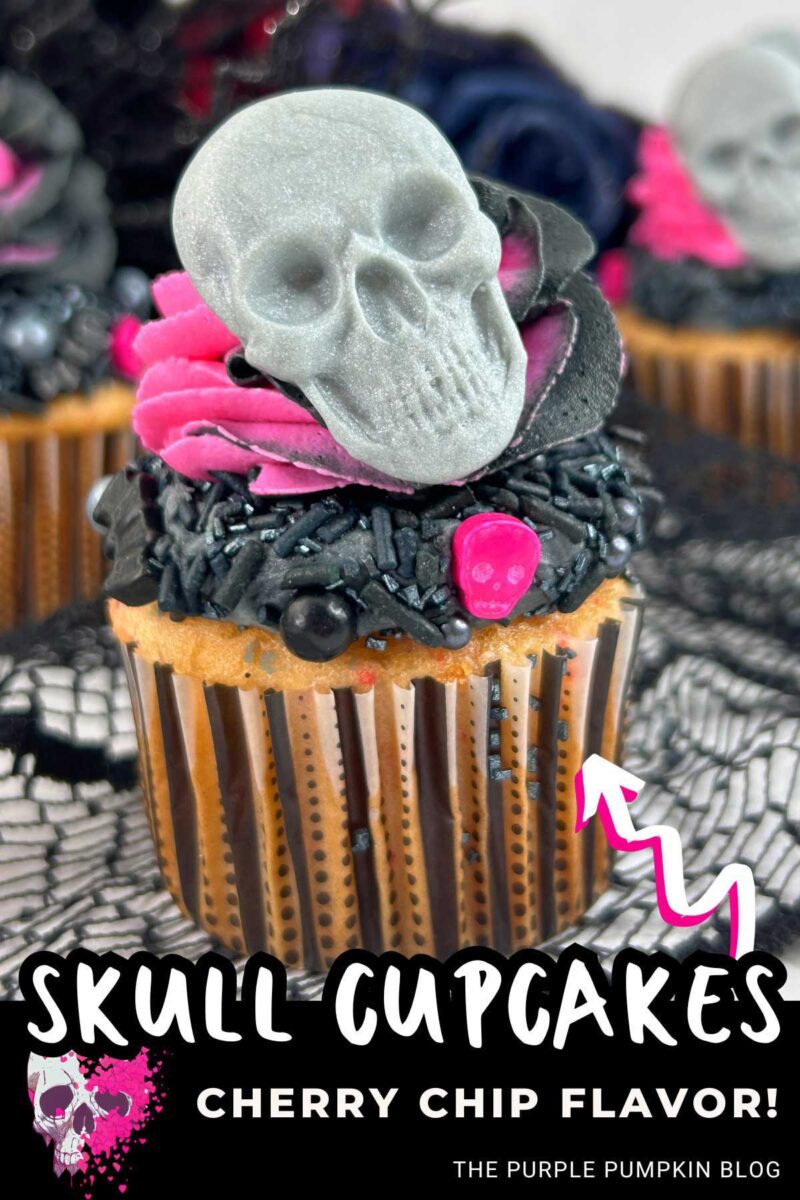
Skull Cupcakes for Halloween
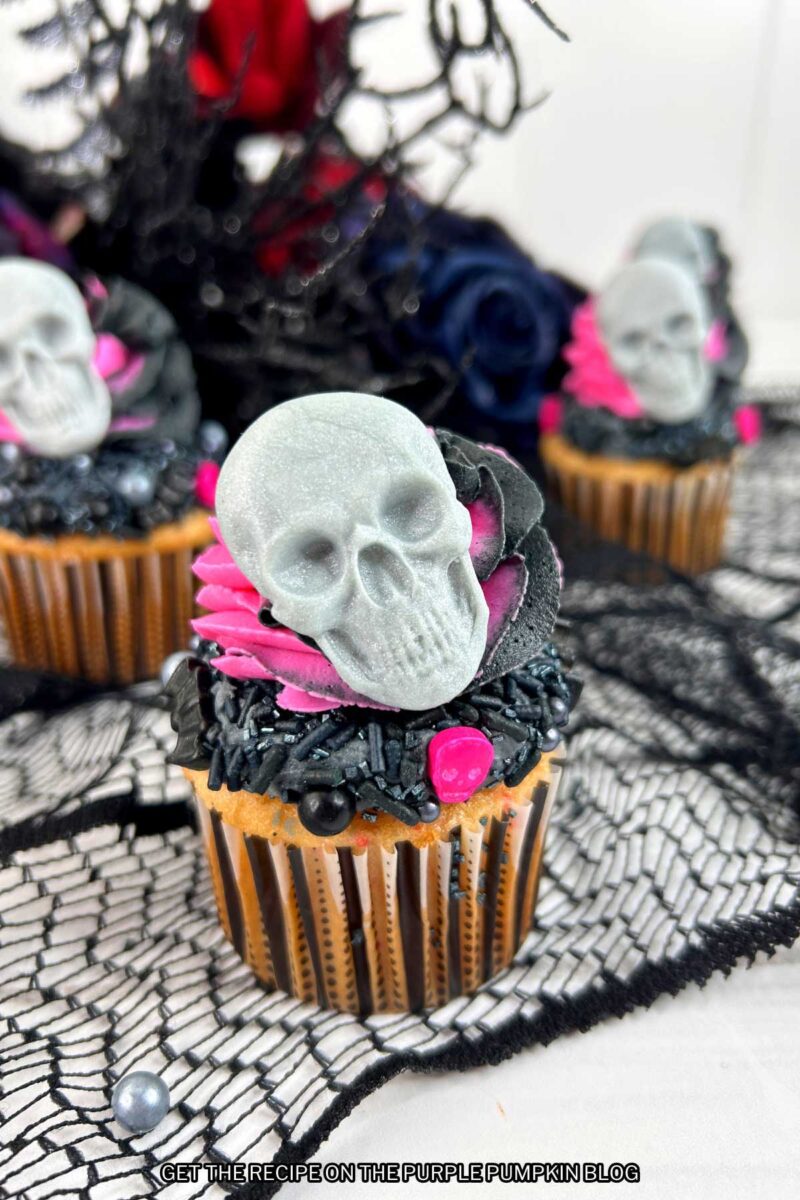
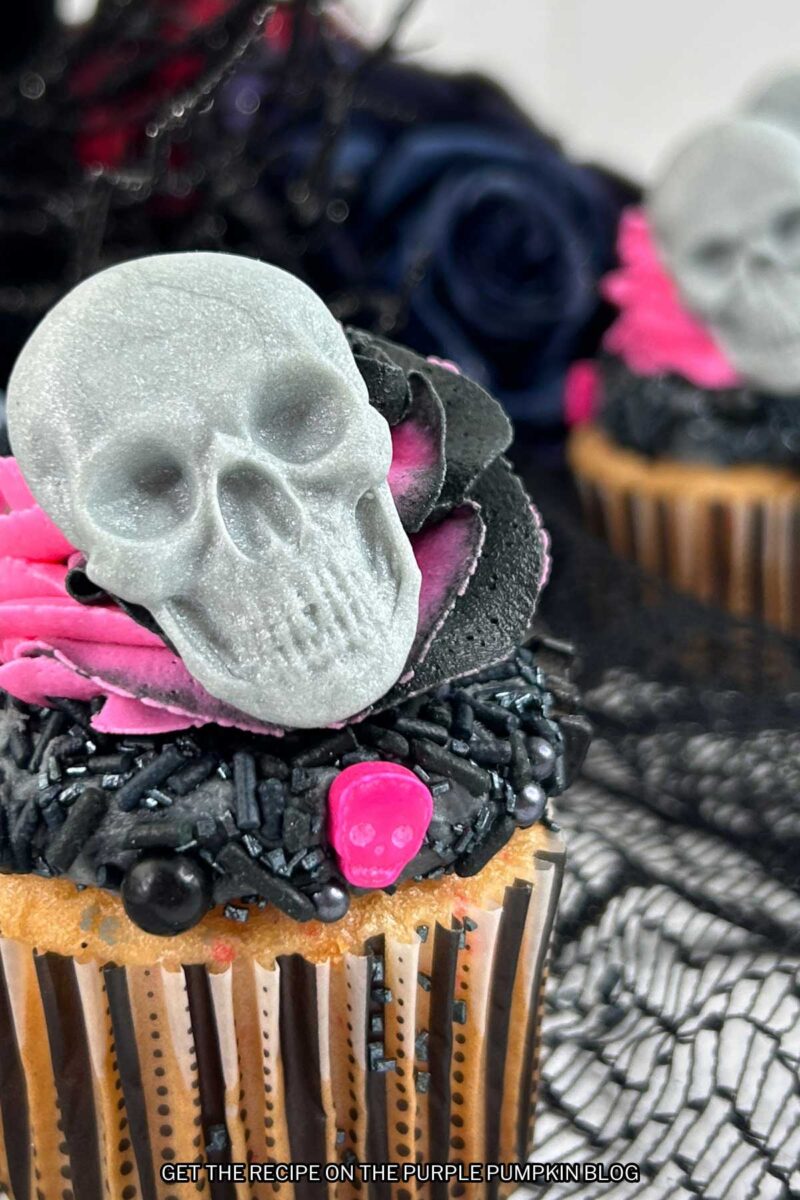
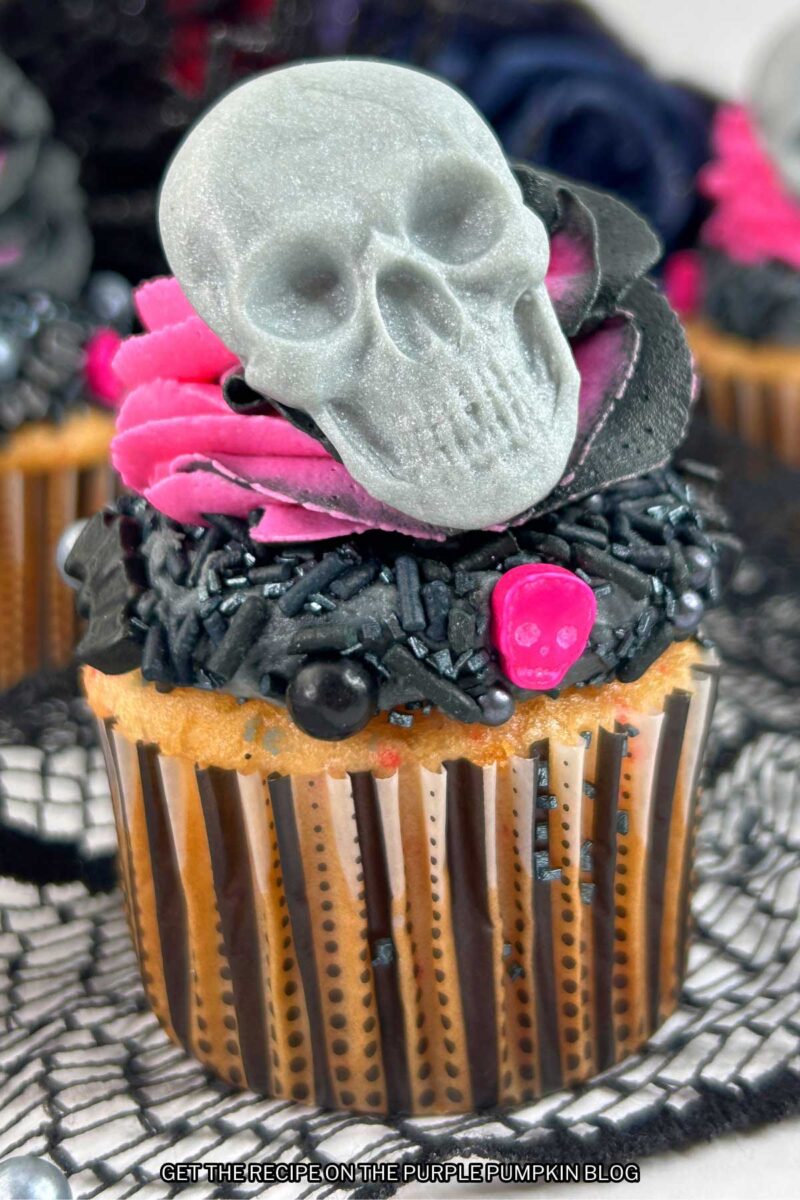
Made with intriguing silver fondant skulls, black and bright pink vanilla frosting, and a box of cherry chip cake mix, these are the cupcakes that your Halloween bash deserves!
Let’s explore how you can create these devilishly fabulous, hauntingly beautiful, and scrumptiously tasty desserts. Shall we?
Affiliate Disclosure
We have included affiliate links to products and services related to the topic of this post.
This post contains affiliate links, and we will be compensated if you purchase after clicking on those links.
As an Amazon Associate, I earn from qualifying purchases.
Read Our Full Disclosure and Privacy Policy
While you may prefer to skip to the recipe card, we suggest reading the entire blog post to avoid missing valuable tips and substitution suggestions and to ensure you have the necessary ingredients, equipment, and understanding of the steps and timings.
Halloween Skull Cupcakes
We love Halloween on The Purple Pumpkin Blog and we love making Halloween Cupcakes!
You can easily see these skull cupcakes being the life—or should we say, the delightful fright—of a Halloween Party.
But don’t limit yourself! These make great snacks during a Halloween movie night or even as a sweet snack for a Halloween Dinner Party. The skull face cupcakes are the perfect Halloween treat for kids and adults alike!
What’s not to love? They’re creepy, they’re tasty, and they’re a whole lot of fun to make!
The skull toppers are made using fondant, which might look tricky but it’s not as difficult as you think.
If you’re an experienced baker, you can jump straight to the recipe at the end of this post and get baking! But if not, please read through the steps, as we’ve got tips and suggestions along the way!
If you want to round out your Halloween-themed feast, consider pairing these cupcakes with a few Halloween Cocktails like the Voodoo Cocktail or the Black Magic Cocktail made with black vodka.
For some appetizers, why not make some Halloween Quesadillas or Jalapeño Popper Mummies, or make a batch of Pumpkin Hummus and serve with tortilla chips.
Ingredients & Equipment Used In This Recipe
The ingredients and tools in this recipe are conveniently linked to online retailers like Amazon or Amazon Fresh.
Ingredients for Cupcakes and Frosting
- Box of Cherry Chip Cake Mix – the usual additional ingredients are changed to butter, milk, and eggs to enrich the cake mix.
- If you can’t find this cake mix, you can substitute it for any flavor—chocolate chip cupcakes are always popular. Or use our Vanilla Cupcakes Recipe and add some sprinkles to the mix, or add cocoa powder to make chocolate cupcakes.
- Powdered Sugar – also known as Icing Sugar and Confectioner’s Sugar.
- Pure Vanilla Extract – always buy good vanilla, which makes a flavor difference.
- Dairy & Chilled Prouce – Unsalted Butter, Heavy Whipping Cream (Double Cream)
- Black Gel Food Coloring
- Neon Pink Gel Food Coloring
NOTE! You can use any combination of frosting and sprinkle colors that you like. We used black and neon pink, but you can use different colors if you wish. Orange, purple, green, and red are all great choices for Halloween.
Decorating Ingredients
- Wilton Fondant – these come in 4.4oz packages and are just the right size for these cupcakes, but you can use any brand you like.
- Silver Fondant – for making the skulls
- Black, Silver, and Pink Halloween Sprinkles – you can use any sprinkles that you like! Make your own mix with different single sprinkle types, or buy a ready-made mix. Whatever you use, you will want 2-3 cups to decorate the cupcakes.
Cupcake Decorating Equipment
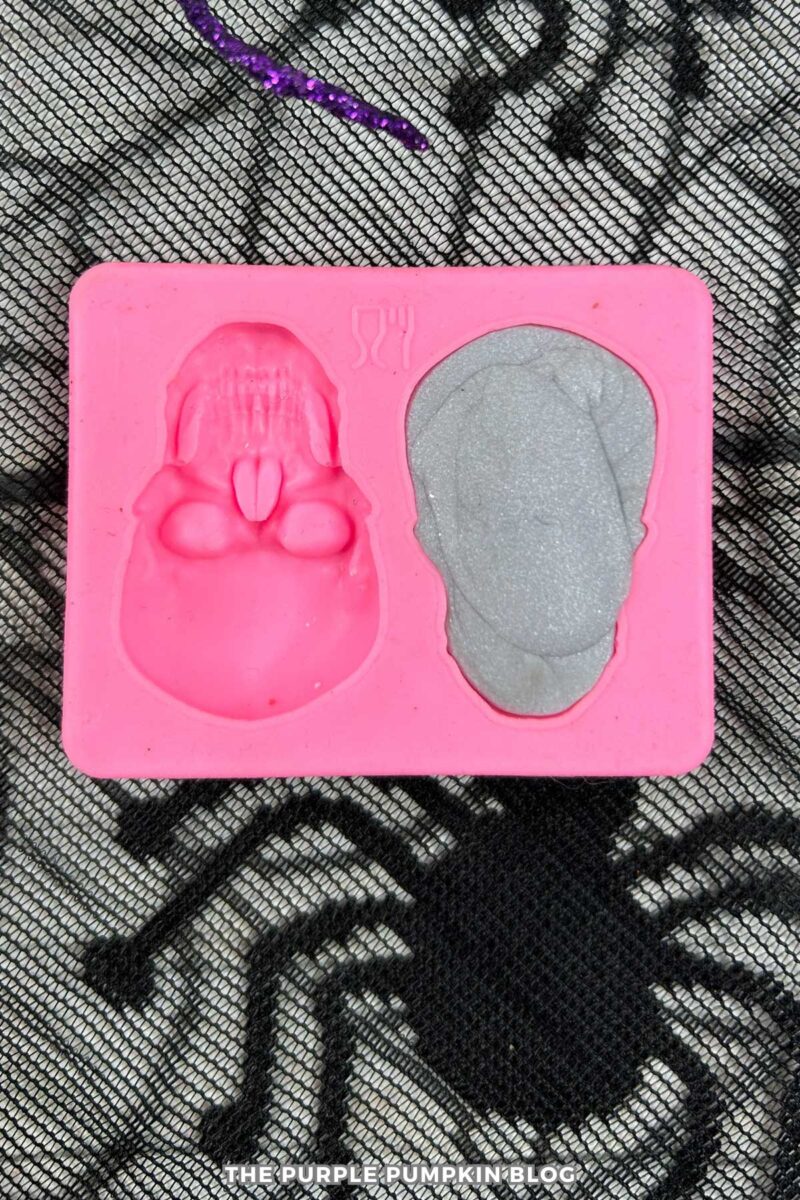
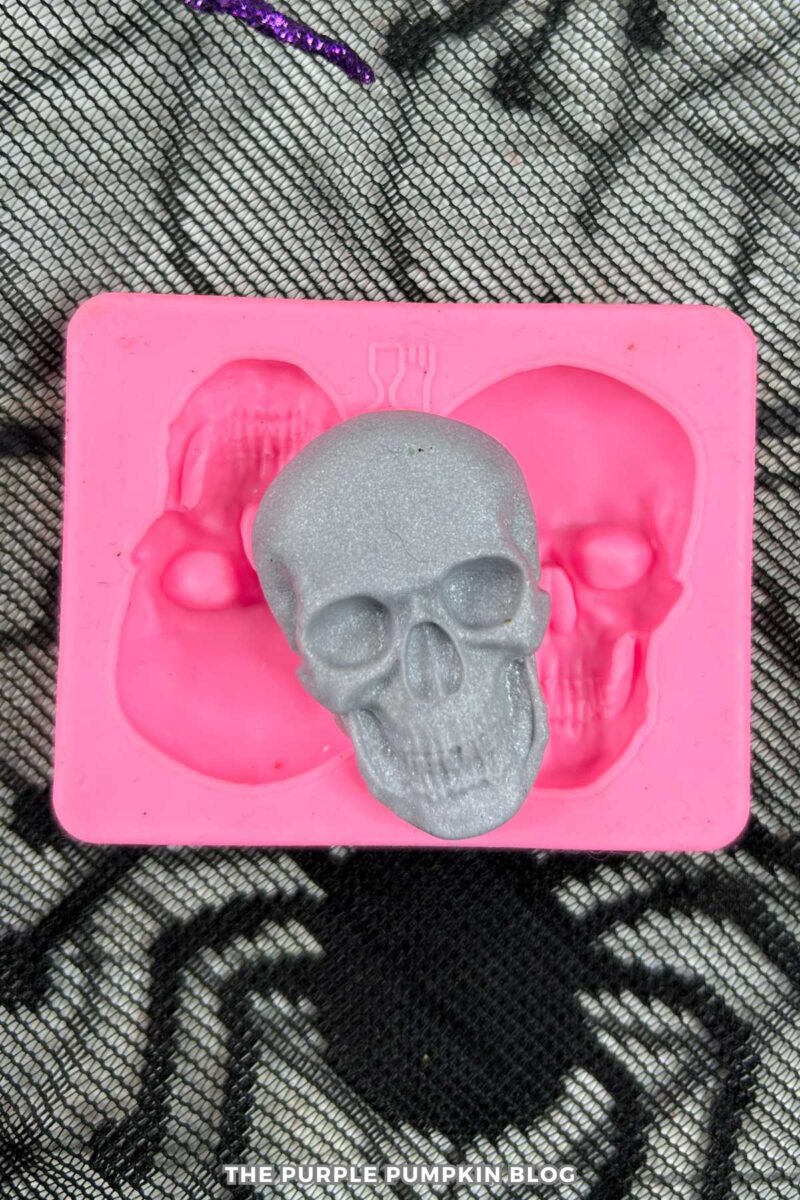
- Skull Fondant Mold – to make the skull shape cupcake toppers.
- Baking/Cookie Sheet
- Parchment Paper – also known as baking paper or greaseproof paper.
- Electric Mixer – either a handheld or standing mixer.
- Mixing Bowls
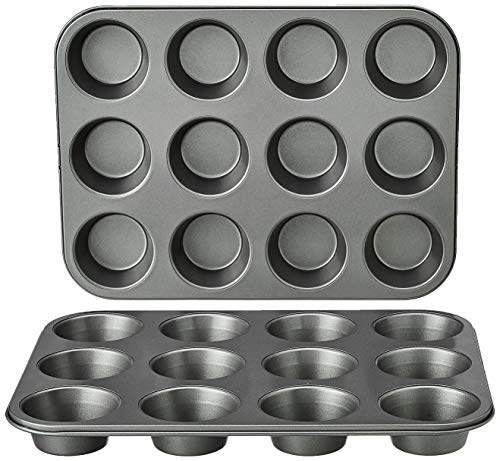
- Cupcake Pan/Muffin Pan
- Cupcake Liners – we used black and white paper cases, but use any color and design you like.
- Wire Cooling Rack – Taking time to cool cupcakes completely before decorating is important, and using a cooling rack allows air to circulate around them.
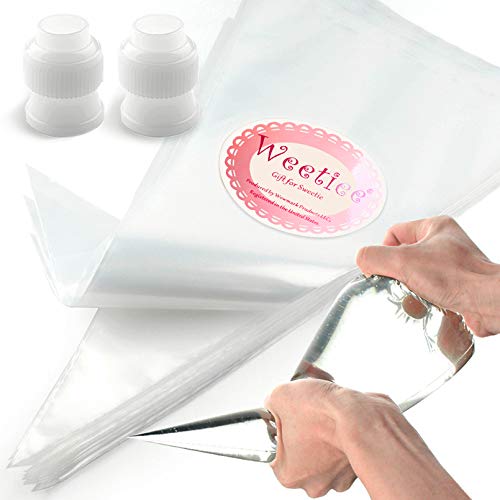
- Large Piping Bag – you can use disposable or reusable, your choice.
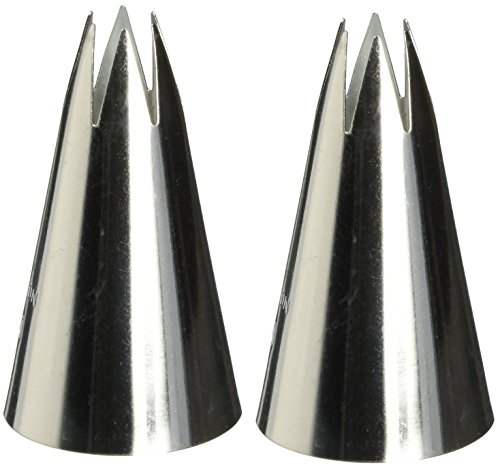
- Large Star Tip – for example, Wilton 1M
The Purple Pumpkin Blog uses both cups and weighted measurements in its recipes, making American cups and kitchen food scales valuable tools for trying all the recipes. We provide US customary, imperial, and metric measurements. Still, it’s important to note that while you can combine cup measurements with weighted measures, never mix US customary/imperial (pounds, ounces, pints, etc.) with metric (kilograms, grams, liters, etc.).
Skull Cupcake Recipe Tips
The skulls that decorate these cupcakes are made with fondant (also known as sugarpaste).
The fondant skulls need time to dry before using them as cake decorations, so allow up to 24 hours to get the pieces made before making and decorating your cupcakes.
Fondant Tips
If you have never worked with fondant before, don’t panic – it is really easy to use. follow our tips, and you’ll be just fine!
- Line a cookie sheet(s) or tray(s)with parchment paper or a non-stick baking mat to place the fondant pieces on to dry.
- Dust your work surface with powdered sugar (icing sugar/confectioner’s sugar) or cornstarch (cornflour) so the fondant doesn’t stick. Think of it like the way you use flour when rolling dough.
- Rub a little powdered sugar/cornstarch into your hands and knead a handful of the fondant to make it more pliable, rather than using it straight from the package.
- Using a Silicone Mold: Dust with powdered sugar before pressing some fondant into the cavity and leveling off before gently popping out and leaving to dry.
- If there is excess powdered sugar on the pieces, gently brush it away with a pastry brush or an unused, clean paintbrush.
- Alternatively, you can use a vodka spray. Pour some vodka into a mini spray bottle and gently mist the fondant wings. Vodka dries more quickly than water, which is usually used when handling fondant.
- Always make extra pieces – that way, if some break or you have another mishap, you have backups that you can use.
- Leave the fondant pieces to harden in a cool, dry place – do not place them in the fridge.
- The fondant pieces should be solid enough to handle and use on the cupcakes after 3 – 6 hours. We like to leave fondant pieces to dry for around 24 hours. How long this takes, however, is based on the size and thickness of the fondant and how humid your house is, so you will need to judge if they will hold up as they need to.
- When making cakes or cupcakes that use fondant decorations, we like to make them a few days ahead, allowing for drying without stress. If fondant hasn’t dried enough, it can mean disappointing end results.
- Always keep fondant covered when making decorations to prevent it from drying out. When you’ve finished, wrap up any remaining fondant very well—double-wrap it in plastic wrap and place it in an airtight container. This keeps it fresh, and you can use it for future cake-making.
Cupcake Making Tips
- These cupcakes are made using a box of cake mix – the flavor is enriched with butter, milk, and eggs instead of the usual oil, water, and eggs.
- For the best results, use room temperature ingredients for a smoother batter, resulting in even mixing and better air-trapping, which gives your cake a softer, fluffier texture.
- Use your choice of cupcake liners – themed to the cupcakes, plain white or black, or a complementary color.
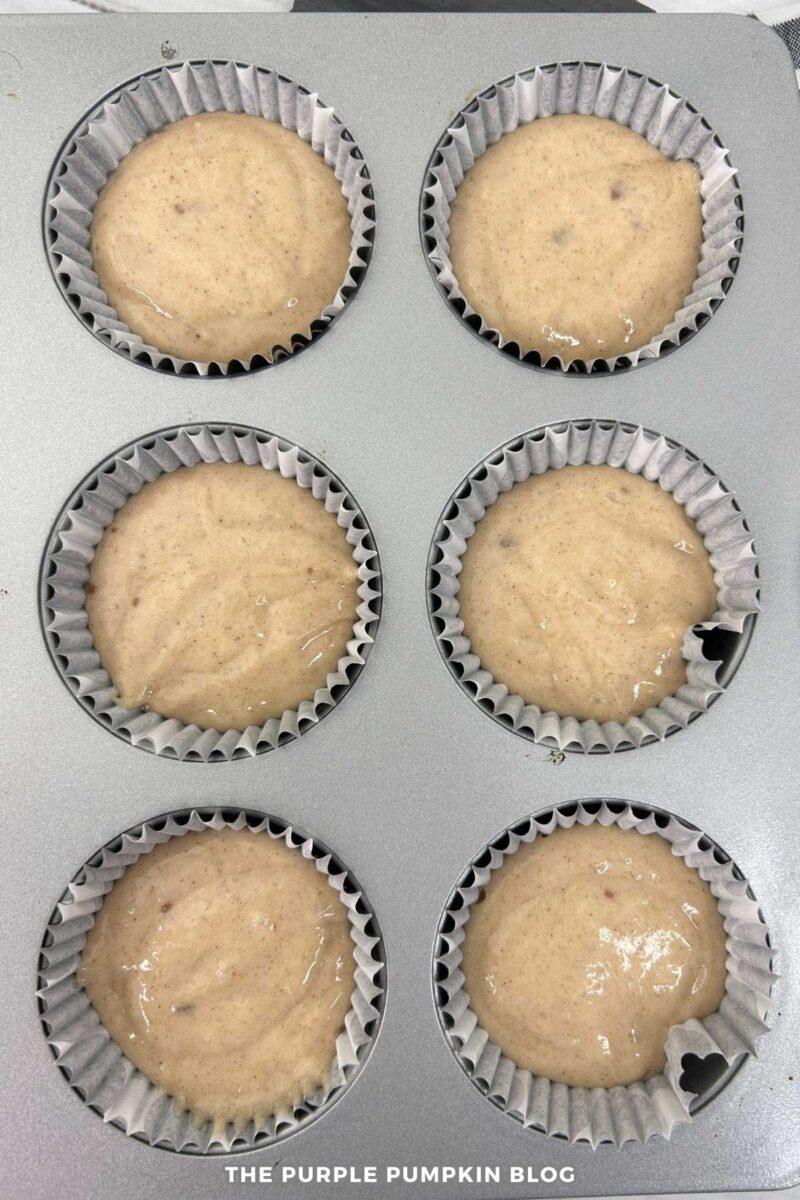
- Use an ice cream scoop to spoon batter equally between the liners. Fill them about three-quarters full.
- The cupcakes should be ready in about 20 minutes – test their doneness by inserting a toothpick into the cakes. It should come out clean when the cupcakes are cooked all the way through. Bake for an extra 2 minutes and check again.
- Cool the cupcakes in the pan for 5 minutes before transferring them to a wire rack to cool completely before frosting.
Cupcake Frosting Tips
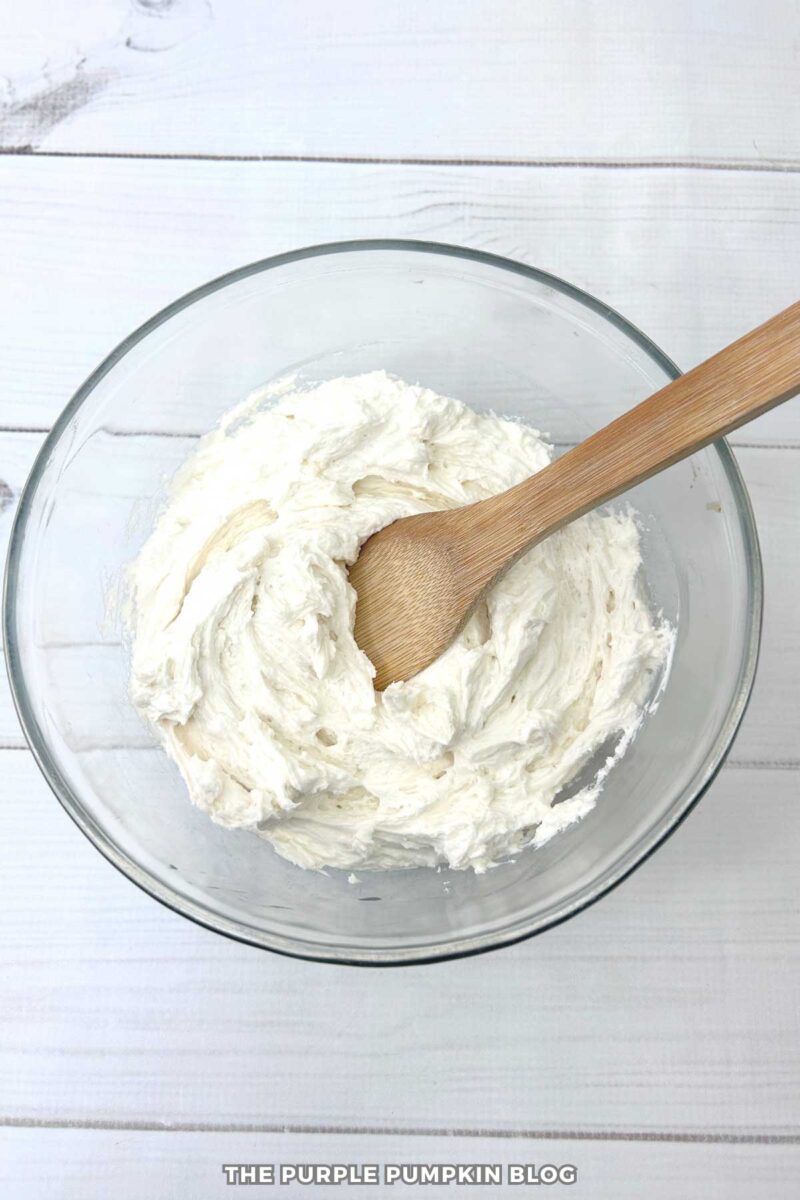
- When making the frosting, you want the end result to be creamy, smooth, and hold a stiff peak. You may have to slightly adjust the powdered sugar and cream amount to achieve your desired consistency.
- Mix the frosting on low speed to start so that the powdered sugar doesn’t go everywhere! You can then increase the speed when all the ingredients are incorporated.
- The frosting is then divided into separate bowls and colored using food coloring. Remember that you can always add more color but can’t remove it. Add a little to start with and add more to get the shade required.
- FOOD COLORING! Food coloring is available in various forms. You’re most likely to find liquid coloring in your grocery store and other types of coloring like gels, pastes, and powders in more specialised cake decorating shops. The cheapest option is liquids, but they can alter the consistency of your frosting and cake batter, so we prefer using pastes or gels, which don’t have that effect. A little goes a long way with food coloring gels, and you can usually get a much deeper shade than you would with liquids.
- Turning white or cream frosting black can be tricky and take a LOT of food coloring. A tip to counter is to make a dark frosting by adding a tablespoon or two of cocoa powder, which will make chocolate buttercream, but on these cupcakes, that’s fine! Adding black food coloring to the dark frosting shouldn’t take as much hard work to get a good deep black rather than gray.
- These cupcakes are double-frosted. The first layer is flattened to create the sprinkle base. The second layer is a swirl of two-tone frosting. Put an ice cream scoop to good use again for the first frosting layer, and then flip the cupcake upside down and press gently onto a piece of parchment paper to flatten.
- SPRINKLES! Following the color or theme provided in the recipe. You can use any type you like, such as nonpareils, jimmies, stars, confetti, pearls, or shapes – you’ll need 2-3 cups to cover the cupcakes.
- Use a piping bag fitted with a large star tip for the two-color frosting swirl.
- There are two ways you can do multi-color frosting:
- Scoop half the side of the piping bag with black frosting and the other half with pink, then squeeze some frosting out until the two colors combine.
- Or, use the double piping bag by putting a piping bag of each color into another one fitted with the tip and frosting as usual. Wilton has a great demonstration video on YouTube that we highly recommend.
- If you feel like you will be making a lot of cookies, cakes, and cupcakes in the future, it is worth investing in a set of piping tips so that you know you always have the right ones on hand for a recipe.
- Do not overfill the piping bag with frosting, and make sure you squeeze the frosting down the bag to expel any air bubbles.
- If you are not confident with your piping skills, practice on some parchment paper first and scoop the frosting back into the bag to use on the cupcakes. Make sure you practice with ONE color and not the two mixed together!
How Do I Make Skull Cupcakes Cupcakes?
Below is the printable recipe card. To save ink, any demonstration photos on the recipe card are not printed out.
*NEW FEATURE!* Tap the Add To Shopping List button to save the ingredients list to your phone!
We appreciate it when you review the recipe and leave a star rating to share your experience with others!

Skull Cupcakes for Halloween
Bite into spooky delights with Skull Cupcakes for Halloween! This ghoulish treat will be the showstopper at your Halloween party!
Ingredients
For the Skulls*
- Cornstarch (cornflour)
- 4.4oz Silver Fondant
For the Cupcakes
- 1 (15.25-oz/432g) box Betty Crocker Super Moist Cherry Chip Cake Mix
- 3 large eggs
- 1 cup whole milk
- ½ cup unsalted butter, softened
For the Frosting
- 2 cups unsalted butter, softened
- 5 cups powdered sugar (icing sugar)
- 6 Tbsp heavy whipping cream (double cream)
- 1 Tbsp pure vanilla extract
- Black gel food coloring
- Neon pink gel food coloring
For Decorating**
- Variety of black and silver sprinkles
- Black and/or pink skull sprinkles
Instructions
- To make the skull toppers, line a cookie sheet or tray with parchment paper or a non-stick baking mat and set it aside.
- When using fondant, use cornstarch as you would flour when making dough. Dust your work surface, hands, and tools.
- Knead the silver fondant in your hands to make it soft and pliable. Dust the mold with cornstarch using a clean, dry paintbrush.
- To make a skull, pinch off about 2 tablespoons of fondant and press it into the mold cavity.
- Leave for 3 minutes before carefully removing it from the mold. Set the skull on the prepared cookie sheet to dry in a cool, dry place (not the fridge) overnight or for 24 hours if possible.
- Repeat to make 18 skulls total. TIP! Always make extra fondant decorations as backup!
- To make the cupcakes, preheat the oven to 350°F/180°C/Gas 4. Line cupcake pans with 18 cupcake liners and set them aside.
- Using an electric standing or hand mixer, beat the cake mix, eggs, milk, and butter until combined and smooth.
- Use an ice cream scoop to divide the batter between the cupcake liners. Fill about ¾ full.
- Bake in the preheated oven for 20 minutes or until an inserted toothpick comes out clean.
- Remove the cupcakes from the oven and leave to cool in the pan for 5 minutes before transferring to a wire rack to cool completely before decorating.
- To make the frosting, use an electric stand or handheld mixer and add the butter, powdered sugar, cream, and vanilla to the bowl.
- Beat on medium speed until creamy, smooth, and stiff peaks form.
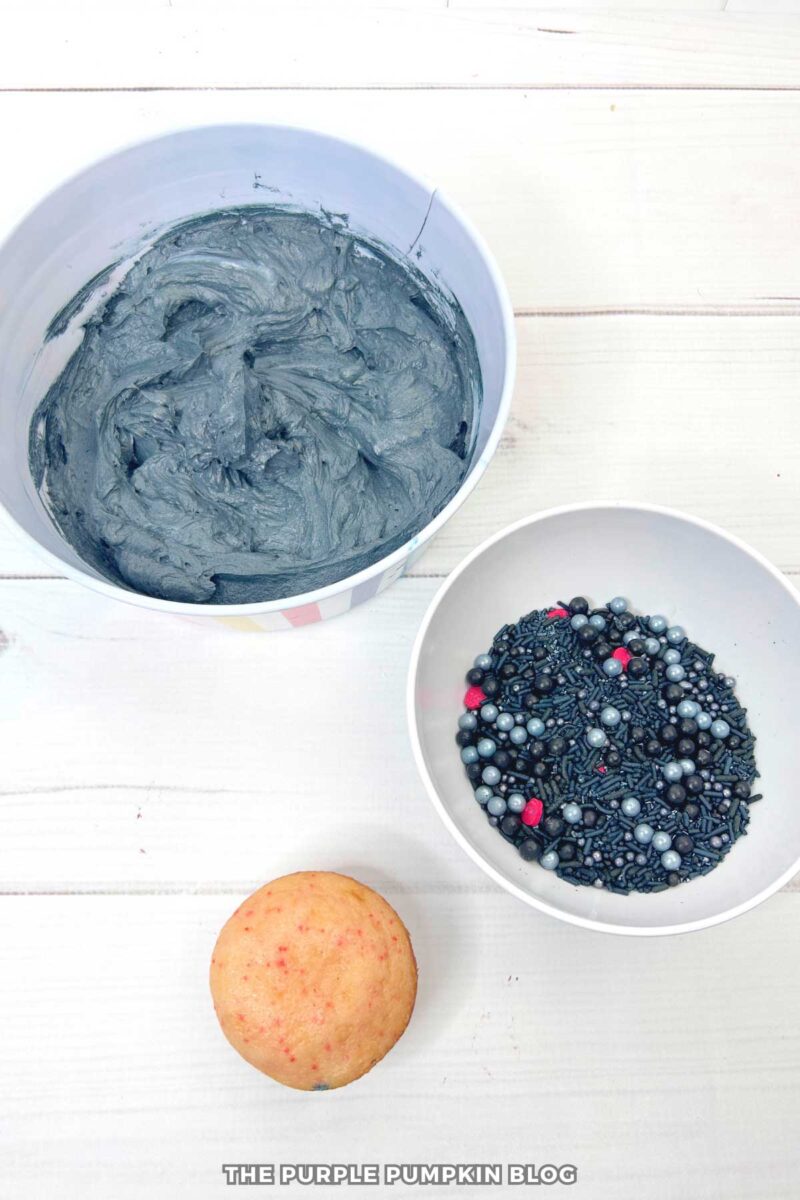
- Scoop 1½ cups of frosting into a separate bowl and add a few drops of neon pink food coloring. Remember, you can always add more coloring, but not remove it! Stir in the food coloring until well combined and you reach the desired shade. Cover and set aside.
- Add several drops of black food coloring to the remaining frosting. Stir in the food coloring until well combined and you reach the desired shade of black.
- Use a medium cookie scoop to place mounds of black frosting onto each cupcake.
- Flip each cupcake upside down and press down lightly onto a piece of parchment paper to flatten the frosting into a thick disk.
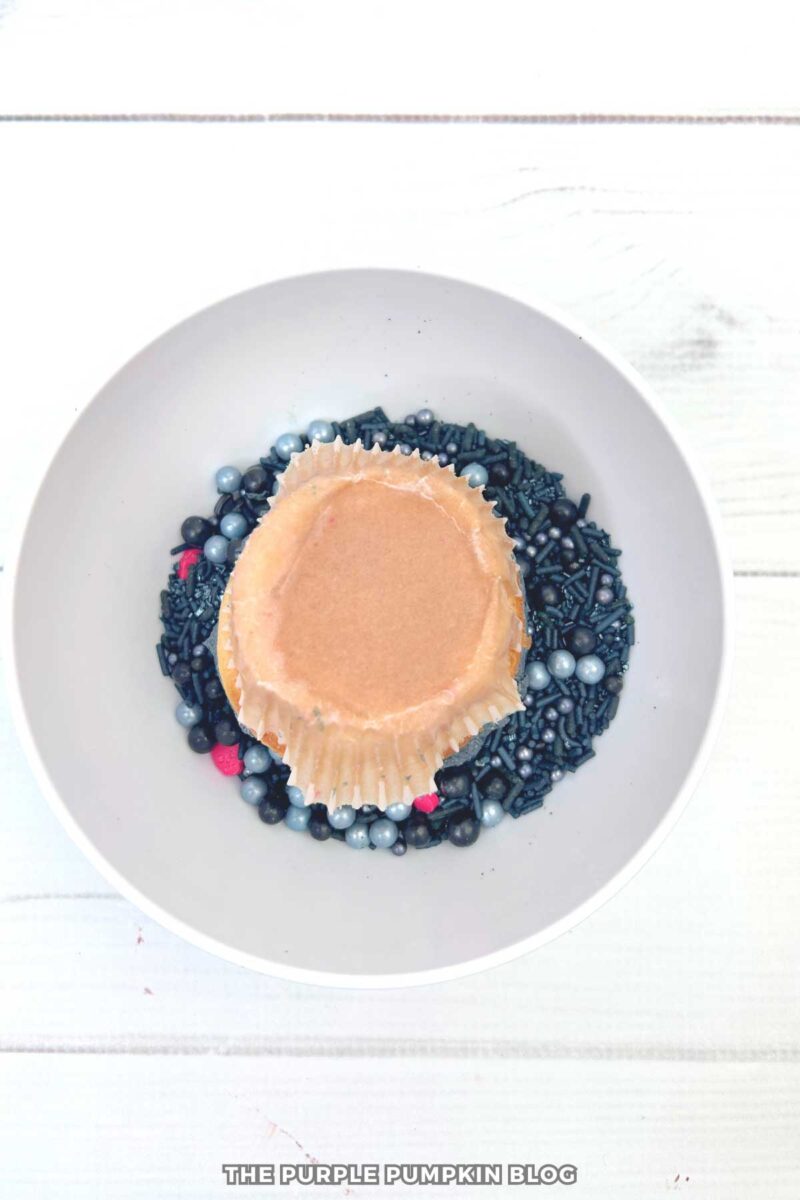
- Pour all the sprinkles into a bowl and stir to combine.
- Dip each frosted cupcake into the sprinkles to cover. Set them aside.
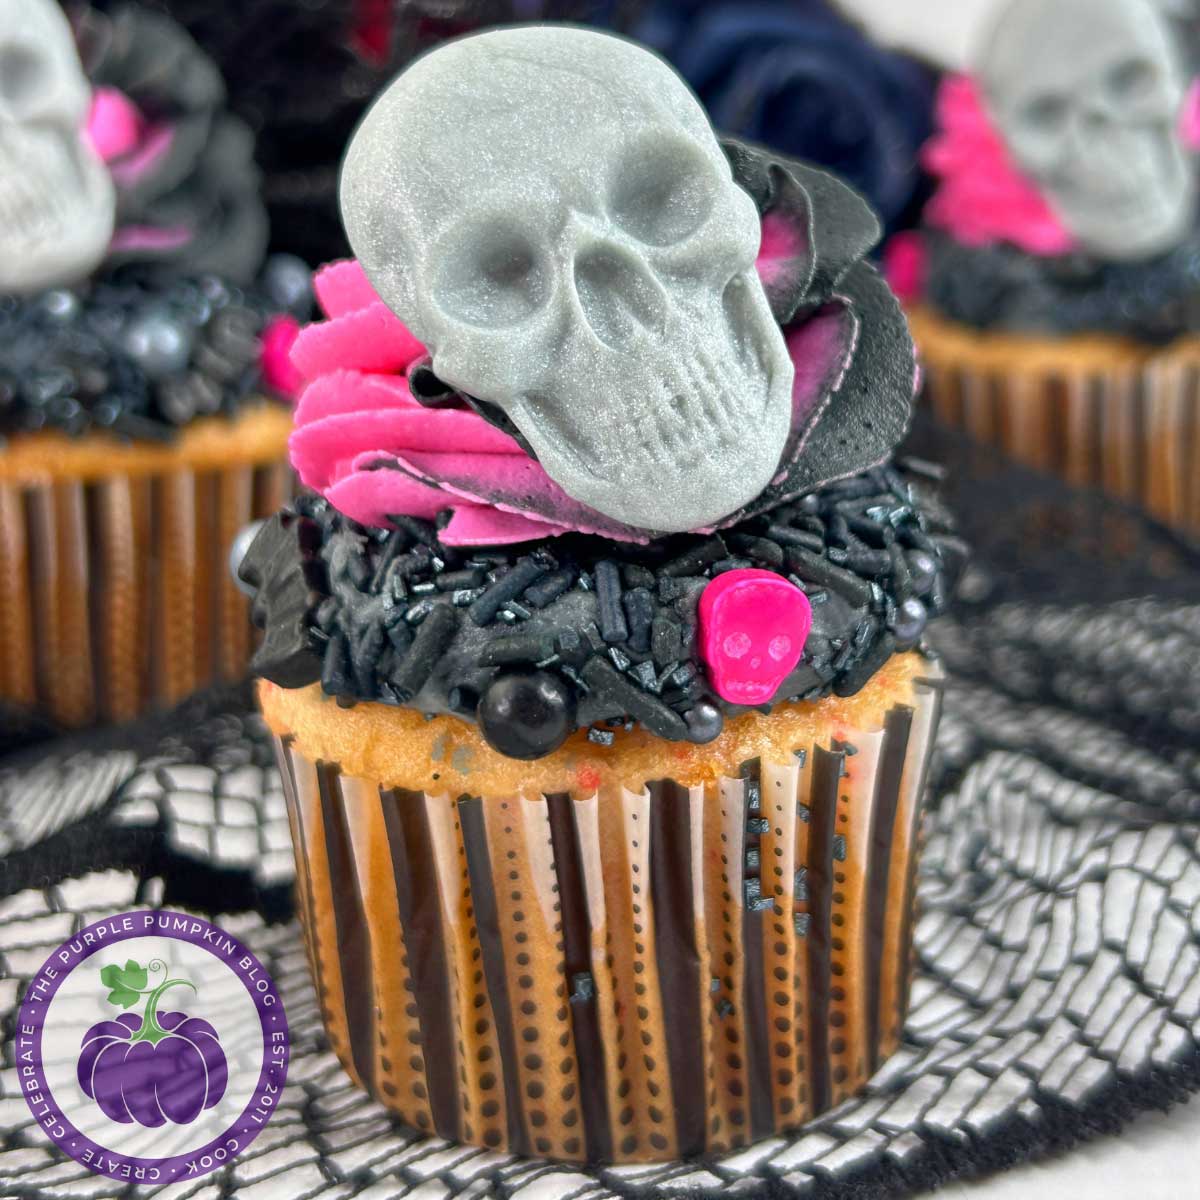
- Place a large star tip into a large piping bag. Add the pink frosting down one side of the piping bag and the black frosting down the other side. Gently squeeze to begin piping out the frosting so it mixes together.
- Pipe a swirl of pink-black frosting on the top of each cupcake.
- Place a fondant skull on top of each frosted cupcake. Enjoy, and Happy Halloween!
Notes
*Make the skulls several hours in advance—24 hours or more, if possible, so they have time to dry out.
**You will need around 2-3 cups of sprinkles.
Recommended Products
As an Amazon Associate and member of other affiliate programs, I earn from qualifying purchases.
-
 Wilton Icing Colors 12-Piece Gel Food Coloring Set
 -
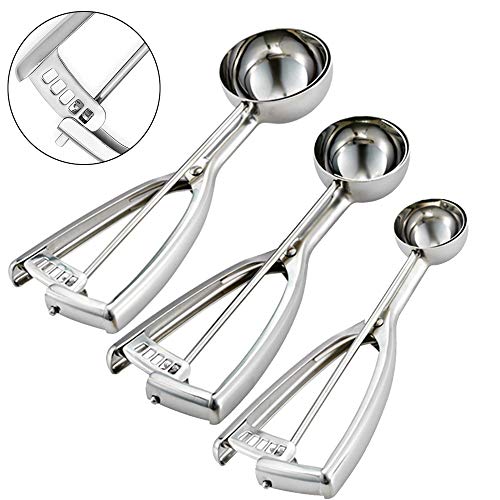 Ice Cream Scoops
 -
 Disposable Piping Bags -100 Pack
 -
 Wilton 1M Open Star Piping Tip (2pk)
 -
 Icing Piping Bag & Tip Set
 -
 Cooling Racks for Baking
 -
 Cupcake Pans
 -
 Black & White Cupcake Liners
 -
 Skull Halloween Silicone Fondant Mold
 -
 Wilton Halloween Sprinkles
 -
 Wilton Black & Silver Sprinkle Mix
Nutrition Information:
Yield: 18 Serving Size: 1Amount Per Serving: Calories: 532Total Fat: 30gSaturated Fat: 18gTrans Fat: 0gUnsaturated Fat: 10gCholesterol: 106mgSodium: 244mgCarbohydrates: 63gFiber: 0gSugar: 50gProtein: 3g
This site uses Nutritionix to provide estimated nutrition. Nutritional information is always approximate and will depend on the quality of ingredients used and serving sizes. If you need exact calories and macros, please do your own calculations.
Dinner Party Menu Suggestions!
You’ve made the dessert, but what about the rest of the courses?
Here are additional recipes to make a full meal for a dinner party or special occasion:
- Appetizer: Jalapeño Popper Mummies
- Soup: Bloody Mary Soup
- Salad: Mexican Chopped Salad with Creamy Avocado Dressing
- Main Dish: Slow Cooker Spicy Pulled Pork Chili
- Side Dish: Broccoli Slaw
- Beverage: Black Magic Cocktail
The post is part of the Crafty October series on The Purple Pumpkin Blog. Check out Crafty October from 2023, 2022, 2021, 2020, 2019, 2018, 2017, 2016, 2015, 2014, 2013, and 2012 for awesome Halloween ideas and inspiration; including recipes, printables, crafts, and more!