
Mickey & Minnie Love Signs
Love and Disney go hand in hand and that’s what makes these Mickey and Minnie Love Signs Craft perfection for Valentine's Day!
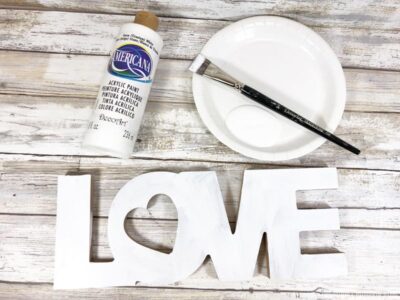
Materials
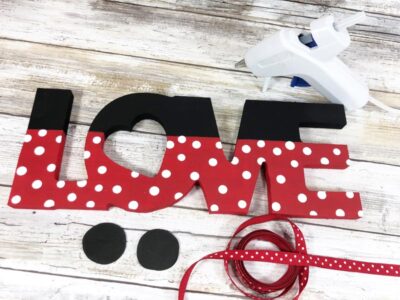
- 2 Wooden LOVE Signs
- 2 Small Yellow Buttons
- Red with White Polka Dots Ribbon
- White Craft Paint
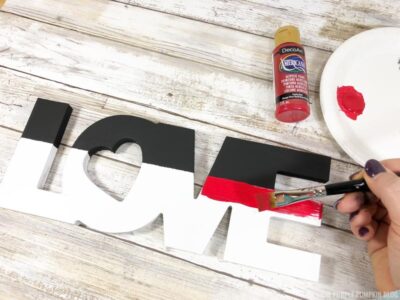
- Red Craft Paint
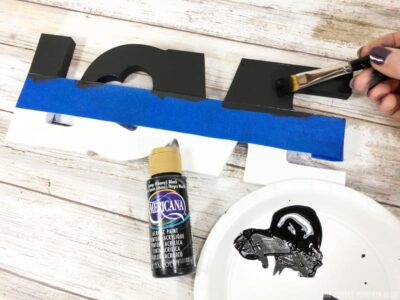
- Black Craft Paint
- Black Craft Foam
TOOLS
- Pencil with New Eraser
- Painter’s Tape (Masking Tape)
Instructions
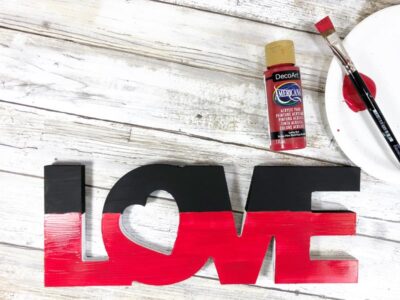
- Remove tags from wooden LOVE signs. Since these signs are made of a wooden particle board, basecoat the front, back, and sides with white acrylic craft paint. Let dry and apply a second coat, if necessary. The white basecoat will allow the red and black colors to pop.
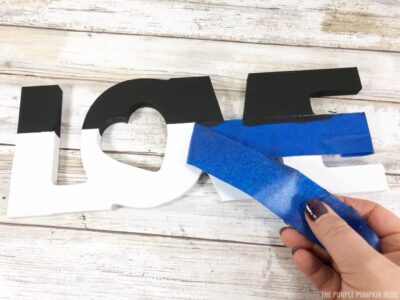
- Using the center of the letter “E” apply painter’s tape across the front and sides of each sign. Paint the top section of both signs with black acrylic craft paint. Apply a second coat, if necessary, and then carefully remove the painter’s tape. Set both signs aside to dry.
- Carefully topcoat the front, back, and sides of the bottom section of each sign with red acrylic craft paint. You could use painter's tape again here or freehand it. Apply a second coat, if necessary, and set aside to dry.
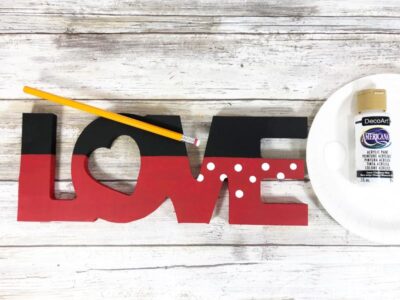
- Create polka dots with white acrylic craft paint and a new pencil eraser over the red section of the Minnie Love sign. Dip the pencil eraser into white craft paint and dab it onto the sign in a random fashion. This will give consistent size polka dots. Set aside to dry.
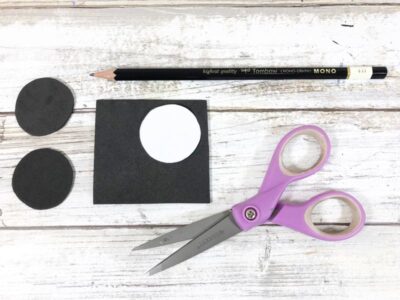
- To make the ears, create a one-inch circle template with a scrap of paper. Use a craft punch, circle template, cookie-cutter, or anything you can find around the house. Trace the one-inch circle onto black craft foam four times, and then cut out with scissors.
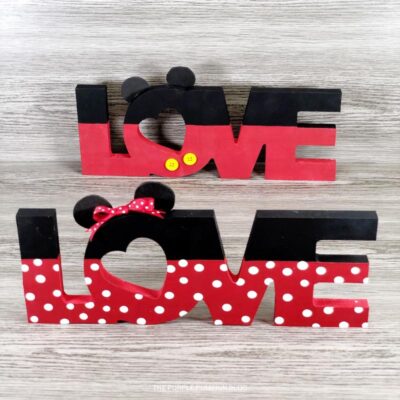
- To assemble Mickey, attach two craft foam ears to the top of the “O” and two yellow buttons to the bottom with a glue gun and glue sticks.
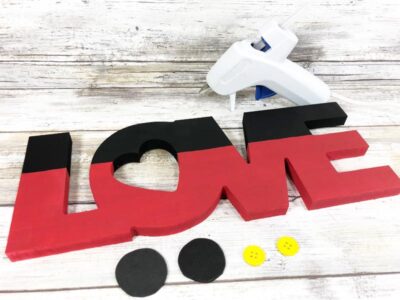

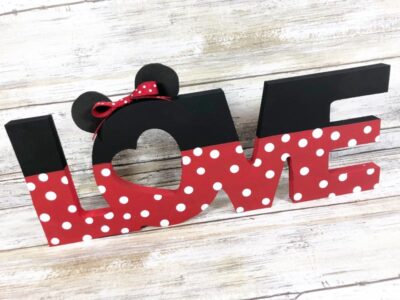
- To assemble Minnie, attach two craft foam ears to the top of the “O” with a glue gun and glue sticks. Tie the red and white polka dot ribbon into a bow, trimming ends to finish. Glue the bow to the top of the “O” in the center of the two ears.
Did you make this project? Share it!Tag @_ThePurplePumpkinBlog on Instagram with the hashtag #TPPBCreate!