Marvel’s The Falcon and The Winter Soldier Cupcakes
Home » COOK » Recipes » Disney Recipes »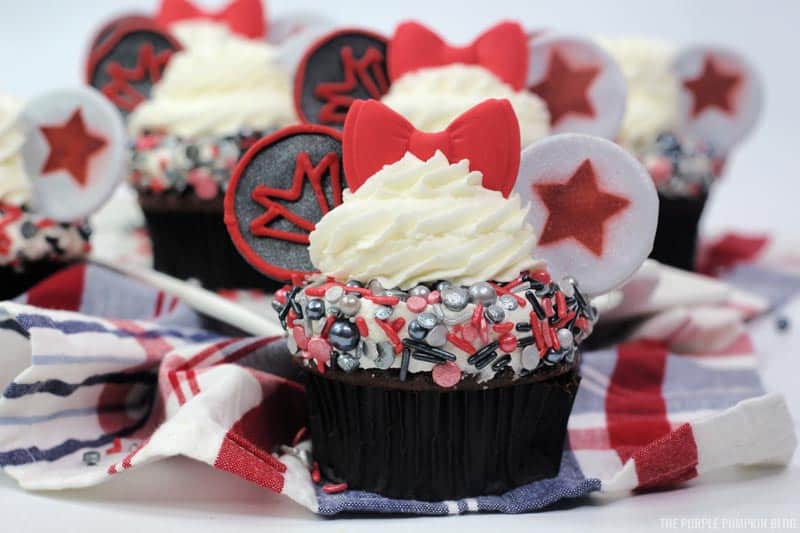
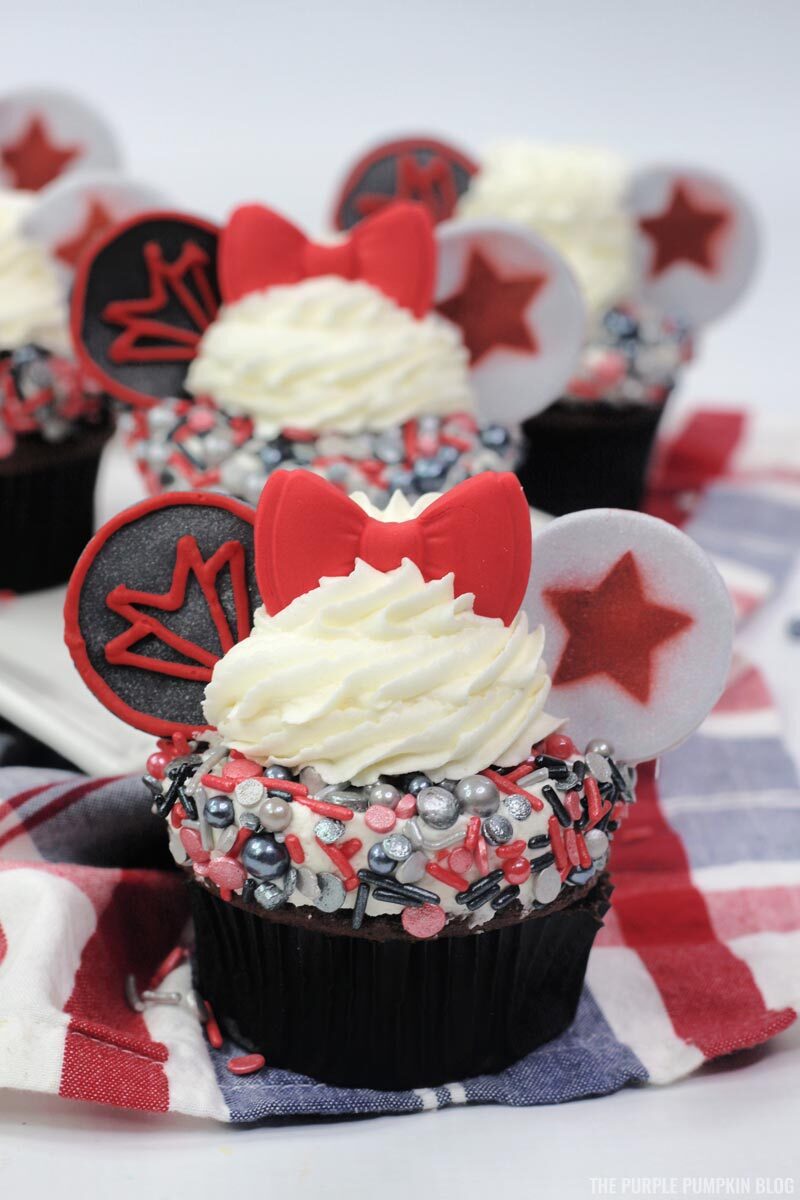
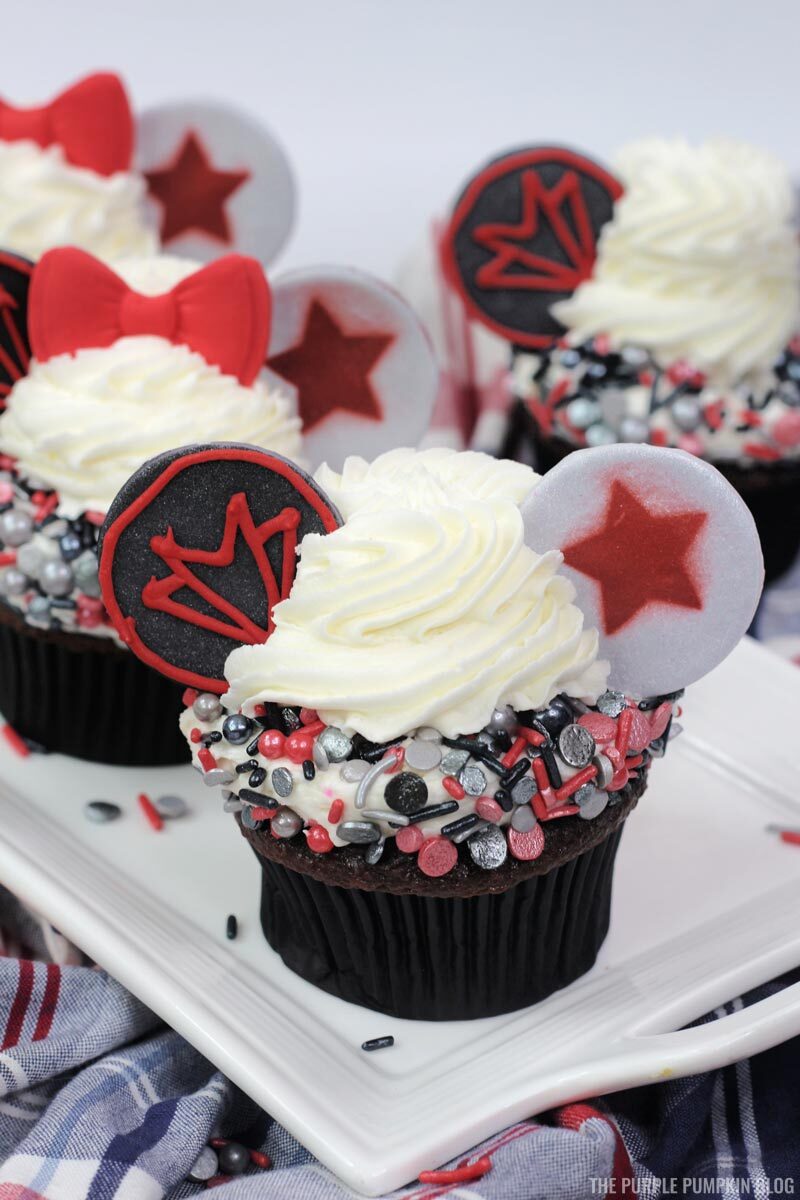

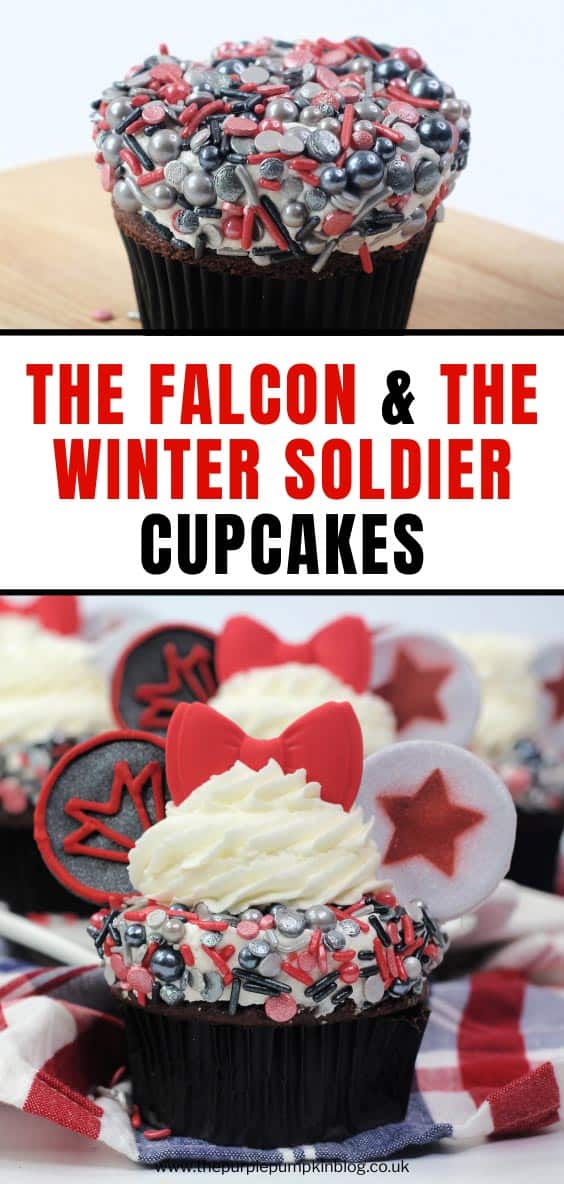
These Falcon and The Winter Soldier Cupcakes are a must-make sweet treat for Marvel fans everywhere! Enjoy a chocolate cupcake topped with two layers of frosting, lots of sprinkles, and the iconic Disney Ears decorated with Sam Wilson’s Falcon symbol and Bucky Barne’s Winter Soldier red star symbol. Don’t watch the next episode of FATWS without these cupcakes!

Affiliate Disclosure
We have included affiliate links to products and services related to this post.
We may earn a commission if you purchase after clicking on those links.
As an Amazon Associate, I earn from qualifying purchases.
Read Our Full Disclosure Policy and Privacy Policy
Falcon and The Winter Soldier Cupcakes
The full ingredients list and instructions are found in the printable recipe card at the end of this post. I highly recommend reading the blog post all the way through so that you don’t miss any tips or substitution suggestions, to ensure that you have all the ingredients and equipment required and understand the steps and timings involved.
Long-time readers will know that we are big Disney fans – and that includes Disney owned properties like Star Wars and Marvel!
We’ve not long finished an MCU movie marathon, watching all of the movies in the order they should be watched in, rather than in cinematic release. That was an emotional journey for sure!
We’ve now moved onto Marvel’s Agents of S.H.I.E.L.D. as well as the newly released show on Disney+ The Falcon and The Winter Soldier, which follows on from the events of Avengers: Endgame. (We also loved WandaVision!).
So, to celebrate the latest adventures in the MCU, I’ve got these awesome cupcakes to share with you!
The cupcakes are made with a box of chocolate cake mix – nice and simple, and the buttercream frosting is a breeze to make. The ‘ears’ and bow are made using fondant, which might look tricky, but it’s not as difficult as you might think.
If you’ve made any of my Disney Ears/Mickey Ears/Minnie Ears cupcakes before then you know the drill, and can probably jump straight to the recipe at the end of this post and get baking! But if not, please read through the steps as I’ve got lots of tips and suggestions along the way!
Ingredients & Equipment Used In This Recipe
You may have some baking ingredients in your kitchen already – the full list with measurements is found in the recipe card.
For your convenience, any specialized or notable ingredients and equipment needed to make these cupcakes have been listed below and linked to Amazon or other stores if available online.
Cupcakes & Frosting Ingredients
- Box of Chocolate Cake Mix – the usual additional ingredients are changed to butter, milk, and eggs to enrich the cake mix.
- Powdered Sugar – known as Icing Sugar in the UK.
- Pure Vanilla Extract – always buy the best you can afford, it really does make a difference!
Decorating Ingredients
- Wilton Fondant – these come in 4.4oz packages and just the right size for these cupcakes, but you can use any brand you like.
- Black Fondant – for the Falcon’s logo ear.
- Gray or Silver Fondant – for the Winter Soldier’s logo ear. If you struggle to find this color, you can use white fondant instead and spray them with silver food spray.
- Red Fondant – for Minnie’s bow.
- Silver Food/Cake Spray – to spray onto Falcon’s ear to give it a shimmer, and on WS’s ear (see above).
- Red Food/Cake Spray – to spray on the red star of Bucky’s logo.
- Wilton Red Cookie Icing – to pipe on Sam’s Falcon logo. Transfer the icing to a piping bag fitted with a round #2 tip to give you more control than piping from the bottle. Alternatively, you could use a ready-made icing tube, but they can be quite small so you may need more than one tube. Or, you can of course make your own royal icing and color it red.
- Red, Black, and Silver Sprinkles – you can use any type of sprinkles that you like! Make a mix of your own with different single sprinkle types, or buy a ready-made festive mix. Whatever you use, you will want about 2 cups to decorate the cupcakes.
Cupcake Decorating Equipment
- Round Cookie Cutter – to cut out the Ears; you will need a 3″/7.5cm cutter.
- Star Stencil – the star should be approximately 1″/2.5cm. You could also make your own stencil by cutting a star into a piece of paper or even into a plastic divider that you find in school binders/folders.
- Fondant Rolling Pin – these have a smooth surface and won’t leave a texture on your fondant when rolling out.
- Wilton Fondant Bow Mold – this one from Wilton is the one used to make the bow you see in the photos in this post. However, for some reason, it’s not available on Amazon, which is super annoying as I use Amazon for everything! Ultimately, use whichever bow mold you can to make a 2″/5cm bow.
- Large Piping Bag – you can use disposable or reuseable, your choice.
- Large Star Tip – for example, Wilton 1M.
- Round #2 Tip – see above.
Recipes on The Purple Pumpkin Blog use both cup measurements and/or weighted measurements. American cups and kitchen food scales are handy pieces of equipment to have in your kitchen as it means you’ll be able to make all of the different recipes on my blog! I try to give American, imperial, and metric measurements in my recipes. You can mix cup measurements with weighted measurements, but never imperial (pounds, ounces, pints, etc.,) with metric (kilograms, grams, litres, etc.,).
More Recipes Using Cake Mix
One of the hero ingredients in this recipe cake mix! So here are some more recipes using the same:
- Chocolate Peanut Butter Easter Bunny Cupcakes
- Oreo Spiderweb Cheesecake with Black Velvet Cake Base
- Pineapple Upside Down Cake Fudge
FATWS Cupcakes Recipe Tips
There are several elements of these cupcakes that are made with fondant – the “ears” and the bows.
Fondant needs time to dry before using as cake decorations, so allow up to 24 hours to get the pieces made before making and decorating your cupcakes.
Fondant Tips
If you have never worked with fondant before, don’t panic – it is really easy to use, follow my tips and you’ll be just fine!
- Line a cookie sheet(s) or tray(s)with parchment paper or a non-stick baking mat to place the fondant pieces on to dry.
- Dust your work surface with powdered sugar (icing sugar) (or cornstarch (cornflour)) so that the fondant doesn’t stick. Think of it like the way you use flour when rolling out dough.
- Rub a little powdered sugar into your hands and knead a handful of the fondant to make it more pliable before rolling, rather than using straight from the package.
- Dust your rolling pin too, and roll fondant to about ¼” thick. Some fondant rolling pins have guides you can use. You don’t want it too thick as it will take ages to dry, and you don’t want it too thin as it will become more tricky to work with.
- Cutting the Ears: Pour a little pile of powdered sugar onto your surface and dip the cookie cutter into it before cutting the ears – again, this is to prevent sticking.
- Using a Silicone Mold: Dust with powdered sugar before pressing some fondant into the cavity and leveling off, before gently popping out and leaving to dry.
- If there is excess powdered sugar on the pieces, you can gently brush away with a pastry brush, or an unused, clean paintbrush.
- Alternatively, you can use a vodka spray. Pour some vodka into a mini spray bottle and gently mist the fondant wings. Vodka dries quicker than water which is why it is usually used when handling fondant.
- Always make extra pieces – that way if some break or you have another mishap, you have got backups that you can use.
- Leave the cut fondant pieces to harden in a cool, dry place – do not place in the fridge.
- The fondant pieces should be solid enough to handle and insert into the cupcakes after 3 – 6 hours. I personally leave fondant pieces to dry for around 24 hours. How long this takes, however, is based on the size and thickness of the fondant, and how humid your house is, so judge best if they will hold up as they need to in the cupcakes.
- When making cakes or cupcakes that use fondant decorations I like to make them a few days ahead of time which allows for drying without the stress. Fondant that isn’t dry enough can mean disappointing end results.
- After using fondant the surface will be super sticky (it always is in my experience!) so you will probably have to wipe away the sugar first, then give it a soapy hot wash over, and then another clean over! You can always buy a fondant rolling mat for easier cleanup!
- Make sure that the ears are well dried before you draw the pinstripe suit lines on them with an edible silver marker pen.
- Always keep fondant covered when making decorations to prevent it from drying out. And when you’ve finished, wrap up any remaining fondant very well – I double wrap it in plastic wrap and place it in an airtight container. This keeps it fresh and you are able to use it for future cake making!
Cupcake Making Tips
- These cupcakes are made using a box of cake mix – the flavor is enriched by using butter, milk, and eggs, instead of the usual oil, water, and eggs.
- Use an ice cream scoop to equally divide the cupcake mixture between the cupcake liners. Fill them about three-quarters full.
- The cupcakes should be ready in about 20 minutes – test their doneness by inserting a toothpick into the cakes. It should come out clean when the cupcakes are cooked through. Bake for an extra 2 minutes and check again.
- Cool the cupcakes in the pan for 5 minutes before transferring them to a wire rack to cool completely before frosting.
Cupcake Frosting Tips
- When making the frosting you want the end result to be creamy, smooth, and to hold a stiff peak. You may have to adjust the amount of powdered sugar and cream slightly to achieve the consistency you need.
- These cupcakes are double-frosting, the first layer is flattened and rounded off a bit to create the base for lots of sprinkles, and then there is a swirl of frosting on top of that.
- SPRINKLES! Speaking of sprinkles, use any type you like in this recipe – you’ll need about 2 cups of them to cover the cupcakes.
- Put an ice cream scoop to good use again for the first frosting layer and use a knife or angled spatula to level it off.
- Use a piping bag fitted with a large star tip for the frosting swirl.
- If you feel like you are going to be making a lot of cakes and cupcakes in your future, I think it is worth investing in a set of piping tips so that you know you always have the right ones on hand for a recipe.
- Do not overfill the piping bag with frosting, and make sure you squeeze the frosting down the bag to expel any air bubbles.
- If you are not confident with your piping skills you can practice on some parchment paper first and scoop the frosting back into the bag to use on the cupcakes.
More Disney Ears Cupcakes
Looking for more Disney cupcakes to make? Check these recipes out next:
How Do I Make The Falcon and The Winter Soldier Cupcakes?
Just check out the recipe card below with full ingredients, and instructions. You can print the card out too (don’t worry, the pics don’t print to save your ink!).
Falcon and The Winter Soldier Cupcakes
Ingredients
For the Ears and Bow
- Cornstarch cornflour, for dusting
- 1 4.4oz package of Wilton Black Fondant
- 1 can Silver Cake Spray
- 1 bottle Wilton Red Cookie Icing*
- 1 4.4oz package of Wilton Gray or Silver Fondant
- 1 can Red Cake Spray
- 1 4.4oz package of Wilton Red Fondant
For the Cupcakes
- 1 box of chocolate cake mix
- ½ cup unsalted butter softened
- 1¼ cup whole milk
- 3 large eggs
For the Frosting
- 1½ cup unsalted butter softened
- 4½ cups powdered sugar icing sugar
- 5-7 Tbsp heavy whipping cream double cream
- 2 tsp pure vanilla extract
For the Marvel Sprinkles Mix**
- Red Sprinkles
- Black Sprinkles
- Silver Sprinkles
SUGGESTED PRODUCTS
Instructions
- Use cornstarch as you would flour when making dough. Dust your work surface, hands, rolling pin, and cutters. Line a cookie sheet or tray with parchment paper or a non-stick baking mat.
- Knead the black fondant in your hands to make it soft and pliable and roll to ¼"/0.5cm thick.
- Using a 3"/7.5cm round cookie cutter, cut out 22 Minnie ears.
- Place the ears on the prepared cookie sheet.
- Use the silver spray to create a shimmer effect on the black ears.
- Squeeze the red icing into a piping bag fitted with a round #2 piping tip and pipe an edge around the black ears, then pipe the Falcon’s symbol in the center.
- Repeated steps 2-4 for the gray fondant. Use a star stencil (approx 1"/2.5cm) to spray red stars on the gray ears.
- Leave both sets of ears to dry overnight or for 24 hours if possible.
- To make the bows, use a silicone bow mold and dust the mold with cornstarch each time you make a fondant bow. The bows should be about 2"/5cm wide.
- Pinch off a small piece of red fondant and press into the bow mold cavity. Carefully remove from mold and set on the cookie sheet to dry overnight or for 24 hours if possible. Repeat to make 24 bows total.
TIP! Always make extra fondant decorations as backup! - To make the cupcakes, preheat the oven to 180C/350F/Gas 4. Line cupcake pans with 24 cupcake liners and set aside.
- Using an electric handheld or stand mixer, place the cake mix, butter, milk, and eggs into a large bowl and mix until combined and smooth.
- Use an ice cream scoop to divide the cupcake batter between the liners – about three-quarters full.
- Bake for 20 minutes or until an inserted toothpick comes out clean.
- Leave to cool in the pan for about 5 minutes before transferring to a wire rack to cool completely before decorating.
- To make the frosting, use an electric stand or handheld mixer and add the butter, powdered sugar, cream, and vanilla to the bowl.
- Beat on medium speed until creamy and smooth and stiff peaks form.
- Transfer 1 cup of frosting into a large piping bag fitted with a star tip. Set aside.
- Pour the red, black, and silver sprinkles into a bowl and stir to mix.
- Use a medium ice cream scoop to place a scoop of frosting on top of each cooled cupcake and use an angled spatula or knife to smooth and flatten slightly.
- Dip into the sprinkles to cover.
- Using the prepared frosting bag, pipe a swirl of frosting on top of the sprinkles layer.
- Place a red fondant bow in the center of the frosting.
- Place a Falcon ear on one side of the both, and a Winter Soldier ear on the other. Enjoy!
Notes
- Wilton Fondant Bow Mold
- 1 (3"/7.5cm) Round Fondant/Cookie Cutter
- 1 (1"/2.5cm) Star Stencil
- 2 Large Piping Bags
- 1 Round #2 Piping Tip
- 1 Open Star (#1M) Piping Tip
- 1 Medium Ice Cream Scoop
Nutrition
Nutritional information is always approximate and will depend on the quality of ingredients used and serving sizes. If you need exact calories and macros, please do your own calculations.