Jack-o’-lantern Pumpkin Embroidery Hoop Craft
Home » CREATE » Crafts » Autumn/Fall Crafts »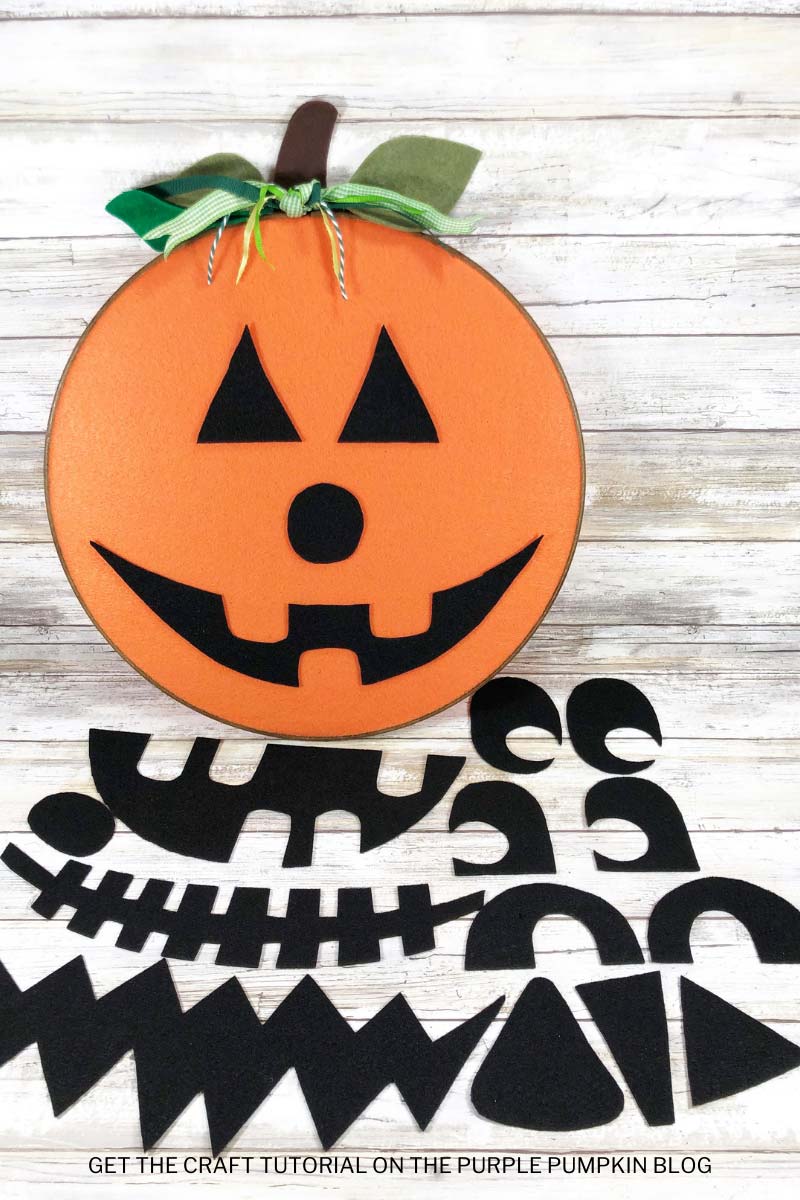

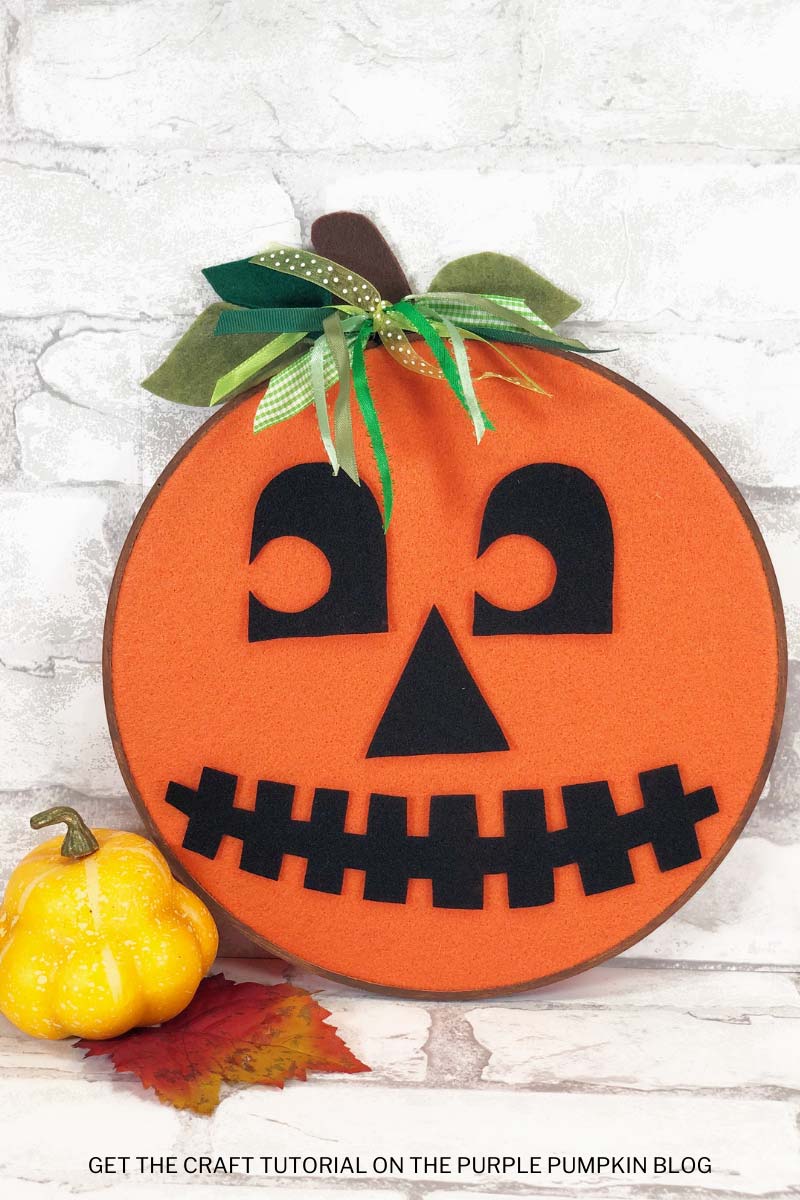
This Pumpkin Embroidery Hoop Craft is the perfect Halloween activity to keep little ones busy for ages! It has changeable faces, providing bags of entertainment plus an attractive Halloween-themed decoration for the house too!

Affiliate Disclosure
We have included affiliate links to products and services related to this post.
We may earn a commission if you purchase after clicking on those links.
As an Amazon Associate, I earn from qualifying purchases.
Read Our Full Disclosure Policy and Privacy Policy
Pumpkin Embroidery Hoop Craft
The full list of materials, tools, and instructions is found in the printable tutorial card at the end of this post. I highly recommend reading the blog post all the way through before starting this project to ensure that you have everything required and understand the steps and timings involved.
In the UK we used to have (still have?) an activity game called Fuzzy Felt, which consisted of a felt board and simple felt shapes that you could use to make scenes.
The Fuzzy Felt sets were usually themed – farm animals, space, dinosaurs, etc., and I LOVED them when I was a little kid!
I’m not sure if Fuzzy Felt was just in the UK, or it has other names in different countries (if it does, let me know in the comments!), but this pumpkin embroidery hoop craft reminds me of that fun felt game.
Using a large piece of felt fabric stretched over a wooden embroidery hoop, some black felt, and my free printable Jack-o’lantern patterns, you will have this craft ready in next to no time!
With Halloween just around the corner, this is a fun project to create in an afternoon with the kiddos – they will love changing the face of the pumpkin and coming up with different combinations of Jack-o’-lantern!
The post is part of the Crafty October series on The Purple Pumpkin Blog and is filled with free printables, crafts, recipes, and more for Halloween! You can check out Crafty October from 2022, 2021, 2020, 2019, 2018, 2017, 2016, 2015, 2014, 2013, and 2012 for tons of awesome Halloween ideas and inspiration!
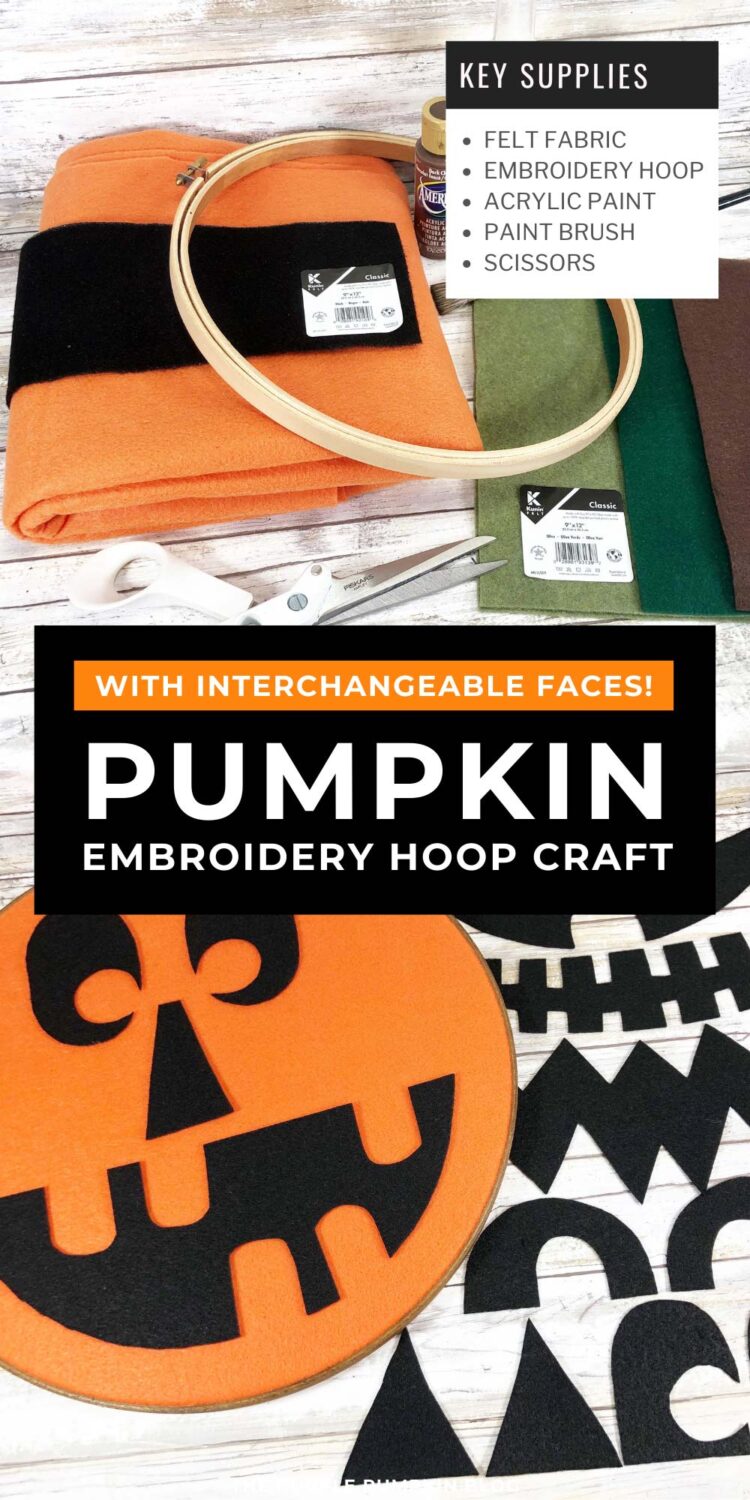
Materials & Tools Used in This Craft
For your convenience, I’ve linked [some of] the materials and tools needed for this project to Amazon below. The quantities are on the tutorial card at the end of this post.
- Felt Craft Sheets – Bright Green, Dark Brown, Olive Green (1 each), Black (3 each)
- Acrylic Craft Paint – Dark Brown
- Felt Fabric/Yardage – Orange (½ yard/18″/45cm) – basically a large piece of felt than the typical craft sheets
- Wooden Embroidery Hoop – 10” diameter
- Ribbons – Green, variety of colors and styles – 12″/30cm lengths
- Fabric Glue
- White Chalk Pencil
- Permanent Black Marker
- Hot Glue Gun and Glue Sticks
- Scissors
- Paintbrush – this is a set of paintbrushes of various sizes and types for different types of paint and glue.
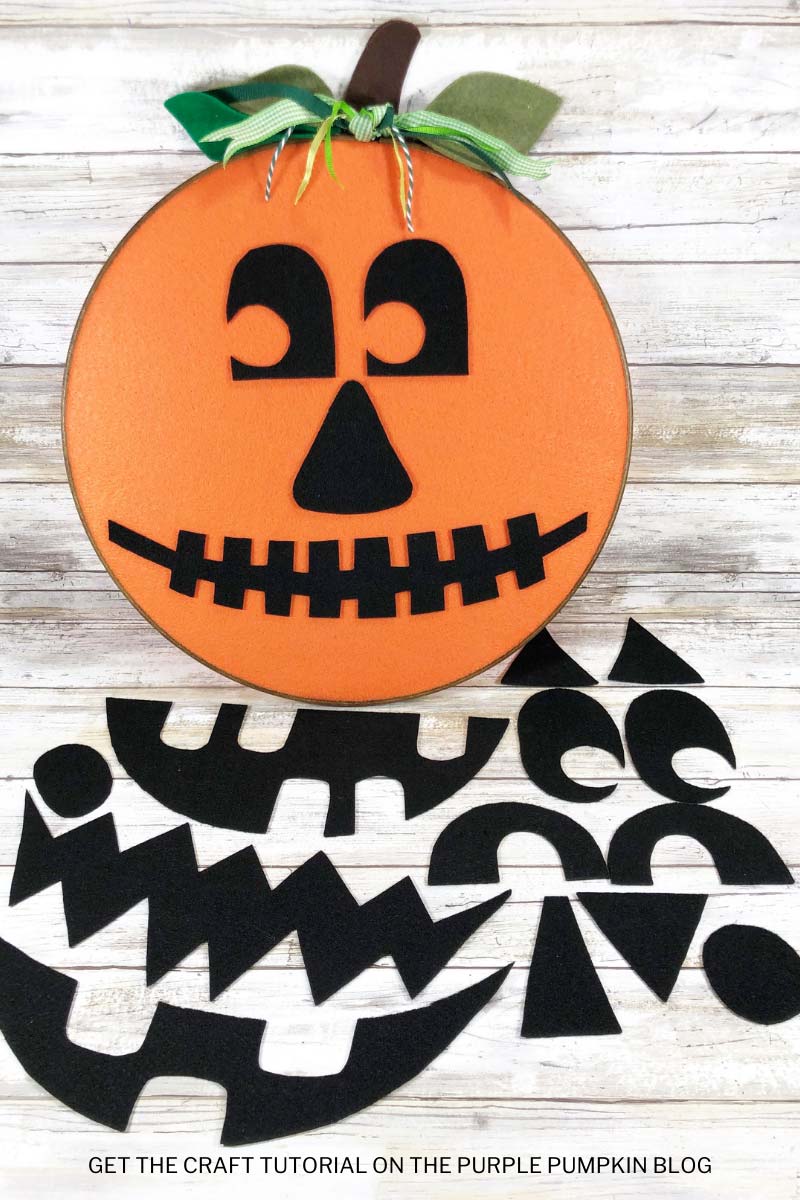
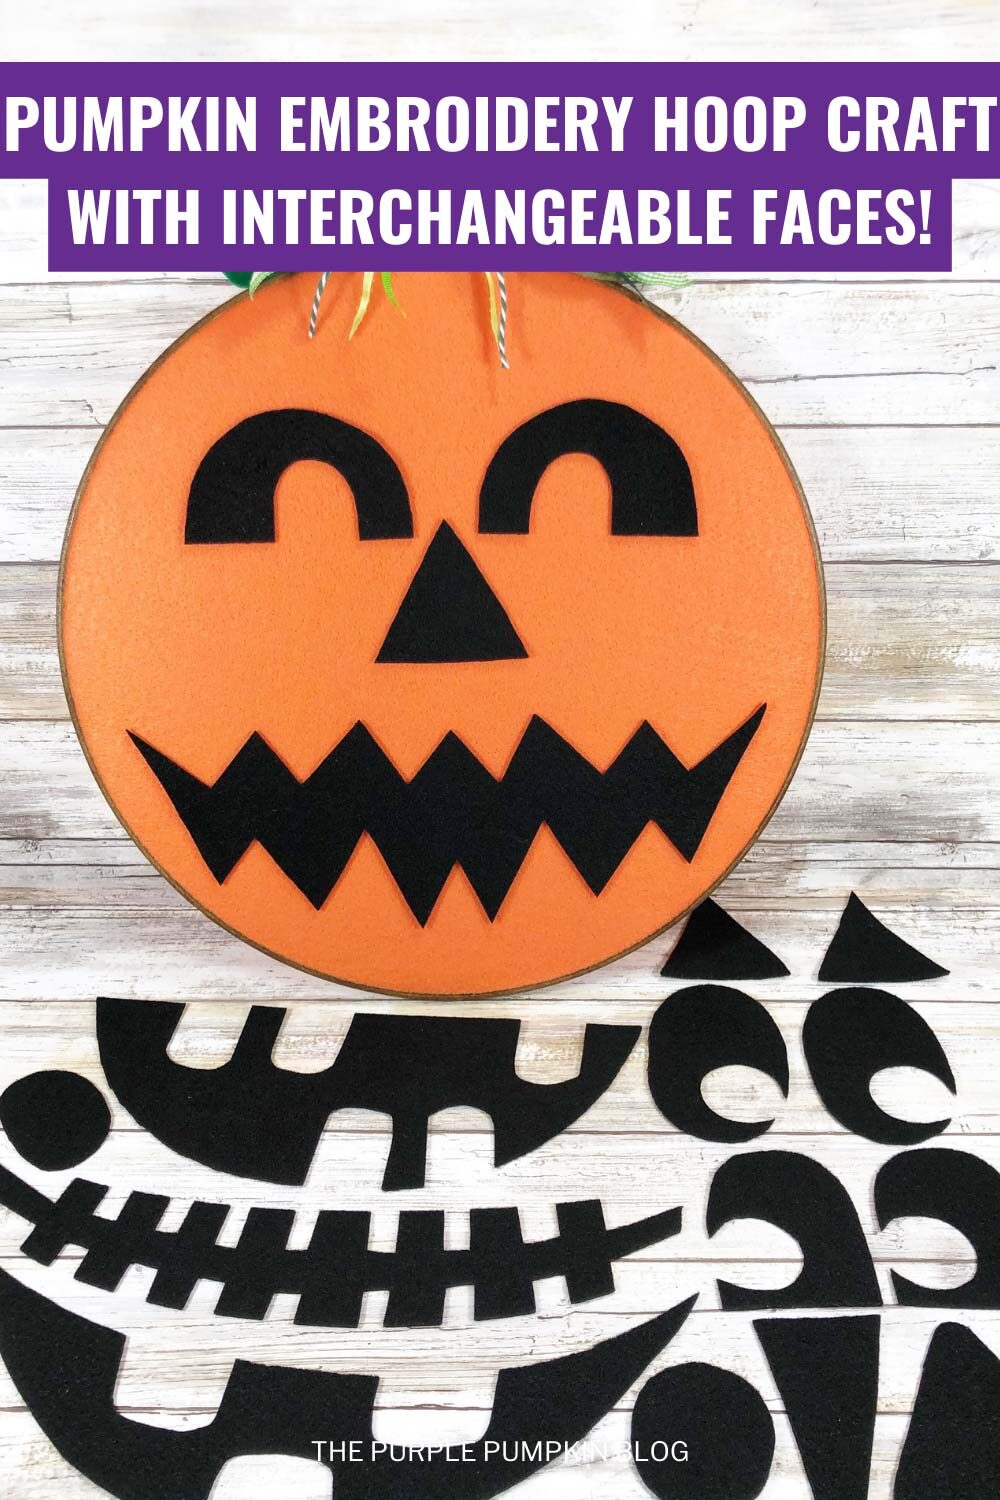
- Jack o’-lanterns Patterns – Four sets of features are included – four pairs of eyes, four noses, and four mouths – for variety. But this is the perfect time to personalize your hoop Jack-O-Lantern with features you create with your kiddos. Get creative and have FUN!
- Jack-o’-lantern Pattern 1 – click to download PDF to your device
- Jack-o’-lantern Pattern 2 – click to download PDF to your device
Cheap Craft Supplies
A great thing about this craft idea is that it can be budget-friendly using supplies you may already have or can be purchased cheaply in stores:
If you’re in the USA, check out your local Dollar Store or Dollar Tree; and if you’re in the UK, the Poundshop, The Range, Wilko, and Baker Ross are great places to shop for cheap and inexpensive craft supplies. The rest of the world reading this – I don’t know every cheap store – sorry! But hunt the ones out in your location for crafting bargains!
More Halloween Crafts
Looking for more crafts to make for? Right-click and open these in a new tab to read next!
- Bride of Frankenstein Craftivity – Halloween Craft & Creative Writing
- Halloween Felt Bat Plush Craft
- Decorate Your Own Halloween Photo Frames
I’ve shared lots of great craft ideas on The Purple Pumpkin Blog over the years, in fact, there are 100+ crafts to make and do at home for you to try!
Craft Tips
- This craft requires the pumpkin faces template:
- Jack-o’-lantern Pattern 1 – click to download PDF to your device
- Jack-o’-lantern Pattern 2 – click to download PDF to your device
How Do I Make A Pumpkin Embroidery Hoop?
Just check out the how-to card below with full materials, tools, and instructions. Any demonstration photos do not print out to save your ink.
Jack-o’-lantern Pumpkin Embroidery Hoop Craft
Materials
- 1 10-inchWooden Embroidery Hoop
- Dark Brown Acrylic Craft Paint
- Felt Yardage/Fabric – Orange ½ yard/18″/45cm
- Jack-o’-lantern Pattern 1 – click to download PDF to your device
- Jack-o’-lantern Pattern 2 – click to download PDF to your device
- Felt Craft Sheets – Bright Green Dark Brown, Olive Green (1 each), Black (3 each) approx 9″/22cm wide
- Green Ribbons – variety of colors and styles – 12″/30cm lengths
TOOLS
- Paint Brush
- Fabric Glue
- White Chalk Pencil
- Hot Glue Gun and Glue Sticks
Instructions
- Remove the label from the embroidery hoop. Loosen the screw at the top of the hoop and separate the inside hoop from the outside hoop. Paint the outside and front-facing edge of the outside ring of the embroidery hoop with dark brown acrylic craft paint. Set aside to dry and apply a second coat, if necessary.
- Fit the orange felt yardage loosely into the embroidery hoop. Pull felt gently from the back to ensure the felt is taught and then tighten the screw at the top of the hoop.
- Trim the excess orange felt fabric from the back of the embroidery hoop with scissors.
- Apply a thin line of Fabric Glue to the cut edge of the orange felt to secure. Set aside to dry.
- Download, print, and cut out the Jack-o'-lantern patterns. (Have the kiddos help with this step to personalize your Jack-o'-lantern!) Cut out the patterns, trace them onto the Black felt with a white chalk pencil, and cut them out with scissors. This works great for the larger and smaller features. TIP: Make sure to cut on the INSIDE edge of the traced line so that you have clean, finished features since the eyes, noses, and mouths are reversible.
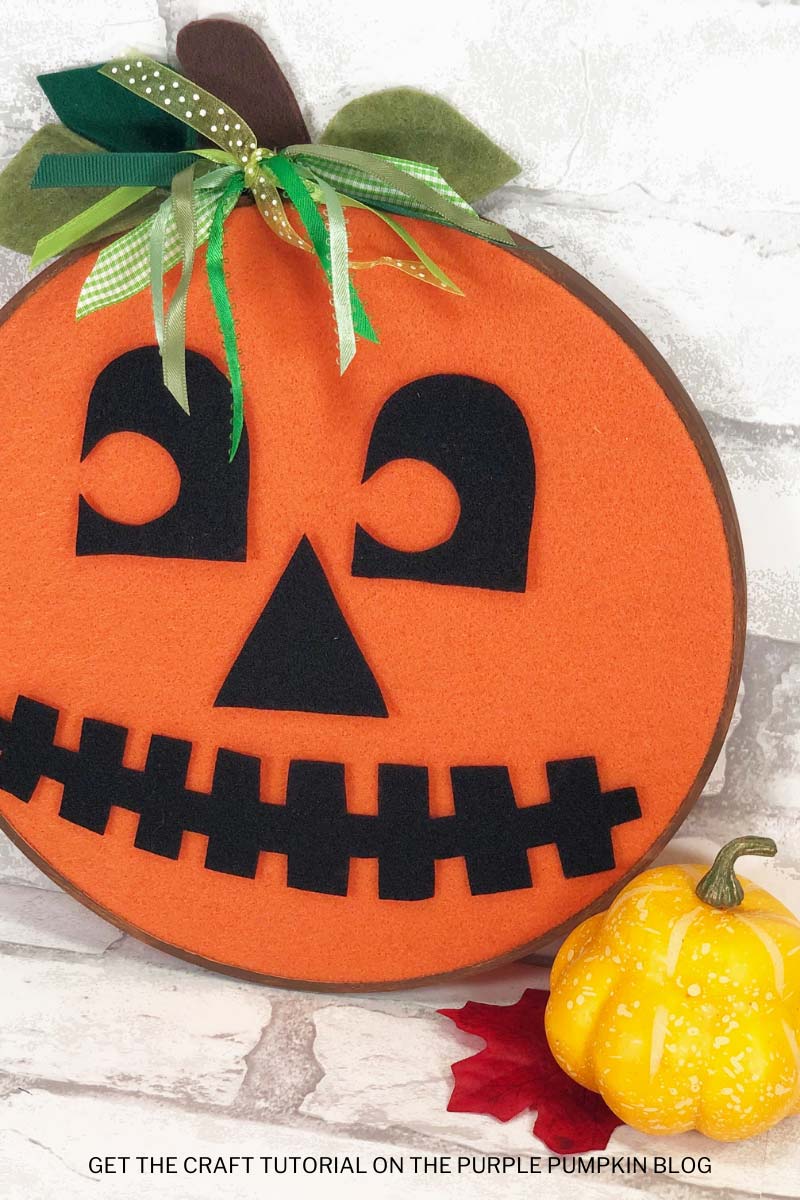
- Trace the pumpkin stem onto brown felt twice and the leaves onto bright green and olive green felt with the permanent marker, then cut out.
- Attach stems together with hot glue and then adhere to the back top of the hoop. Apply a half-inch bead of hot glue to the base of each leaf and fold in half to create dimension. To finish the hoop Jack-o'-lantern, glue leaves to either side of the screw at the top of the hoop.
- Cut 12” lengths of five to six different green ribbons and then tie in a loose knot to the screw at the top of the embroidery hoop.
- Place Jack's face as desired – the felt features "stick" to the felt background so can be mixed and matched and changed over and over again!
- Create a hanging loop with ribbon or twine if desired, then hang (or place) where desired. Happy Halloween!
This post is part of my long-running Crafty October series on The Purple Pumpkin Blog. Since 2012, I’ve shared Halloween recipes, printables, and crafts every October. While I don’t officially run the series anymore, all my new Halloween posts are still part of this decades-long celebration of spooky fun! Browse past Crafty October years for even more inspiration: 2024, 2023, 2022, 2021, 2020, 2019, 2018, 2017, 2016, 2015, 2014, 2013, and 2012.