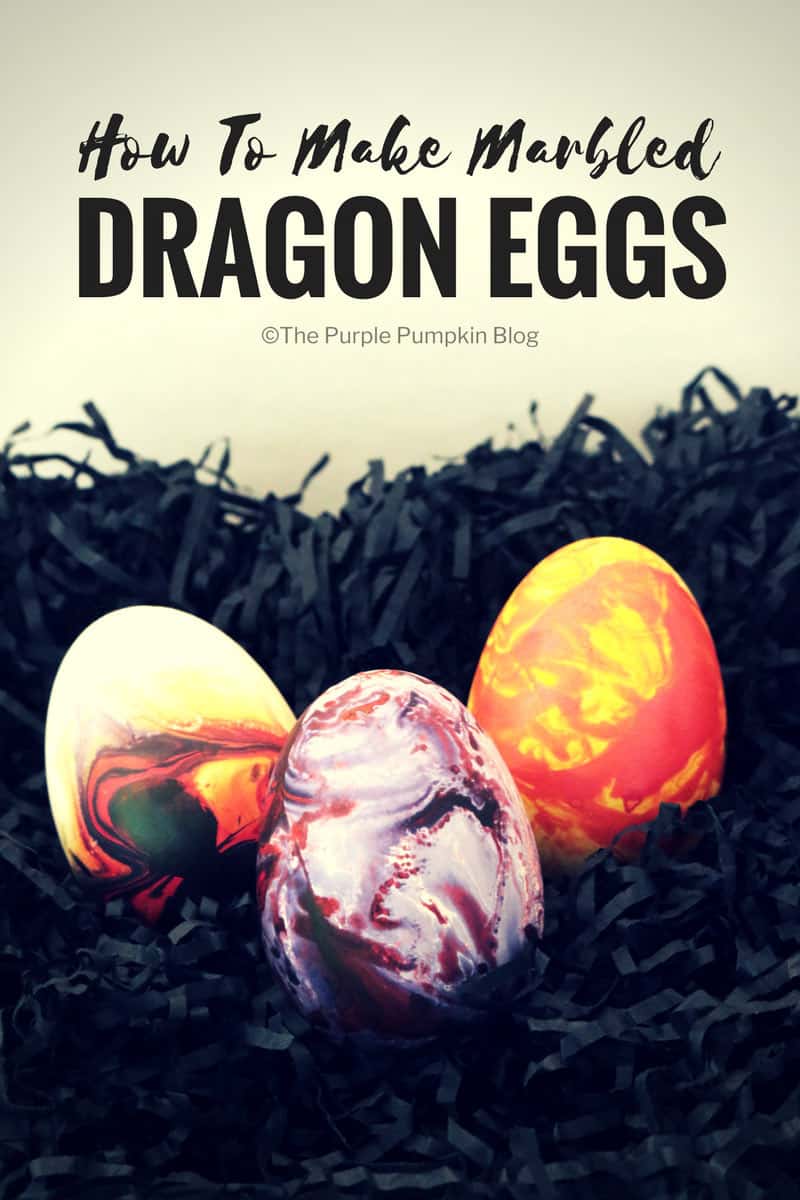
How To Make Marbled Dragon Eggs
Home » CREATE » Crafts »Using marbling ink is a fun and beautiful way to decorate paper, but what about using marbling to decorate other things too? This tutorial shows you how to make dragon eggs using this easier than you might think technique!
If you can’t find dragon eggs; ceramic eggs, chicken or duck eggs will do!
How To Make Dragon Eggs
I used ceramic eggs from Baker Ross to make dragon eggs. But you could also use chicken (or duck) eggs. I mention duck eggs, because in another decorative egg project I did a while ago, I couldn’t find any white chicken eggs, only white duck eggs. You can check out that tutorial here: Decorating Eggs with Sharpie Pens.
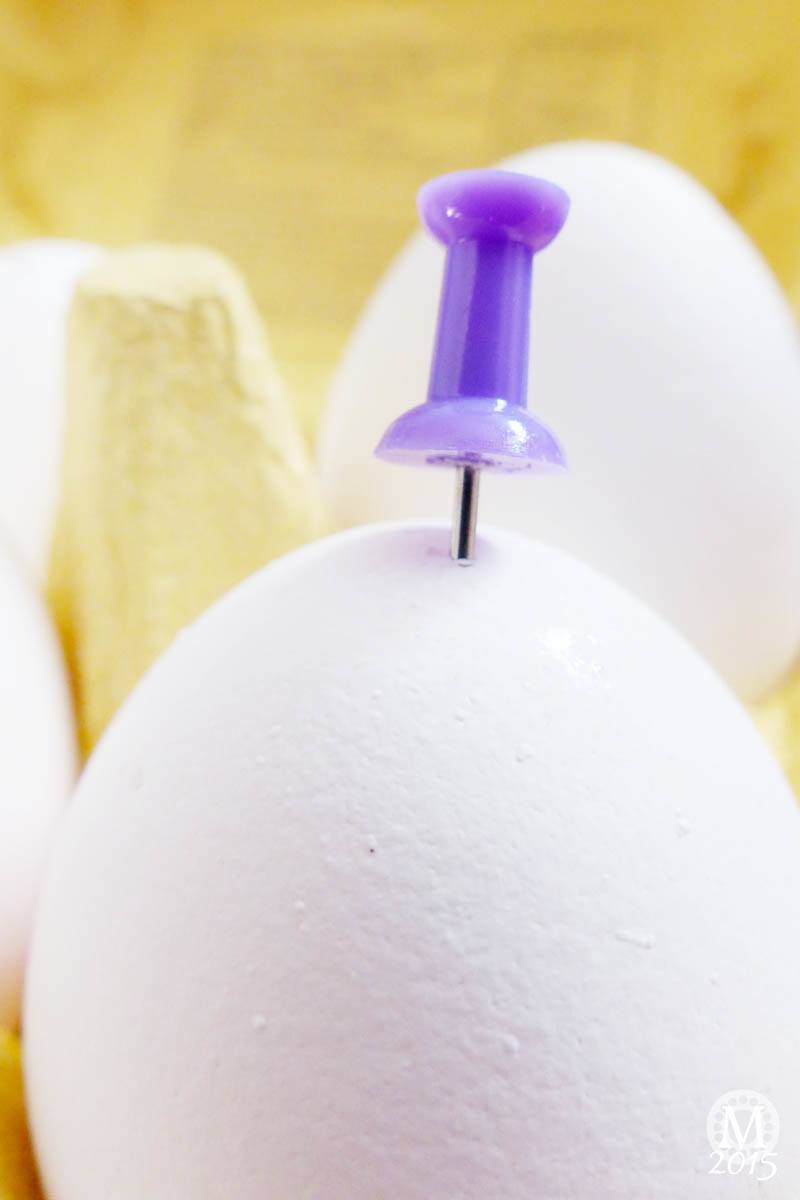
If you are making these marbled dragon eggs to keep, and are using real eggs, rather than ceramic, you will need to blow out the egg.
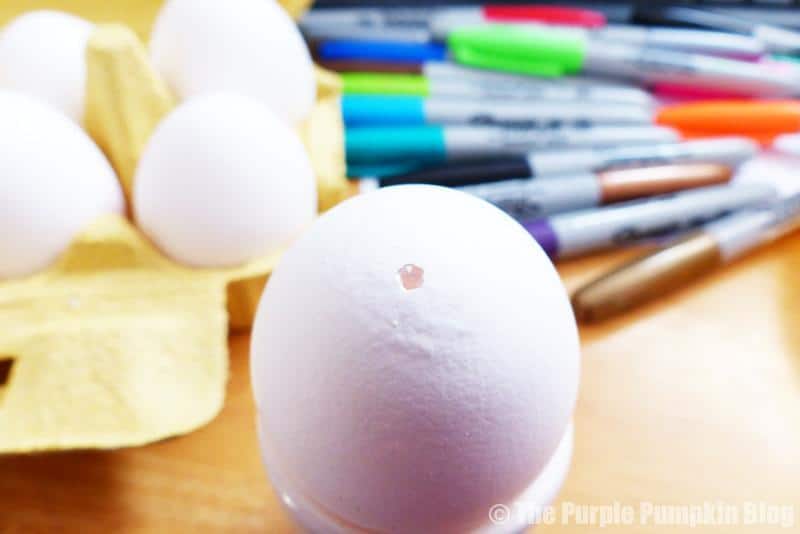
It’s quite easy to do, and, eggs are actually pretty strong, so don’t panic at the thought of having to pierce a hole in the top and bottom of the egg. Take a drawing pin and gently push it into the top of the egg, swivel it about to create a small hole, then turn the egg upside down. Do the same, but make the hole a bit bigger. Then, over a bowl, blow through the top hole and the insides will come through the bottom hole. If you’re finding it a struggle, make the holes a bit bigger! Once all the insides have been blow out, hold under a running tap to clean through, and blow out any excess water. Leave to dry
Marbling Ink
I remember marbling paper when I was in primary school (many eons ago, like the 1980s!) but haven’t done it since. Which is a shame as it’s actually really quite easy to do. Of course you need marbling inks and the set of 6 inks from Baker Ross is a barging £5.99 (at time of writing this post). You only need a few drops so they will last a long time.
I’ve been trying to find out what the difference is between using marbling ink and regular inks or paints in marbling, but can’t seem to find a definitive answer. The marbling ink however, sits on the surface of the water, so I suspect there might be some oil involved. I think I’ll test it out and report back with results.

What you’ll need
- old newspaper (to protect work surface – marbling inks will stain!)
- plastic gloves (you don’t want to stain your hands either!)
- old plastic bowl
- water
- marbling inks
- scrap paper
- toothpick/old comb (for creating patterns)
- ceramic eggs or
- chicken/duck eggs, blown out
- varnish (optional)
How to marble
- Marbling inks will stain, so make sure to cover your work surface with some old newspaper, put on an apron, or old clothes, and protect your hands with some plastic/latex gloves.
- Stains should be treated immediately with neat washing up liquid.
- You want to use an old bowl that will be deep enough to submerge your egg. It doesn’t need to be a huge bowl, in fact the one I used was about 15cm/6″ across.
- Fill about two thirds with water (or enough to know you can dip the whole egg into it).
- Before marbling you need to prime the water by adding a drop of ink and removing it with a scrap piece of paper.
- Use the dropper bottles to add 1 or 2 drops of marbling ink to the surface of the water. Several colours may be used. Allow the colours to spread across the surface of the water.
- Create patterns by blowing on the inks, or by combing through with a toothpick or an old comb. Just look how beautiful the ink can become!
- Smoothly dip your egg into the water and ink, and move around to cover (see video below for demonstration). Allow excess to drip off and hang to dry for 24 hours.
- If using real eggs you will have to either dip the egg part way – or go all in (make sure those gloves are on!) For drying, you could use an old egg cup, and turn the egg part way. Or you could thread through a skewer and balance across something (like two stacks of books) so that they can be suspended.
- You may be able to get another egg dipping out of the ink, but if you don’t think you can, use sheets of paper to create marbled paper for art projects. Place the paper on top of the water and the pattern will transfer – hang to dry. You can see my excess inked paper below. I’ll use them for lettering backgrounds!
- For each new colour set, I changed the water completely, because it’s actually quite tricky to get rid of all the previously used ink! See my oops moment below! I didn’t clear all the dark ink properly. I didn’t think it would matter… it did! I mean, it still came out pretty cool, but didn’t make the main photo cut!
- Once your eggs are dry, you can leave with a matte finish, or add a coat of varnish for shine. So far I’ve left mine matte, but I do plan to varnish them.
Rachel
November 27, 2018 @ 1:09 am
This is a really cool, original craft! I will definitely be trying this one!