Grogu Pocket Organizer Craft Using An Embroidery Hoop!
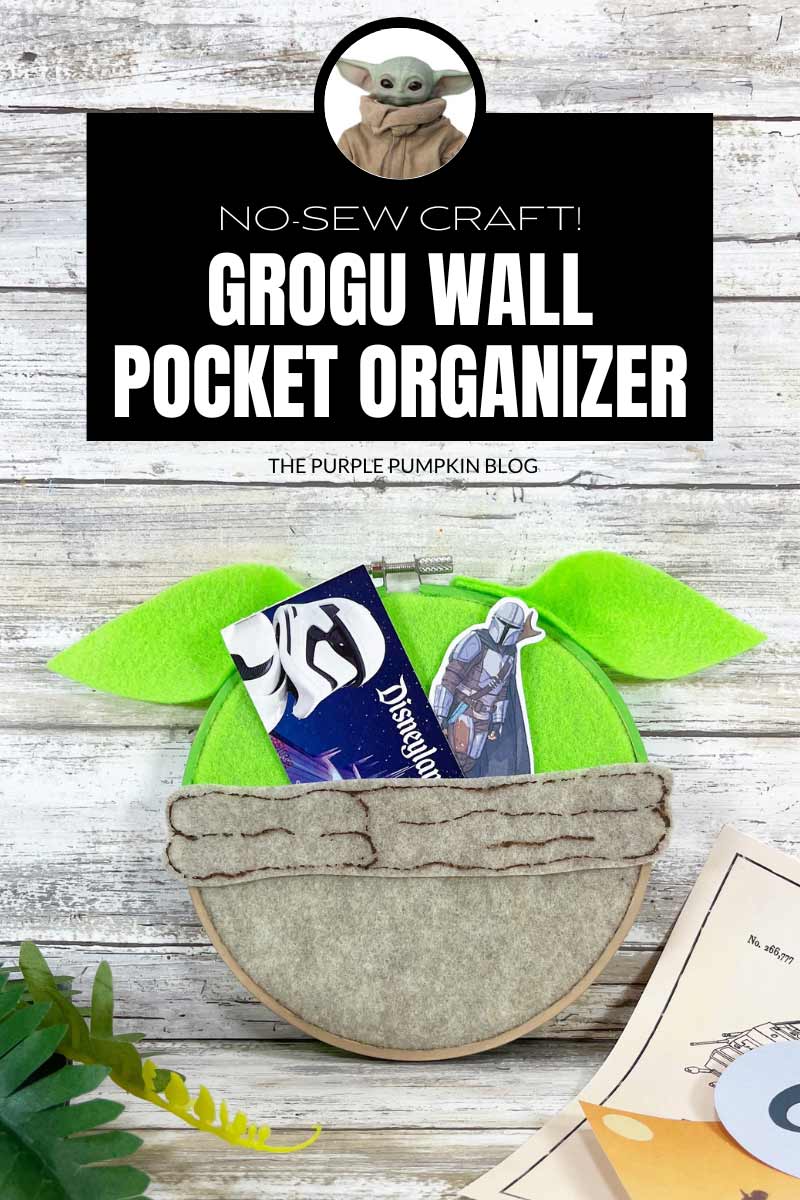
Home » CREATE » Crafts » Disney Crafts » Star Wars Crafts »Why not show your love for everyone’s favourite little green guy, with this Grogu Pocket Organizer Craft! Using an embroidery hoop, some felt, and a few other simple craft supplies, you’ll have a place to keep all your paper mementos and tickets safe, and a cute display for your wall!
Don’t have time for this craft now? Be sure to tap the heart icon in the bottom right of the screen to save this post for later!

Affiliate Disclosure
We have included affiliate links to products and services related to the topic of this post.
This post contains affiliate links, and we will be compensated if you purchase after clicking on those links.
As an Amazon Associate, I earn from qualifying purchases.
Read Our Full Disclosure and Privacy Policy
Grogu Pocket Organizer Craft
The full list of materials, tools, and instructions is in the printable tutorial card at the end of this post. I highly recommend reading the blog post all the way through before starting this project to ensure that you have everything required and understand the steps and timings involved.
Season 3 of The Mandalorian will be returning to Disney+ on March 1 and we can’t wait!
If like us at The Purple Pumpkin Blog, you have fallen in love with Baby Yoda (who we of course learned is actually called Grogu!), then you are going to love this craft idea!
This craft is not only fun to make, but it also has a function when finished as a pocket organizer that you can hang up on your wall, or display propped on a shelf.
If you keep hold of paper ephemera like your Disneyland or Walt Disney World tickets, park maps, stickers, or similar, then the Grogu pocket organizer is the perfect place to store them!
This fun Grogu craft is quick and easy to make for family, friends, or even the kids’ teachers. And once you know the technique for creating the pocket you can make all sorts of your favorite characters!

Materials & Tools Used in This Craft
For your convenience, I’ve linked [some of] the materials and tools needed for this project to Amazon below. The quantities are on the craft tutorial card at the end of this post.
- 6-inch Wooden Embroidery Hoop – this forms the base of your pocket organizer. You can make larger ones if you like, just make sure to use larger pieces of felt fabric.
- Felt Fabric – (9″ by 12″/23cm x 30cm) in the colors Sandstone (or Brown or Tan), and Neon/Bright Green. Felt craft sheets are perfect for crafting because when cut they will not fray like traditional materials. Layering the tan felt over the top of the neon green felt creates a small pocket that can be filled with all your Mandalorian keepsakes.
- Acrylic Craft Paints – in the colors Brown/Tan, and Bright Green. Try to match your paints as close as possible to your felt colors.
- Dimensional Fabric Paint – I remember calling this puffy paint when I was a kid! You will need the color Brown for this project.
- Ribbon – an optional extra to create a hanging loop if desired.
- Scissors
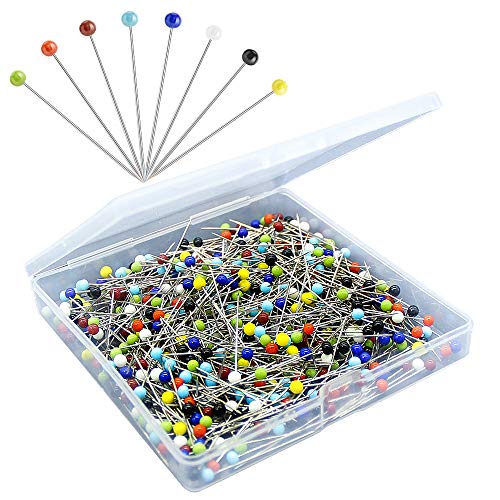
- Straight Sewing Pins
- Hot Glue Gun and Glue Sticks
- Paintbrush – this is a set of paintbrushes of various sizes and types for different types of paint and glue.
- Grogu Pocket Organizer Template – click to download the PDF which you can print on either US Letter or A4 paper sizes. Opens in a new tab.
No time to read now? Tap the buttons below to save the craft to your Pinterest boards or Facebook page for later!
Cheap Craft Supplies
This can be a budget-friendly craft using supplies you may already have or that can be purchased cheaply in stores:
If you’re in the USA, check out your local Dollar Store or Dollar Tree; and if you’re in the UK, the Poundshop, The Range, Wilko, and Baker Ross are great places to shop for cheap and inexpensive craft supplies.
To the rest of the world reading this, unfortunately, I don’t know every cheap store out there – sorry! But please do hunt the ones out in your location for crafting bargains!

How Do I Make A Grogu Pocket Wall Organizer?
The printable tutorial card with the full supplies list and instructions can be found at the end of this post.
Step 1 – Add Felt to Hoop: Loosen the screw at the top of the wooden embroidery hoop and separate the inner ring from the outer ring.
Layer the sandstone/brown/tan felt on top of the green felt so that 4″ (10cm) of the green is at the top and 3″ (7.5cm) of the tan is at the bottom. Place the inner hoop underneath the layered felt.
Fit the felt loosely into the outer ring of the embroidery hoop. Pull the felt gently from the back to ensure the felt is taught and then tighten the screw at the top of the hoop.


Step 2 – Trim Felt: Use scissors to trim the excess felt from the back of the hoop. Apply a thin line of hot glue to the cut edge of the felt to secure it.
TIP! You can use liquid craft glue for this project, but you will have to wait for the glue to dry.


Step 3 – Paint Embroidery Hoop: Paint the top of the outside and front edge of the wooden hoop with bright green acrylic craft paint, lining it up with the green felt. Set aside to dry. Apply a second coat, if necessary.
Paint the bottom of the outside and front edge of the hoop with tan acrylic craft paint, lining it up with the tan felt. Set aside to dry. Apply a second coat, if necessary.


Step 4 – Use Downloadable Pattern: Download, print, and cut out the patterns. Attach the paper ears to the green felt, and the collar to the tan felt with straight sewing pins. Cut everything out with scissors.
TIP! If working with younger kids, cut out the patterns and trace them onto the felt with a dark marker.
Step 5 – Attach Ears: Place a small dab of glue at the base of each ear and fold partially in half. Glue the ears to the top right and top left of the embroidery hoop, using the metal screw as your center point.


Step 6 – Attach Collar: Place a piece of scrap paper into the pocket so that the glue doesn’t seep through, then attach the collar to the top edge of the tan felt pocket with hot glue.
Step 7 – Add Dimension: Using the brown dimensional fabric paint, outline the collar and draw on a few folds to mimic the look of the fabric. Leave to dry.


Step 8 – Add Hanging Loop: This is an optional extra step. Create a hanging loop and tie it to the metal screw so that you can hang your Grogu organizer on the wall.
Slide your paper mementos and tickets into the pocket and display your organizer where desired!
If giving the organizer as a gift you can finish the back with a circle of neon green or tan craft felt.

More Grogu (Baby Yoda) Crafts
Looking for more Grogu crafts to have fun with? Right-click and open these in a new tab to read next!
- Grogu Popsicle Stick Craft
- Make Your Own DIY Baby Yoda Plush! Cute Mini Felt Baby Yoda Tutorial
- Build A Baby Yoda Free Printable! Paper Grogu Template!
- (Baby Yoda) Grogu Easter Basket with Cricut Vinyl Sticker Decoration
I’ve shared lots of great craft ideas on The Purple Pumpkin Blog over the years, in fact, there are 100+ crafts to make and do at home for you to try!

Printable Grogu Pocket Wall Organizer CraftTutorial Card
To save ink, any demonstration photos on the tutorial card do not print.

Grogu Pocket Organizer
Why not show your love for everyone's favourite little green guy, with this Grogu Pocket Organizer Craft!
Materials
- 6-inch Wooden Embroidery Hoop
- Felt Fabric (9” by 12”) – Sandstone/Brown/Tan, and Bright/Neon Green
- Acrylic Craft Paint – Brown/Tan, Bright Green
- Brown Dimensional Fabric Paint
- Grogu Pattern
- Ribbon, for hanging (optional)
Tools
- Scissors
- Straight Pins
- Glue Gun and Glue Sticks
- Paint Brush
Instructions
- Loosen the screw at the top of the wooden embroidery hoop and separate the inner ring from the outer ring.
Layer the sandstone/brown/tan felt on top of the green felt so that 4″ (10cm) of the green is at the top and 3″ (7.5cm) of the tan is at the bottom. Place the inner hoop underneath the layered felt.
Fit the felt loosely into the outer ring of the embroidery hoop. Pull the felt gently from the back to ensure the felt is taught and then tighten the screw at the top of the hoop.
- Use scissors to trim the excess felt from the back of the hoop. Apply a thin line of hot glue to the cut edge of the felt to secure it.

- Paint the top of the outside and front edge of the wooden hoop with bright green acrylic craft paint, lining it up with the green felt. Set aside to dry. Apply a second coat, if necessary.
Paint the bottom of the outside and front edge of the hoop with tan acrylic craft paint, lining it up with the tan felt. Set aside to dry. Apply a second coat, if necessary.
- Download, print, and cut out the patterns. Attach the paper ears to the green felt, and the collar to the tan felt with straight sewing pins. Cut everything out with scissors.

- Place a small dab of glue at the base of each ear and fold partially in half. Glue the ears to the top right and top left of the embroidery hoop, using the metal screw as your center point.

- Place a piece of scrap paper into the pocket so that the glue doesn’t seep through, then attach the collar to the top edge of the tan felt pocket with hot glue.

- Using the brown dimensional fabric paint, outline the collar and draw on a few folds to mimic the look of the fabric. Leave to dry.

- Step 8 – Add Hanging Loop: This is an optional extra step. Create a hanging loop and tie it to the metal screw so that you can hang your Grogu organizer on the wall.
Slide your paper mementos and tickets into the pocket and display your organizer where desired!
If giving the organizer as a gift you can finish the back with a circle of neon green or tan craft felt.
Recommended Products
As an Amazon Associate and member of other affiliate programs, I earn from qualifying purchases.


