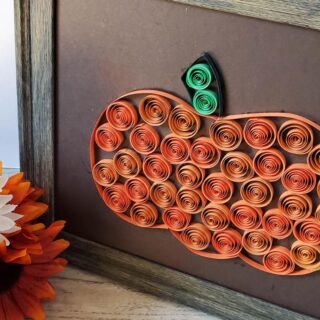
Paper Quill Pumpkin Craft
This paper pumpkin is a perfect introduction to paper quilling for beginners, and is a fun project for fall!
Materials
- Paper Quilling Kit – specific tools used from the kit:
- Orange Paper Set 3 darkest colors
- Green Paper Set 2 darkest colors
- Paper Quilling Pen
- Quilling Board
- Glue Bottle filled with Tacky craft glue
- Scissors
- Tweezers
- Photo Frame – rustic wooden 8″ x 10″
- Brown Cardstock – sheet cut to 8″ x 10″
- White PVA/School Glue – this dries clear
- Pen or pencil
Instructions
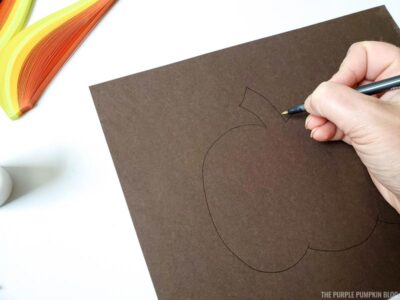
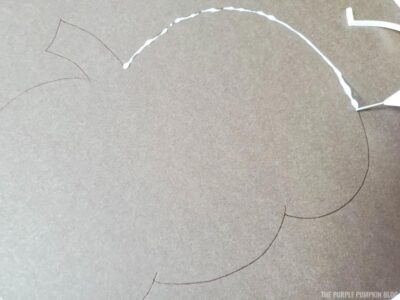
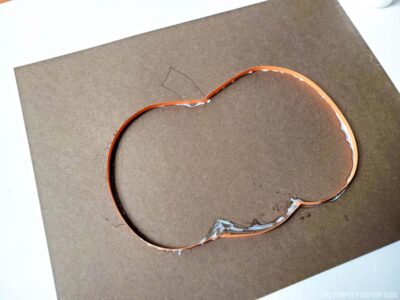
- Start by drawing your pumpkin. You can either print out a shape to trace or just free-hand it.
- Remove the paper strips you will be using from the rest of the stack, and peel them off the glue end. You will be using ALL of the 3 darkest orange colors, as well as one strip of the darkest green color, and two strips of the second darkest green color.
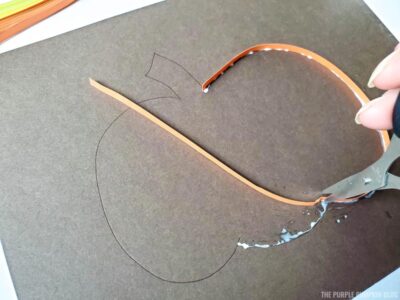
- Fill your glue bottle with glue, and trace your entire drawn pumpkin with a thin layer of glue.
- Take a strip of the darkest orange paper and maneuver it around the pumpkin, on the glue. You will need to cut the paper when you come to a point in the design, then start over with maneuvering over the glue. You may need to hold the paper in place for 30-60 seconds to get it to stay exactly where you want it.
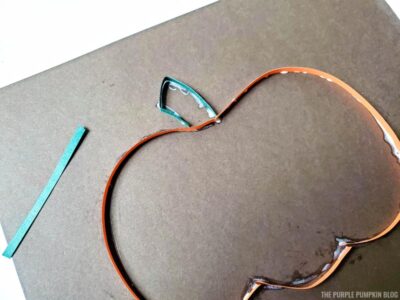
- Repeat step 4 for the stem, with the darkest shade of green paper strip.
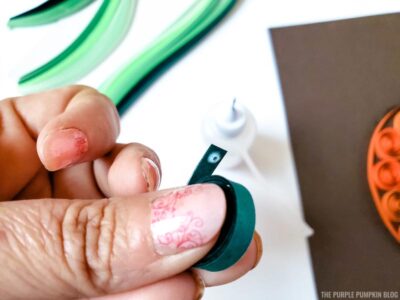
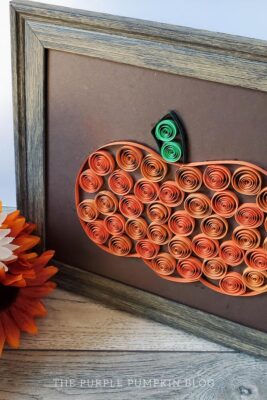
- Now it’s time to start quilling the paper! Using the paper quilling pen, place one end of an orange paper strip inside the tool, then start rolling until you come to the end of the paper.
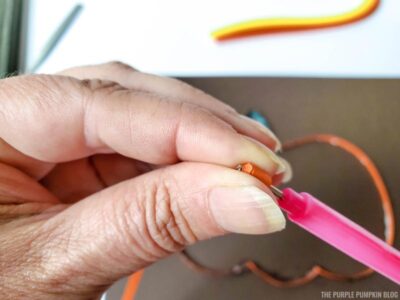
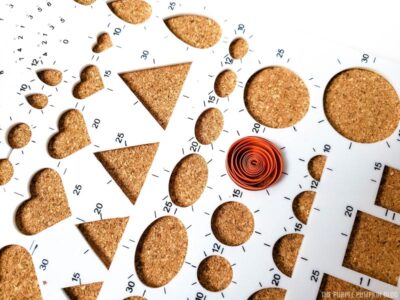
- Gently pull the paper off the quilling pen, and place it into the #20 circular hole in the quilling board. Push down gently with your finger until it forms the correct size/shape.
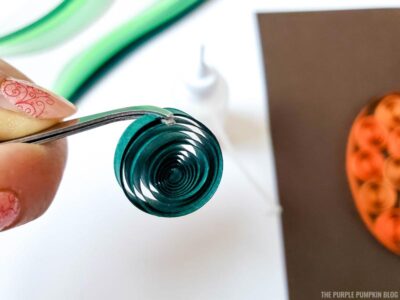
- Gently grab your quilled paper strip where the end of the strip is with your tweezers. Apply a small amount of glue to the end of the paper strip, and using your tweezers, attach and hold it for a few seconds.
- You will repeat this quilling process (steps 6-8) until you run out of the darkest 3 colors of orange paper strips, and two strips of the second darkest green.
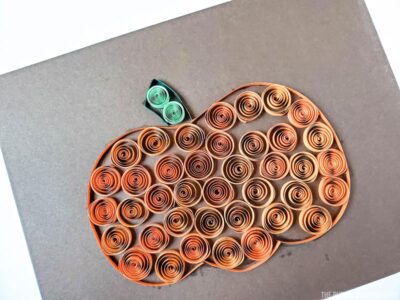
- Once all of your paper is quilled, arrange them into your pumpkin however you like. For this one, I didn’t do a specific design, rather I just tried to get the 3 shades all over, making the entire pumpkin look blended.
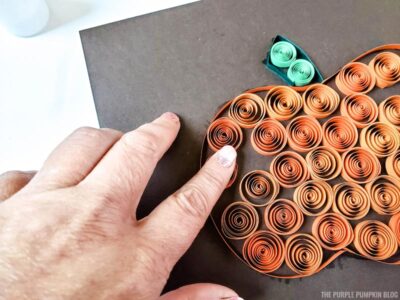
- You will apply a small dot of glue in 3 areas of the back of each quilled circle, then adhere it to the cardstock.

- Repeat steps 11 and 12 for the stem.
- Remove the glass from your frame and place your cardstock quilled pumpkin art inside. You may place the glass behind the cardstock if you’d like for safe keeping.
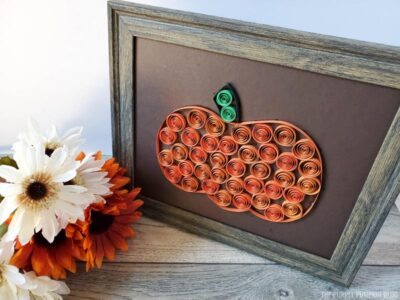
- Display your paper quill pumpkin where desired!
Notes
If you have never done paper quilling before, I recommend watching a few videos on YouTube to learn the basics. This project is pretty basic, so you should have no problem making it after watching a few beginner videos.
Did you make this project? Share it!Tag @_ThePurplePumpkinBlog on Instagram with the hashtag #TPPBCreate!