Craft Foam Christmas Cookie Ornament Craft
Home » CREATE »
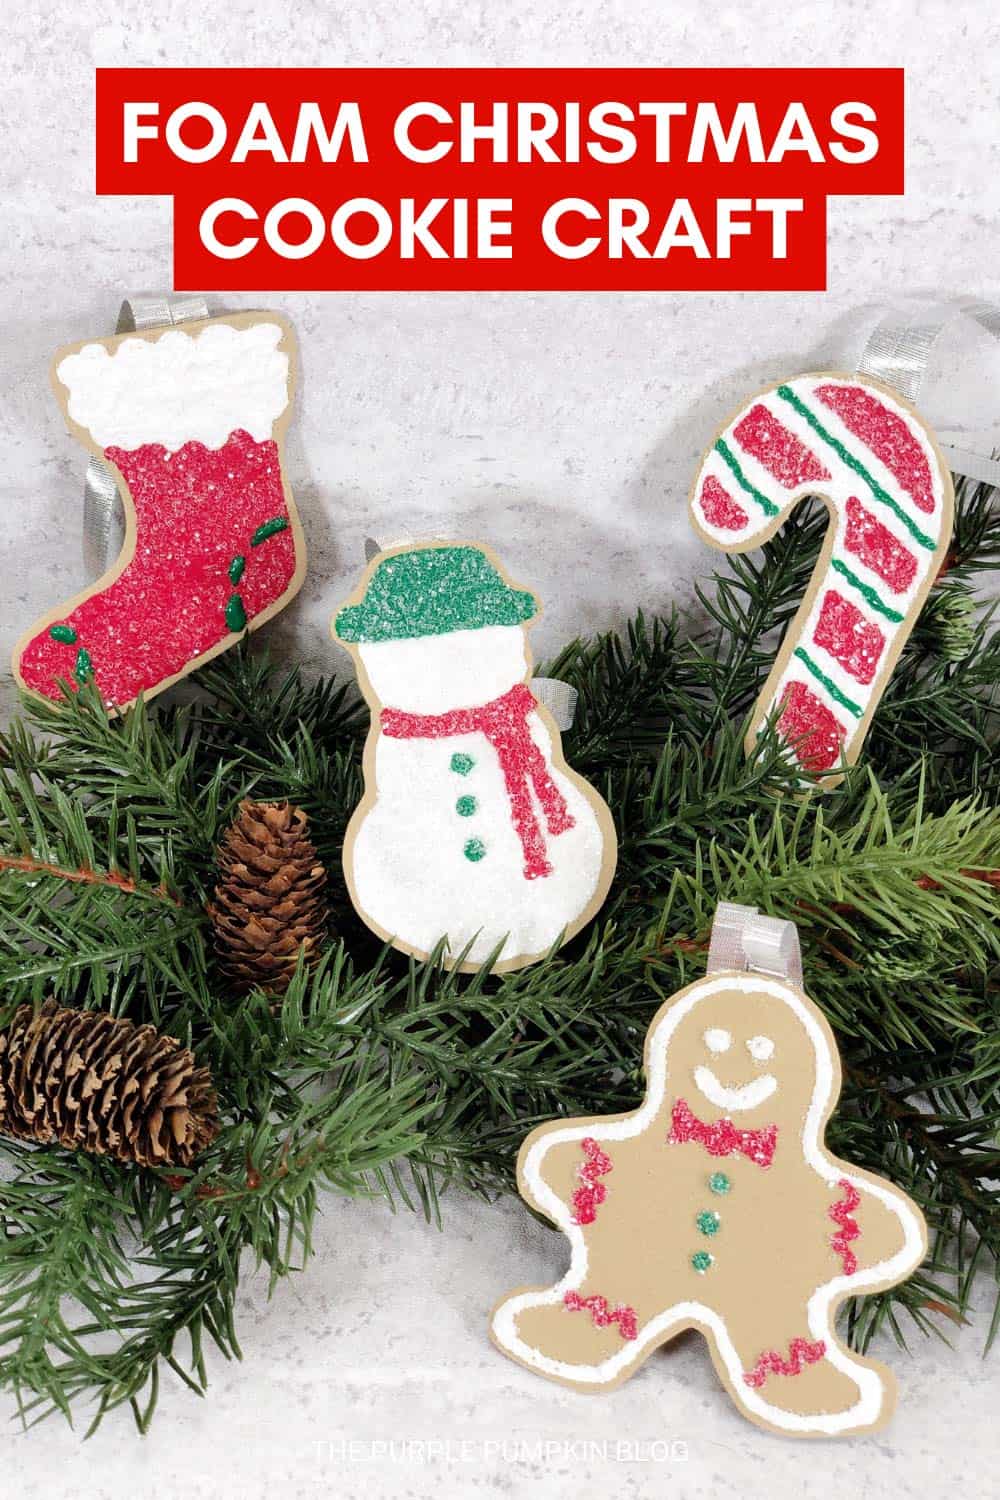
This Christmas Cookie Ornament Craft is simple and fun and uses craft foam and glitter to give it a bit of sparkle.

So if you’re looking for easy homemade ornaments that kids can help make, then they will love decorating these cookie ornaments and then hanging them on the Christmas tree!
Affiliate Disclosure
We have included affiliate links to products and services related to this post.
We may earn a commission if you purchase after clicking on those links.
As an Amazon Associate, I earn from qualifying purchases.
Read Our Full Disclosure Policy and Privacy Policy
Christmas Cookie Ornament Craft
The full list of materials, tools, and instructions is found in the printable tutorial card at the end of this post. I highly recommend reading the blog post all the way through before starting this project to ensure that you have everything required and understand the steps and timings involved.
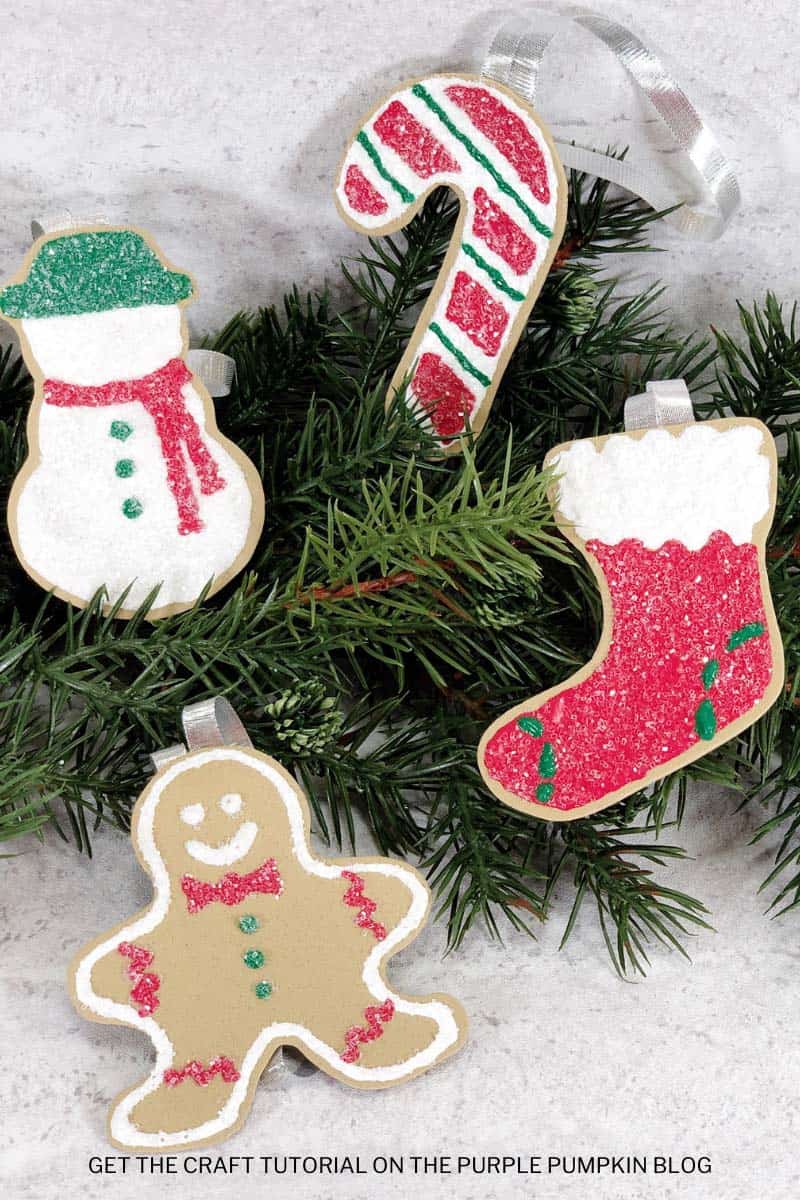
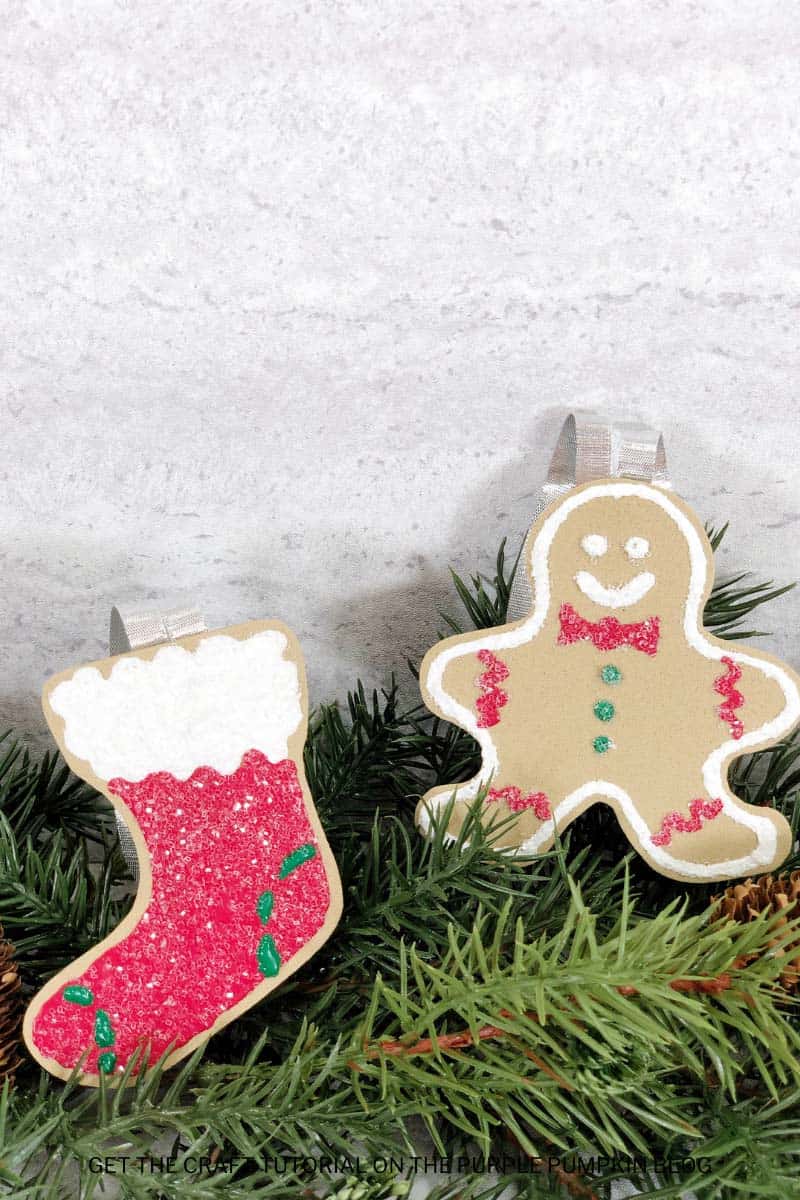
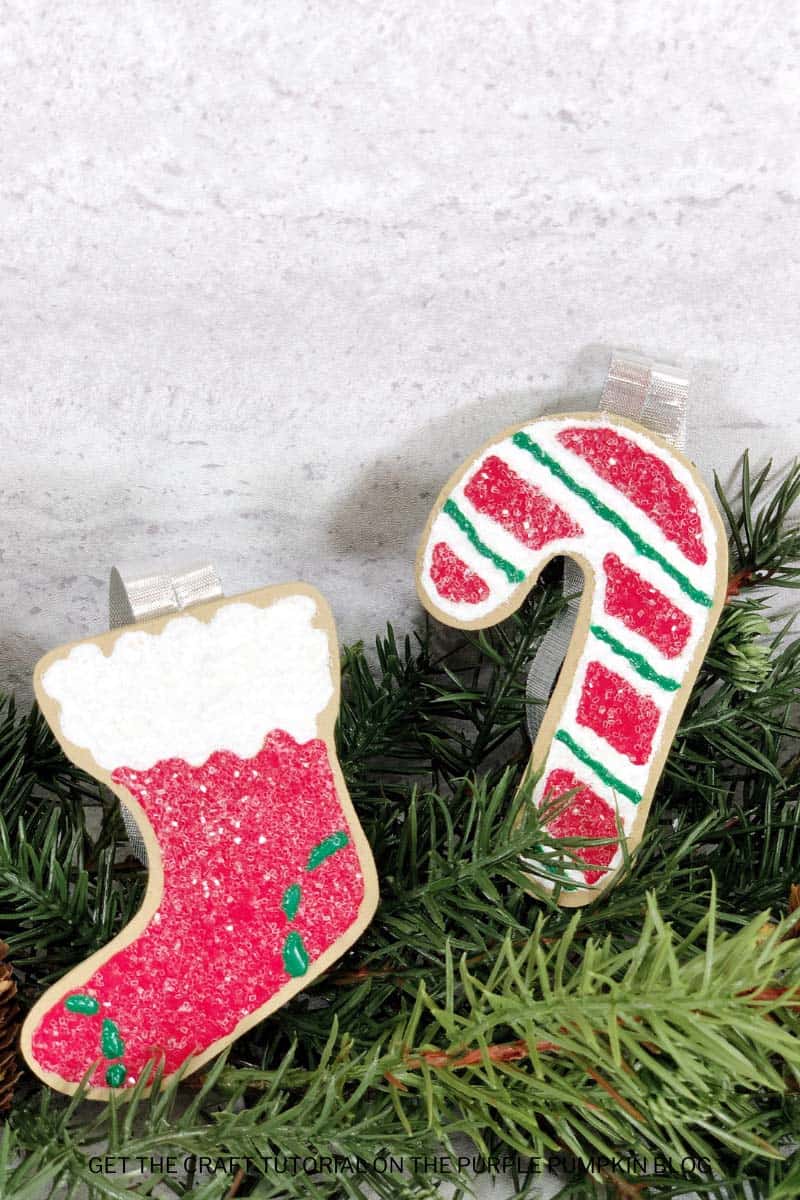
Want to make cookie ornaments for the tree, but baking with kids is just too stressful? Well, how about making them with craft foam!
This deliciously creative Christmas cookie Ornament craft will sweeten up your tree this holiday season!
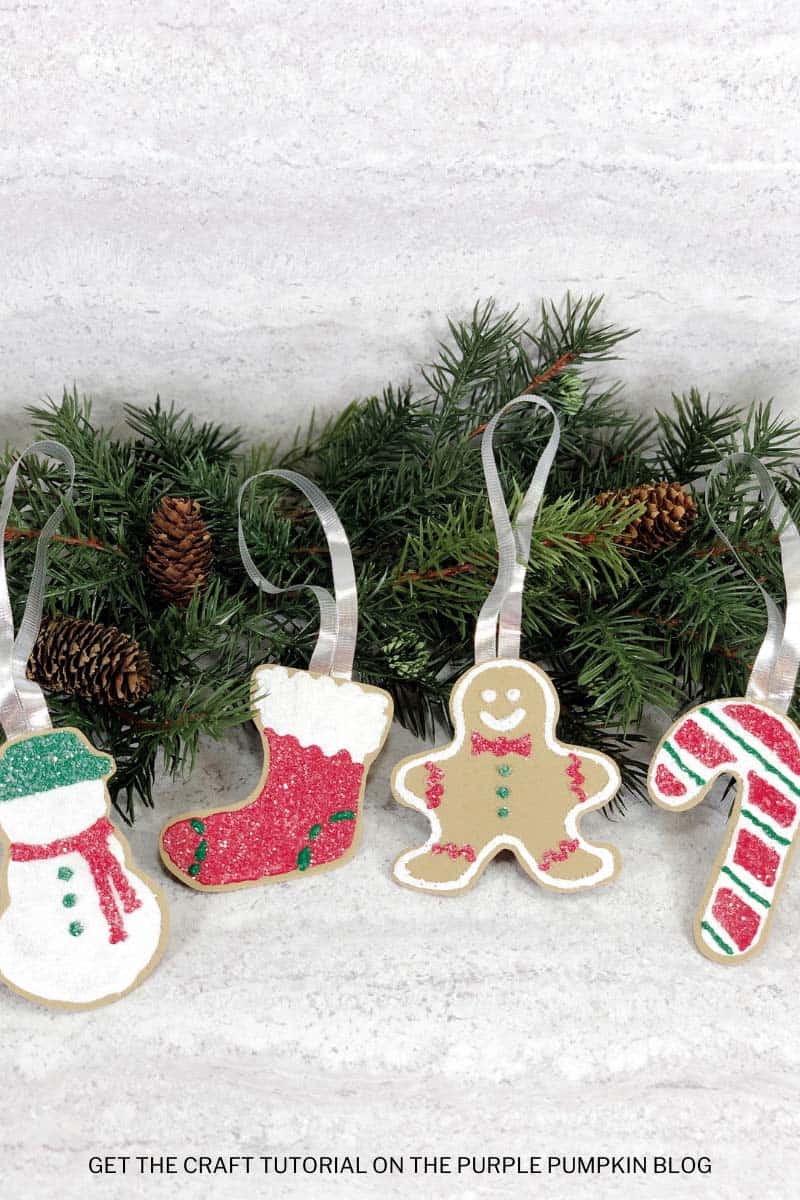
Use festive cookie cutters to cut out “cookies” from craft foam, add puffy paint, and glitter glue “icing”, and decorate with pony bead “candy”.
The craft foam cookie ornaments are so simple to make, and kids (and you!) will have so much fun customising them any way that you like.
Plus, they’re lightweight and won’t take up much space on your tree. Ready to get started? Keep reading for instructions.
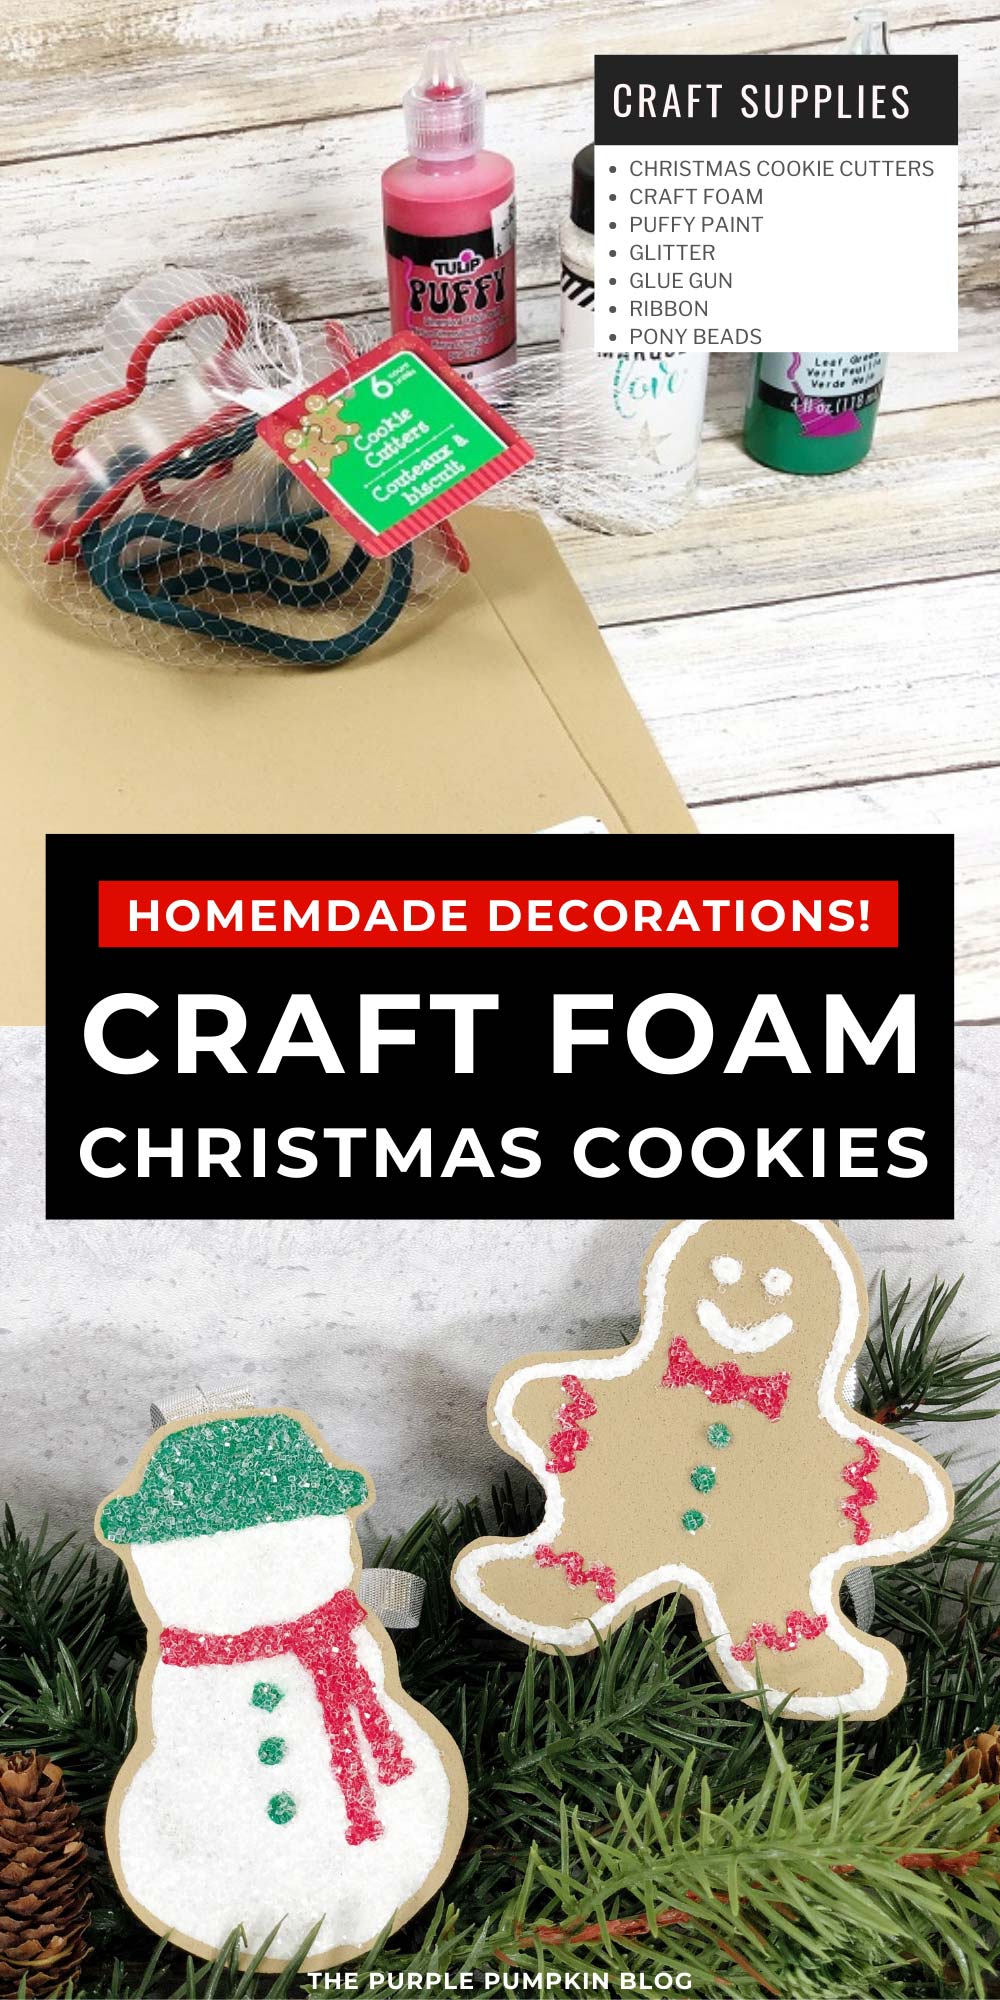
Materials & Tools Used in This Craft
For your convenience, I’ve linked [some of] the materials and tools needed for this project to Amazon below. The quantities are on the craft tutorial card at the end of this post.
- Christmas Cookie Cutters – these are used to mark the shape into craft foam, and then to cut out with scissors, rather than to cut cookie shapes directly from the foam.
- Light Brown/Tan Craft Foam – the base of your cookie decorations.
- Dimensional Fabric Paint – I remember calling this puffy paint when I was a kid! You will need the colors white, red, and green for this project. This paint dries to leave a raised, 3-D effect.
- Clear/White Glitter
- Glue Gun and Glue Sticks – use a dual or low-temp glue gun for this project.
- Scissors
- Ribbon – for hanging the ornaments. We used silver, but you can use any color you like.
- Pony Beads – optional, to add extra embellishments to the “cookies”.
Cheap Craft Supplies
A great thing about this craft idea is that it can be budget-friendly using supplies you may already have or can be purchased cheaply in stores:
If you’re in the USA, check out your local Dollar Store or Dollar Tree; and if you’re in the UK, the Poundshop, The Range, Wilko, and Baker Ross are great places to shop for cheap and inexpensive craft supplies. The rest of the world reading this – I don’t know every cheap store – sorry! But please hunt the ones out in your location for crafting bargains!
For another fun Christmas project, this cute Snowglobe Ornament Craft is a great addition to your holiday crafting lineup.
More Ornament Crafts
Looking for more ornaments to make? Right-click and open these in a new tab to read next!
- Snowman Mickey & Minnie Mouse Christmas Ornaments Craft
- Adorable Faux Hot Cocoa Cup Ornament Craft for Your Christmas Tree!
- Easy No-Sew Felt Christmas Ornament Penguin + Free Printable Pattern
I’ve shared lots of great craft ideas on The Purple Pumpkin Blog over the years, in fact, there are 100+ crafts to make and do at home for you to try!
How Do I Make Christmas Cookie Ornaments?
Just check out the how-to card below with full materials, tools, and instructions. Any demonstration photos do not print out to save your ink.
Craft Foam Christmas Cookie Ornament Craft
Materials
- Christmas Cookie Cutters
- Tan Craft Foam
- Dimensional Fabric Paint – White Red and Green
- Clear Glitter
- Plain Paper
- Pony Beads optional
- Ribbon
Instructions
- Push cookie cutters into craft foam, so they leave an indentation.
- Cut cookie shapes from craft foam with scissors.
- See design tip in notes. Apply white dimensional fabric paint to "cookies". Place cookie onto a plain piece of paper, and sprinkle with clear glitter. Shake excess glitter onto paper, gather paper, and return excess glitter to the container. Set aside to dry for several hours before adding the next color.
- Apply red dimensional fabric paint to "cookies". Place cookie onto a plain piece of paper, and sprinkle with clear glitter. Shake excess glitter onto paper, gather paper, and return excess glitter to the container. Set aside to dry for several hours before adding the next color.
- Apply green dimensional fabric paint to "cookies". Place cookie onto a plain piece of paper, and sprinkle with clear glitter. Shake excess glitter onto paper, gather paper, and return excess glitter to the container. Set aside to dry for several hours before adding the next color.
- If using beads in your designs, insert the pony beads into dimensional fabric paint, while still wet, to mimic cookie decorations.
- Attach a ribbon loop to the back of each cookie ornament with a low-temp glue gun and glue sticks to hang on the tree.
Handy Tips & More Ideas
This post is part of my long-running Create the Holidays series on The Purple Pumpkin Blog. Since 2012, I’ve shared free printables, crafts, recipes, and more for Christmas and the Winter Holidays. While I don’t officially run the series anymore, seasonal inspiration will still be here! Browse past Create the Holidays (formerly Create Christmas) years: 2024, 2023, 2022, 2021, 2020, 2019, 2018, 2017, 2016, 2015, 2014, 2013, and 2012.
This post features in Twinkl’s Create Unique Christmas Gifts blog.