Setting Up Your First Bullet Journal: Organise Your Life!
Home » CREATE » Bullet Journal »If you love writing lists as a way to stay organised, then the bullet journal system is definitely for you! But what is a bullet journal and how do you start one?
Well, I’m going to tell you all about it, and show you how easy setting up your first bullet journal really is!
I started my first bullet journal at the end of January 2018 and I haven’t looked back since. It has allowed me to get more organised in my life, as well as be more creative than I have been for a long time!
Affiliate Disclosure
We have included affiliate links to products and services related to this post.
We may earn a commission if you purchase after clicking on those links.
As an Amazon Associate, I earn from qualifying purchases.
Read Our Full Disclosure Policy and Privacy Policy
Setting Up Your First Bullet Journal
Before we start setting up your first bullet journal, let me say that you don’t have to have amazing lettering or doodling skills to keep a bullet journal. At its very core is a bullet system to keep track of the things you need. It can be as simple or as creative as you want it to be. To start a bullet journal, all you really need is a notebook and a pen. I’ll be explaining everything throughout this post, but first…
What is a bullet journal?
The Bullet Journal system is the brainchild of New York designer, Ryder Carroll, as an analog system in a digital world. It is a quick and easy way of keeping track of life, projects, goals, and dreams.
Ryder’s method was created back in 2013, and I do actually remember someone recommending it to me as a way to keep track of my to-do’s at home and work. I set one up, carefully following the step-by-step guide on his website, but didn’t keep it up for more than a couple of weeks. I tried several times but felt it wasn’t for me.
However, Instagram changed all of that for me. I kept seeing pictures of these creative bullet journals (or BuJo for short) and knew that this would be something for me. So I’m just ignoring those mistakes from years gone by, and 2018 was when I really started bullet journalling!
There are hundreds if not thousands of bullet journalers on Instagram.. There is so much talent out there, and so many amazing ideas and inspiration, that I am so glad to be part of this community.
Bullet journalists the world over have taken a simple system of logging and tracking tasks, and taken it to next level awesome (in my opinion!)
A bullet journal can be whatever you want and need it to be, and that is what makes it so much more versatile than a pre-made planner. As time goes by, you figure out what works, and what doesn’t, and you might just create your own organisation system that is perfect for your life.
What do I need?
As I have already mentioned, all you need when starting your first bullet journal is a notebook and a pen. If you watched Ryder’s video, you’ll know that’s all he used (and a ruler, but you don’t have to worry about straight lines if you don’t want to – I don’t!)
A Notebook…
A hardback notebook (A5 size) is best as it is a lot more hard-wearing than a paperback notebook. And to make things easier when writing things down or drawing lines; a dot grid notebook is a way to go. You want your journal to stand up to daily use, be carried around, and be able to look back on it in the future. So it’s worth spending a little more for a good quality notebook.
You’ll find that bullet journalists have preferred brands of notebooks – it all depends on your personal needs. But if you have a notebook and are really keen to get started – go for it! My first bullet journal ever (that I kept for only a few weeks) was just a random one I had at home, and it did me just fine.
You might want to try out one of these popular in the BuJo community notebooks: Moleskine, Scribbles That Matter, or Leuchtturm1917. There are several others, but these are definitely the ones I see mentioned a LOT. I have used all three, and it’s a toss-up between Scribbles That Matter and Leuchtturm1917 for me. I am undecided… I am currently using Scribbles That Matter which should last me now until the end of the year.
A Pen…
This will depend on the paper inside your notebook. Some notebook paper holds certain pens better than others. Some bleed through or have ghosting, while others don’t. The best thing to do is to have a page at the back of your journal to test pens out to see how they will fare in your notebook before you start writing etc.

The Scribbles That Matter has a page dedicated to exactly that task which is cool! But in my old Leuchtturm, I just used the last few pages for pen testing.
Some of my personal favourite pens that I use in my BuJo are Paper Mate Flair Medium Tip and Uni Pin Fine Line – both for writing and drawing. I have also just used regular biros or rollerball pens. For lettering, I use several different ones including my favourite Pentel Fude Touch Sign Brush Tip Pens, and WHSmith Dual Tip Brush Pens. I have lots of others but that’s a post for another time!
How Does a Bullet Journal Work?
I am going to assume that you are reading this because you want to set up a bullet journal but don’t know where to start, so it’s not very helpful if I say that what goes inside is up to you, when you don’t even know what to put inside!
Here are the basics:
- Bullets – This is how the journal got its name. You make bullet lists in your journal, creating your own key to keep track of what is what. For example small circles or checkboxes. You could also use other shapes for different things like events, appointments, or birthdays. But I think, to start it’s best to keep things really simple.
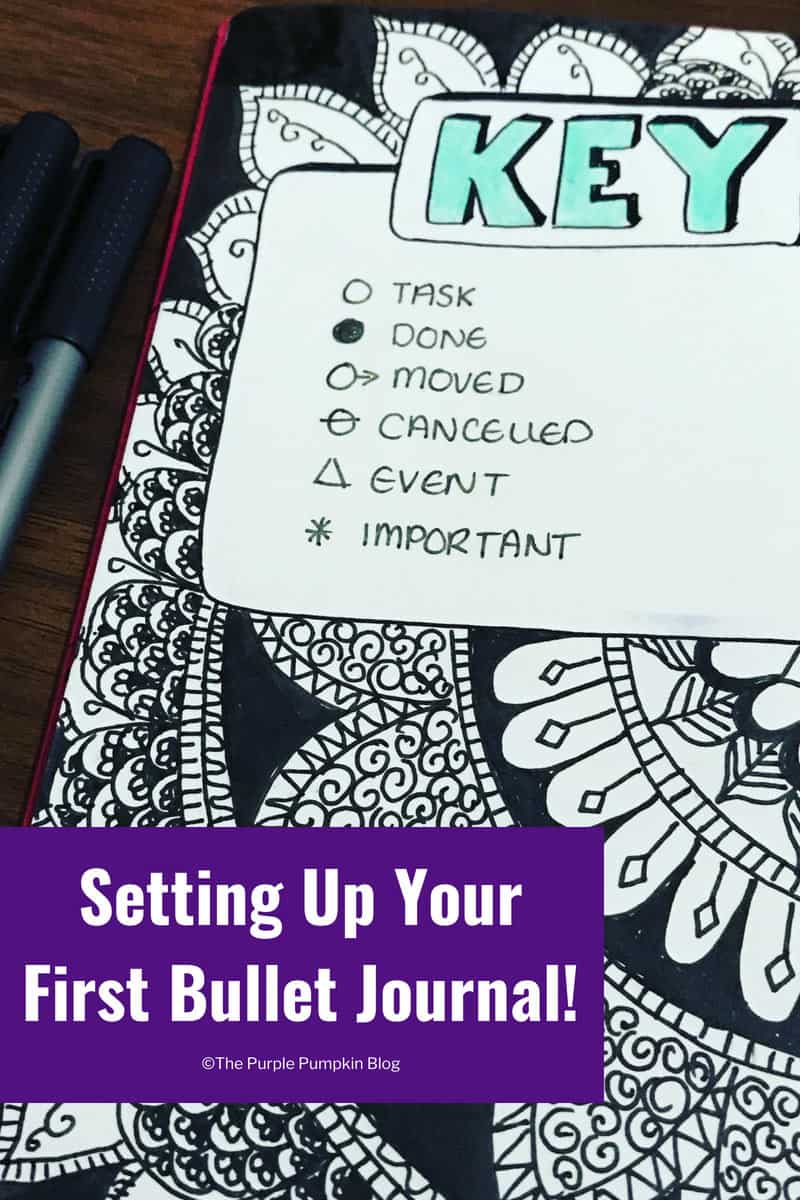
- Signifiers – These tell you that a task has been completed; if it’s important; if it’s been moved to another time; or if it has been abandoned altogether. You will want to have a key to all of your bullets and signifiers at the start of your journal so that you can refer to your squiggles. You can see my key in the picture below. I fancied the page up by doodling a mandala around it because I thought the page looked too plain.

Task 1 – Create your bullet key
Open up your notebook, and on the inside cover write down the key for your bullets. You can copy mine if you like – a circle for tasks; a coloured circle for tasks done; an arrow for when you’ve moved a task; a line through when you’ve cancelled a task; a triangle for an event; and asterisks for something important.
You could have other bullets like – a heart for dates or meeting friends; a lightbulb for an idea; a simple gift doodle for birthdays etc..,
When first starting out, it’s good to keep things simple. I’ve only just started using other bullets and I’ve been keeping my bullet journal for 7 ish months now!
- Index – Much like any other book, you will want to have an index so that you can easily find stuff in your bullet journal. Some notebooks have pages numbered which is so handy. Some don’t so you will have to number them yourself. You can see the index page of my newest BuJo above. Some pages have been left out – but that’s because I haven’t quite decided what to put there yet!
Task 2 – Create your index
Granted, there isn’t going to be anything here at the moment, but it is good to set out the pages for it.
Turn to the first double-page spread of your notebook, and write the word Index at the top of each page. Then turn to the next double-page spread and do the same.
You can write quite plainly, or in fancy lettering – it’s up to you! If you’re not sure of your skills, sketch out lightly in pencil first and then go over with pen (and then erase away the pencil)
If you have a Scribbles That Matter or Leuchtturm1917, there are three pages set up for your index. For me, this wasn’t quite enough and four would be better. I would rather have one too many pages in my Index than not enough!
But what about that empty single page we skipped over? You can add your name and contact details so that it can be returned if you lost it – or decorate the page any way you want!
- Logs – this is where you will write down your tasks. You might not use all of these but it’s worth trying them all out to see what suits you the most. There is no right or wrong way to do it.
- Future Log – for stuff months ahead
- Monthly Log – for stuff happening this month
- Weekly Log – for stuff happening this week
- Daily Log – for stuff happening today
Before you do Task 3, I want to share with you a quick flip-through of my bullet journal when I first started it. You will see my future, monthly and weekly logs, and lots of other stuff too. They are the fun things that can make your journal completely you – and they’re generally called collections. I will be going over those further down this post.
Task 3 – Set up your logs
You are more than welcome to base your first few logs on my layouts above.
Instagram and Pinterest are both great sources of layout inspiration!
For this section, sketch everything out in pencil first, and then when you are happy with the placement and layout, you can go over it all with a pen.
Future Log – for this, you want space for each month of the year.
You could fit all 12 months on a double-page spread, or space it out over two double pages as I have done. This worked out in my favour as I used one notebook for the first half of 2018, and am now in my new one, so only copied over the last 6 months of the year without losing my initial future log layout.
You will want to add the month, as well as the days/dates of said month.
Monthly Log – this is essentially a double page with a calendar layout. This is why a dot grid notebook is so popular as it’s easy to count out and space things evenly.
Dot grids do vary from notebook to notebook brand, so I can’t give you exact dot counts, but I believe it was roughly 6 x 6 dot squares in my layout which you can see above.
Add the name of the month, days, and dates of the week. You can decorate if you wish, but for now, since we are just setting up, you can leave it minimal.
Weekly Log – guess what this is? Yup, a layout with a week to view over a double-page spread. Again, take a quick look back up at one of my early weeklies.
I’ve got the days of the week set out in their own boxes (the weekends share as I don’t do much planning on the weekend). I’ve added the month and the week dates, as well as the days/dates of the week.
I also added a space for some notes, as well as a quote and a habit tracker (more on all of that later).
Daily Log – you know the drill by now! This is for your daily stuff – it could be a page a day, or half a page a day, or even two pages per day – you will soon work out what works best for you.
Full-page daily logs are the most helpful for me and my mindset. Since I switched from weeklies to dailies, I have been a lot more focused and productive.
In my two daily spreads, as you can see above, you can see I’ve got the day and date, as well as space for to-dos, some journaling space, a quote, some doodles, a meal tracker, and some health habit tracking too. I didn’t start using daily spreads until April – my 4th full month of bullet journaling.
You may find that you don’t need a daily log, and can get by with a weekly one – and that’s fine. This is your bullet journal – you do you!
We’re past all the planning stuff and into the more fun and creative stuff now! This is all optional. If you want to have a bullet journal just to keep track of your day-to-day tasks, then by all means, go ahead and set it up as I’ve demonstrated to you so far.
But if you want to delve further into the BuJo world, you are going to want to set up some trackers and collections!
- Trackers – A tracker is self-explanatory – it’s set up so that you can track things in your life – such as the number of hours you’ve slept, how many glasses of water you’ve drunk, or what your mood has been like that day. I have had habit trackers included in my weekly and daily logs, as well as having them set out for the whole month as demonstrated above. There are so many ideas out there, and it’s about finding one that works for you!
I saw this mood tracker – My Year In Pixels online and thought it was awesome! In addition to that, I also keep a monthly mood tracker as it reminds me then to fill in my annual one! My monthly mood tracker changes each month as I generally give each month a theme. I’ve also got a Netflix tracker because why not see how much binge-watching I do!
- Collections – These are simply where you corral all your useful lists, ideas, thoughts, and whatever else for future reference. There are so many possibilities, and they deserve a blog post all of their own! If you are a compulsive list maker, you might find yourself becoming addicted to creating collections. Again, these can be as simple or as decorative as you like – check out Insta, Pinterest, and bullet journal blogs and videos online for inspiration.
As I said, BuJo collections could (and will!) have a post all of their own, but some of the collections I’ve got in my bullet journal are:
- Seasonal Holidays
- Birthdays
- Personal Goals
- Blog Goals
- Books I’ve Read
- Movies We’ve Watched
- My Wish List (of things I want to buy)
- Bucket List
- Wanderlust List
- UK Counties we’ve visited
- Blog Ideas
- Bujo Review
- Gratitude Log
- Brain Dump
- New BuJo Ideas
- BuJo Layout Ideas
- Washi Tape Collection
- Challenges – this is one last thing I wanted to mention! A lot of BuJo enthusiasts love to take part in challenges – often to improve their lettering or doodling skills. But I’ve seen challenges for watercolors, for handwriting, with journaling prompts… I even run my own challenges! I guess challenges could fall under the collections bracket, but let’s not confuse things! @LetteringChallengeHQ on Instagram is a great account that rounds up lots of monthly challenges so it’s easy to pick and choose. Essentially you are given a prompt daily and you then letter, doodle, or whatever it is for that challenge. You can share daily, weekly, or at the end of the month – or not at all if you don’t want to!
When I discovered the bullet journal community on Instagram, I jumped right in! I took on lots of challenges to help improve my lettering skills, and my doodling/drawing skills too.
Prior to starting my bullet journal at the start of 2018, I had started to learn modern calligraphy. And back in the day I used to be very artistic, but it’s a hobby and skill that I had let fall to the wayside. Having a BuJo has re-ignited all those creative juices and keeping a bullet journal brings me so much joy.
I have so many favourite challenges that I’ve taken part in (I often do 4-6 a month!) but here are some that I’ve taken part in that was a lot of fun to do!
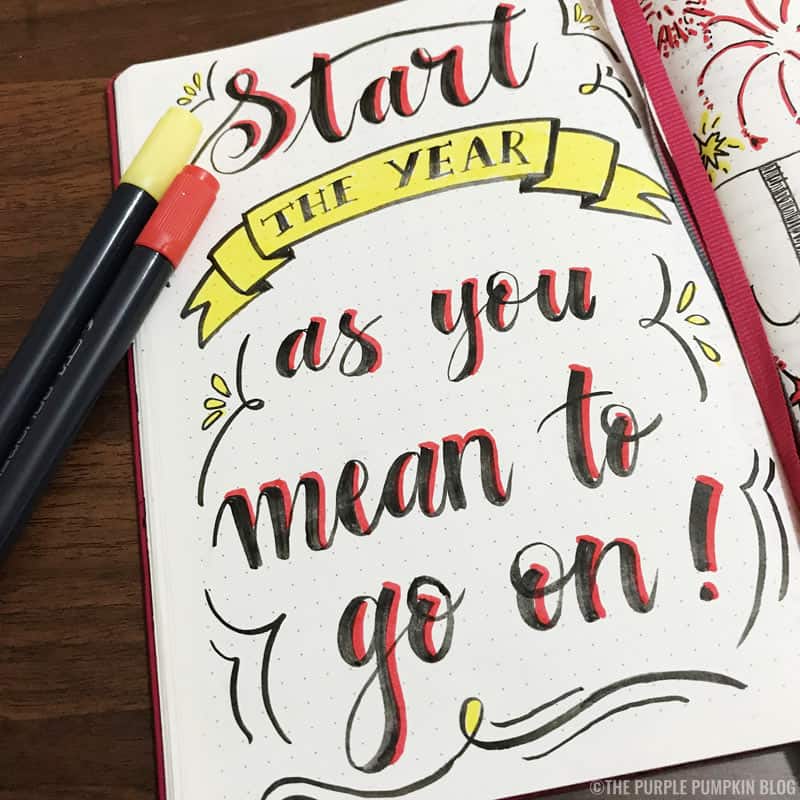
I guess the only other thing I do (and a lot of other BuJo-er’s do) isto have a cover page for each month – again it can be as fancy or as simple as you like. I like to theme each month too!
As you can see from the pictures and videos of my bullet journal, I love colour! But if you are more of a monochrome person, or like to keep things more simple these are all acceptable too. Always remember that this is your BuJo, and you can do exactly what you like with it!
You can decorate your journal using colouring pens, and/or pencils, and even paint – it will depend on the thickness of the pages in your notebook. Some people love using stickers or washi tape – but don’t feel you need to buy ALL the things when you start out.
I’ll close this post out with a flipthrough video of my bullet journal so you can see what mine looks like after the first 6 months. I hope it gives you some inspiration for your BuJo!
If you have any questions about bullet journaling, plese do feel free to leave a comment or send me an email and I’ll do my best to help you out!