Salt & Pepper Shaker Snowmen Craft
Home » CREATE »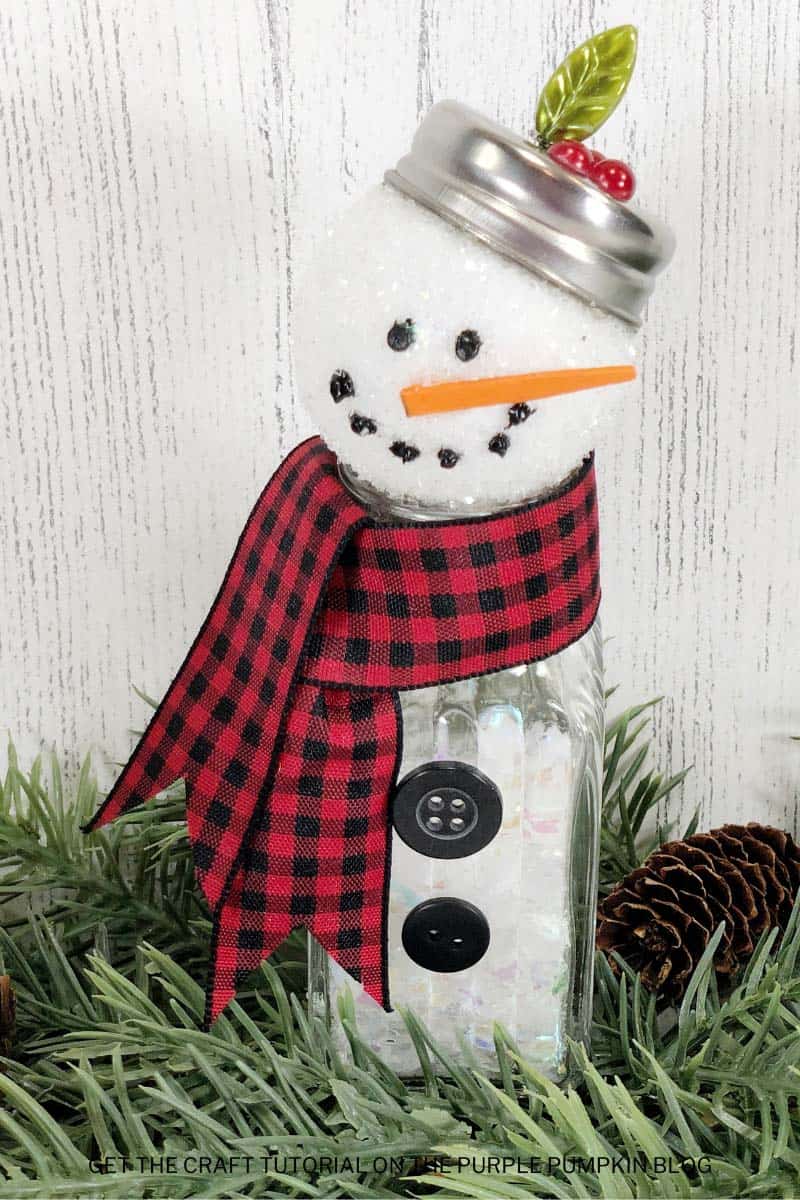
Salt & Pepper Shaker Snowmen are a cute craft to make for the winter season!

This tutorial will show you how to make these adorable snowmen using salt and pepper shakers, hot glue, and other embellishments.
These little guys would make a great addition to your Christmas decor, or why not use them as placeholders for the holiday dinner table?
I’ve got more Snowman Crafts & Recipes for you to try out – right-click and open these other activities in a new tab so that you can read them after this one!
Affiliate Disclosure
We have included affiliate links to products and services related to this post.
We may earn a commission if you purchase after clicking on those links.
As an Amazon Associate, I earn from qualifying purchases.
Read Our Full Disclosure Policy and Privacy Policy
Salt & Pepper Shaker Snowmen
The full list of materials, tools, and instructions is found in the printable tutorial card at the end of this post. I highly recommend reading the blog post all the way through before starting this project to ensure that you have everything required and understand the steps and timings involved.
We love snowmen crafts at The Purple Pumpkin Blog, and I think these salt & pepper shaker snowmen are the cutest yet!
The kids will have so much fun helping with this cute snowman craft!
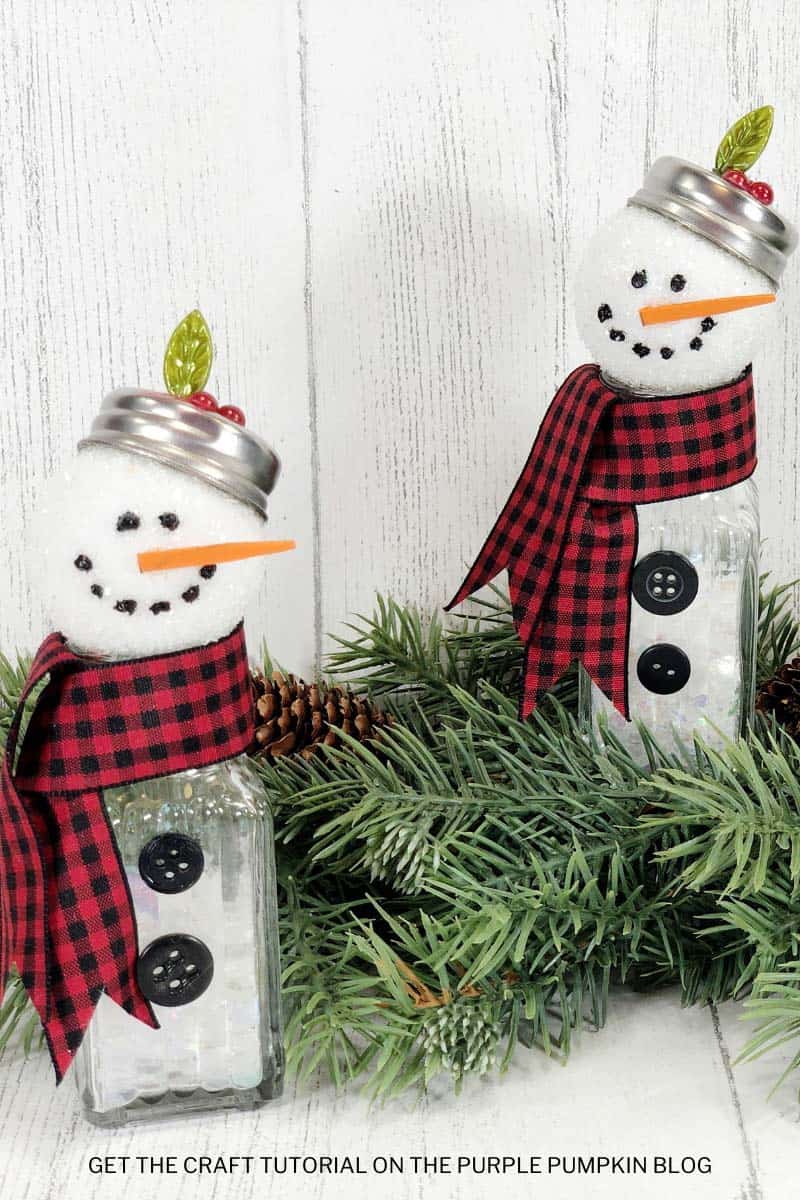
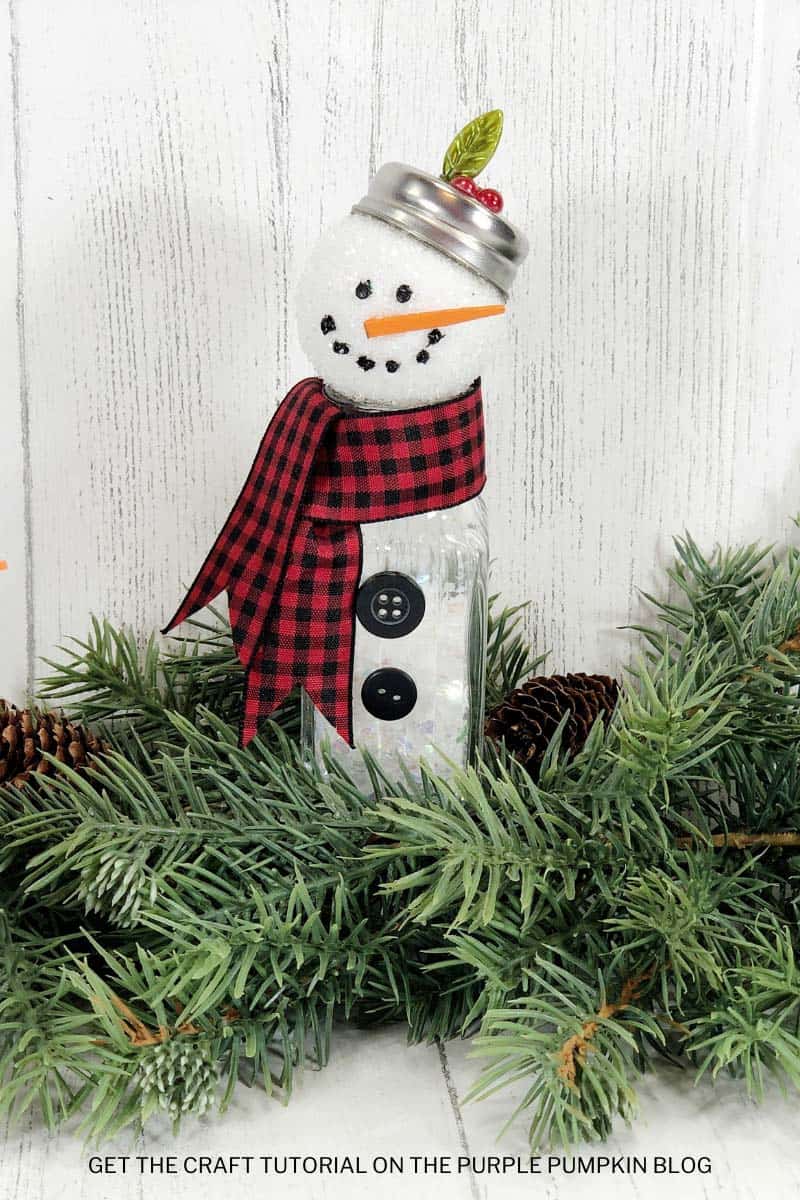
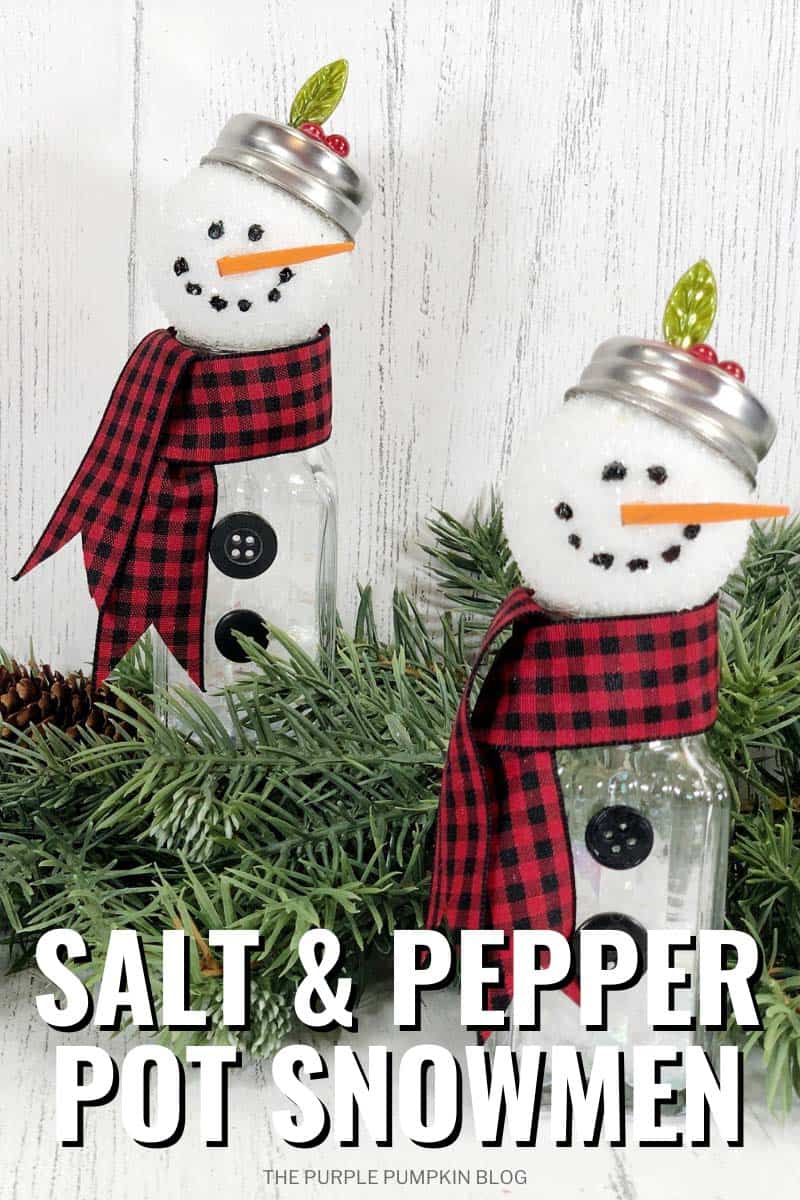
Old-fashioned glass shakers with metal caps (which you can pick up cheaply) are filled with glitter and topped off with a ping-pong ball that has been rolled in more glitter!
The metal cap turns into the snowman’s hat, and then it is decorated with ribbon and other embellishments.
Why not mix and match the supplies for the super cute and cozy salt and pepper shaker snowmen and create a keepsake decoration with the kiddos.
Materials & Tools Used in This Craft
For your convenience, I’ve linked [some of] the materials and tools needed for this project to Amazon below. The quantities are on the craft tutorial card at the end of this post.
- Salt & Pepper Shaker Set – you will need glass and metal-style shakers. The shaker will become the body, and the metal cap will become the snowman’s hat.
- Ping Pong Balls – to make the snowman’s head.
- Wooden Toothpicks – to make the snowman’s carrot nose. Alternatively, you could use some felt or craft foam.
- Orange Acrylic Craft Paint – to paint the toothpicks and create a carrot nose.
- Glitter – white or clear glitter to coat the ping pong balls.
- Large Glitter Flakes – white or iridescent glitter flakes to fill the shakers.
- Black Buttons – you will need 2 per salt shaker snowman.
- Ribbon – to make the snowman’s scarf. We used buffalo check, but you can use any color, or design you like.
- Mini Holly Sprig Embellishments – these go on the snowman’s hat. Alternatively, you could use Red Self-Adhesive Pearls and a piece of felt to create holly leaves.
- Hot Glue Gun and Glue Sticks
- E6000 Adhesive – is a waterproof rubber-based adhesive. It has multiple uses for gluing glass, clay, beads, fabric, ceramics, wood, glass, and metal.
- Black Dimensional Fabric Paint – this is used to add the “coal” eyes and mouth to the snowman’s face.
- Decoupage Medium – such as ModPodge. This is to glue the glitter to the ping pong ball which will dry clear. You could also use PVA/White School Glue, which also dries clear and is cheaper!
- Paintbrush – this is a set of paintbrushes of various sizes and types for different types of paint and glue.
- Scissors
- Ruler
Cheap Craft Supplies
A great thing about this craft idea is that it can be budget-friendly using supplies you may already have or can be purchased cheaply in stores:
If you’re in the USA, check out your local Dollar Store or Dollar Tree; and if you’re in the UK, the Poundshop, The Range, Wilko, and Baker Ross are great places to shop for cheap and inexpensive craft supplies. The rest of the world reading this – I don’t know every cheap store – sorry! But hunt the ones out in your location for crafting bargains!
More Snowman Crafts
Looking for more snowman crafts to do? Right-click and open these in a new tab to read next!
- Build A Snowman Printable
- Silly Stocking Fillers! Snowman Poop – Free Printable Labels
- Fun & Simple Paper Snowman Bookmark Craft for Kids
I’ve shared lots of great craft ideas on The Purple Pumpkin Blog over the years, in fact, there are 100+ crafts to make and do at home for you to try!
How Do I Make Salt & Pepper Shaker Snowmen?
Just check out the how-to card below with full materials, tools, and instructions. Any demonstration photos do not print out to save your ink.
Salt & Pepper Shaker Snowman Craft
Materials
- Salt & Pepper Shaker Set glass and metal
- Plain Paper
- Large White/Irridescent Glitter Flakes
- Ping Pong Balls
- Clear Glitter
- Wooden Toothpicks
- Orange Acrylic Craft Paint
- Black Dimensional Fabric Paint
- Small Black Buttons
- Buffalo Check or Plaid Ribbon
- Mini Green Holly Leaves*
- Red Self-Adhesive Pearls**
TOOLS
- Decoupage Medium or Liquid Glue
- E6000 Multi-Surface Adhesive
Instructions
- Remove the metal lids from the salt and pepper shakers. Roll a piece of scrap paper into a cone and insert it into the neck of the shaker. Carefully fill the shaker three-quarters full with large glitter flakes.
- Coat the ping pong balls with decoupage medium using a paintbrush. Roll the ball around in clear glitter until the entire surface is coated. Carefully place the glittered ping pong ball aside to dry.
- Once the glittered ping pong ball is dry, attach it to the snowman’s body with a multi-surface adhesive to create the head.
- Paint two toothpicks with orange craft paint, and leave them to dry. Cut the tip from a toothpick and attach it to the snowman’s head as the carrot nose.
- Attach two mini black buttons to the front of each snowman with multi-surface adhesive.
- Create coal eyes and mouth with dots of black dimensional fabric paint.
- Attach the metal salt and pepper shaker lids to the snowman’s head as a hat with a glue gun and glue sticks.
- Measure and cut a 12”/30cm length of ribbon then tie it around the snowman’s "neck". Fold the ribbon scarf over and secure it with a glue gun and glue sticks. Trim ribbon ends to size, fringe the ends, or cut a triangular notch with scissors.
- Attach a green holly leaf button to the snowmen hats with a glue gun and glue sticks. Attach three red self-adhesive pearls around the leaf to create a holly sprig.
- Make sure everything is dry and secure before displaying where desired.
Handy Tips & More Ideas
This post is part of my long-running Create the Holidays series on The Purple Pumpkin Blog. Since 2012, I’ve shared free printables, crafts, recipes, and more for Christmas and the Winter Holidays. While I don’t officially run the series anymore, seasonal inspiration will still be here! Browse past Create the Holidays (formerly Create Christmas) years: 2024, 2023, 2022, 2021, 2020, 2019, 2018, 2017, 2016, 2015, 2014, 2013, and 2012.