Make A Simple Autumn Wreath – Crafty October Day 1
Home » CREATE » Crafts »
Time just creeps up on you doesn’t it? Every year that I do Crafty October, I promise myself that I will be more organised and have everything ready to go, but here I am on the 1st october 2015, rushing to get things done! That said, I do have things made in advance this year – woohoo! – but I’ve got to write everything up…
I am aiming to share something every day for Crafty October 2015, as I have done in previous years, but if I miss a day out here and there, please forgive me! My mojo has been way off this year, but I’m going to do my best. What I do share, I hope you enjoy!
For those that are new to Crafty October, it’s not just about crafts – it’s essentially anything I cook, craft, or create for Halloween and Autumn. This is my 4th year of doing this series, and one that I love, because I love this time of year so much!
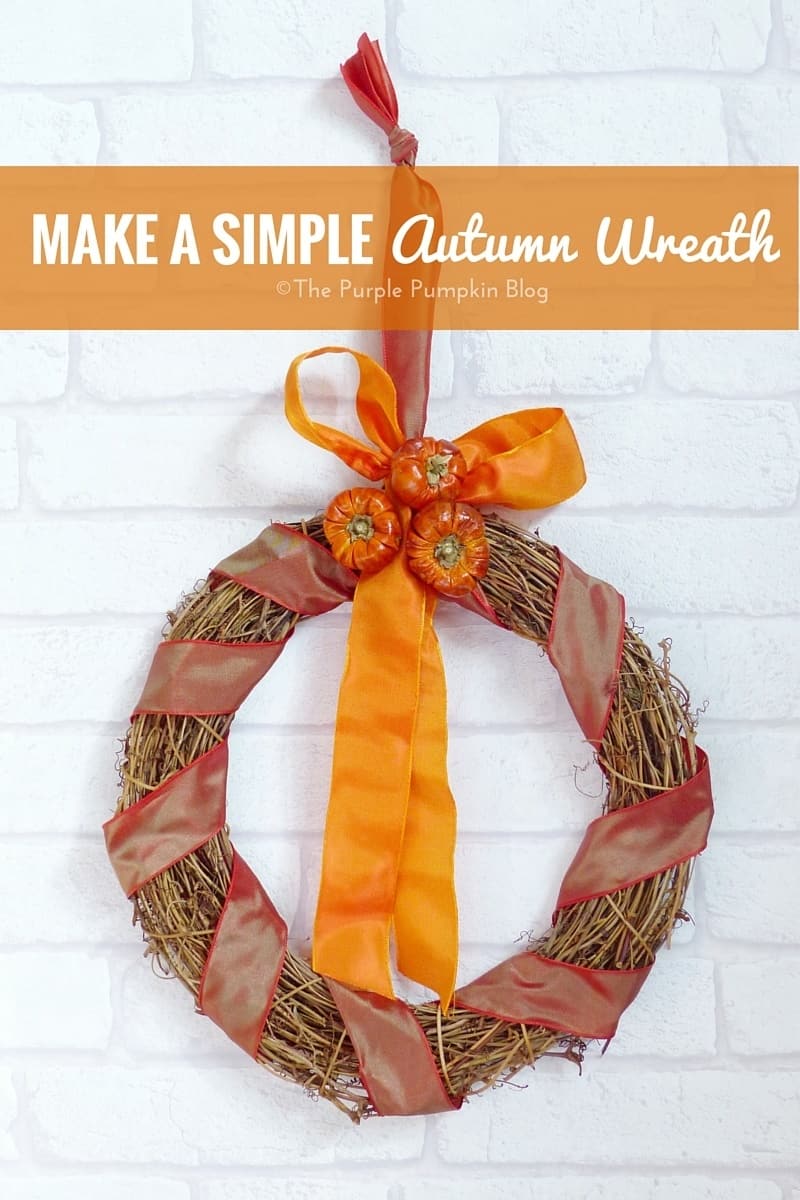
Today I am starting with a very simple and quick to make autumn wreath, which takes less than 10 minutes to assemble! I used the following supplies to make this, but the photo below shoes the selection of things I bought to use for crafting during the autumn season. How you decorate your wreath is entirely up to you!
 Supplies
- Grapevine Wreath
(Buy here in the US)
- Orange Ribbon
(Buy here in the US). In two different shades, around 2m/6ft in length.
- Dried Mini Pumpkins
(Buy here in the US)
- Florists Wire
(Buy here in the US)
How to make a simple autumn wreath
The wreath can be any size you like, mine was around 12″ wide. Starting in the middle, at the top, wrap one of the orange coloured ribbons around the wreath as shown above. Leave a long tail end of at the start so that you can tie the ends together when you get back around, then form a loop to hang it up. (oh how I wish I’d made that video to show you!) Use the other orange coloured ribbon to make a bow, and leave some tail ends hanging down. Because there is no glue involved, you can play about with this until you’re happy with the way it looks.
Now cut 6″/15cm lengths of floristry wire, and poke two pieces through the base of three dried mini pumpkins. Carefully thread these through the wreath where the bow is and twist at the back to secure. I didn’t glue mine, but, if you wanted to, you could.
And that’s it!
If you make this (or any other) wreath for autumn, I would love to see! Make sure to come and share it with me over on my Facebook page.
Crafty October is a month long series on The Purple Pumpkin Blog, where I share an idea a day for Halloween + Autumn. All ideas for Crafty October 2015 are here. And if you are a blogger and would like to share your ideas, check out the Crafty October 2015 Blogger Linky which is running until 31st October 2015.


www.justmeleah.co.uk
October 5, 2015 @ 9:45 pm
This is lovely! xx
Gude Hudson-Gool
October 5, 2015 @ 7:39 pm
This looks so lovely! Autumnal and pretty and stylish xx
Jen Walshaw
October 5, 2015 @ 3:43 pm
You are an enbler. I am now off to buy dried mini pumpkins! I love crafting at this time of year. Just lovely
DaisiesandPieUK
October 2, 2015 @ 10:05 am
Gorgeous, gorgeous – I totally love October it’s the best time of year – looking forward to seeing all the crafts :)
Loopyrach
October 1, 2015 @ 8:22 pm
This is lovely, might even have a go at making one myself, i’m not mentally planning a trip to hobby craft lol
Kim Carberry
October 1, 2015 @ 11:42 am
That is gorgeous! Perfect for this time of year x