How To Make Paper Ninjas – Fun Craft Idea for Kids!
Home » CREATE » Crafts » Paper Crafts »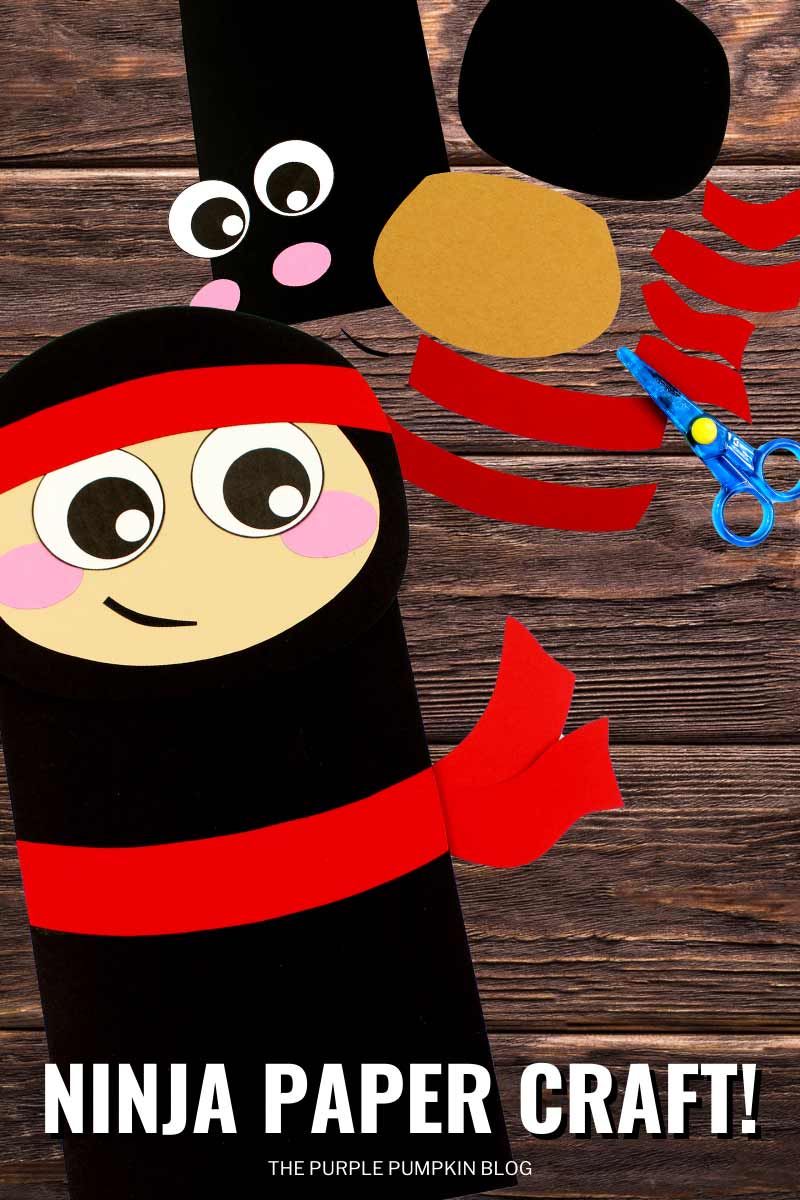
Do you have a little ninja in the house? Let their imaginations run wild with this fun and easy craft! Learn how to make Paper Ninjas with just a few simple materials. This simple craft is great as an individual activity, or do it together as a family project!
Don’t have time for this craft? Be sure to tap the heart icon in the bottom right of the screen to save this post for later!

Affiliate Disclosure
We have included affiliate links to products and services related to this post.
We may earn a commission if you purchase after clicking on those links.
As an Amazon Associate, I earn from qualifying purchases.
Read Our Full Disclosure Policy and Privacy Policy
Paper Ninjas
The full list of materials, tools, and instructions is in the printable tutorial card at the end of this post. I highly recommend reading the blog post all the way through before starting this project to ensure that you have everything required and understand the steps and timings involved.
Much like the paper craftivities that I have shared for Christmas and Halloween, the ninjas are made from construction paper (or cardstock) using a printable template.
If you’re looking for a simple craft to do – maybe for yourself, to make with the kiddos, or for your classroom or homeschool room, this cute paper ninja craft is a fun one to try!
Kids will be rolling up their sleeves and polishing off their cutting and pasting skills.
Once assembled, these paper ninjas can then be used for imaginative play either at home or even taken along on outdoor adventures to play with friends!
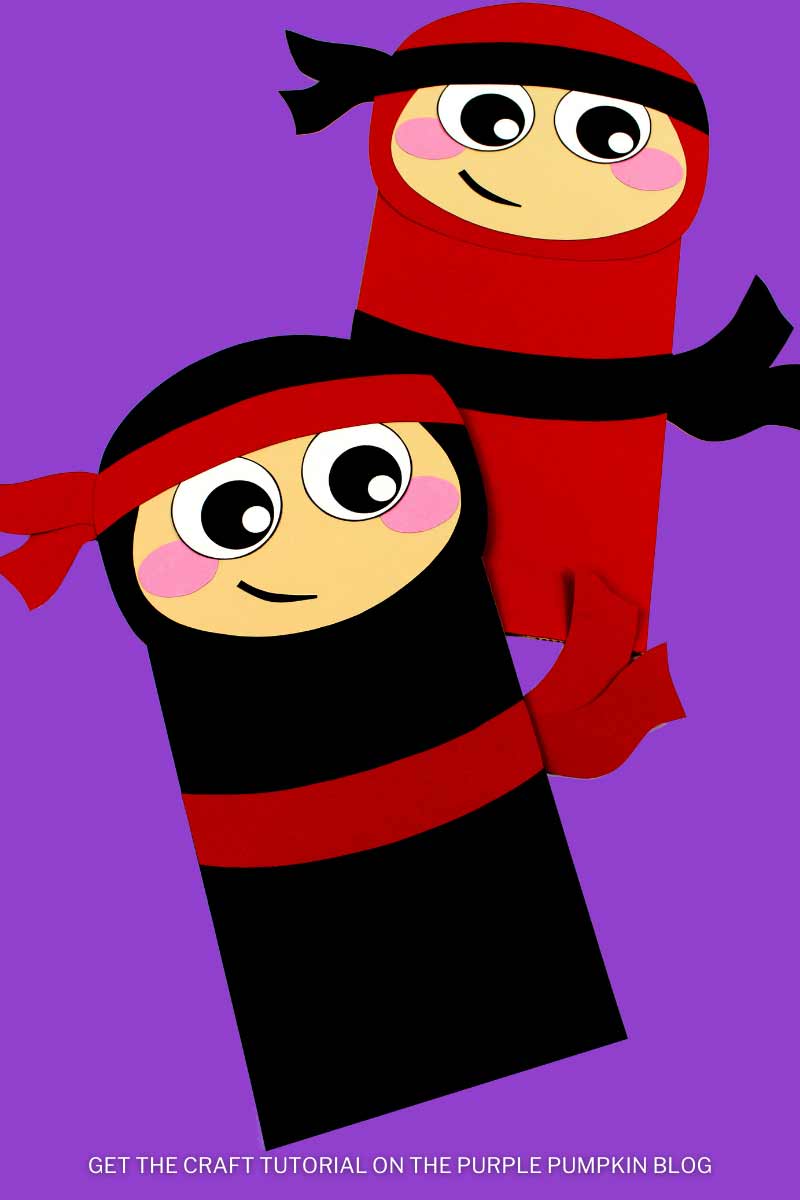
The paper ninjas are quite large – around 12 inches/30cm high – these make great decorations, or you could use a folded piece of card for the body of the ninja and add the pieces on top to turn it into a greeting card.
I’ve also included a smaller version of the printable which can be used to make puppets (add a popsicle stick to the back) or turned into a bookmark!
Materials & Tools Used in This Craft
For your convenience, I’ve linked [some of] the materials and tools needed for this project to Amazon below. The quantities are on the craft tutorial card at the end of this post.
- Construction Paper – you can use any colors you like, but we used black, red, pink, and flesh tone
- Scissors
- Glue Stick – or you could use:
- Roller Glue Tape – which I find less messy!
- Free Printable Ninja Template – you’ll find this just before the tutorial
- You will find the download links further down this page surrounded by a purple box.
- Tap the purple download buttons to save the file(s) to your device.
- I’ve provided the usual two paper sizes – A4 and US Letter (8.5″ x 11″) – use the size that is appropriate for your printer.
No time for crafting now? Save to your Pinterest boards for later!
Cheap Craft Supplies
A great thing about this craft idea is that it can be budget-friendly using supplies you may already have or can be purchased cheaply in stores:
If you’re in the USA, check out your local Dollar Store or Dollar Tree; and if you’re in the UK, the Poundshop, The Range, Wilko, and Baker Ross are great places to shop for cheap and inexpensive craft supplies.
To the rest of the world reading this – I don’t know every cheap store out there – sorry! But please do hunt the ones out in your location for crafting bargains!
More Paper Crafts
Looking for more paper crafts? You’ll love these:
- St. Patrick’s Day Leprechaun Gnome Paper Craft (with Free Template)
- Adorable Jellyfish Paper Craft! With Free Printable Template!
- Boy Scuba Diver Craft – An Awesome Ocean Paper Craft!
- Free Printable Polar Bear Paper Craft
- Paper Puffer Fish Craft – A Cute Under The Sea Activity!
I’ve shared lots of great craft ideas on The Purple Pumpkin Blog over the years, in fact, there are 100+ crafts to make and do at home for you to try!
How Do I Make Paper Ninjas?
There is a printable how-to card at the end of this post. To save ink, demonstration photos do not print.
The paper ninjas have the following components and the printable gives you a guide as to what colors to use. However, you can use any colors that you like!
- Body (Rectangle)
- Hood (Large Round Shape)
- Head
- Eyes
- Cheeks
- Headband (3 pieces)
- Belt (3 pieces)
There are a few different ways you can build and use this ninjas activity, which means you can get multiple uses from the same printable!
- Print the ninja template onto colored paper (or cardstock that goes through your printer) and cut out the pieces to build.
- Print the character template onto white paper (or cardstock that goes through your printer), cut, and color the pieces with markers, pens, or crayons before assembly.
- Print the template onto white paper (or cardstock that goes through your printer), cut and then trace around each piece onto colored construction paper then use those pieces to assemble the ninjas.
Whichever way you decide to print and cut out the pieces, the assembly remains the same.
Before gluing the pieces together, lay them out first to determine you have them placed correctly!
- Glue the head to the hood, then attach the two cheeks on either side of the face and the eyes to just overlap them.
- Cut a black sliver of paper for the mouth and stick it to the face. Alternatively, you can draw the mouth with a black marker pen.
- Glue the headband (in a contrasting color to the hood and body) over the top of the head. Then attach the extra pieces to the back to create the tied part of the headband.
- Glue the completed head/hood to the top of the body.
- Repeat the headband process with the belt around the middle of the body, and the tied pieces behind.
You can use a glue stick or glue roller. These are my favorite glue rollers and they’re so much easier and less messy than a glue stick!
Some of the pieces for this papercraft take up a whole page, while others do not.
Where possible, I’ve made small items fill up a page and have a page with individual items (it will become more apparent when you download the file!).
I have done this so that you can save on paper if you only want to make one of these characters, or if you want to make several – for example in a group or classroom.
Other Ways to Use The Ninja Printable Template
- There are two sizes in the printable template.
- The large ninja will be around 12 inches/30cm high.
- The small ninja will be around 6 inches/15cm high.
- Turn the large ninjas into greeting cards by folding some cardstock in half, and attaching the features to the front.
- Use the template to cut the pieces from craft foam instead of paper.
- Laminate the pieces and number each one. Make a game of “Build the Ninja” by rolling dice and when you throw the number you can build that part of the ninja. The first to build it wins!
- Use the smaller paper ninjas as bookmarks.
- Or punch a hole in the very top of a smaller ninja and use it as a gift tag or as a favor tag.
- Using either size ninjas, punch holes on the left and right of each one and thread it onto string to hang up as a garland.
- Finally, attach a popsicle stick to the back of a small ninja to turn it into a puppet.
Download Paper Ninjas Template
Click the download link to save the printable file(s) to your computer.
The Shop opens in a new tab/window.
Visit The Purple Pumpkin Shop for more awesome printables and products!
Paper Ninjas Craft
Materials
- Free Printable Template Download in Blog Post
- Black Construction Paper
- Red Construction Paper
- Pink Construction Paper
- Flesh Tone Construction Paper
TOOLS
- Glue Stick or Roller Glue Tape
Instructions
- Print the template pieces onto the suggested colored card and cut them out.
- Alternatively, print onto white cardstock and cut them out with scissors. Trace around the template pieces onto colored cardstock and cut them out.
- Lay the pieces in the correct order, then using glue, stick the pieces together.
- Display as desired, or use in creative roleplaying.