How To Make Jelly Worms
Home » HOLIDAYS & EVENTS » HALLOWEEN »Welcome to Day 27 of Crafty October 2014 (check out 2013 and 2012 here) – a month of Halloween Ideas here on The Purple Pumpkin Blog!
I’ve often seen homemade jelly worms on blogs and Pinterest over the years, but never quite got around to actually making them myself. Then Flora sent me a creepy crate full of stuff for their Halloween Fun Pack and one of the activities was these jelly worms.
So I got to work, following the instructions – make the jelly, add extra gelatin, pack the straws tightly together and pour the jelly carefully in… The only trouble was, the jelly just oozed out of the bottom of the straws, filling up the jar, and I had my very own fail! I was less than amused, mainly because I got lots of jelly everywhere – what a waste of good jelly! I poured what was left into some zombie jelly molds and vowed to have another try.
Another packet of jelly later and some changes made, I was successful! And here is how to make jelly worms – without making a hideous mess! Unless of course, you like wasting jelly!!
You’re gonna need…
- plastic drinking straws
- sticky tape
- glass or jar
- elastic band
- jug
- 135g packet of jelly
- 12g packet of gelatin powder
- boiling water
- cold water
- crushed chocolate biscuits (optional)
- tall glass
- hot tap water
How to make jelly worms…
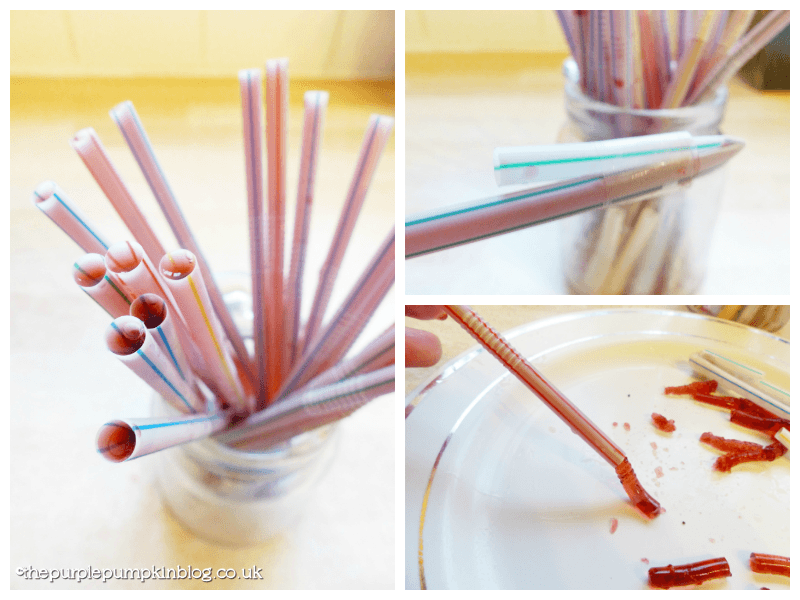
- Prepare the straws by first expanding the bit at the top, and then, at the other end folding up about 2cm of straw back over itself and taping into place. This is the key stage – the jelly then doesn’t flow out!
- Pack all of the straws into a glass or jar, if they don’t fill the glass completely, then secure them together with an elastic band – this will just making pouring the jelly a whole lot easier.
- Most packets of jelly make a pint – using half boiling water and then topped up with cold water. We’re going to ignore this nonsense and halve the amount of water required. Break up the jelly cubes into a jug and add the gelatin. Add ¼ pint of boiling water and stir until everything is dissolved and then add another ¼ pint of cold water.
- Carefully start pouring into the straws – some spillage will naturally occur, unless you have the eyes of a hawk and the steady hand of a surgeon! Once all the straws are filled up, you can pick the bundle up, pour out the excess jelly that has accumulated in the bottom of the glass. (You’re likely to have jelly left over, so pour that into a jelly mould (or another jar) and eat that bad boy with a spoon once it’s set!)
- Place in the fridge to set – a couple of hours should do it.
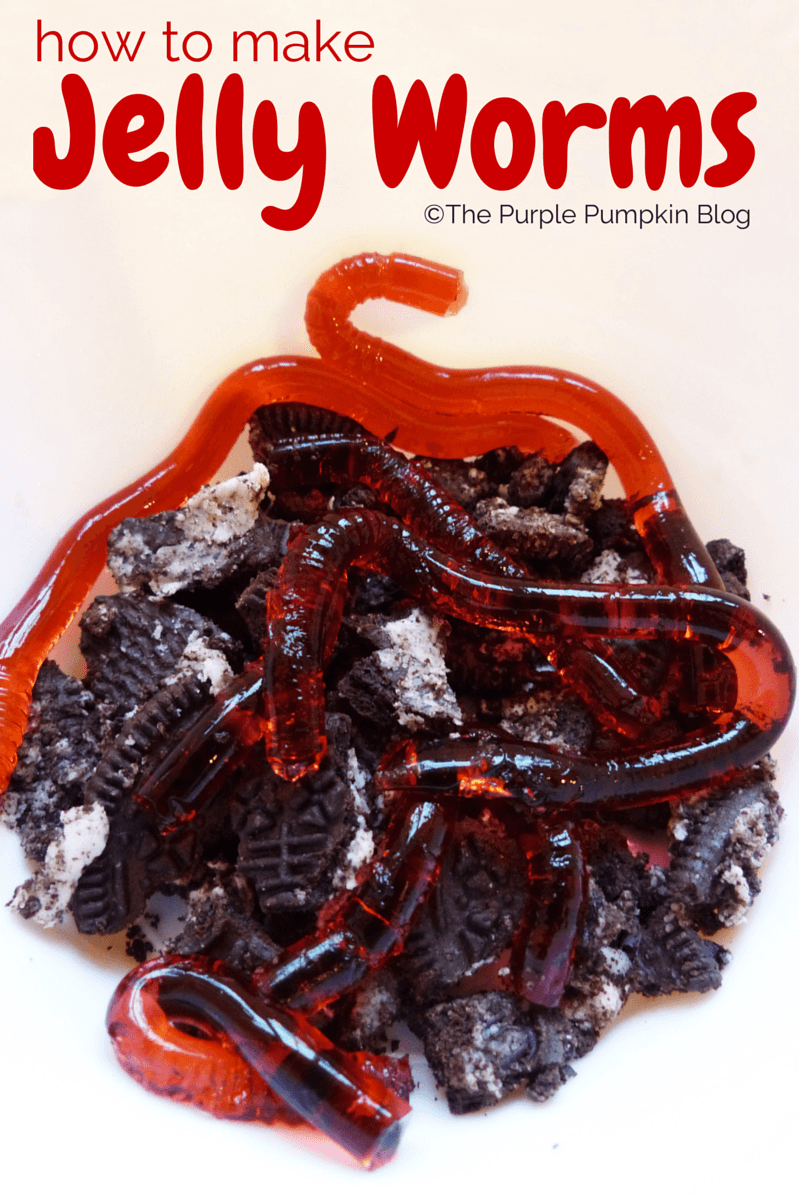
- Your jelly worms are going to need somewhere to sit on – a pile of dirt should do it – dirt made from crumbled chocolate biscuits. Place some biscuits in a food bag and smash with a rolling pin (or your fist if you’re that way inclined!) until you have crumbs. Dump them into a bowl and get ready for the unveiling of the jelly worms.
- Get a tall glass and fill it about ¾ of it with hot water from the tap.
- I worked on each straw one at a time – place the straw, sealed end down into the glass of water for a few seconds then remove. Snip off the end and squeeze down from the top, ease the jelly out onto a plate – or directly onto the biscuit dirt. Continue doing this until you have your very own jelly worm farm!


Jennypaulin
November 4, 2014 @ 5:59 pm
ohhhhh so that is how you remove them successfully ! mine were tricky to get out i love how you have presented yours too x
Michelle Ordever
November 4, 2014 @ 6:03 pm
The first time I did this it was a complete mess! so glad I figured it all out in the end – they’re a great gross surprise for Halloween! x