Free Printable Easter Bunny Paper Wreath
Home » CREATE » Free Printables »I’ve got a printable Easter Bunny paper wreath to share with you today, which makes a quick and easy Easter decoration using the free printables that you will find in this post, and some basic craft supplies.
Visit my Free Easter Printables for lots more fun things to print, make and do at home.
⬇️ Save this post to Pinterest for later! ⬇️
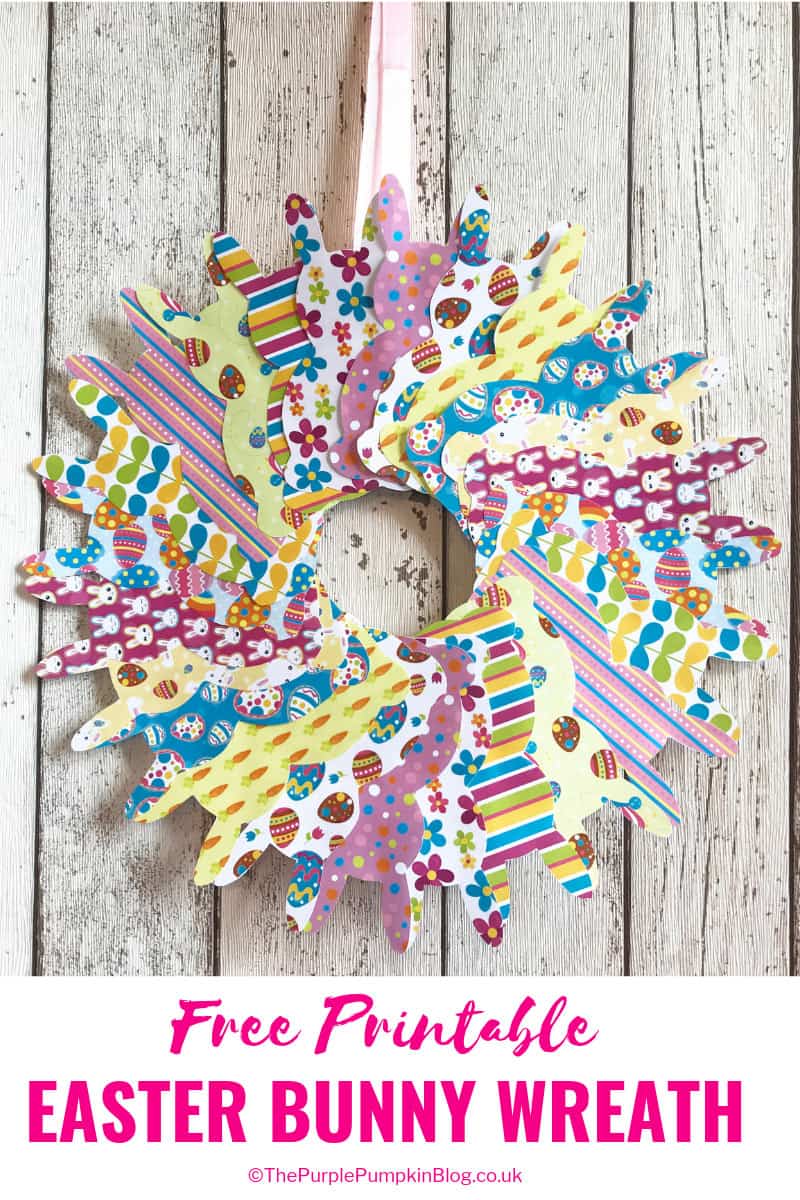
Printable Easter Bunny Paper Wreath
I have included links to some of the products that I used in this project. If you purchase via the links I may earn a small commission.
To make this paper wreath craft you will need:
- 24 Easter Bunny silhouettes (free printable download below)
- a sheet of cardboard about 12″/30cm (I used the side of a box)
- craft knife (optional)
- scissors
- white acrylic paint & brush
- pencil
- ruler
- glue tape roller
- pink ribbon (about 9″/22 cm length)
- sticky tape
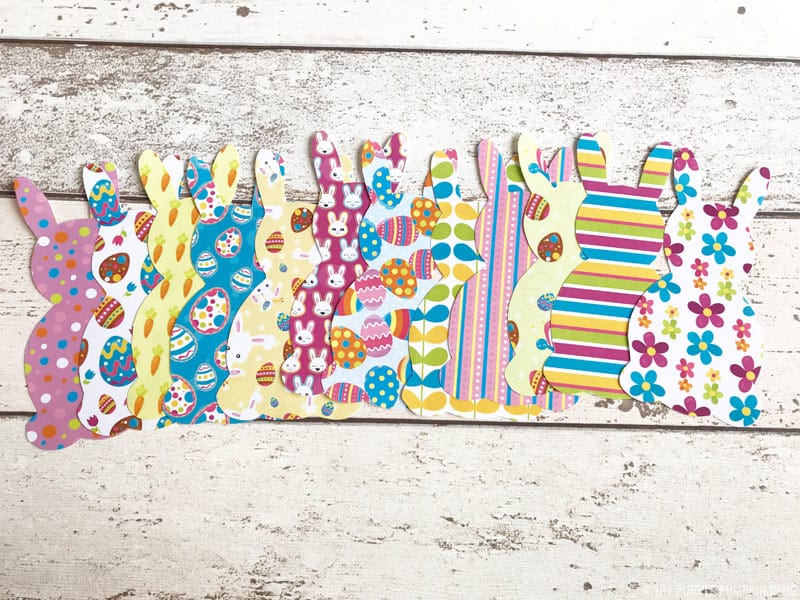
The printable Easter Bunny silhouettes come in 12 different designs, with four of each design to a page. As with all of my printables, I’ve got them available in A4, and US Letter paper size.
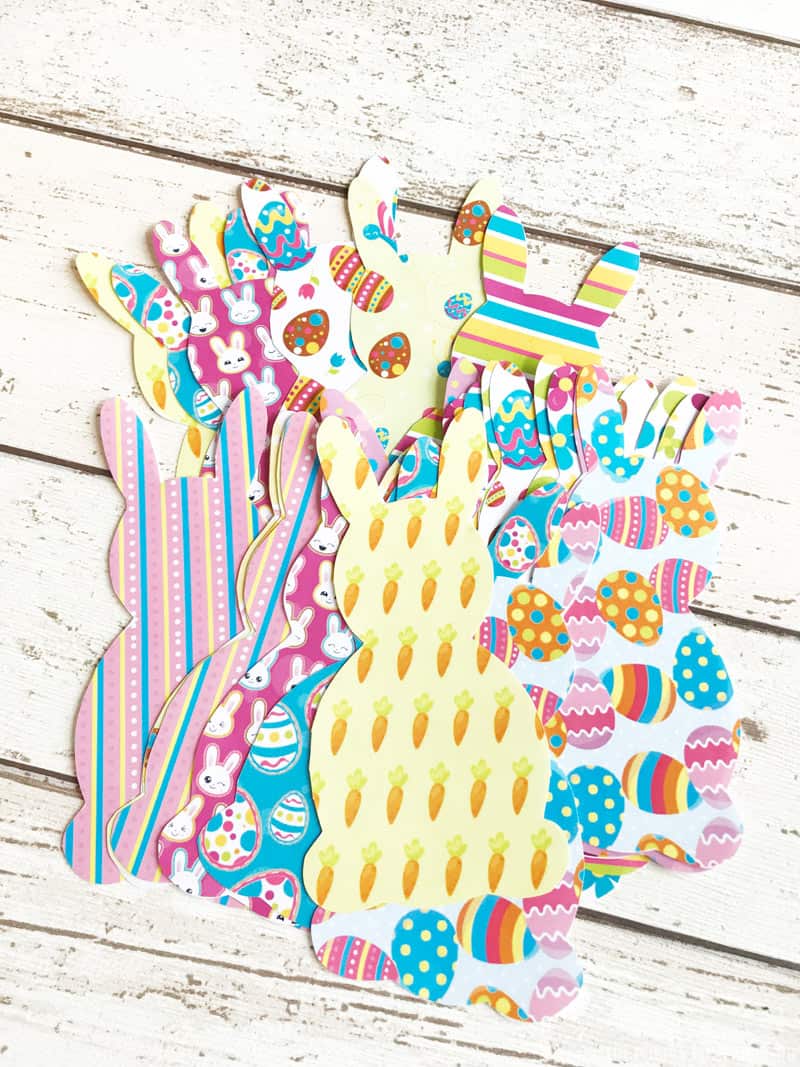
I used 24 of the silhouettes (2 each of the 12 designs), but you could use any mixture of designs that you like. You could also use less bunnies – just experiment with placement before sticking in place!
Once printed, cut with scissors.
I am looking into turning this printable into a print and cut project using the Cricut Maker, but need to experiment with that feature first. If I can do that with my printables, that is going to make cutting them so much easier for everyone!
Printable Download:
(Opens in new window)
The base of this wreath is made using a piece of cardboard that is cut into a ring shape. (You could use a large, sturdy paper plate; which was my original plan, but I didn’t have any at home!)
Place a dinner plate (about 11″/27 cm diameter) onto the cardboard and draw around it with a pencil. Cut with a craft knife, or scissors – whichever is accessible to you.
Now you need to cut out the inner circle which is roughly 5″/12cm diameter. You can do this in two ways – either with a smaller plate or other circular object that you can draw around; or by finding the center of the circle with a ruler/tape, and using a compass to pencil out the circle. Then use a craft knife/scissors to cut it out leaving behind the wreath ring.
Then paint the front of the ring with white acrylic paint (it may need a few coats) and leave to dry completely.
The reason I painted the cardboard ring was in case any of it would show behind the bunnies. As it turns out, it didn’t but if you use less paper bunnies in your wreath, it might.

You’ll notice the pencil lines on my wreath ring – I drew these out to guide the bunny placement – the paper bunnies are going to sit over each line, rather than in the gaps between.
I used a long ruler and a pencil to mark the lines out, kinda of like a clock face, but with more lines. You can see they’re not exactly even, and that’s okay!
If you are using less bunnies, make sure you divide your wreath the correct number.
Now it’s time to experiment with the placement of each paper bunny. I recommend you do this so that you fill the wreath ring evenly, and to get the sequence of colors/patterns to your liking.
I started with less than 24 bunnies, and you can now see why I recommend painting the ring white (pic above)! My initial layout had a layer of bunnies on the bottom, with another on to top between each pair. But I then decided to making them overlapping as you can see in the picture below.
To get everything to be as even as I could, I lined the tops of the bunny heads with the edge of the outer ring, and so that the pencil line was roughly down the center.
FYI, the bunnies in the US Letter size printable are slightly smaller than the A4 size, so you might notice a difference in your placement compared with mine.
Once happy with your layout you can start to stick everything in place. Using the roller glue, run it along each line on the ring and stick each bunny down in turn.
I didn’t worry about completely covering each bunny with glue, the strip of glue tape is enough to hold them in place.
I recommend removing a quarter of your layout at a time so that you have a guide as you work your way around.
I found, that as I was sticking everything in place, that only part of my guidelines would be showing, and so I would continue to run the tape over the previous bunny. It’s hard to explain, but it becomes clear as you do it!
Finally, fold the ribbon in half and stick to the back of the cardboard ring so that you can hang up your paper Easter Bunny wreath!
⬇️ Save this printable to Pinterest for later! ⬇️
The document(s) is (are) a PDF and can be opened with Adobe Reader which is free to use.
Printables created by The Purple Pumpkin Blog are for personal use only and not for resale. You are welcome to print my designs at a print shop if you don’t have a printer at home. If you wish to link to, pin or share my printables, you are welcome to do so as long as a link back to the blog post is shown and the watermarks are kept intact. Please do not save the PDF to Pinterest, but save the blog post itself. Colours may vary slightly on printing due to different screen and printer settings. If you use any of my printables it would be awesome to know about it! Just leave me a comment, here on my blog, or post a picture on Facebook, Twitter, Instagram or Pinterest! Use the hashtag #TPPBprintables so I can find you! I hope you find these free printables useful!