“Let It Snow” Snowman Sign Craft using a Cricut
Home » CREATE » Crafts » Winter Crafts »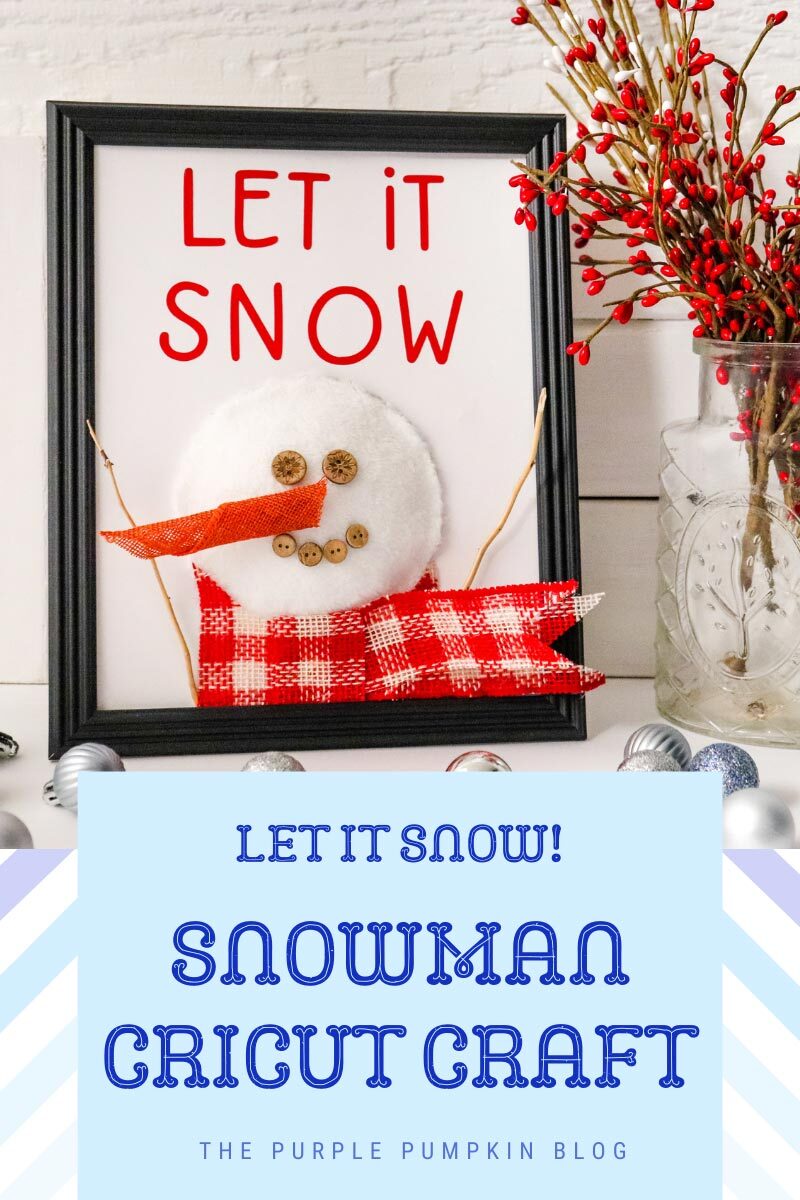
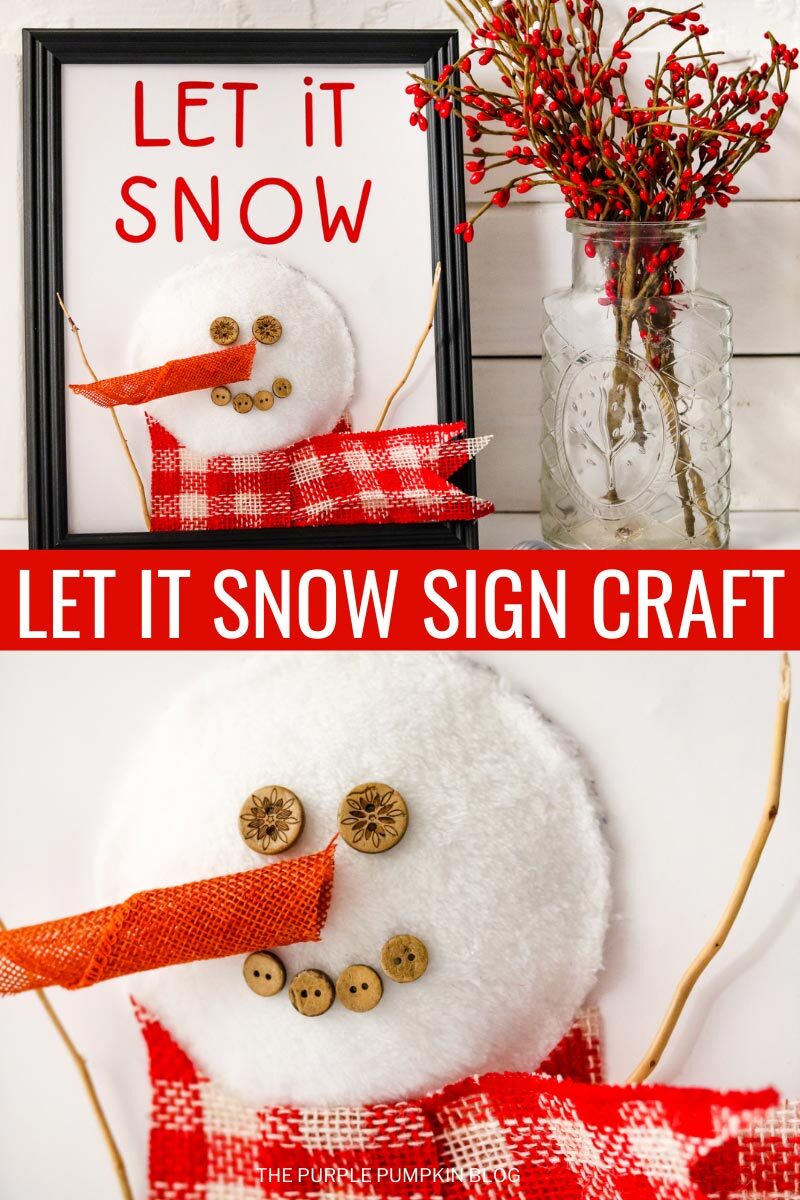
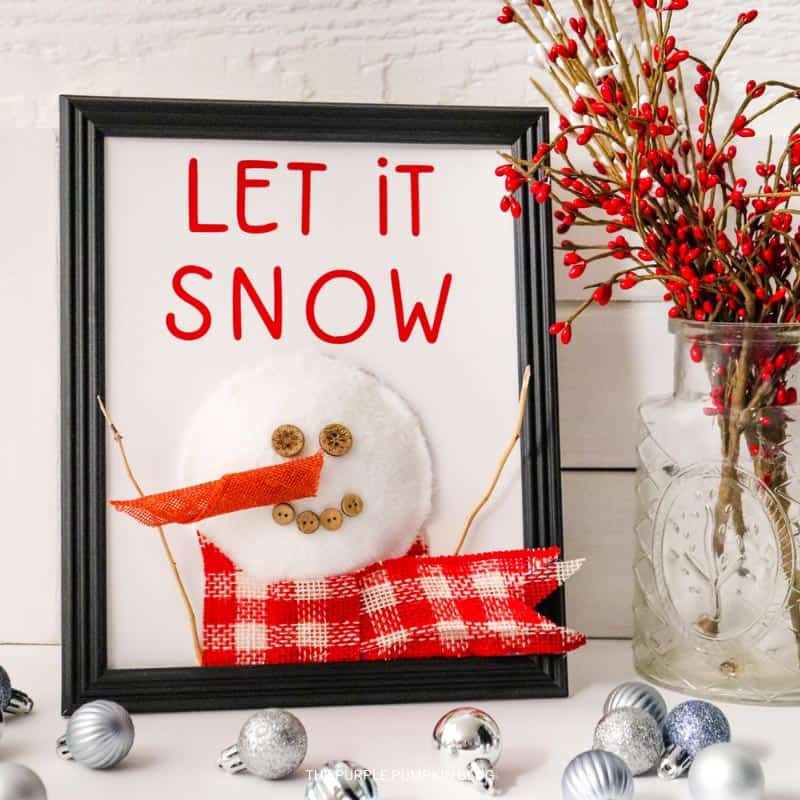
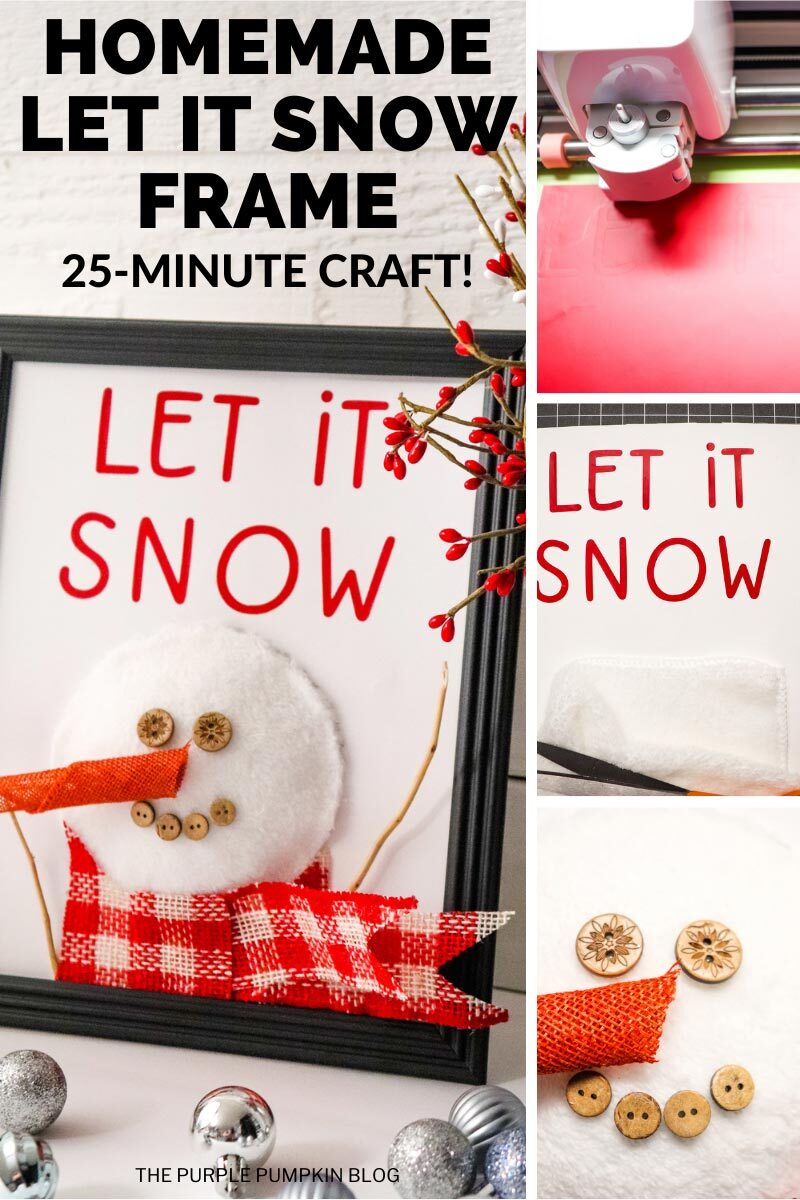
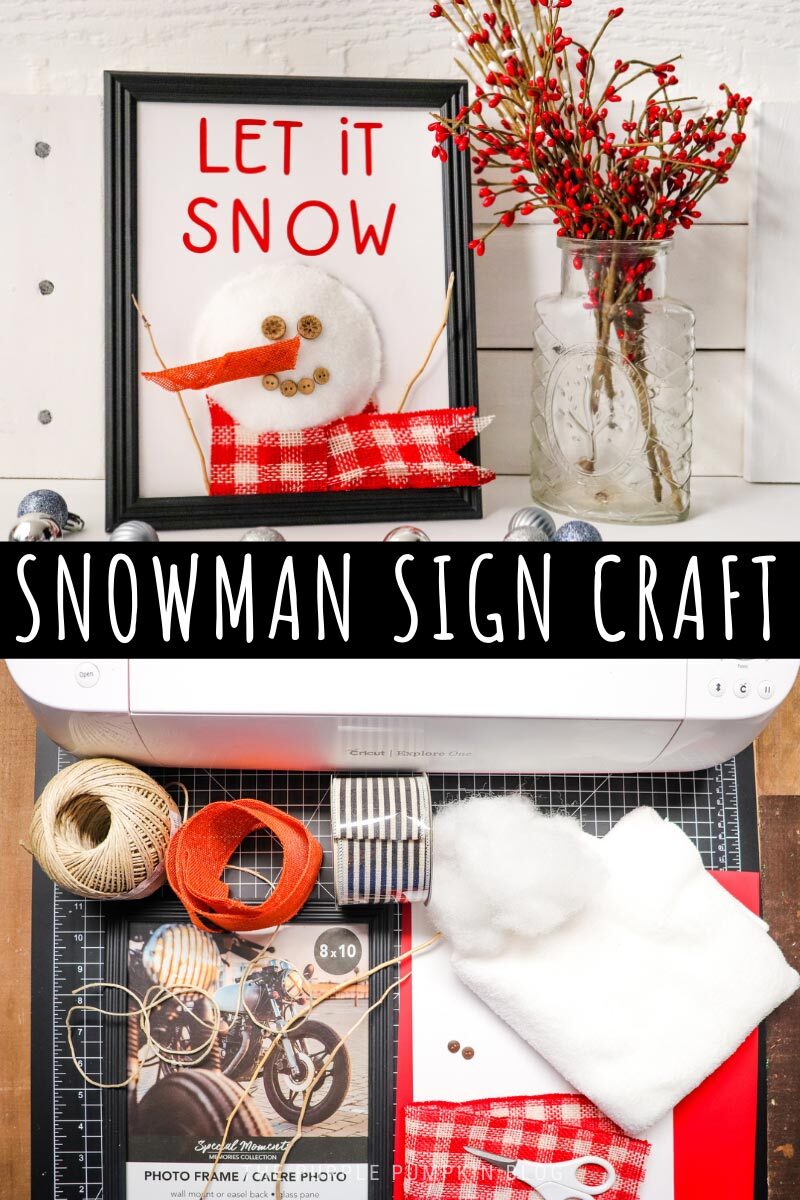
This sweet Snowman Sign Craft is fun and easy to make using some simple craft supplies and a Cricut cutting machine to cut out the letters for “Let it Snow” at the top of the sign. This lovely snowman frame will look great on your sideboard or mantle during the winter holidays!

I’ve got more Snowman Crafts & Recipes for you to try out – right-click and open these other activities in a new tab so that you can read them after this one!
Affiliate Disclosure
We have included affiliate links to products and services related to this post.
We may earn a commission if you purchase after clicking on those links.
As an Amazon Associate, I earn from qualifying purchases.
Read Our Full Disclosure Policy and Privacy Policy
Snowman Sign Craft
The full list of materials, tools, and instructions is found in the printable tutorial card at the end of this post. I highly recommend reading the blog post all the way through before starting this project to ensure that you have everything required and understand the steps and timings involved.
This 25-minute craft is a great project for adults and teens, and perfect to make on a cold afternoon!
The letters for “Let It Snow” are cut using a Cricut cutting machine using the provided SVG file. If you have another brand of cutting machine that uses SVGs you of course can use that. I just so happen to have a Cricut!
If you don’t have a cutting machine at all, you could buy cardboard letters or stickers to use instead. There’s always a way around most crafts!
The rest of the sign doesn’t need the use of a Cricut, just old-fashioned scissors to cut a circle of white material for the snowman’s head, and ribbon to create his nose and scarf.
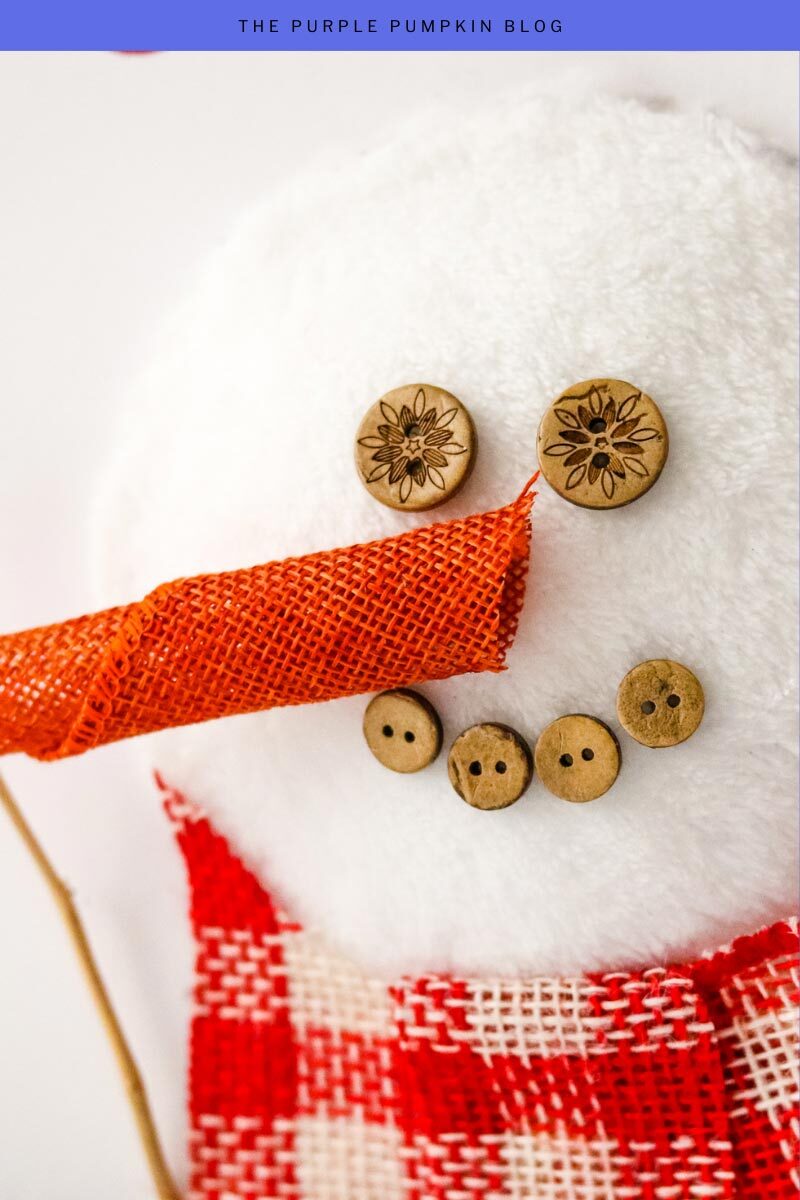
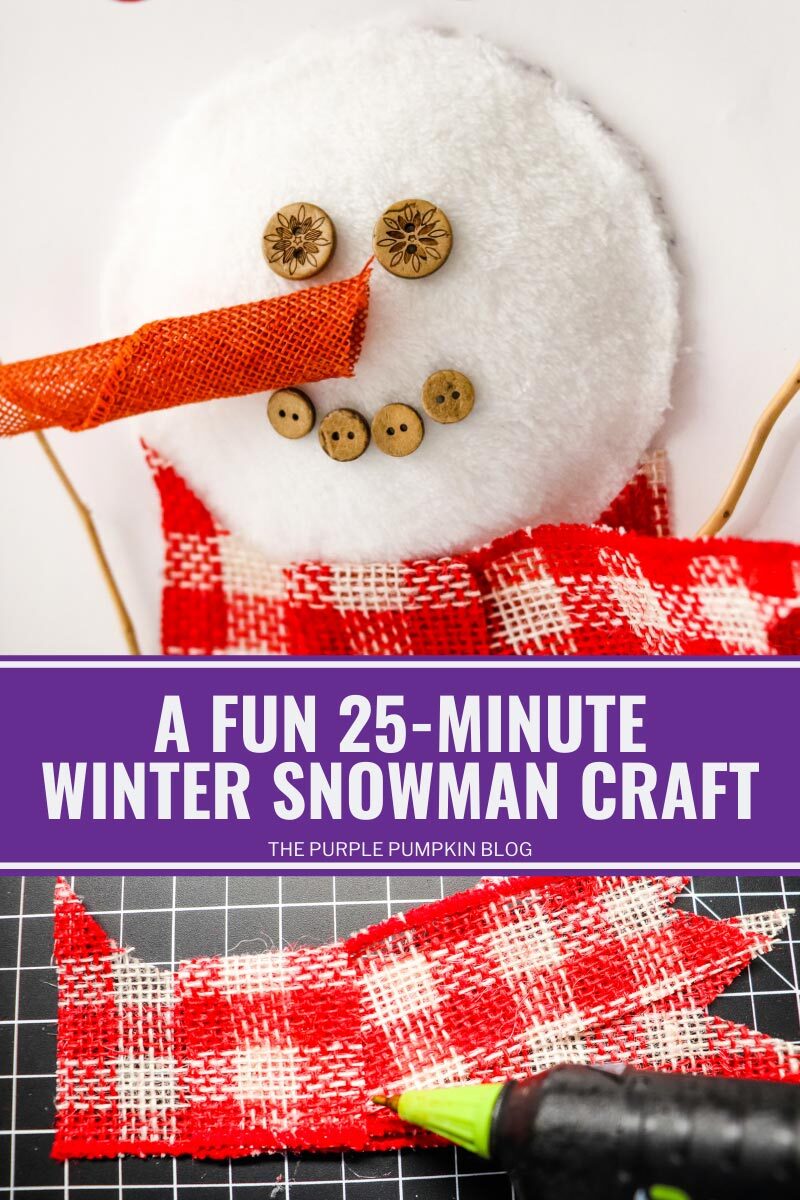
The snowman head is padded out using toy stuffing, which gives a nice 3D effect on the sign, and he’s finished off with button eyes and mouth and sticks for arms.
We used red for the words and the scarf, but you could use any color you like!
Materials & Tools Used in This Craft
You may have some standard craft supplies at home already, however, for your convenience, I’ve linked any specialized materials and tools needed for this craft to Amazon below.
- Let It Snow SVG file
- Cardstock – you will need red, and white.
- Picture Frame – we used an 8×10″ frame. The plexiglass (or glass) needs to be removed for this craft. Safely discard the glass.
- Buttons – use any color you like, we used brown, but you could use black. You will need 2 medium-size and 4 small-size.
- Poly-fil – this is stuffing for toys and crafts. It comes in huge bags and seems to last forever! You can always use some balls of cotton wool instead.
- White Cloth – use any kind you have such as felt or flannel. It needs to be wide enough to fill the width of the frame and forms the snowman’s head.
- Orange Wire Edge Burlap Ribbon – to create the snowman’s carrot nose.
- Red/White Checked Wire Edge Burlap Ribbon – to create the snowman’s scarf.
- Thin Sticks – for the snowman’s arms. You could grab a couple of twigs from the yard!
More Seasonal Crafts
Here are some more for you to check out:
- Snowman Mickey & Minnie Mouse Christmas Ornaments Craft
- How To Make Glitter Snowflakes
- Easy No-Sew Felt Christmas Ornament Penguin + Free Printable Pattern
I’ve shared lots of great craft ideas on The Purple Pumpkin Blog over the years, in fact, there are 100+ crafts to make and do at home that you can try!
How Do I Make a Snowman Sign?
Just check out the how-to card below with full materials, tools, instructions and demonstration photos. You can print the card out too (don’t worry, the pics don’t print to save your ink!).
“Let It Snow” Snowman Sign Craft
Materials
- Let It Snow SVG file – right-click and “save as” to download the file
- Red Cardstock
- White Cardstock
- 8 x10″ Picture Frame glass removed
- 6 Buttons 2 medium, 4 small
- Twine
- Handful of Polyfill stuffing or cotton wool
- White Cloth Piece– Felt Flannel, Car Shammy
- Orange Wire Edge Burlap Ribbon
- Red/White Checked Wire Edge Burlap Ribbon
- 2 Thin Sticks
TOOLS
- Cricut Machine
- Glue
- Glue Gun
Instructions
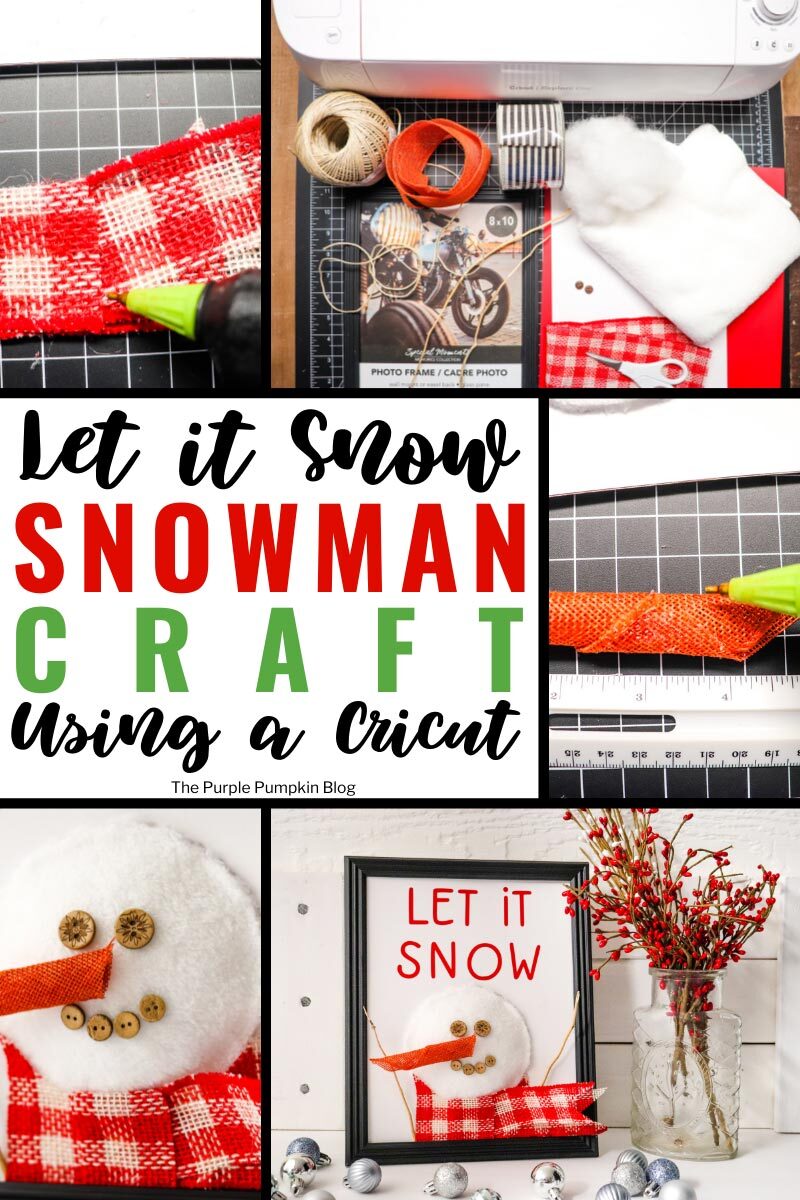
- Upload the "Let It Snow" SVG file to Cricut Design Space.
- Place red cardstock on cutting mat and cut with Cricut. Carefully weed out letters, set aside.
- Remove the board backing from the frame and glue white cardstock to cover it.
- Center and glue the cut letters to the white cardstock at the top. (Frame should be vertical). Use a popsicle stick or toothpick to spread glue to the underside of letters.
- Cut a large white fabric circle (snowman’s face) that fits in the empty space on the picture frame under the letters. Use a glue gun to secure the edge of the circle three-quarters of the way around. Stuff the circle with polyfill and finish gluing the edge of the circle.
- To create the carrot nose, cut a 4”/10cm piece of orange burlap ribbon. Roll it from bottom-left edge to top-right edge, creating a tapered nose that is more wide on one edge. Hot glue the edges of the ribbon together. Set aside.
- To create the scarf, cut two pieces of white and red checked ribbon. One piece is 4"/10cm long and the other is 5"/12.5cm long. Cut the 5” piece in half lengthwise and cut the ends to create points. Cut and shape the 4” piece of ribbon lengthwise so that it fits snuggly under the snowman face. Hot glue into place. Hot glue the two scarf pieces on top, just at the very end.
- To create the snowman’s face, glue the end of the orange burlap nose to the center of the snowman face. Add two buttons for the eyes and 4 buttons for the mouth.
- Hot glue two thin sticks to the base of the snowman at the scarf and bottom of the frame.
- Allow the glue to dry before displaying where desired!
This post is part of my long-running Create the Holidays series on The Purple Pumpkin Blog. Since 2012, I’ve shared free printables, crafts, recipes, and more for Christmas and the Winter Holidays. While I don’t officially run the series anymore, seasonal inspiration will still be here! Browse past Create the Holidays (formerly Create Christmas) years: 2024, 2023, 2022, 2021, 2020, 2019, 2018, 2017, 2016, 2015, 2014, 2013, and 2012.