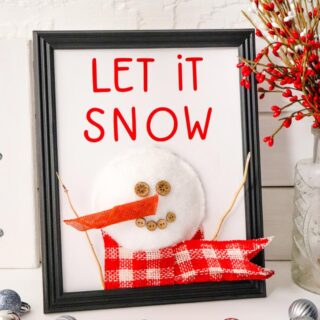
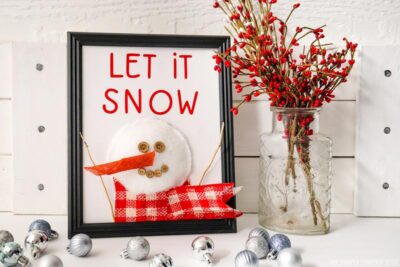
"Let It Snow" Snowman Sign Craft
This sweet Snowman Sign Craft is fun and simple to make using some simple craft supplies and a Cricut cutting machine to cut out the letters for "Let it Snow" at the top of the sign. This lovely snowman frame will look great on your sideboard or mantle during the winter holidays!
Materials
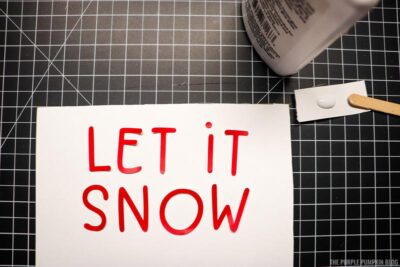
- Let It Snow SVG file - right-click and "save as" to download the file
- Red Cardstock
- White Cardstock
- 8 x10" Picture Frame glass removed
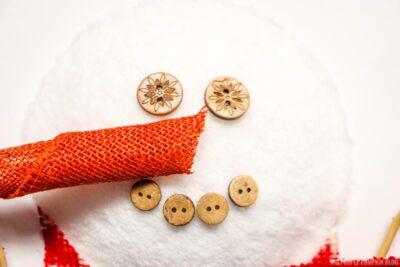
- 6 Buttons 2 medium, 4 small
- Twine
- Handful of Polyfill stuffing or cotton wool
- White Cloth Piece– Felt Flannel, Car Shammy
- Orange Wire Edge Burlap Ribbon
- Red/White Checked Wire Edge Burlap Ribbon
- 2 Thin Sticks
TOOLS
- Cricut Machine
- Glue
- Glue Gun
Instructions
- Upload the "Let It Snow" SVG file to Cricut Design Space.
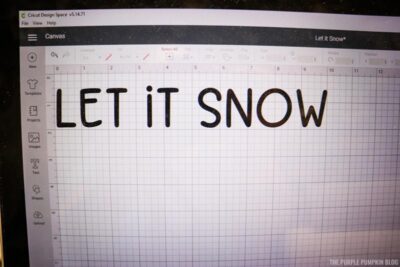
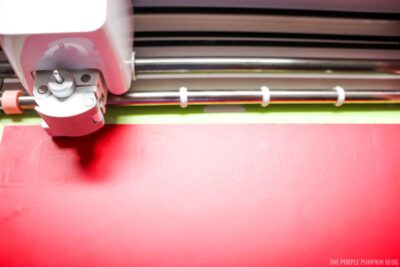
- Place red cardstock on cutting mat and cut with Cricut. Carefully weed out letters, set aside.
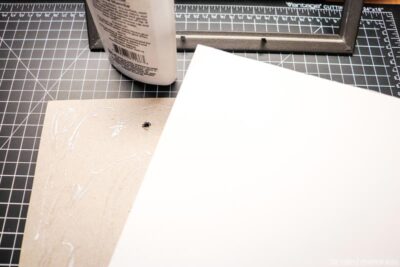
- Remove the board backing from the frame and glue white cardstock to cover it.
- Center and glue the cut letters to the white cardstock at the top. (Frame should be vertical). Use a popsicle stick or toothpick to spread glue to the underside of letters.
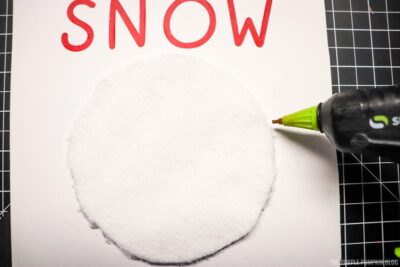
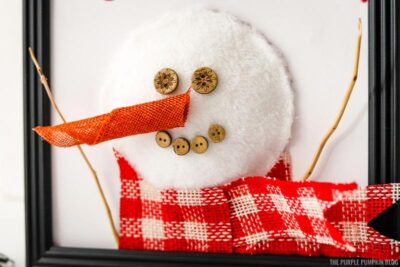
- Cut a large white fabric circle (snowman's face) that fits in the empty space on the picture frame under the letters. Use a glue gun to secure the edge of the circle three-quarters of the way around. Stuff the circle with polyfill and finish gluing the edge of the circle.
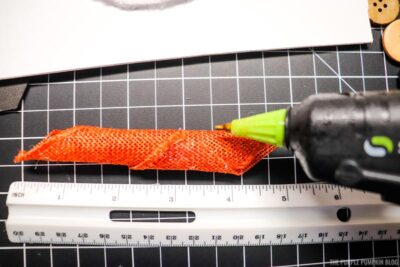
- To create the carrot nose, cut a 4”/10cm piece of orange burlap ribbon. Roll it from bottom-left edge to top-right edge, creating a tapered nose that is more wide on one edge. Hot glue the edges of the ribbon together. Set aside.
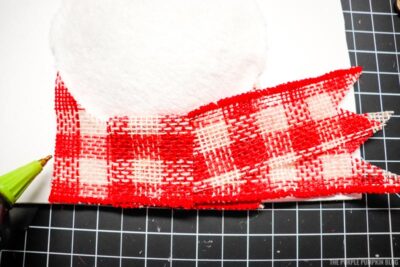
- To create the scarf, cut two pieces of white and red checked ribbon. One piece is 4"/10cm long and the other is 5"/12.5cm long. Cut the 5” piece in half lengthwise and cut the ends to create points. Cut and shape the 4” piece of ribbon lengthwise so that it fits snuggly under the snowman face. Hot glue into place. Hot glue the two scarf pieces on top, just at the very end.
- To create the snowman's face, glue the end of the orange burlap nose to the center of the snowman face. Add two buttons for the eyes and 4 buttons for the mouth.
- Hot glue two thin sticks to the base of the snowman at the scarf and bottom of the frame.
- Allow the glue to dry before displaying where desired!
Did you make this project? Share it!Tag @_ThePurplePumpkinBlog on Instagram with the hashtag #TPPBCreate!