How To Make A Wooden Disney Sign With A Cricut Maker
Home » CREATE » Crafts »This is a sponsored conversation written by me on behalf of Cricut. The opinions and text are all mine.
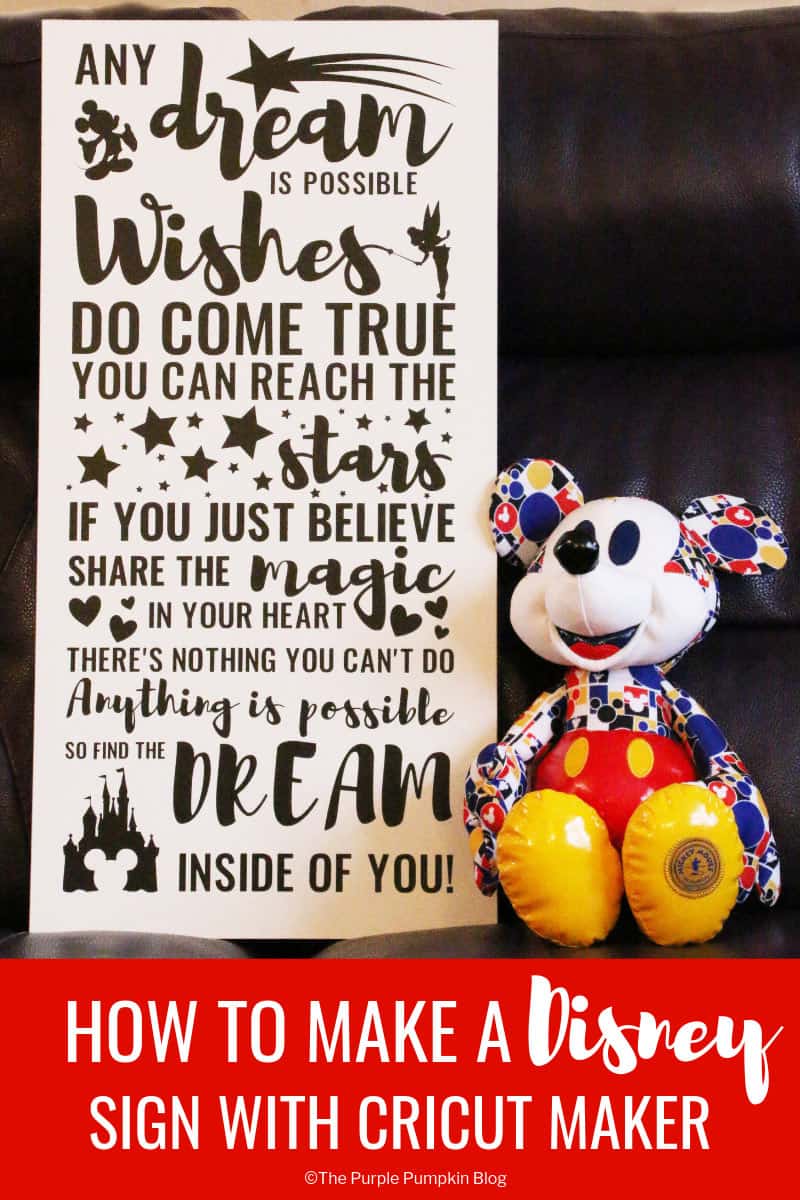
For the longest time I have wanted a wooden Disney sign to place in our home, but finding one I really like I want has been tricky. So I thought, why not make one myself? And that is exactly what I did this weekend, using my Cricut Maker!
I was able to turn some of my favourite, and uplifting Disney song lyrics into a gorgeous piece of Disney home decor which is truly unique and not too hard to make when you know how!
In this tutorial I’m going to show you how to create your design in Design Space, as well as how to cut, weed and transfer it from the cutting mat to a wooden board.
How To Make A Wooden Disney Sign
I created my Disney word art directly in Design Space, and have made a demonstration video to guide you. I’m also going to let you in on some tips which I learned the hard way, so that you don’t make the same mistakes as I did!
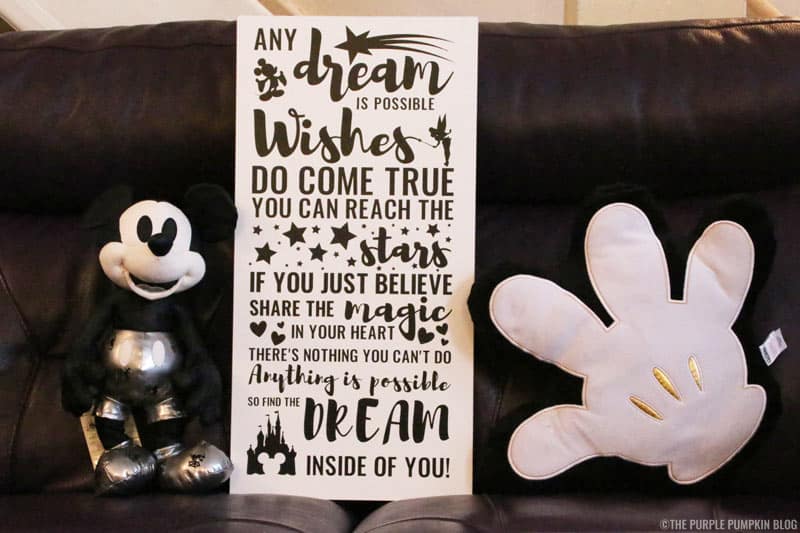
I cut the design in black vinyl on my Cricut Maker, weeded it, and transferred it to a wooden board. The board was actually an old shelf we found while decluttering the house. This saved me having to sand down and stain/paint a plain piece of wood.
My finished wooden Disney sign was 12in x 24in / 30cm x 60cm. (I work in inches because that is the default in Design Space. You can change to metric in the settings)
I have included links to some of the products that I used in this project. If you purchase via the links I may earn a small commission.
Any Dream Is Possible
One of my favourite set of Disney song lyrics comes from a now closed show at Magic Kingdom called Dream Along With Mickey. It’s from the final number of said show, called Any Dream Is Possible. I am a dreamer at heart, and these lyrics just sing (no pun intended!!) to me.
Any dream is possible
Wishes do come true
You can reach the stars if you just believe
Share the magic in your heart
There’s nothing you can’t do
Oh, anything is possible
So find the dream inside of you
Just remembering the first time I heard this song, back in 2011 on our first visit to Walt Disney World brings so much joy, and even though Dream Along With Mickey has now ended, I still listen to the soundtrack on my Magic Kingdom Event Party Music CD often! I cannot describe how happy having this Disney sign displayed in my house is making me, I smile every time I look at it as evokes all of my treasured Disney memories!
I encourage you to make your sign using your favourite Disney quote, or song lyrics. If you love Disney as much as I do (and I guess you do!), then you will no doubt have many favourites! But if you’re stuck, I’ve included some inspiration at the end of this post.

To make this wooden Disney sign you will need:
- Cricut Maker, or any Cricut machine in the Explore family
- 12″ x 24″ Standard Grip Mat
- Black Vinyl
- Transfer Tape
- Weeding Tool
- XL Scraper
- 12″ x 24″ Wooden Board
- Rubbing alcohol (91% isopropyl alcohol) + paper towel
- Scissors

Before we get started…
- If you want to make a smaller sign, please go ahead and do so. This tutorial will work for smaller signs too. Even though I’ve never made anything like this before, I really am a “go big or go home” type of person, so I went as big as the Cricut Mat would allow me to!
- Use whatever colour vinyl you like. I decided to make my sign completely in black vinyl. I did experiment with using different colours for the some elements, but decided one colour looked best. You might want to use a dark piece of wood instead, so white or cream vinyl will look better.
- Figure out your design before buying a piece of wood. That way you’ll get the sizing of both right without having to worry about altering your design, or having to cut the wood to size.
- Depending on you piece of wood, you may have to sand the edges smooth, paint or stain it, and wait for it to dry before cutting your vinyl – allow time for this! Or you can go the super easy route and buy a shelf board (as I mentioned, we found one while decluttering). They seem to be around 12in/30cm wide, which is perfect. You can always ask in the hardware store to have the length cut down to size if needed.
How long will it take to make a wooden Disney sign?
The longest part for me was designing the layout of the Disney song lyrics, as well as sourcing cut files, and making my own shooting star graphic. As a designer I am a stickler for things looking a certain way, so this process probably takes a lot longer than it should! I know I was sat in front of the computer for 2 or 3 hours messing around with different layouts!
The design took about half an hour to cut, and then another half an hour or so to weed and transfer to the wooden board. I did make some mistakes along the way which I will be telling you all about, so you don’t make the same ones I did!
This wood sign is one of those projects you could do on a rainy afternoon, wishing you were at Disney!
Step 1 – Designing the layout
I mentioned that you should buy your wood board (or acquire – this would be a great project to upcycle a piece of wood!) after you have designed your layout, but you also need to have some sort of idea of size in mind.
I went with the 12in x 24in size because it is the size of the large Cricut mat. However, I wanted to have a border around the words, so my design ended up being 10in x 22in, giving me a one inch border all the way around.
In my video demonstration below, I’m using different Disney song lyrics. This time from the (now closed) Wishes fireworks at Magic Kingdom.
Star light, star bright
First star I see tonight
I wish I may, I wish I might
Have the wish, I wish tonight
We’ll make a wish
And do as dreamers do
And all our wishes
Will come true
Design Tips!
- Create two background boxes to guide you in the design process. One should be the size of your board, and then the other should be an inch smaller all around. For a 12in x 24in background, this would be 10in x 20in. Make them two different colours to start with so it’s easier to see which is which. For example, make the full background black, and the smaller background, white. At the end of the design, change the black background to match the white so you can check for placement issues on the full board. (I really hope that makes sense, it’s so much easier to show than to write out!)
- Pick out key words, or sentences that you want to highlight and give emphasis to – these can be put into a different font, into upper case, made bigger, or bolder.
- Don’t be afraid to move things around, making elements bigger or smaller, or nestling words close together. Add in shapes and images to add interest.
- Stick to two, or three fonts – too many different fonts can be distracting. Pair a fancy font – like a brush or script font with a simple block font. You can use fonts from your system in Design Space which is really handy. I am a font hoarding fiend! Find free fonts at Dafont.com – there are thousands of them! Once installed onto your device, you must restart Design Space for them to appear in the font menu.
Terminology…
Weld
During the design process you will notice the layers on the right side of the screen. Each individual element is a cut piece – including those individual script/brush letters. Even though they look like they are joined as one in your design, they most definitely are not.
As an example, to make sure that the Cricut Maker knows to cut the word dream as one whole word, rather than the letters d, r, e, a, m, you must WELD them together. Think of welding like glue. It is a permanent change, and you can’t unweld something.
The photo below demonstrates what happens when you don’t weld your elements. Notice how the upstrokes of each letter that looked like it wasn’t there on the screen, has actually been cut out. (You will also notice the crease marks in some of the vinyl, so in a way, I’m glad i made this mistake, as it meant I could get rid of those horrible creases!)
So learn from my mistakes! Make sure that letters or images that join or overlap are welded together so that there is one whole cut, rather than individual cuts. I had to recut the unwelded words (of which there were 6!)
You can see what the words look like when they have been welded.
Attach
Next to the Weld option in Design Space, you’ll see the ATTACH option. You might think this is similar to weld, but they’re really not. Think of attaching as a paper clip – you’re keeping all the pieces in the same place, but you can remove the paper clip and make changes.
Attaching elements together will tell the Cricut Maker that they all need to be cut in this exact placement. If you don’t attach your elements, Design Space will lay all of the individual pieces on the mat in the best way it thinks it should (to save material).
The photo below demonstrates the attached elements. Cricut Maker cut everything where it was in the design as I saw it on the screen. Please ignore the missing pieces – more about that later; and I’ve not weeded yet either!
Group
Grouping elements together makes it easier for you to move sections of your design around. For example, if you look at my design above the word stars and the actual stars are all individual layers. If I wanted to reposition all of these elements I would have to do them one by one, but if I group them together I can move them as one piece. I could weld them together, but what if in the future I want to make the stars a different colour? You can ungroup, but you can’t unweld!
The attach function also groups elements together so that you can move them around as one piece; which is confusing. But when you group something together, it is only for the design process – when you click the Make It button all the pieces will be placed in the best position possible, as I mentioned earlier about attaching.
Here are two screenshots from Design Space (I changed the colour to red so that it would be easier to see) The top screenshot demonstrates what happens when you group elements, and the bottom screenshot when you attach. I hope this helps you to visually understand the difference.
Step 2 – Preparing your mat
Cut the vinyl to the required length (24in in my project), carefully line it up with the long side guideline on the mat, and push down from the center outwards so you can press out any air bubbles that form. Be gentle as you don’t want to crease the vinyl. Vinyl is placed with the backing paper down on the mat.
I found that the vinyl I was using, lifted from the backing paper causing a ridge. To fix that, I lifted the vinyl away and pressed the backing paper onto the mat, and then let the vinyl lay back down – ridge gone.
You will need patience when preparing your cutting mat with such a big piece of material. You might find it easier to have an extra pair of hands when placing such a long piece of vinyl to the cutting mat – I know it helped me!
Step 3 – Cutting your design
Before cutting, make sure that your design is exactly how you want it – you don’t want to waste all that vinyl.
Double check that the measurements are correct; that there are no spelling errors; that joined up letters are welded together so they are cut as one piece, and not individually. I didn’t do this, and well, I had to re-cut some words on another piece of vinyl and place them individually. Transferring one whole sheet is a lot easier than lining up individual words!
You do not need to mirror your design when cutting vinyl.
Step 4 – Weeding
With such a large piece to weed, I recommend that you leave the vinyl stuck to the mat while you work. Begin by gently pulling the vinyl away from the backing paper, until you reach the outlines of your first words. Take your time and go carefully, making sure that letters or graphics are in place on the backing paper, especially around smaller pieces. Once you’ve removed all of the vinyl from around your design, you can use a weeding tool to remove the vinyl from inside the letters.
A few things I learned…
- An extra pair of eyes is helpful, as they can spot if elements are missing. I hadn’t realised that the word ‘is’ was missing until I had transferred my design to the wood. I had to re-cut it as it had been scrunched up with the discarded vinyl! One of the hearts was left out too, so ditto on that! Maybe we needed three sets of eyes actually…
- I found that some of the smaller elements – especially the stars – moved about as I was pulling the vinyl away. This didn’t matter so much, as they didn’t have to line up, but letters within words is more of a nuisance. Take your time to realign any moved pieces.
- The back of the vinyl is really sticky! Cutting it off as I pulled it away was helpful as I didn’t have to worry about it sticking to the pieces left behind and accidentally removing those in the process.
- Good lighting is essential so that you can see which parts need to be weeded out.
Step 5 – Applying the transfer tape
Transfer tape is the product that will help you to transfer your cut and weeded vinyl design from the backing paper, and place it onto the board.
Cut the tape to size (24in), and peel the backing paper away. Holding the tape at both ends, raise your hands so that the tape kind of make a ‘U’ shape in the middle. Now, holding the transfer tape above your vinyl design, place the bottom of the ‘U’ onto the center of the mat, and carefully – but confidently, let either side lay down over the design – ensuring that there are no air bubbles.
Step 6 – Burnishing
To ensure that the vinyl attaches to the transfer tape, we use a technique called burnishing. This sounds complicated, but it just means to rub with pressure. In this case, we use the scraper tool and rub it over the transfer tape so that the two materials stick together. Make sure you get every last piece of your design burnished – you can kind of see a change in the colour of the vinyl as it attaches which helps.
Once you’re happy you’ve burnished everything, you then peel the transfer tape with the attached vinyl from the backing paper. Then remove and discard that piece of backing paper from your cutting mat. Remember to replace the protection film back on your mat.
Step 7 – Preparing your wooden board
You want to make sure that your wooden board is free from grease and dust, so use some rubbing alcohol and a paper towel to clean it before applying your vinyl transfer.
Step 8 – Transferring your design
An extra pair of hands is definitely going to be handy (pun totally intended!) for this step.
One of the reasons why I made my design on 12in x 24in was so that I could line up the edges of the transfer tape with the edges of my [same size] board. This would help to ensure that my design was centered on the wooden board itself. That said, I do know it is a little bit off center, but eh, whatchagonnado? *shrugs* For a first time attempt at this sort of project I think it came out well!
My husband was my extra pair of hands, and he held the corners of the bottom end of the transfer tape, while I held the top two corners. I then lined the top edge of the tape with the top edge of the board, we then began to gently lay the design down.
There is some room for manoeuvre, as the vinyl needs to be burnished onto the wood. So before doing that, carefully lift the tape back up and re-position correctly if needed.
My husband initially tried to lay the transfer tape on his own while I filmed him doing it, but he had trouble lining it up. Two pairs of hands are definitely better than one here.
I guess you could cut the transfer tape into smaller pieces, but then, in my mind that’s even more pieces to make sure line up correctly… Just be patient… you got this!
Once you are happy with the position of the vinyl on the board, use the scraper to burnish the vinyl to the wood. Start to peel the transfer tape away, making sure the vinyl stays in place. If you find the vinyl hasn’t transferred completely, just lay the transfer tape back and burnish again.
We pulled down quite flat to the board as didn’t want the tape to stick to itself – you can reuse transfer tape several times, so don’t throw the backing paper away!
After the Disney song lyrics had been transferred, I had to go back in and transfer the missing elements that I didn’t weed correctly, and the words that I didn’t cut correctly… To do this, I looked at my design on the screen to line up the letters.
But you shouldn’t need to do this as you’ll have learned from all of my mistakes!
Step 9 – Admire your wooden Disney sign!
And that is it! Stand back and admire your wooden Disney sign with pride!
You can then stand your sign on a mantle or sideboard, or attach a hanging kit to the back so that it can be hung on a wall.
I hope you have found my tutorial useful and go on to make your own wooden Disney sign. If you do make one, please do share it with me, I would love to see it!
Just leave me a comment, here on my blog, or post a picture on Facebook, Twitter, Instagram or Pinterest! Use the hashtag #TPPBCrafts so I can find you!
Disney Quotes to use in your sign:
“All our dreams can come true, if we have the courage to pursue them.” – Walt Disney
“In every job that must be done, there is an element of fun.” – Mary Poppins (Mary Poppins)
“You’re braver than you believe, and stronger than you seem, and smarter than you think.” – Winnie the Pooh (Pooh’s Most Grand Adventure)
“Always let your conscience be your guide.” – The Blue Fairy (Pinocchio)
“There’s a great big beautiful tomorrow, shining at the end of every day” – Carousel of Progress (Magic Kingdom)
“Don’t just fly, soar.” – Dumbo (Dumbo)
“To infinity and beyond.” – Buzz Lightyear (Toy Story)
“‘Ohana means family, and family means no one gets left behind or forgotten.”– Lilo & Stitch
““When life gets you down do you wanna know what you’ve gotta do? Just keep swimming!” – Dory (Finding Nemo)
“Do. Or do not. There is no try.” – Yoda (The Empire Strikes Back)
“Laughter is timeless, imagination has no age, and dreams are forever.” – Walt Disney
Disney Song Lyrics to use in your sign:
“When you wish upon a star, makes no difference who you are, anything your heart desires will come to you.” – When You Wish Upon a Star (Pinocchio)
“Have faith in your dreams and someday your rainbow will come smiling through.” – A Dream Is a Wish Your Heart Makes (Cinderella)
“Like a bolt out of the blue, fate steps in and sees you through, when you wish upon a star, your dreams come true” – When You Wish Upon a Star (Pinocchio)
“Zip-a-dee-doo-dah, zip-a-dee-ay, wonderful feeling, wonderful day!” – Zip-A-Dee-Doo-Dah (Splash Mountain)
“A dream can be, a dream come true, with just that spark, from me and you” – Journey Into Imagination with Figment (Epcot)
It’s a world of laughter, a world of tears, it’s a world of hopes and a world of fears, there’s so much that we share, that it’s time we’re aware, it’s a small world after all” – it’s a small world (Magic Kingdom)
“We got not troubles, life is the bubbles, under the sea!” – Under The Sea (The Little Mermaid)