How To Make A Tissue Paper Flower – Crafty October Day 15
Home » CREATE » Crafts »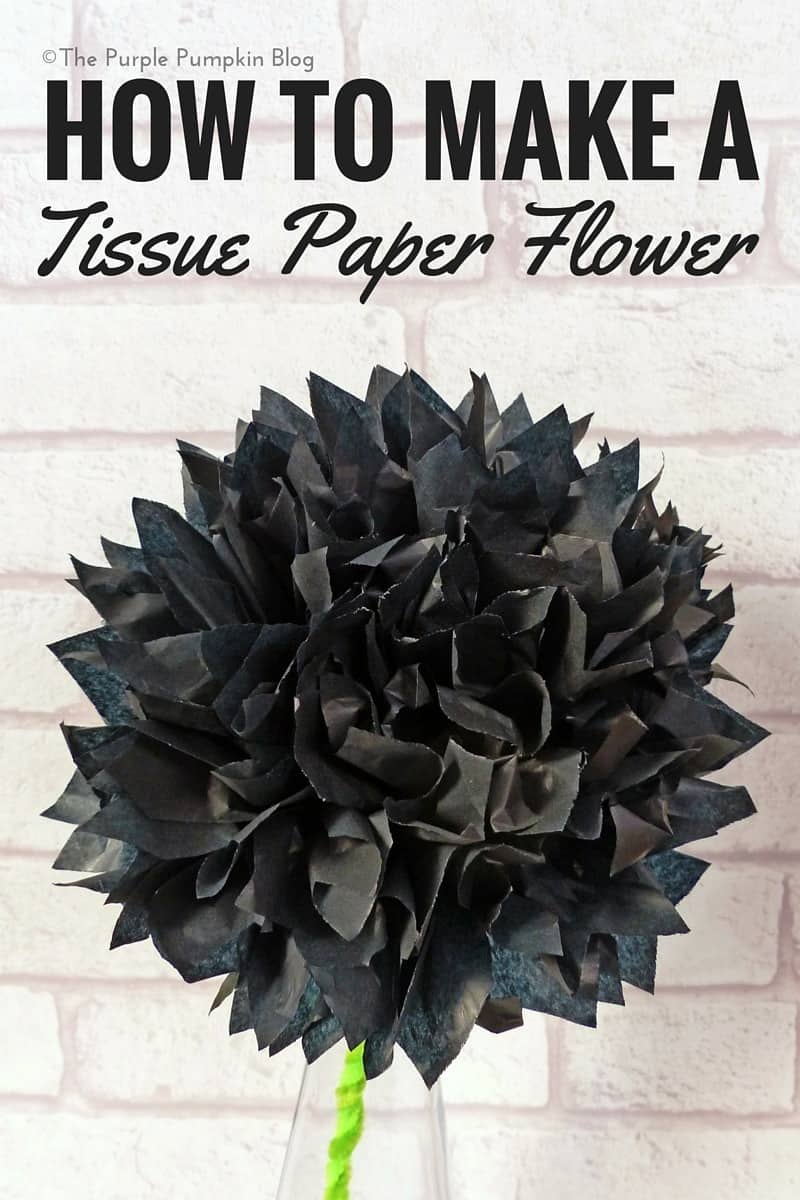

Tissue paper flowers (or rosettes) are so easy to make, yet look amazing! They are one of my go-to homemade party decoration crafts for this very reason, in fact check out all the times I’ve made them over the years:
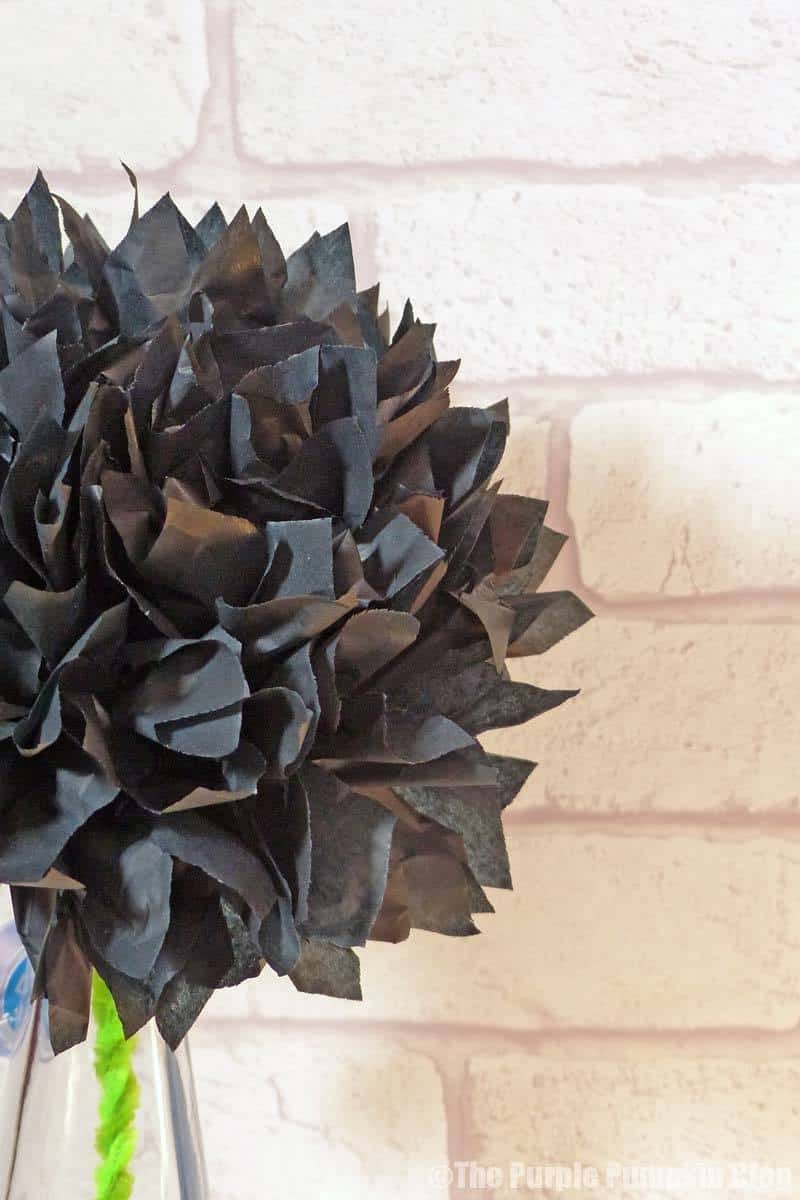
It would seem though, that I have never made them for Halloween, so this changes now! I made one giant black tissue paper flower to place in a glass bottle on my desk, but you could make as many as you want, and in any colour you want. For Halloween, the colours (for me at least!) are black, orange, purple, green, and red.
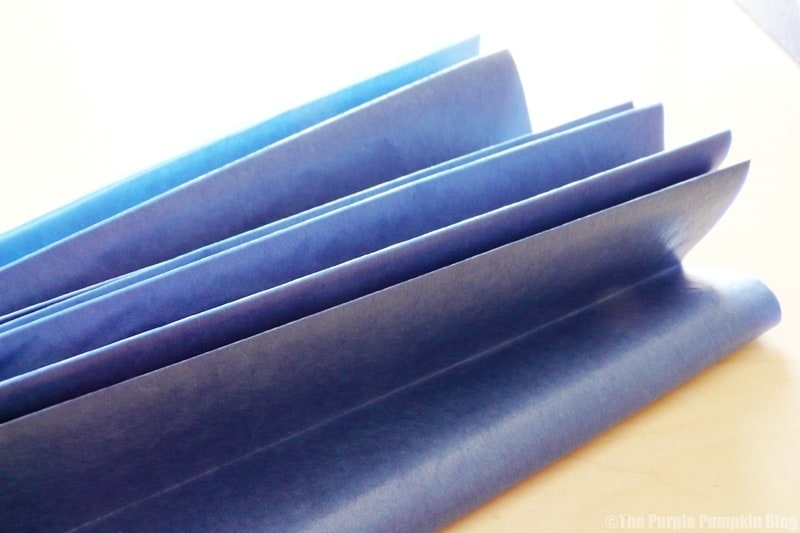
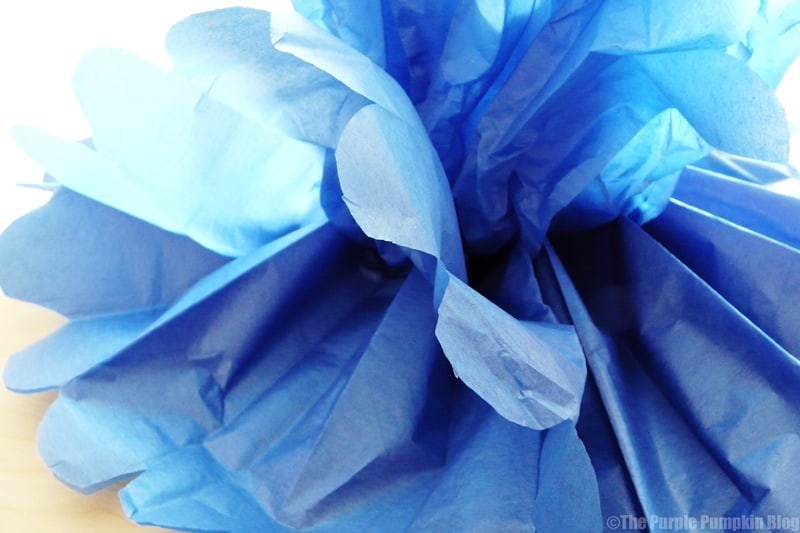
Now, stupidly, I didn’t take step-by-step photos, as I just got busy crafting…but I do have photos from a previous post, so you will have to just imagine that the tissue paper is black, and the thread is pipe cleaners! The sheets of tissue paper I used were about 50cm/20″ wide, the width will dictate how big your tissue paper flower is. The amount of sheets you use will determine how full you want the tissue paper flower to be. I generally use 5, maybe 6 sheets – any more and it becomes hard to pull the tissue paper apart to form the flower.
Supplies
- Tissue Paper (buy here in the US) in your chosen colour/s
- Green Pipe Cleaners (buy here in the US)
- Scissors
Instructions
1. Lay the sheets of tissue paper one on top of each other, and then fold, concertina style, about 2cm/1″ in width. Keep folding until you run out of paper.
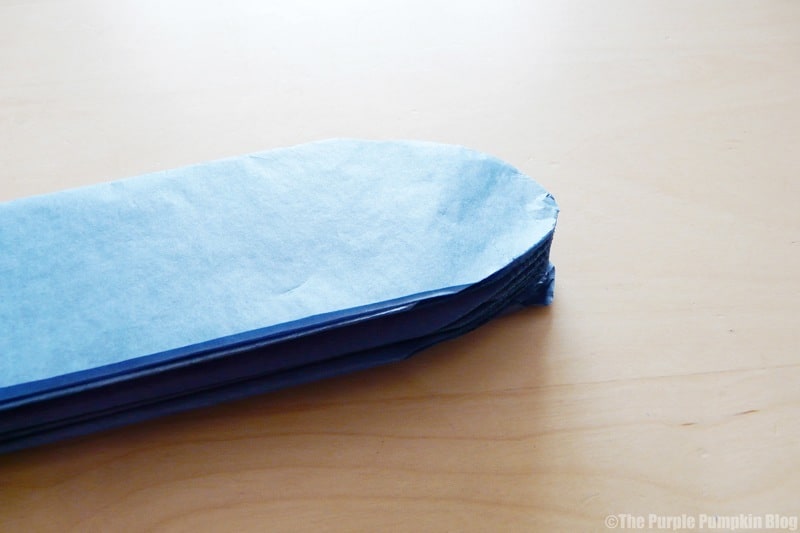
2. Locate the centre by folding over in half gently, and wrap a pipe cleaner around. Twist to secure it, then add another couple to form a stem. Just imagine the thread below is a pipe cleaner!

3. Using your scissors, cut a “V” at each end, about 2cm/1″ big. In the photo below I made rounded petals, for the flower that I made for Halloween, I wanted pointy petals.
4. Now gently open up the concertina-d tissue paper to spread each piece out.
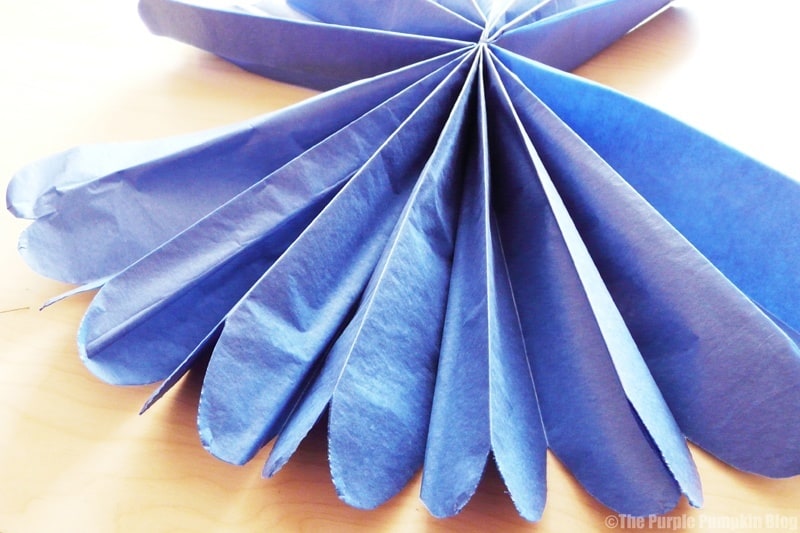
5. Then, very gently start to pull each layer of tissue paper away, up to the centre. I generally do one side first, and then the other. Be careful not to pull to hard as you may rip the tissue paper. Keep doing this with each layer until they’re all pulled out. Once you start doing it, it becomes a lot more clear than my instructions!
6. Tease the layers until you get the look you want, and then bend the flower head down a bit to place into a bottle. Alternatively, instead of a pipe cleaner, use thread or ribbon, and hang your tissue paper flowers up instead.
It really is simple to do, and if you’re like me, you’ll find them quite therapeutic to make!

Crafty October is a month long series on The Purple Pumpkin Blog, where I share an idea a day for Halloween + Autumn. All ideas for Crafty October 2015 are here. And if you are a blogger and would like to share your ideas, check out the Crafty October 2015 Blogger Linky which is running until 31st October 2015.