Bathroom Renovation – Day by Day
Home » Home & Garden »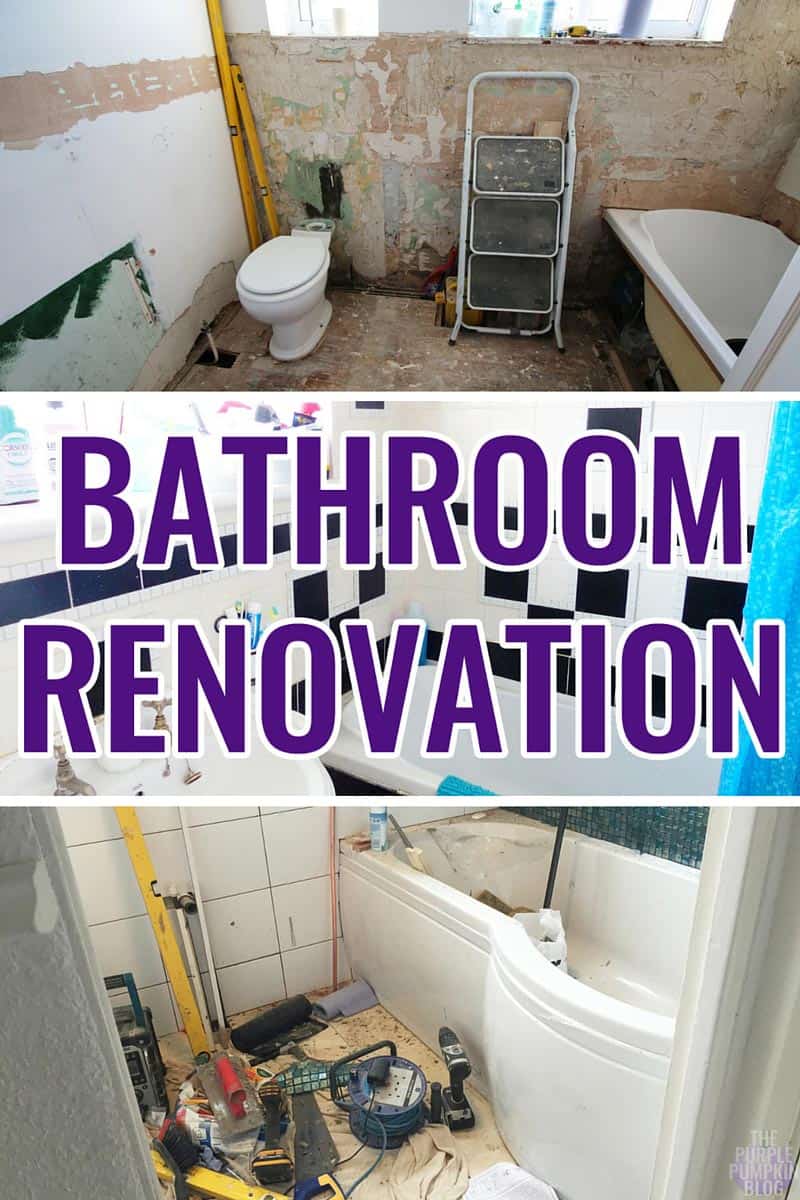
Back in March I shared inspiration for a nautical/beach themed bathroom, and announced my working with Bathroom Takeaway, on renovating our old bathroom. I can’t tell you how excited I was at this prospect, as our [old] bathroom just wasn’t my cup of tea, and the opportunity came at a perfect time.
We are at the final, final stretch now… the final few things are being done, as I type this blog post out, so I will be able to share our finished bathroom very soon!
It’s so nice to finally have a working bathroom back, after nearly 2 weeks of not. I wrote a post with tips for surviving a bathroom renovation, sharing how we got through the process, having just one bathroom in the house. If you have a second WC, or bathroom, the pressure isn’t so great (especially if you need to go to the loo right now!)
For now, I want to share our bathroom renovation – day by day, to show you what happens when you have a complete replacement of the smallest room in the house. You can watch it below, or over on my YouTube channel (as always, don’t forget to subscribe!)
For the making of the video I broke down the renovation work into days; but there were some jobs that ran into other days, so this is more of a rough outline than what exactly happened on which day. Kevin from KayJay Interiors, whom we hired for this job, was a hard worker, starting early doors – around 8am, and working till late afternoon. He tidied up each day, and checked in with me as work was carried out, explaining what was being done, or making suggestions that I hadn’t thought of – that’s why you hire a pro! In total, from start to finish, Kevin has been here for around 10 days. I’m amazed at what one person can do!
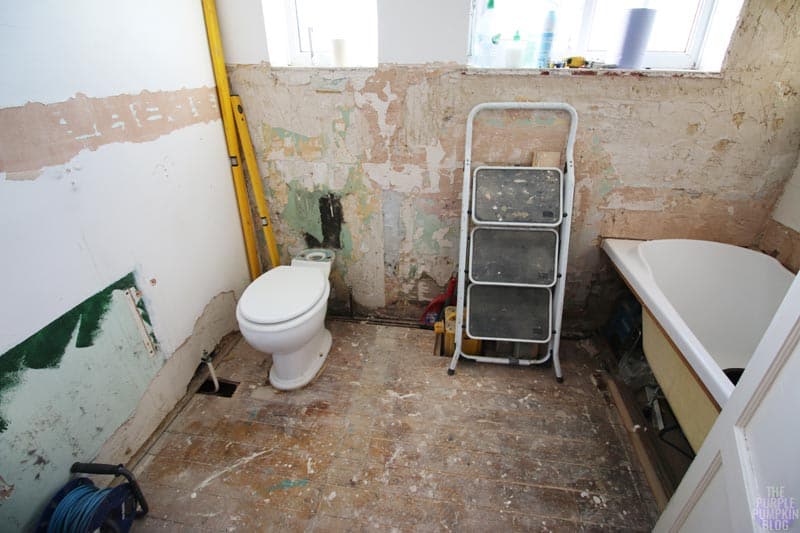
Day One
The first task was ripping out the old bathroom – so it was out with the sink, toilet cistern, bath panel, radiator, lino, and window ledges. The tiles were chipped off, leaving behind some very crumbly old plaster, and a very uneven surface – it was then decided that in fear of walls actually crumbling down, that we would tile over tile around the bath. By the end of the day, the house was very dusty (do not underestimate the level of dust caused!), and I felt really grimy, with the feeling of a thin layer of dust on my skin.
The old bath remained so that we could fill up a bucket with water to flush the loo.
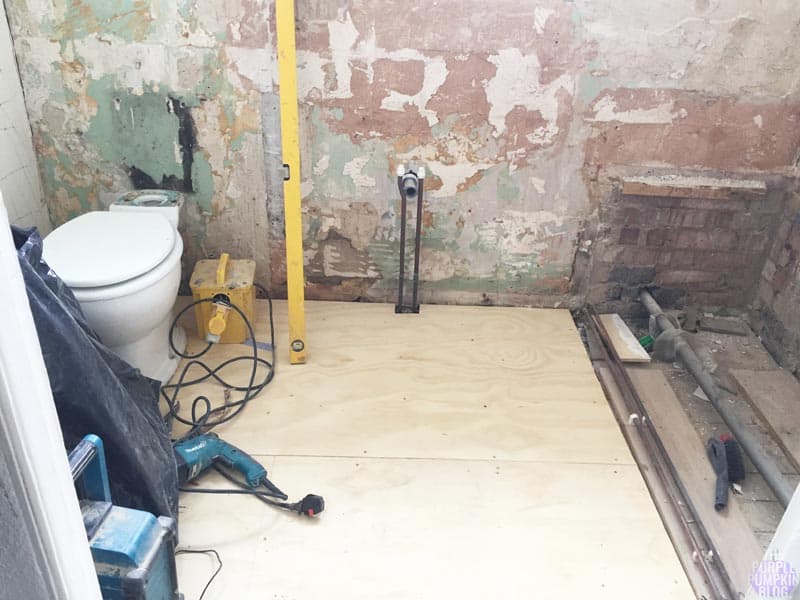
Day Two
The old bath was removed, (we had a temporary standing tap to use instead, saving having to go to the kitchen to fill up a bucket!) and Kevin then spent a lot of the day draining down our radiators and setting up all the new pipework that was needed. He also laid down some wood to level off our floor to make sure that the floor tiles would lay correctly. We found out that walls and floors in our 1950s built house are very wonky!
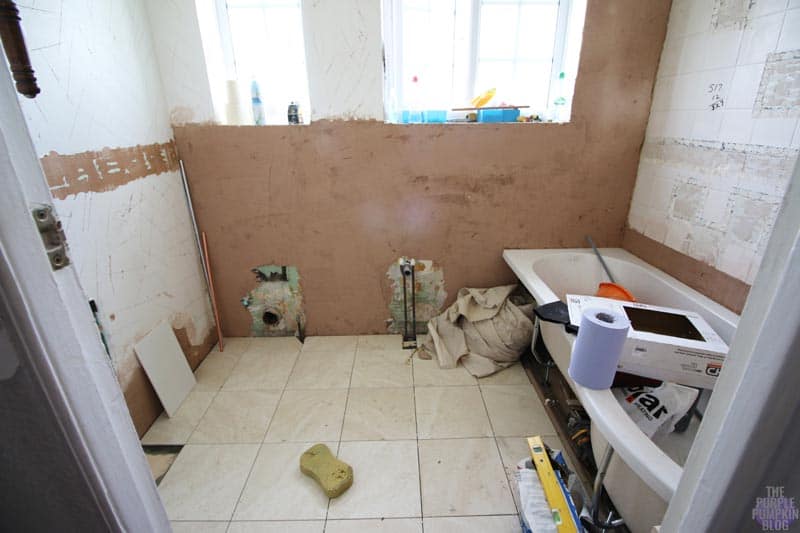
Day Three
Kevin plastered the crumbly wall, and also laid down the floor tiles. Once the floor was complete, we were not allowed to step on it for around 4 hours, while the floor adhesive dried – it was a tense few hours of leg crossing! The new bath also went in.
Day Four
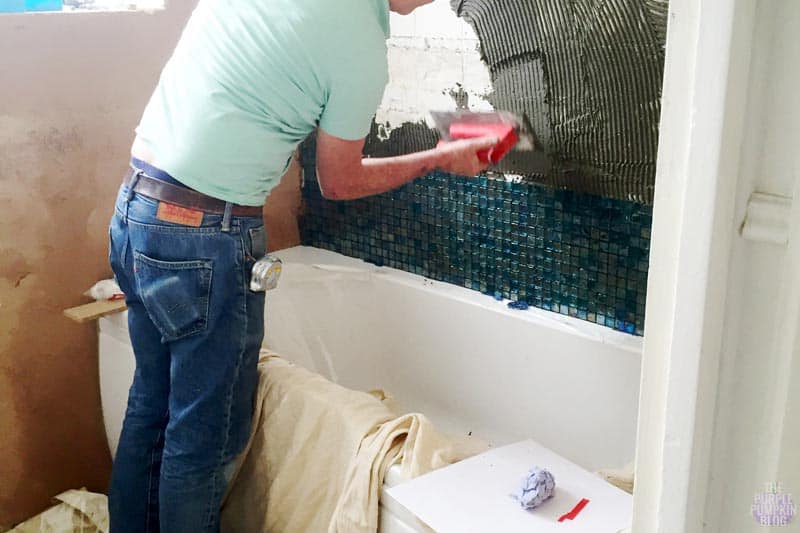
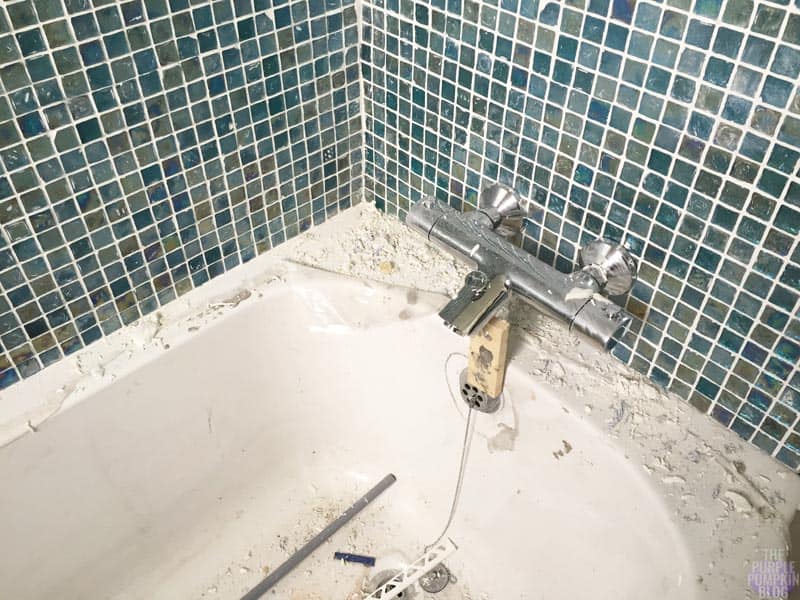
The mosaic tiles went up on the walls around the bath – this was the most exciting thing for me to see, as I really loved the tiles I had picked out, and whilst they looked a bit darker on the walls than I thought they would, by the time grouting went on (a few days later) they were brightened up. The new toilet also went in – but no cistern yet, it was still loo flushy bucket!
Day Five
The large white wall tiles started to go up, with a border of the mosaic tiles to break up the colour. With the tiles now in place, I could really see things shaping up. As you can also see in the picture below, the bath panel also fitted.

Day Six and Seven
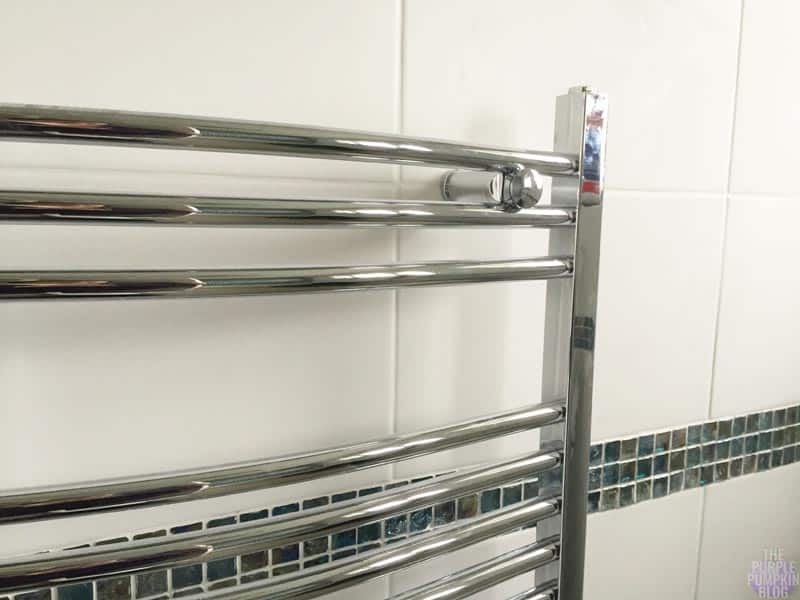
Lots of grout was needed for the mosaic walls, after all, there are lots of spaces between each tile to fill in, and the grout was finished around the rest of the room too. The new taps for the bath also went in… although, I think that may have been on day seven, after the grout had dried off. The towel radiator was installed, and we were coming into the home stretch now!
Day Eight and beyond
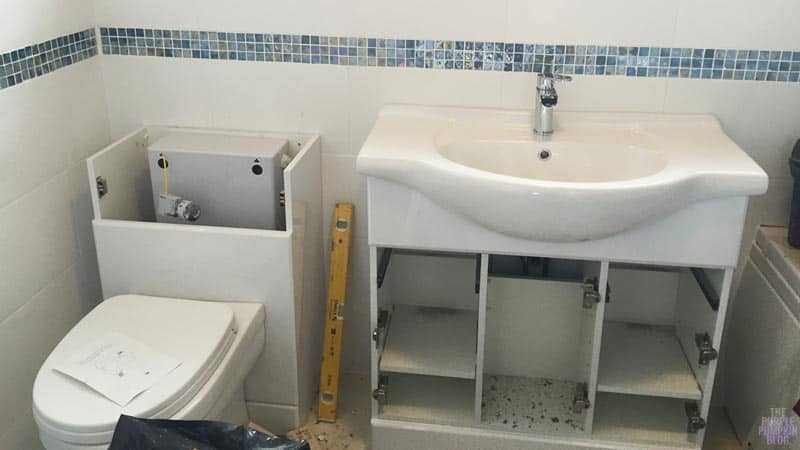
This is where the bathroom really came together, with the toilet cistern finally going in (hooray for a flushing toilet!) and the boxing surrounding it. The sink/vanity unit was installed, along with the waterfall tap (huzzah for being able to wash hands and brush teeth at a sink, instead of in a bucket, or down in the kitchen!). The shower door was attached, as was the shower rail and head.
Kevin built some box frames to go around the windows, and they’ve been installed (as I write), and the door we bought is now hung, with a shiny new door handle and lock. Once he’s finished the job completely, I’ll be taking photographs of our finished bathroom, and will be sharing it with you very soon! It will be interesting to go back to my original planning/inspiration post and see what things we did and didn’t do!
Don’t forget to use my 10% discount at Bathroom Takeaway – just enter the code PURPLE10 when you check out!
![]()

Kara Guppy
June 9, 2016 @ 12:27 pm
I love your mosaic tiles – we had ours done just before I had Sebby and never again, hated being without a bathroom
cass bailey
June 8, 2016 @ 9:29 pm
It’s looking great – can’t wait to see the fully finished room x
Lucy Dorrington
June 8, 2016 @ 11:21 am
The whole thing looks amazing, but I love the tiles best!
Michelle Ordever
June 8, 2016 @ 1:19 pm
They’re my favourite part too!!
Louise
June 8, 2016 @ 7:14 am
Wow you have really gutted your bathroom and started again! It is looking so clean and fresh though – and love the nautical theme x
Michelle Ordever
June 8, 2016 @ 9:10 am
It really was from the ground up in there! I’m loving the clean and fresh feeling in there now. No matter how much I cleaned our old bathroom, it was so old and dated, that it never really felt clean -__- x
Sara-Jayne
June 7, 2016 @ 11:55 pm
We live in Hampshire, and with the hard water here, our bathroom is a wreck! Add to that our two huskies, three boys and 16 years of bathroom madness and I am ashamed to even let people in my house in case they use the bathroom – seriously!! I’m so excited to see the final showcase!
Michelle Ordever
June 8, 2016 @ 9:13 am
Not quite the same amount of usage as you guys – but I felt the exact same way with our old bathroom! Even having to share pics of it on my blog made me cringe!!
Jen
June 7, 2016 @ 8:01 pm
Wow it is looking amazing and you have a great sized bathroom. I can not wait to see how you style it
Michelle Ordever
June 8, 2016 @ 9:13 am
Ooh, the pressure now! I can’t wait to share the final result!
The Mummy Diary
June 7, 2016 @ 5:25 pm
Ooh its looking good, we have those little tiles as a feature in our bathroom and they look fab. Our old house was in desperate need of one for years and it wasn’t until we moved out we put a new one in. I look forward to seeing the end result.
Michelle Ordever
June 8, 2016 @ 9:14 am
They are so pretty aren’t they? I’m so glad I made the decision on those tiles!
Liz Burton
June 7, 2016 @ 2:53 pm
We had our bathroom done last year, such a stressful time! I hate that bit when it’s looking worse than before you started.
He’s done a fab job and I absolutely love your mosaic tiles.
Michelle Ordever
June 8, 2016 @ 9:16 am
I know what you mean – when it’s stripped back to bare brick, floorboards and pipes you wonder what the heck have I done?! The end result was worth it all!
Erica Price
June 7, 2016 @ 2:43 pm
It’s really starting to take shape isn’t it? We will struggle when we do ours. At our last house we had a bathroom & a shower room so not too bad when we did them out. This time we have a downstairs loo, but no other washing facilities. Look forward to seeing the finished room.
Michelle Ordever
June 8, 2016 @ 9:17 am
I am so glad I kept a record of the progress as you can see it coming along day by day. The final bit is now putting all the toiletries etc back in.
Jess @ Catch A Single Thoughte
June 7, 2016 @ 2:13 pm
It looks really great, and what a lot of work! Amazing what can be achieved in less than 2 weeks with a lot of hard work. Your new bathroom looks brilliant, enjoy :)
Michelle Ordever
June 8, 2016 @ 9:18 am
I know – crazy! We’ve never had such a big job go on in our house before, so I was amazed at what can be accomplished!