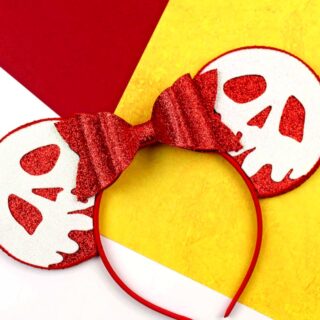
Snow White Poison Apple Mickey Ears
If you love Snow White and the Evil Queen, these Poison Apple Mickey Ears are perfect for you!
Materials
- Red and White Foam Sheets
- Red and White Glitter Foam Sheets
- Red Sewing Trim
- Red Headband
TOOLS
- Craft Knife
- Low Heat Hot Glue Gun + Glue Sticks
- Marker or Pen
Instructions
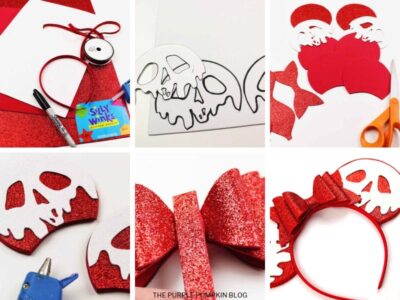
- Download and print the Poison Apple Mickey Ears template. Cut the pieces out.
- Trace around and cut the template pieces on the following foam colours: 2 x plain red ears; 4 x glitter red ears; 2 x white plain or glitter poison apple pieces - remember to flip one; 1 x large glitter red bow; 1 x small glitter red bow; 1 x small glitter red bow ribbon; 1 x strip glitter red - to wrap around to form the bow.
- Assemble each pumpkin head/ear part individually by taking two glitter pieces and one regular piece and gluing together with the glitter facing outwards. Repeat this until you have Mickey ears. Glue on the poison apple pieces. Leave to dry completely.
- To assemble the bow, take the large red glitter bow piece, bring the two ends into the middle and glue in place. Do the same with the small red glitter bow piece. Place the small bow on top of the large one and wrap the strip of red glitter foam around the middle to keep the two bows together. Glue at the back to secure everything in place. Then glue the assembled bow to the red glitter bow ribbon and leave all to dry.
- Apply glue around the edges of the dried red Mickey heads and press trim around to cover. Leave to dry.
- To assemble your Mickey ears, glue the ears to the headband, and finish with the bow in the center.
- Leave to dry thoroughly and then your Snow White Poison Apple Mickey Ears are ready to be worn!
Did you make this project? Share it!Tag @_ThePurplePumpkinBlog on Instagram with the hashtag #TPPBCreate!