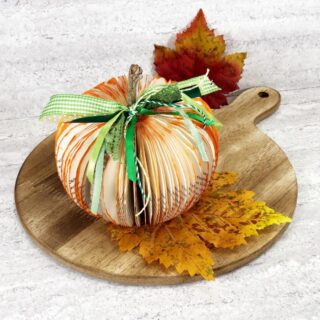
Paperback Book Pumpkin
Learn how to make an elegant Paperback Book Pumpkin, using an old book, some craft paint, and ribbon to decorate your home for fall.
Materials
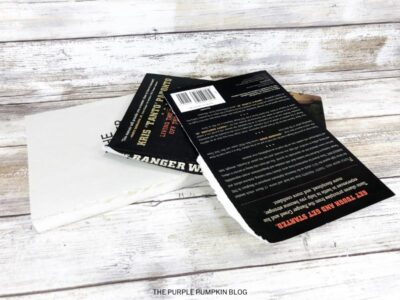
- Paperback Book
- Orange Craft Paint
- Assorted Green Ribbon Scraps
- Twig
TOOLS
- Pencil or Marker
- Craft Knife
- Self-Healing Mat
- Wire Cutters or Branch Cutter
- Binder Clip
- [Book Pumpkin Pattern]
Instructions
- Remove the front and back covers of the paperback book.
- Download and print the book pumpkin pattern or draw your own shape on the inside of the book covers with a pencil or marker. The pattern has two sizes to choose from.
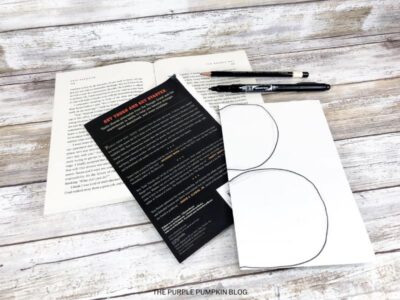
- Cut out the book pumpkin patterns with scissors.
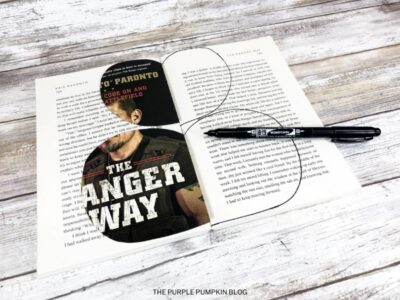
Open the book flat at the halfway point, trace the pumpkin pattern on the right half of the open book with a pencil or marker. Repeat by tracing the pumpkin pattern on the right half of the open book.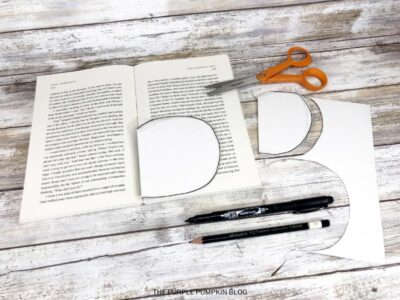
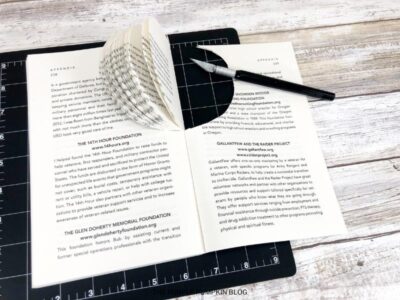
- Using a new, sharp blade on a craft knife, carefully cut through the pages a few at a time. Insert a self-healing mat under the book and continue cutting pages until the pages are completely cut out. Repeat on the other side of the book.
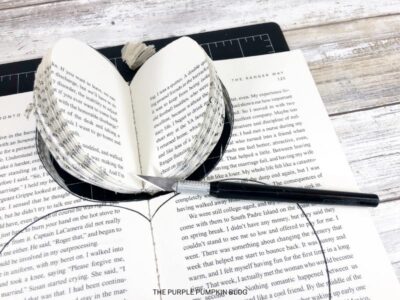
- Remove the cut-out pumpkin and attach the exposed spine together with a line of hot glue from a glue gun.
- Fluff out the pumpkin by crinkling and crumpling each page individually. Bend and score the spine of the book as you fluff out the pumpkin shape.

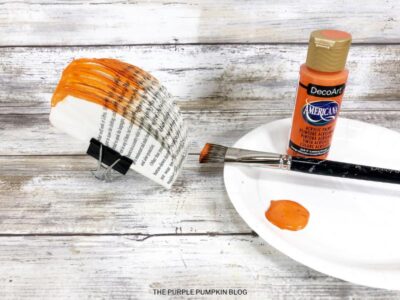
- Fold book pumpkin in half and secure with a binder clip. Dry brush orange craft paint around the edges of the book pages. Carefully separate any pages that might stick together, then set aside to dry.
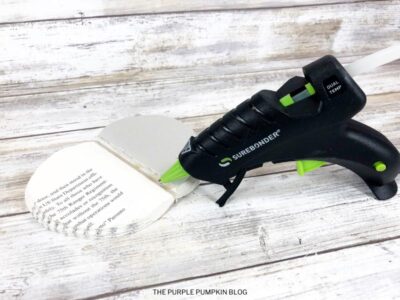
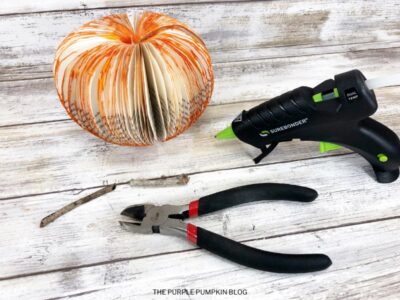
- Cut a suitable twig to size using cutters to create a pumpkin stem. Attach to the top center of the book pumpkin with a glue gun.
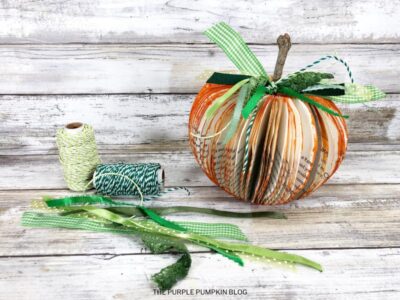
- Tie assorted green ribbon scraps around the stem of the book pumpkin to finish.

Handy Tips & More Ideas
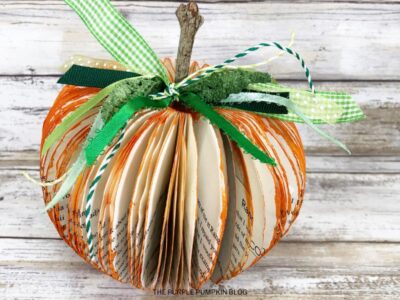
Change things up by creating book pumpkins of all shapes, sizes, and colors. Your family and friends will never know how quick and easy this trendy Paperback Book Pumpkin was to create!
Did you make this project? Share it!Tag @_ThePurplePumpkinBlog on Instagram with the hashtag #TPPBCreate!