
Mickey and Minnie Button Art
If you're a Disney fan and a crafter, you're going to love making this Mickey and Minnie Button Art!
Materials
- 2 6x6"/15x15cm Burlap Canvases
- Red Button Assortment
- Black Button Assortment
- White Button Assortment
- 2 1".2,5cn Yellow Buttons
- ⅝ ” Red and White Polka Dots Grosgrain Ribbon
- Mickey and Minnie Button Art Pattern
TOOLS
- Liquid Craft Glue**
- Glue Tape Runner
Instructions
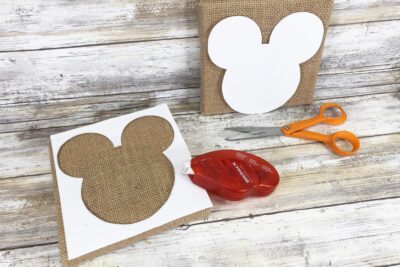
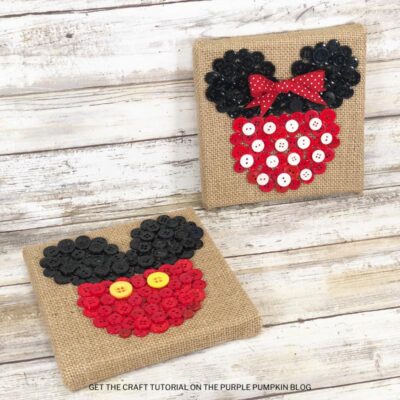
- Download and print the Mickey and Minnie Button Art Pattern. Cut out the mouse outline and attach the frame (or negative) to the canvas with glue tape. You can use the negative to do an outline of the famous Mouse couple.
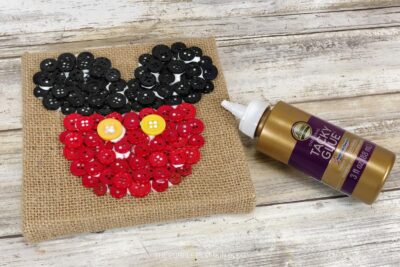
- Using the intersection of where the ears meet the head, dry fit a variety of red buttons across the bottom and black buttons across the top to create a line.
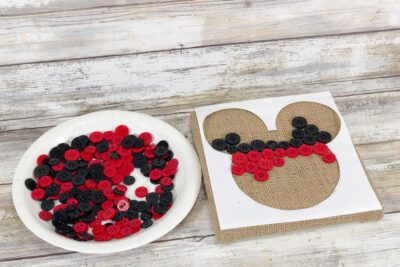
- Attach the first row of red buttons and the first row of black buttons using liquid craft glue. Either slide the row of buttons out of the way and apply a line of glue or remove each button and attach it with dots of glue.
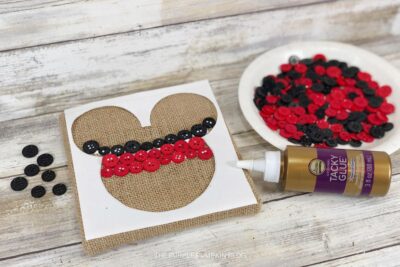
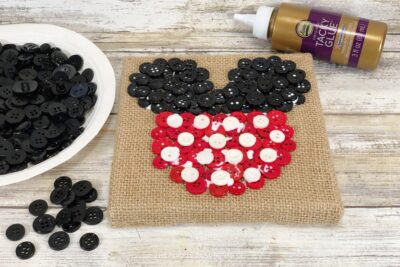
- Continue adding red buttons to the bottom section of the canvas. Use a variety of sizes, and don’t worry about any small gaps.

- Add black buttons to the top section of the canvas, using the smallest buttons to fill in the curves. Repeat the above steps for the second canvas.
- Attach the two one-inch yellow buttons to the top center of the red button section of the Mickey Canvas to create his shorts.
- Attach small white buttons in random order on the red button section of the Minnie Canvas to create her polka-dotted dress.
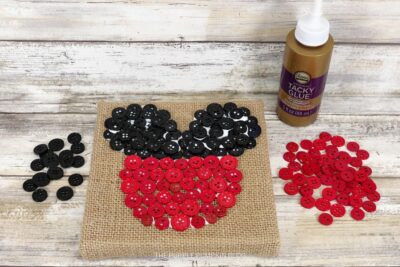
- Once the first layer and the accents are attached, add additional red and black buttons on a second layer to hide any of the burlap canvas gaps.
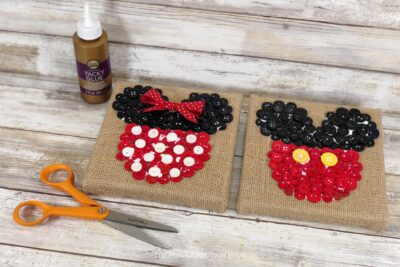
- Tie the red and white polka dot ribbon in a bow, trimming any long ends with scissors. Attach between the ears on the Minnie Canvas with liquid craft glue. Set both canvases aside to dry.
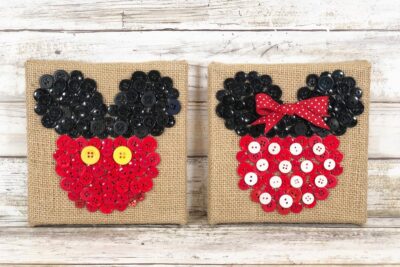
- When dry, display where desired!
Handy Tips & More Ideas
- *This project uses burlap canvases, but you can use regular white stretched canvases.
- **Choose a glue that dries clear.
Did you make this project? Share it!Tag @_ThePurplePumpkinBlog on Instagram with the hashtag #TPPBCreate!