
Clay Pot Reindeer Craft
If you're looking for a fun winter craft project, look no further than this tutorial on how to make a Clay Pot Reindeer Decoration!
Materials
- 2.5 "/6cm Clay Pot
- Acrylic Craft Paint – Dark Brown Kelly Green, Pink, Yellow
- Natural Jute Twine
- 2 Googly Eyes
- 1 Large Red Tinsel Pom Pom
- 2 Brown Pipe Cleaners Chenille Stems
- Brown Felt
TOOLS
- Pencil with New Eraser
Instructions
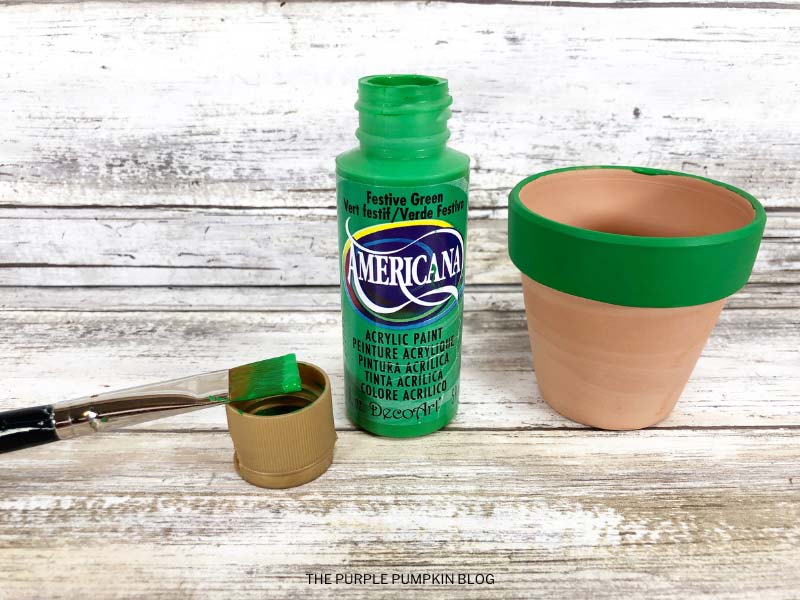
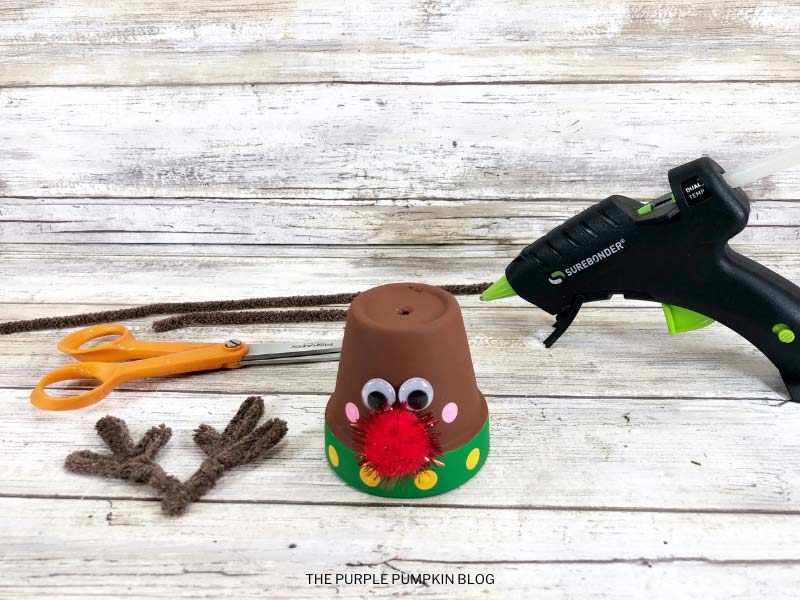
- Basecoat the rim of the clay pot with kelly green acrylic craft paint. Let the paint dry and then apply a second coat, if necessary.
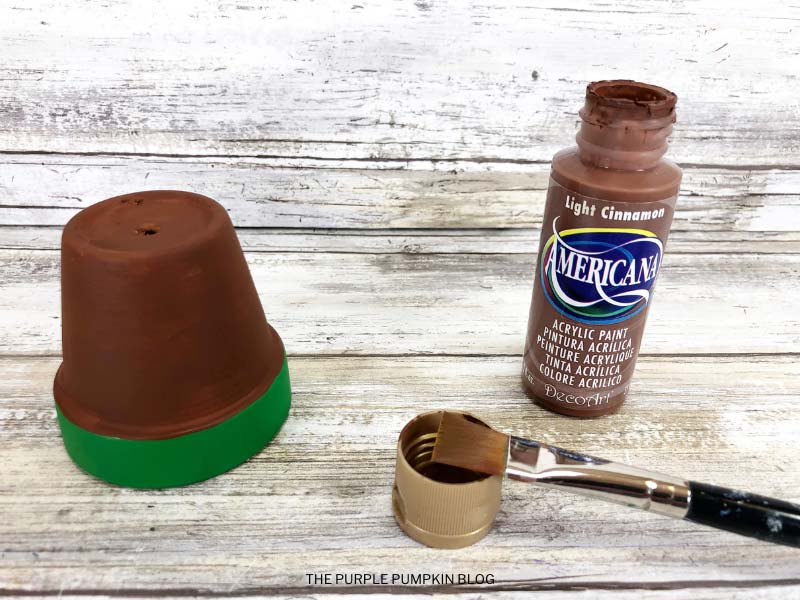
- Basecoat the remaining section of the clay pot with dark brown acrylic craft paint. Set aside to dry. Apply a second coat, if necessary.
- Attach two googly eyes and the red tinsel pom pom to the reindeer with a glue gun and glue sticks. Add polka dot cheeks to the Reindeer by dipping a new pencil eraser into pink acrylic craft paint. Set aside to dry.
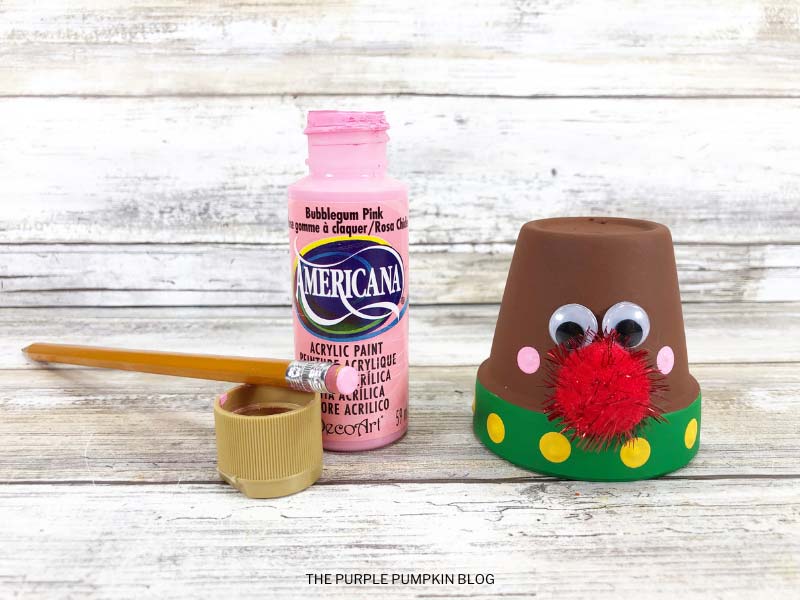
- Create polka dots around the kelly green rim by dipping a new pencil eraser into bright yellow acrylic craft paint. Set aside to dry.
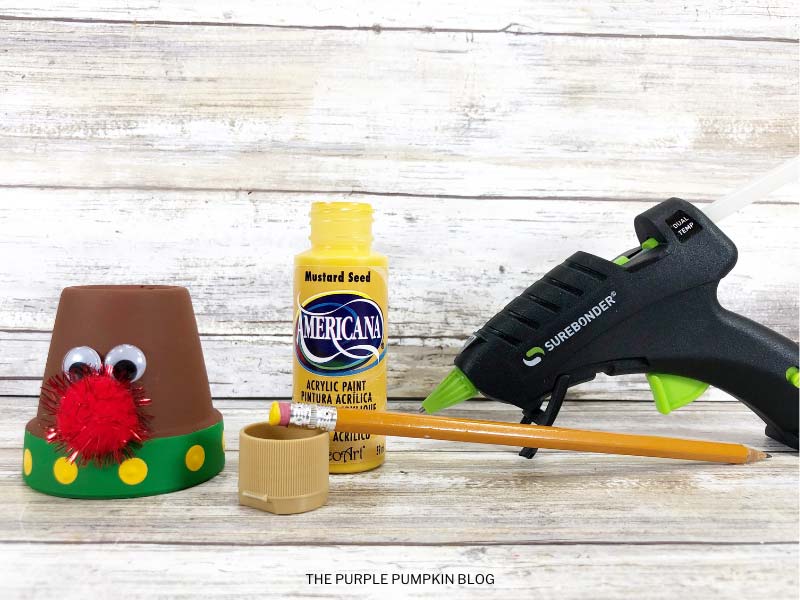
- Bend both brown pipe cleaners into antler shapes and insert them into the hole at the top of the clay pot. Secure from the inside with a glue gun and glue sticks.
- Cut two ear shapes from a scrap of brown felt then fold them in half and glue them to the top right and top left of the reindeer.
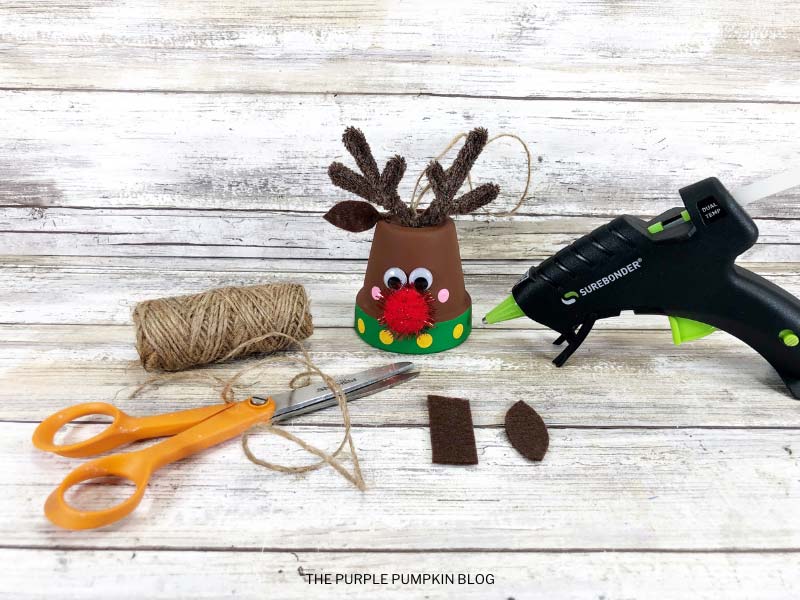
- Cut a 12"/30cm length of natural jute twine, tie it in a loop with a knot, and attach it to the top of the clay pot reindeer with a glue gun and glue sticks.
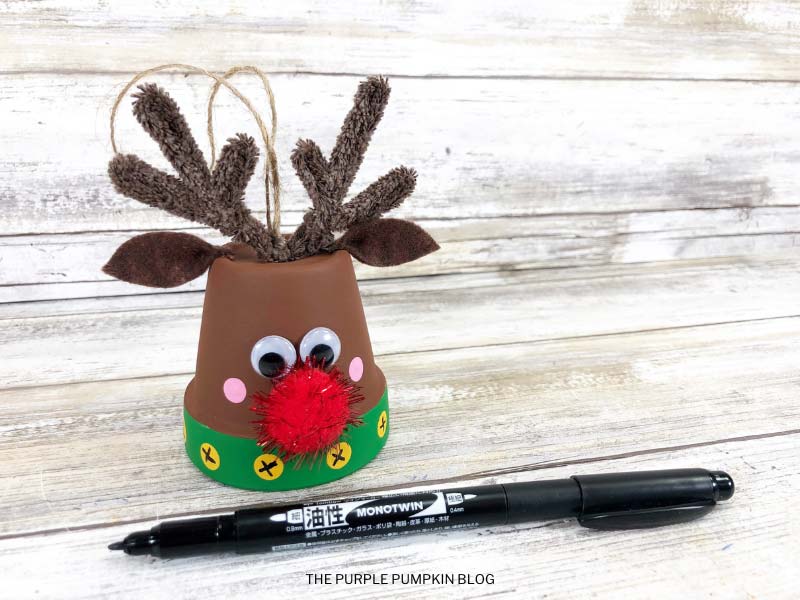
- When dry, create jingle bells from the yellow polka dots by drawing a small plus sign in the center of each with a permanent black marker.

Handy Tips & More Ideas
Tip: You can use liquid craft glue for this project, but you would have to wait for it to dry.
Did you make this project? Share it!Tag @_ThePurplePumpkinBlog on Instagram with the hashtag #TPPBCreate!