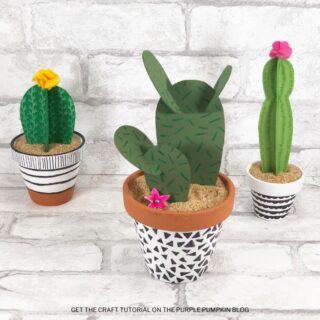
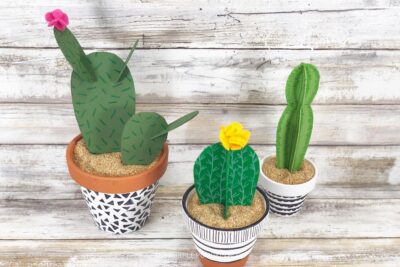
Cardboard Cactus Craft
This beautiful Cardboard Cactus Craft is the ideal activity for upcycling any cardboard that you have lying around and turning it into something colorful and creative.
Materials
- Free Printable Cactus Pattern Template
- Cardboard Box
- Acrylic Craft Paint in White Bright Green, Medium Green, Dark Green
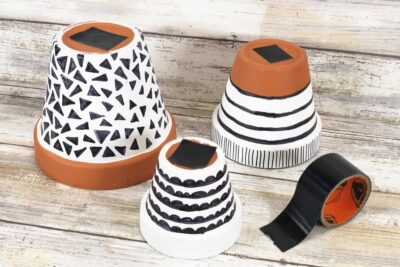
- Clay Flowerpots in three sizes approximate diameter - 2.5"/6cm, 3.5"/9cm and 4.5"/12cm
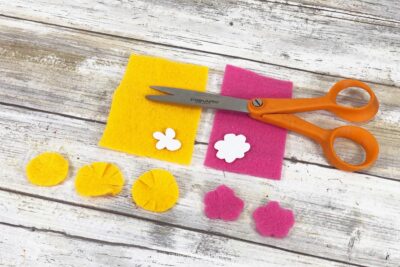
- Felt Scraps in Bright Colors*
- Small Rocks
- Sand
- Duct Tape
TOOLS
- Colored Pencils
Instructions
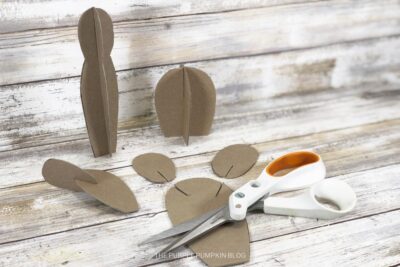
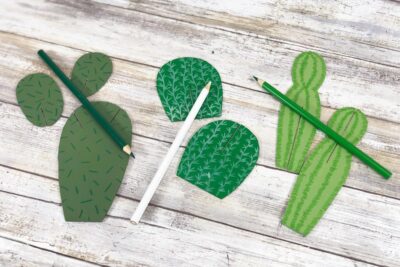
- Download, print, and cut out the cactus template, making sure to cut the slits. Flatten a corrugated cardboard box or chipboard food box. Trace patterns onto the cardboard with a pencil. Flip-up the cactus patterns to trace the slits.
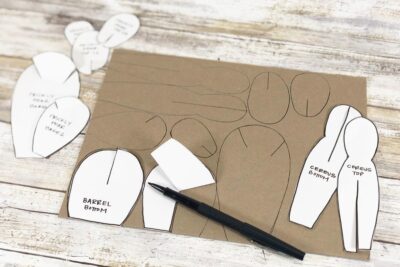
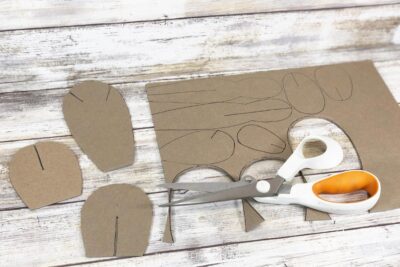
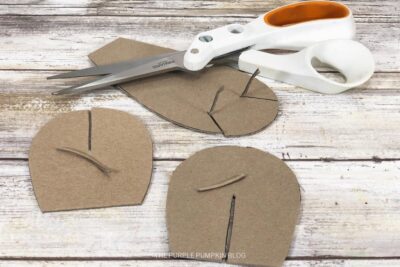
- Cut out all the cactus patterns with heavy-duty scissors. Double cut the slits to the width of your cardboard. Then slide both pieces together to make sure the cactus shapes fit.
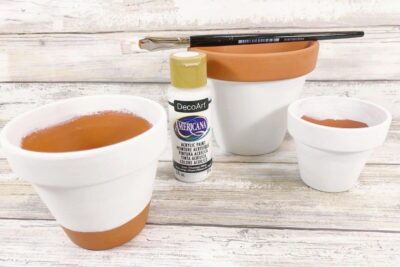
- Basecoat the smallest clay flowerpot completely with white acrylic craft paint, let dry. Paint the medium size clay flowerpot top, leaving a one-inch section natural at the bottom. Basecoat the largest clay flowerpot bottom, leaving the rim natural. Let paint dry, and apply a second coat, if necessary.
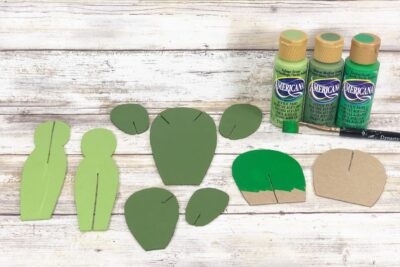
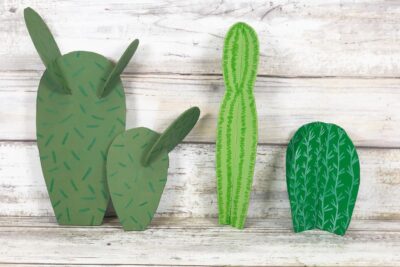
- Paint all sides of the Prickly Pear Cactus pattern pieces with medium green acrylic craft paint. Basecoat front, back, and sides of the Barrel Cactus pattern pieces with dark green acrylic craft paint. Paint all sides of the Cereus Cactus pattern pieces with bright green acrylic craft paint. Let paint dry, and apply a second coat, if necessary.
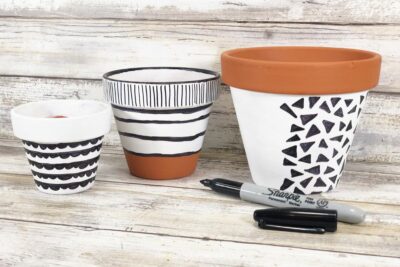
- Doodle designs onto the clay flowerpots with a permanent black marker. Think modern patterns like triangles, scallops, and a mix of horizontal and vertical lines.
- Once dry, lay all cactus pieces flat and draw needle patterns on each cactus with different shades of colored pencils. Assemble each cactus, securing all pieces with a small dot of glue from a glue gun.
- Trace flower patterns onto brightly colored scraps of felt, and then cut them out with scissors. Attach the flower layers together with a glue gun and glue sticks, pinching in the center to create dimension. Then attach the flowers to the top of the cactus.
- Apply a piece of duct tape to the hole at the bottom of each flower pot.
- Fill with rocks and sand.

- Finally, “plant” the upcycled cardboard cactus into the pots and display them where desired!
Handy Tips & More Ideas
- *You can use colored paper or craft foam if you prefer.
Did you make this project? Share it!Tag @_ThePurplePumpkinBlog on Instagram with the hashtag #TPPBCreate!