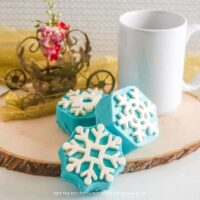
Snowflake Hot Cocoa Bombs
January doesn’t have to be dark and gloomy - cheer it up by creating these adorable Snowflake Hot Cocoa Bombs.
Servings 6
Calories 1106kcal
Equipment
Ingredients
- 1 cup white candy melts
- 2 cups blue candy melts
- 2 cups white hot chocolate mix
- 1 cup mini marshmallows
- ¼ cup blue winter sprinkles mix
Instructions
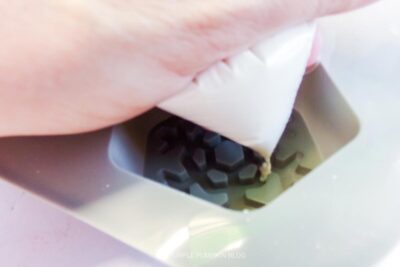
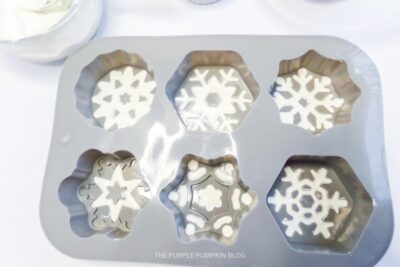
- Melt the white candy melts according to package instructions and transfer to a piping bag.
- Snip the tip of the piping bag off and fill just the snowflake portion of each mold.
- Place the snowflake mold into the freezer for 5-10 minutes to set.
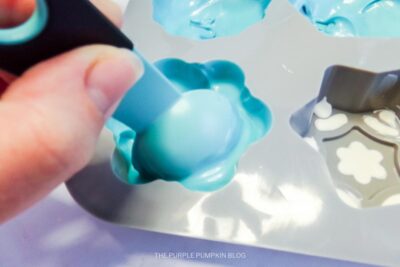
- Melt the blue candy melts according to package instructions.
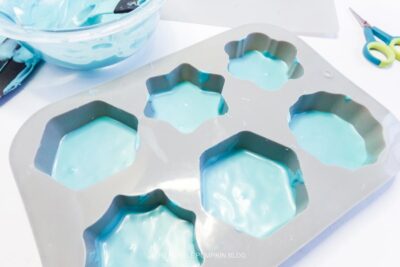
- Remove mold from the freezer and place 2 tablespoons of melted blue candy into one cavity of the bomb mold. Using the bottom of your tablespoon measuring spoon, press the chocolate up the sides of the mold, keeping it thick but even. Repeat with all of the bomb mold halves.

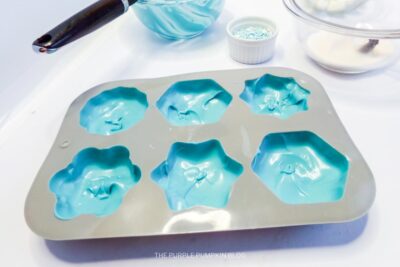
- Place the mold into the freezer for 5-10 minutes to set. If you feel like the sides may be too thin, you can melt some more blue candy and add another layer.
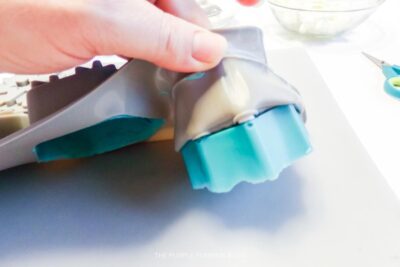
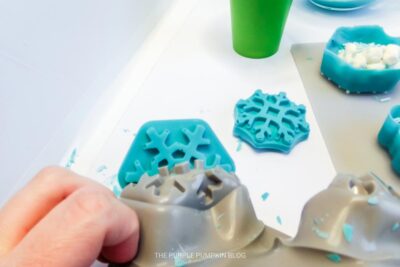
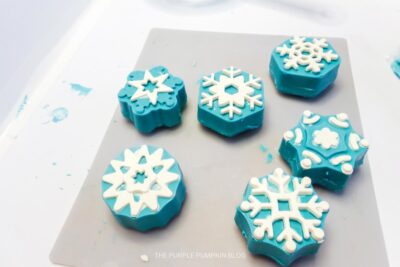
- Remove molds from the freezer and gently pull the mold away from the chocolate snowflakes.
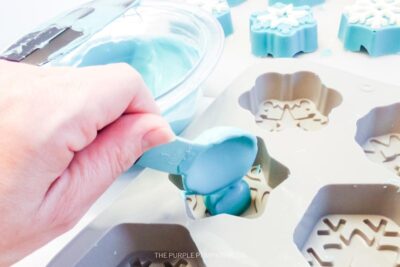
- To make the bottom cap of the hot cocoa bombs, fill the molds with about ½ tablespoon of melted blue candy and spread this over the entire face snowflake shape, but not going up the sides.
- Place the mold into the freezer for 5-10 minutes to set.
- Remove molds from the freezer and gently pull the mold away from the bottom caps.
- Before building the cocoa bombs you will want to make sure that the edges are nice and level. There are two ways you can do that:
Method 1: Warm up a shallow frying pan on the stove. Place a piece of wax paper into the pan, and holding the top snowflake mold, rub gently on the wax paper until the edges start to melt a bit.
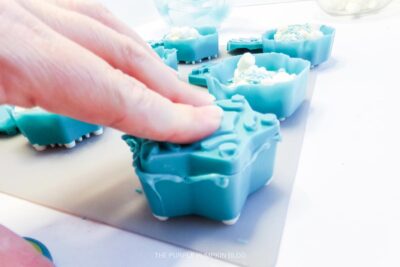
Method 2: Place a small plate in the microwave for 30-60 seconds until warm. rub the mold over the plate which will gently melt the edges. This is my preferred method. - Using your method of choice as listed above, gently melt the rim of each snowflake top part. You may also want to/need to level out the bottom cap pieces too.
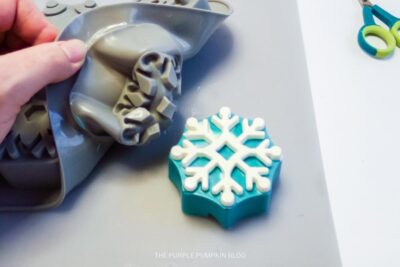
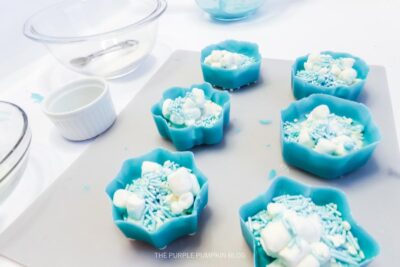
- Fill each snowflake bomb with 1-2 tablespoons of hot chocolate mix, a tablespoon of sprinkles, and 5-6 mini marshmallows.
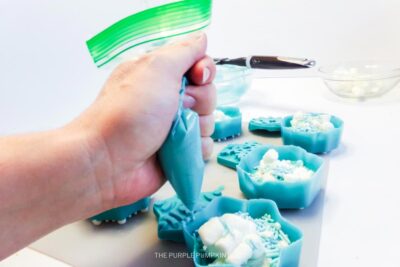
- To attach the bottom cap to the snowflake bombs, you can gently melt using the method above, and additionally, pipe a little melted blue candy along the edge of each shape to hold it in place firmly.
- Immediately press the cap to the top of one of the filled cups and makes sure there are no gaps along the seam. Add additional melted candy and use your finger to gently spread if needed.
- Place the hot cocoa bombs into the freezer for 5-10 minutes to set the seams.
- Remove and store in an airtight container until you’re ready to use.
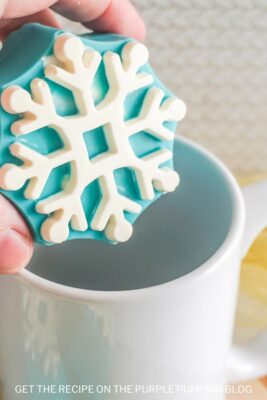
- To use the snowflake hot cocoa bombs, place them in a mug and pour 2 cups of hot milk over the top. Stir until the hot cocoa bombs are completely melted and enjoy!
Nutrition
Serving: 1 | Calories: 1106kcal | Carbohydrates: 248g | Protein: 10g | Fat: 8g | Saturated Fat: 4g | Polyunsaturated Fat: 4g | Sodium: 803mg | Fiber: 6g | Sugar: 178g