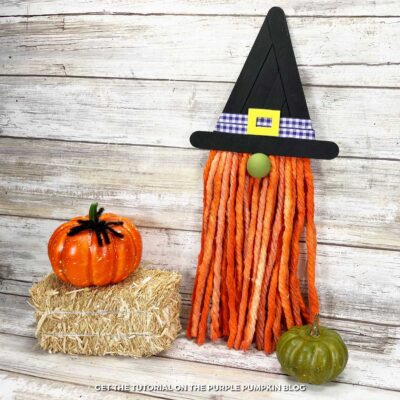
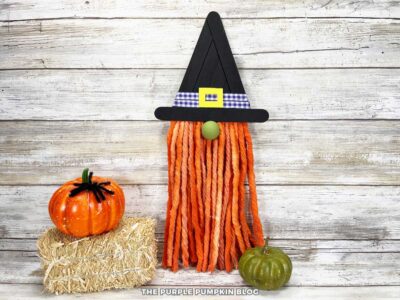
Halloween Witch Gnome
Create this Halloween Witch Gnome Craft in just 30 minutes—kids will love helping paint, glue, and decorate their spooky new friend!
Materials
- Cotton Mop Head
- Large Zipper Bag for dyeing strings
- Aluminum Foil for drying strings
- Acrylic Craft Paint Orange, Muted Light Green, Black
- Jumbo Craft Sticks
- Wooden Ball/Bead
- Craft Foam Yellow
- Gingham Ribbon Purple
TOOLS
- Glue gun & glue sticks
Instructions
- Cut about 30 mop head strings and dampen them. Place them in a zipper bag.
- Dye by adding orange acrylic paint to the bag, squishing it until the strings are coated. Lay on aluminum foil to dry.
- Build the witch hat: form an upside-down “V” with two jumbo craft sticks, glue in place, then add more sticks to fill the hat shape. Trim and add a brim.
- Paint the hat black. Apply a second coat if needed.
- Paint the wooden bead light green. Let dry.
- Glue 15 mop strings along the hat brim. Layer another 15 strings for fullness.
- Attach the bead nose under the hat brim, centered.
- Wrap purple ribbon around the hat for the band. Glue in place.
- Cut a buckle shape from yellow craft foam (using the free printable template as a guide) and glue it to the hat band.
- When dry, your Halloween Witch Gnome is ready to display!
Notes
Handy Tips & More Ideas
- Pre-Paint the Hat and Nose—If crafting with kids or a group, paint the craft sticks black and the bead green in advance so they’re dry and ready to assemble.
- Safer Glue Option—Swap the hot glue gun for liquid craft glue when working with younger children. It takes longer to dry, but it avoids burns.
- Try Different Beards—Instead of orange mop strings, use yarn, raffia, or even faux fur for a different look. Purple, green, or black yarn makes a spooky twist!
- Add Extra Details—Embellish the hat with glitter, stickers, or Halloween-themed charms for a unique touch. You could also use glow-in-the-dark paint for a fun nighttime effect.
- Customize the Hat Band—Change up the ribbon to black and orange stripes, sparkly purple, or even Halloween ribbon with bats or pumpkins, which would all look amazing.
- Make a Gnome Family—Vary the beard colors and hat decorations to create a whole set of Halloween gnomes to display together.
- Seal for Durability—If you’ll display your witch gnome year after year, coat the hat with Mod Podge or spray sealant to protect the paint.
Did you make this project? Share it!Tag @_ThePurplePumpkinBlog on Instagram with the hashtag #TPPBCreate!