
Flowerpot Easter Bunny Craft
This super cute Flowerpot Easter Bunny Craft is so easy to make using our free printable template! The rabbit is adorable décor for Spring!
Materials
- 1 (4"/10cm Flowerpot
- Felt Fabric - in white and baby pink
- White Acrylic Craft Paint
- Blue & White Checked Ribbon
- Googly Eyes
- Black Twine
- Plain Paper
- Flowerpot Bunny Template
TOOLS
- Permanent Marker
Instructions
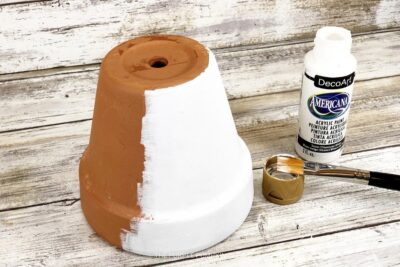
- Basecoat the flowerpot with white acrylic craft paint and leave to dry. Apply a second coat if necessary. A 4” flowerpot was used for this craft, but any size would work.
- Download and print the template for the flowerpot rabbit. Cut the pieces out and using a permanent marker, trace two ears and a muzzle on white felt, two inside ears, and a nose on baby pink felt, and then cut out with scissors.
TIP: Cut inside the traced line, so that your project looks neat and clean. You can also pin the paper patterns to the felt and cut them out with scissors.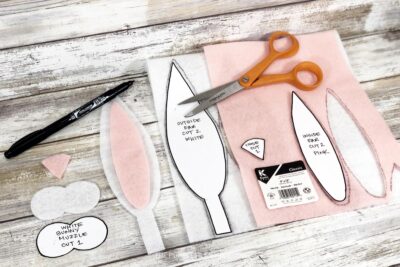
- Attach the pink inner ear felt pieces to the center of the white outer ear felt pieces with a glue gun and glue sticks. Glue the pink nose onto the white muzzle.
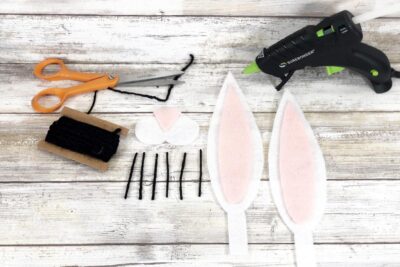
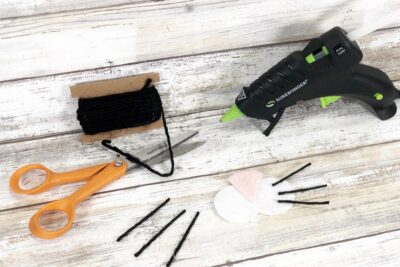
- Measure and cut six 2″ long pieces of black twine and glue them to the Rabbit’s muzzle for whiskers.
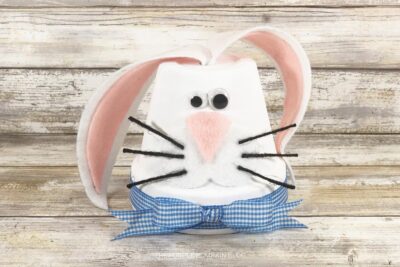
- Attach the completed muzzle and googly eyes to the flowerpot using the photo for placement.
- Insert the tab of the felt rabbit ears into the hole in the flowerpot and adjust as needed.

- Embellish the base of the flowerpot with a band of ribbon in blue, securing in the back with glue, then tie a bow and attach to the front center.
- Display where desired and Happy Easter!

Handy Tips & More Ideas
- You can use liquid craft glue for this project, but you will have to wait for it to dry.
Did you make this project? Share it!Tag @_ThePurplePumpkinBlog on Instagram with the hashtag #TPPBCreate!