
Easter Paper Puppets
These Paper Easter Puppets are super cute and simple to make!
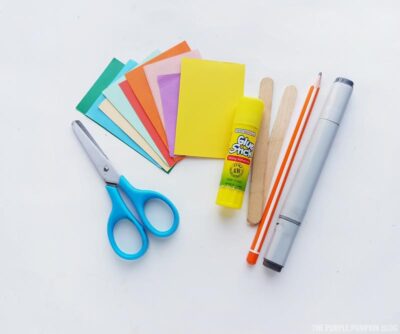
Materials
- Construction paper in the following suggested colors:
- Bright Yellow
- Pale Yellow
- White
- Cream
- Pink
- Orange
- Blue
- Red
- Green
- Light Brown
- Dark Brown
- Popsicle Sticks
- Free Printable Template - link in blog post
Instructions
- Print the template and cut all the pieces out. Trace around each piece onto colored paper - you can use the suggested color list or pick your own.
- Starting with the chick puppet, trace the chick template onto yellow paper, the beak onto orange paper, the cheeks onto pink paper, and the hatched egg onto a cream or white paper.
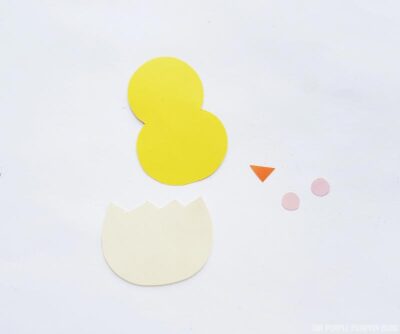
- Use a glue stick to attach the beak and cheeks, and use a black marker to draw on the eyes.
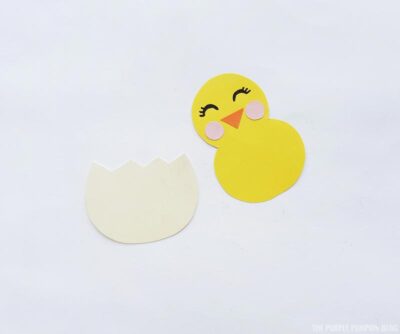
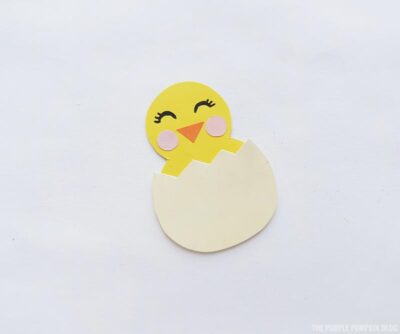
- Stick the hatched egg to the bottom of the chick and set aside to dry.
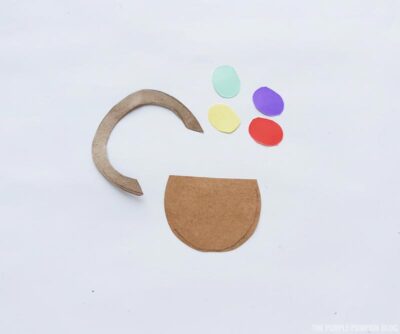
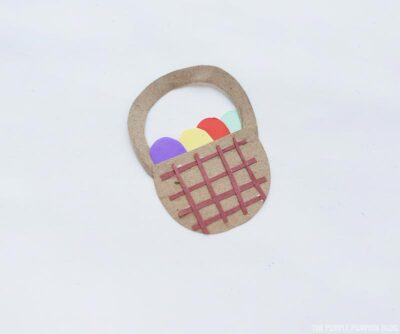
- Trace the pieces for the Easter basket puppet - light brown for the basket and handle, and cut some thin strips of paper in dark brown for the basket weave. Cut the eggs from bright colors.
- Glue the handle to the top of the basket
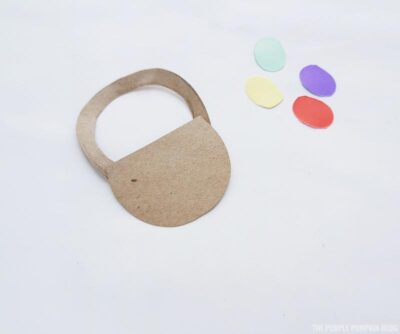
- Stick the eggs to the back top of the basket.
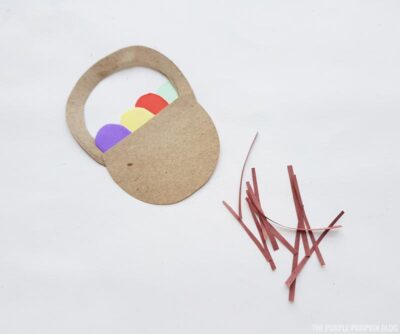
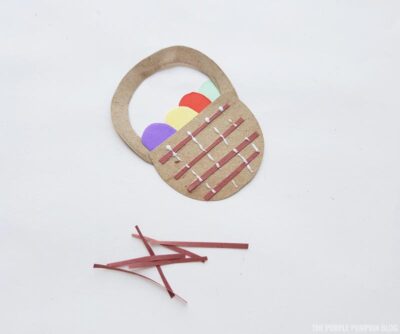
- Glue the thin strips of dark brown paper to the front of the basket to form the basket weave. Glue some horizontally first, then glue some vertically. You don't have to actually weave them! Set aside to dry.
- To make the bunny puppet, cut the base shape, tail, and muzzle from white or cream paper, the inner ears and tummy from pale yellow paper, and the cheeks from pink paper.
- Using a glue stick attach the inner ears, cheeks muzzle, and tummy to the front of the bunny, and the tail to the back. Use a black marker to draw on the eyes, nose, and mouth. Set aside to dry.
- Make the Easter egg and flower puppets in a similar fashion, cutting the pieces from colored paper and sticking layers together with glue.
- Once all the elements have dried, use a blob of white school glue to attach each of them to popsicle sticks.
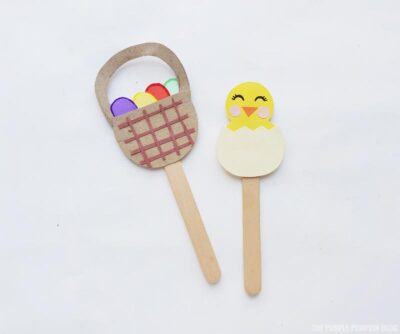
- Leave to dry before using to tell springtime and Easter stories or sing songs!
Did you make this project? Share it!Tag @_ThePurplePumpkinBlog on Instagram with the hashtag #TPPBCreate!