
Disney's Frozen Queen Elsa Hot Cocoa Bombs
These Disney-inspired Queen Elsa Hot Cocoa Bombs are an absolute must make for your little Frozen fan!
Servings 6
Calories 705kcal
Equipment
Ingredients
- 1 bag of light blue candy melts
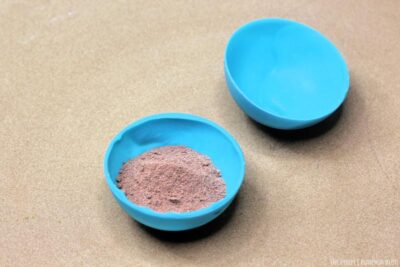
- 2 cups of cocoa mix
- 1 cup mini marshmallows
- 1 can of Wilton silver cake spray
- 1 container of sugar crystal sprinkles
- 1 container of snowflake sprinkles
- 1 package of Wilton icing crown decorations
Instructions
- To prepare your hot cocoa bomb molds, use a paper towel or clean kitchen cloth to wipe the inside of the silicone molds. This will allow your chocolate sphere to have a shiny coat on it.
- To make removing the chocolate shells from the mold easier, you can cut each section of the mold so you have individual pieces. This can give you more control, but is 100% optional and a personal choice! The photo below is of another chocolate bomb, but demonstrates what I mean!

- Line a cookie sheet (or tray or plate) with wax paper and set it aside.
- Pour the blue candy melts into a microwave-safe bowl, and microwave for 45-second intervals, stirring each time until the candy is completely melted and smooth. Alternatively, follow the directions on the package.
- Spoon about 1 to 2 tablespoons of the melted candy into one of the mold cavities
- Carefully swirl the melted candy to completely coat the inside of the mold. You may need to use the back of a spoon to help spread the melted candy.
- Lightly shake the extra candy back into the bowl.
- Repeat steps 5-7 for as many chocolate bombs as you are making. You will need two halves per bomb.
- Place the coated molds into the fridge for 5-10 minutes to set. You may want to add an additional layer of candy melts if you feel that the first layer is too thin. Add extra melted candy and place mold back in the fridge to set.
- Gently peel the silicone mold back away from the hardened candy and carefully place it onto your prepared cookie sheet.
- Repeat step 10 with the rest of the set molded candy.
- Before building the molds you will want to make sure that the edges are nice and level. There are two ways you can do that:
Method 1: Warm up a shallow frying pan on the stove. Place a piece of wax paper into the pan, and holding the top half-sphere, rub gently on the wax paper until the edges start to melt a bit.
Method 2: Place a small plate in the microwave for 30-60 seconds until warm. rub the half-sphere over the plate which will gently melt the edges. This is my preferred method. Whichever method you use, you will need the warm pan/plate again to attach the spheres together. - Once the edges are leveled, turn the half-spheres over and use spray the silver cake spray over them to create a pearl shimmer. Leave to dry for about 10 minutes.

- To build the Elsa hot chocolate bombs, place about 1½ tablespoons of chocolate hot cocoa powder into one candy half-sphere.
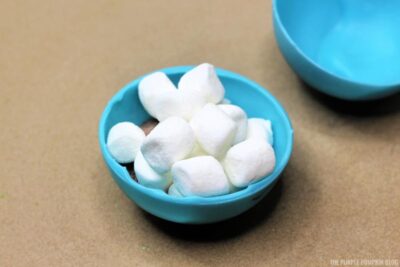
- Sprinkle in a few mini marshmallows. You can add some sprinkles in there too if you like!
- Carefully melt the top sphere's edge again and quickly place onto the bottom mold and hold together to make sure they adhere. make sure that there are no gaps around the middle of the blue chocolate bomb. Place on a cookie sheet to finish setting while you assemble the others.
- Melt the remaining blue candy and transfer it to a squeeze bottle or piping bag. Drizzle over the cocoa bombs and immediately sprinkle some sugar crystals, as well as a few snowflake sprinkles.
- Carefully place the silver crown in the top center of the bomb - you can add a dab of melted candy to the back to make sure it sticks.
- Leave to dry completely before using.
- To use the hot cocoa bomb, place it in a large mug, pour warm milk over it, and stir until everything is mixed together and enjoy!

Notes
You can make whatever size (and even shape!) of cocoa bomb that you like as long as they fit inside your mug! We used a mold approx 2.5"/70mm - you can make them slightly bigger or smaller.
Nutrition
Serving: 1 | Calories: 705kcal | Carbohydrates: 145g | Protein: 11g | Fat: 10g | Saturated Fat: 4g | Polyunsaturated Fat: 5g | Cholesterol: 8mg | Sodium: 802mg | Fiber: 6g | Sugar: 113g