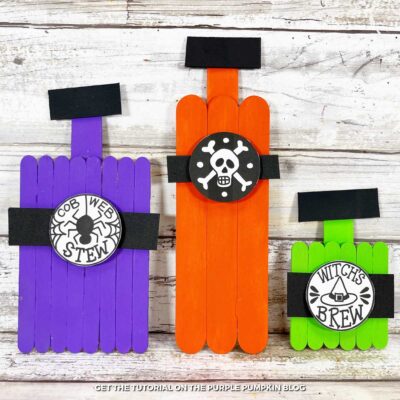
Craft Stick Magic Potion Bottles
Craft Stick Magic Potion Bottles make a fun and easy Halloween project for kids and adults, adding a spooky and magical touch to your festive décor this season. Perfect for home or classroom crafting.
Materials
Instructions
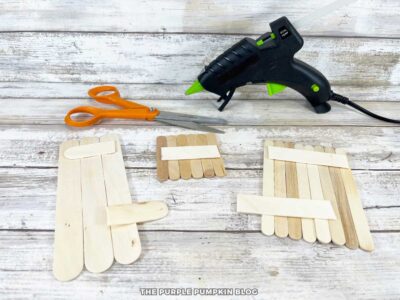
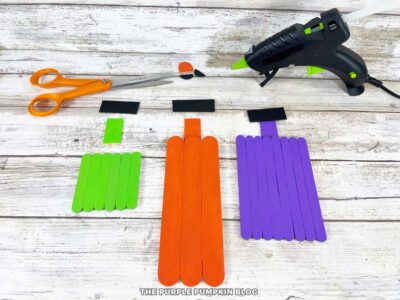
- To make the tall potion bottle, line up three jumbo craft sticks vertically on your work surface. For the medium potion bottle, line up three regular craft sticks, and for the small potion bottle, line up six mini sticks. Use scissors to trim additional jumbo craft sticks to the width of each bottle. You will need two for the tall and medium bottles and one for the small bottle. Use a glue gun to attach them to the bottles to hold the sticks in place.
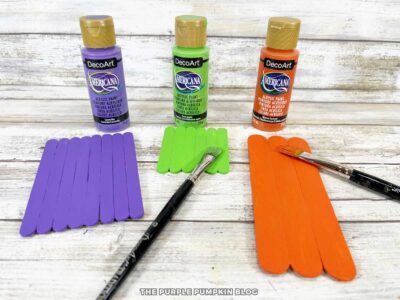
- Basecoat the tall potion bottle orange, the medium bottle purple, and the small one green. Leave to dry, and apply a second coat if necessary.
- Use a pencil to lightly mark a jumbo craft stick into three. Basecoat one section each with orange, purple, and green. Basecoat a second jumbo craft stick with black paint. Leave to dry, and apply a second coat if necessary.
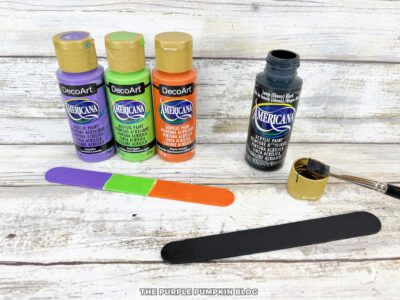
- Cut apart the three colored sections from the painted craft stick and attach each one to the top center of the potion bottles with a glue gun. This creates the necks of the bottles. Cut the black craft stick into three sections and attach them to the top center of the bottlenecks with a glue gun. This creates the lids of the bottles.
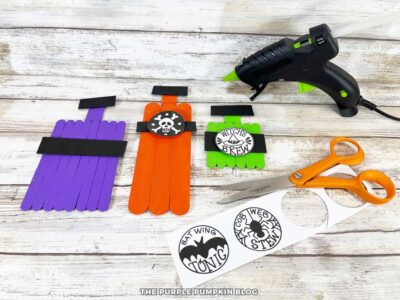
- Cut three rectangles the width of each potion bottle from black craft foam. Download, and print out the Free Printable Potion Bottle Labels. Cut out the round labels with scissors. Attach the black rectangles and labels to the potion bottles with a glue gun and glue sticks.
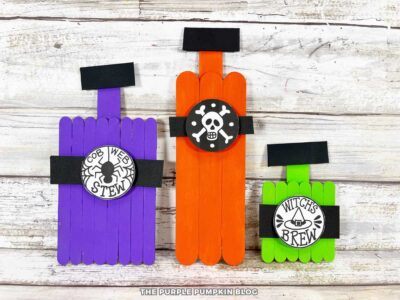
- Display where desired, and Happy Halloween!
Handy Tips & More Ideas
Handy Tips & More Ideas
- Pre-Paint the Craft Sticks—If you're crafting with a group and pressed for time, paint the craft sticks in advance. This ensures they are dry and ready to go when it's time to assemble the potion bottles. Alternatively, use Acrylic Paint Pens, which will dry more quickly.
- Use Liquid Glue for Safety—Swap the glue gun with liquid craft glue for small kids. It may take longer to dry, but it's safer for little hands.
- Get Creative with Colors—While bright orange, purple, and green are classic Halloween colors, feel free to mix it up! Try metallic paints or even glow-in-the-dark colors for an extra spooky effect.
- Add Glitter for a Magical Touch—Sprinkle glitter on the potion bottles after painting for an enchanted sparkle. Just make sure the paint is still wet to ensure the glitter sticks. Alternatively, use Glitter Glue Pens to add detail to the bottles.
- Customize the Potion Labels—Create your potion names, like "Eye of Newt" or "Dragon's Elixir." Kids will have fun personalizing their bottles with spooky names!
- Cut Craft Foam in Advance—If you're hosting a group craft session, pre-cut the craft foam rectangles and potion labels. This helps keep the activity flowing smoothly, especially for younger crafters.
- Work on a Covered Surface—Cover your work area with newspaper or a plastic tablecloth. Crafting with paint, glue, and glitter can get messy, so it's best to protect your table!
- Use Recycled Materials—If you don’t have craft foam, try using scrap cardboard or felt for the labels and necks of the potion bottles. This is a great way to recycle materials you already have on hand.
- Let Imagination Run Wild—Encourage kids to imagine what each potion bottle holds. They can create stories about the magical potions inside and play with their creations after crafting!
- Seal the Paint for Durability—Once the bottles are dry, protect the paint and glitter with a clear sealant like Mod Podge. This makes the potion bottles more durable, especially if you plan to use them as long-term decorations.
Did you make this project? Share it!Tag @_ThePurplePumpkinBlog on Instagram with the hashtag #TPPBCreate!